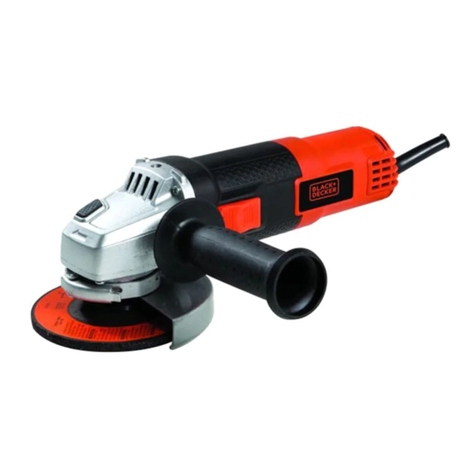
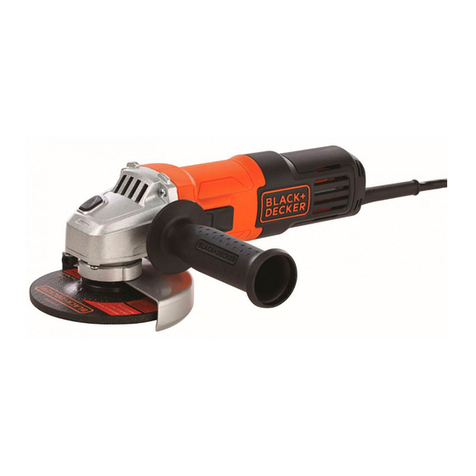
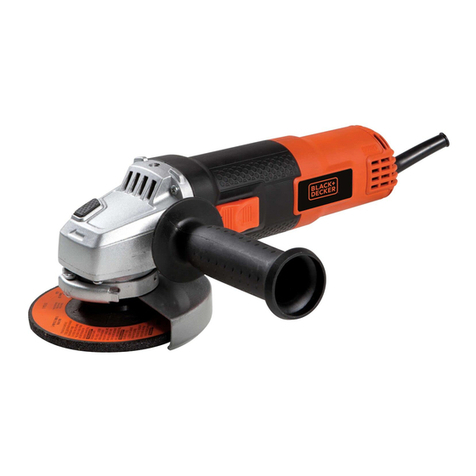
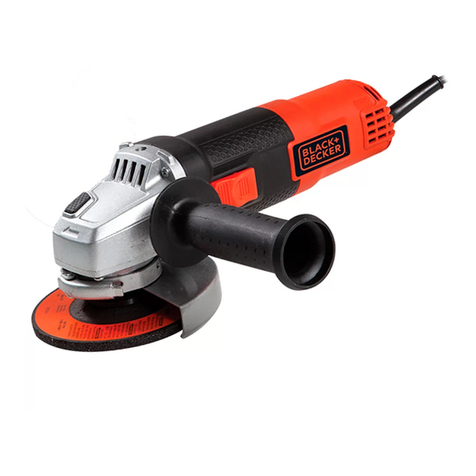
BLACK DECKER KG115 User manual

www.blackanddecker.com
ENFRPTRUTRUAAR
KG115

ENGLISH
2
(Original instructions)
1
2
4
3

3
ENGLISH
(Original instructions)
13
16
15
10
5
9
4
7
9
8
5
10
11
13
BA
D
C
F
E
9
4
5
6
7
9
8
13
11
12
10
5
14
11
13

4
ENGLISH (Original instructions)
Intended use
Your BLACK+DECKER KG115 angle grinder
has been designed for cutting metal and
masonry using the appropriate type of
cutting or grinding disc. This tool is
intended for consumer use only.
Safety instructions
General power tool safety warnings
Warning! Read all safety warnings
and all instructions. Failure to
follow the warnings and instructions
listed below may result in electric
shock, fire and/or serious injury.
Save all warnings and instructions for
future reference.
The term “power tool” in all of the warnings
listed below refers to your mains operated
(corded) power tool or battery operated
(cordless) power tool.
1. Work area safety
a. Keep work area clean and well lit.
Cluttered or dark areas invite accidents.
b. Do not operate power tools in explosive
atmospheres, such as in the presence of
flammable liquids, gases or dust. Power
tools create sparks which may ignite the
dust or fumes.
c. Keep children and bystanders away
while operating a power tool.
Distractions can cause you to lose
control.
2. Electrical safety
a. Power tool plugs must match the outlet.
Never modify the plug in any way. Do
not use any adapter plugs with earthed
(grounded) power tools. Unmodified
plugs and matching outlets will reduce
risk of electric shock.
b. Avoid body contact with earthed or
grounded surfaces such as pipes,
radiators, ranges and refrigerators.
There is an increased risk of electric
shock if your body is earthed or
grounded.
c. Do not expose power tools to rain or wet
conditions. Water entering a power tool
will increase the risk of electric shock.
d. Do not abuse the cord. Never use the
cord for carrying, pulling or unplugging
the power tool. Keep cord away from
heat, oil, sharp edges or moving parts.
Damaged or entangled cords increase the
risk of electric shock.
e. When operating a power tool outdoors,
use an extension cord suitable for
outdoor use. Use of a cord suitable for
outdoor use reduces the risk of electric
shock.
f. If operating a power tool in a damp
location is unavoidable, use a residual
current device (RCD) protected supply.
Use of an RCD reduces the risk of electric
shock.
3. Personal safety
a. Stay alert, watch what you are doing and
use common sense when operating a
power tool. Do not use a power tool
while you are tired or under the
influence of drugs, alcohol or
medication. A moment of inattention
while operating power tools may result in
serious personal injury.
b. Use personal protective equipment.
Always wear eye protection. Protective
equipment such as dust mask, non-skid
safety shoes, hard hat, or hearing
protection used for appropriate
conditions will reduce personal injuries.
c. Prevent unintentional starting. Ensure
the switch is in the o-position before
connecting to power source and/or
battery pack, picking up or carrying the
tool. Carrying power tools with your
finger on the switch or energising power
tools that have the switch on invites
accidents.
d. Remove any adjusting key or wrench
before turning the power tool on. A
wrench or a key left attached to a
rotating part of the power tool may result
in personal injury.

5
ENGLISH
(Original instructions)
e. Do not overreach. Keep proper footing
and balance at all times. This enables
better control of the power tool in
unexpected situations.
f. Dress properly. Do not wear loose
clothing or jewellery. Keep your hair,
clothing and gloves away from moving
parts. Loose clothes, jewellery or long
hair can be caught in moving parts.
g. If devices are provided for the
connection of dust extraction and
collection facilities, ensure these are
connected and properly used. Use of
dust collection can reduce dust-related
hazards.
4. Power tool use and care
a. Do not force the power tool. Use the
correct power tool for your application.
The correct power tool will do the job
better and safer at the rate for which it
was designed.
b. Do not use the power tool if the switch
does not turn it on and o. Any power
tool that cannot be controlled with the
switch is dangerous and must be
repaired.
c. Disconnect the plug from the power
source and/or the battery pack from the
power tool before making any
adjustments, changing accessories, or
storing power tools. Such preventive
safety measures reduce the risk of
starting the power tool accidentally.
d. Store idle power tools out of the reach
of children and do not allow persons
unfamiliar with the power tool or these
instructions to operate the power tool.
Power tools are dangerous in the hands
of untrained users.
e. Maintain power tools. Check for
misalignment or binding of moving
parts, breakage of parts and any other
condition that may aect the power
tools operation. If damaged, have the
power tool repaired before use. Many
accidents are caused by poorly
maintained power tools.
f. Keep cutting tools sharp and clean.
Properly maintained cutting tools with
sharp cutting edges are less likely to bind
and are easier to control.
g. Use the power tool, accessories and tool
bits etc., in accordance with these
instructions, taking into account the
working conditions and the work to be
performed. Use of the power tool for
operations dierent from those intended
could result in a hazardous situation.
5. Service
a. Have your power tool serviced by a
qualified repair person using only
identical replacement parts. This will
ensure that the safety of the power tool is
maintained.
Additional power tool safety
warnings
Warning! Additional safety
warnings for grinding, sanding, wire
brushing, polishing or abrasive
cutting-o operations
• This power tool is intended to function
as a grinder, sander, wire brush, polisher
or cut-o tool. Read all safety warnings,
instructions, illustrations and
specifications provided with this power
tool. Failure to follow all instructions
listed below may result in electric shock,
fire and/or serious injury.
• Operations for which the power tool was
not designed may create a hazard and
cause personal injury.
• Do not use accessories which are not
specifically designed and recommended
by the tool manufacturer. Just because
the accessory can be attached to your
power tool, it does not assure safe
operation.
• The rated speed of the accessory must
be at least equal to the maximum speed
marked on the power tool. Accessories
running faster than their rated speed can
break and fly apart.
• The outside diameter and the thickness
of your accessory must be within the
capacity rating of your power tool.
Incorrectly sized accessories cannot be
adequately guarded or controlled.

6
ENGLISH (Original instructions)
• The arbour size of wheels, flanges,
backing pads or any other accessory
must properly fit the spindle of the
power tool. Accessories with arbour
holes that do not match the mounting
hardware of the power tool will run out
of balance, vibrate excessively and may
cause loss of control.
• Do not use a damaged accessory.
Before each use inspect the accessory
such as abrasive wheels for chips and
cracks, backing pad for cracks, tear or
excess wear, wire brush for loose or
cracked wires. If power tool or
accessory is dropped, inspect for
damage or install an undamaged
accessory. After inspecting and
installing an accessory and run the
power tool at maximum no-load speed
for one minute. Damaged accessories
will normally break apart during this test
time.
• Wear personal protective equipment.
Depending on application, use face
shield, safety goggles or safety glasses.
As appropriate, wear dust mask, hearing
protectors, gloves and workshop apron
capable of stopping small abrasive or
workpiece fragments. The eye
protection must be capable of stopping
flying debris generated by various
operations. The dust mask or respirator
must be capable of filtering particles
generated by your operation. Prolonged
exposure to high intensity noise may
cause hearing loss.
• Keep bystanders a safe distance away
from work area. Anyone entering the
work area must wear personal
protective equipment. Fragments of
workpiece or of a broken accessory may
fly away and cause injury beyond
immediate area of operation.
• Hold power tool by insulated gripping
surfaces only, when performing an
operation where the cutting accessory
may contact hidden wiring or its own
cord. Cutting accessory contacting a
"live" wire may make exposed metal
parts of the power tool "live" and shock
the operator.
• Position the cord clear of the spinning
accessory. If you lose control, the cord
may be cut or snagged and your hand or
arm may be pulled into the spinning
accessory.
• Never lay the power tool down until the
accessory has come to a complete stop.
The spinning accessory may grab the
surface and pull the power tool out of
your control.
• Do not run the power tool while carrying
it at your side. Accidental contact with
the spinning accessory could snag your
clothing, pulling the accessory into your
body.
• Regularly clean the power tool's air
vents. The motor's fan will draw the dust
inside the housing and excessive
accumulation of powdered metal may
cause electrical hazards.
• Do not operate the power tool near
flammable materials. Sparks could ignite
these materials.
• Do not use accessories that require
liquid coolants. Using water or other
liquid coolants may result in electrocution
or shock.
Note: The above warning does not apply for
power tools specifically designed for use
with a liquid system.
Kickback and related warnings
Kickback is a sudden reaction to a pinched
or snagged rotating wheel, backing pad,
brush or any other accessory. Pinching or
snagging causes rapid stalling of the
rotating accessory which in turn causes the
uncontrolled power tool to be forced in the
direction opposite of the accessory's
rotation at the point of the binding.
For example, if an abrasive wheel is snagged
or pinched by the workpiece, the edge of
the wheel that is entering into the pinch
point can dig into the surface of the material
causing the wheel to climb out or kick out.
The wheel may either jump toward or away
from the operator, depending on direction of
the wheel's movement at the point of
pinching. Abrasive wheels may also break
under these conditions.
7
ENGLISH
(Original instructions)
Kickback is the result of power tool misuse
and/or incorrect operating procedures or
conditions and can be avoided by taking
proper precautions as given below.
• Maintain a firm grip on the power tool
and position your body and arm to
allow you to resist kickback forces.
Always use auxiliary handle, if provided,
for maximum control over kickback or
torque reaction during start-up. The
operator can control torque reactions or
kickback forces, if proper precautions are
taken.
• Never place your hand near the rotating
accessory. Accessory may kickback over
your hand.
• Do not position your body in the area
where power tool will move if kickback
occurs. Kickback will propel the tool in
direction opposite to the wheel's
movement at the point of snagging.
• Use special care when working corners,
sharp edges etc. Avoid bouncing and
snagging the accessory. Corners, sharp
edges or bouncing have a tendency to
snag the rotating accessory and cause
loss of control or kickback.
• Do not attach a saw chain woodcarving
blade or toothed saw blade. Such blades
create frequent kickback and loss of
control.
Safety warnings specific for
grinding and abrasive cutting-o
operations
• Use only wheel types that are
recommended for your power tool and
the specific guard designed for the
selected wheel. Wheels for which the
power tool was not designed cannot be
adequately guarded and are unsafe.
• The grinding surface of centre
depressed wheels must be mounted
below the plane of the guard lip. An
improperly mounted wheel that projects
through the plane of the guard lip cannot
be adequately protected.
• The guard must be securely attached to
the power tool and positioned for
maximum safety, so the least amount of
wheel is exposed towards the operator.
The guard helps to protect operator from
broken wheel fragments and accidental
contact with wheel.
• Wheels must be used only for
recommended applications. For
example: do not grind with the side of
cut-o wheel. Abrasive cut-o wheels
are intended for peripheral grinding, side
forces applied to these wheels may cause
them to shatter.
• Always use undamaged wheel flanges
that are of correct size and shape for
your selected wheel. Proper wheel
flanges support the wheel thus reducing
the possibility of wheel breakage. Flanges
for cut-o wheels may be dierent from
grinding wheel flanges.
• Do not use worn down wheels from
larger power tools. Wheel intended for
larger power tool is not suitable for the
higher speed of a smaller tool and may
burst.
Additional safety warnings specific
for abrasive cutting-o operations
• Do not "jam" the cut-off wheel or apply
excessive pressure. Do not attempt to
make an excessive depth of cut. Over
stressing the wheel increases the loading
and susceptibility to twisting or binding
of the wheel in the cut and the possibility
of kickback or wheel breakage.
• Do not position your body in line with
and behind the rotating wheel. When the
wheel, at the point of operation, is
moving away from your body, the
possible kickback may propel the
spinning wheel and the power tool
directly at you.
• When wheel is binding or when
interrupting a cut for any reason, switch
o the power tool and hold the power
tool motionless until the wheel comes to
a complete stop. Never attempt to
remove the cut-o wheel from the cut
while the wheel is in motion otherwise
kickback may occur. Investigate and take
corrective action to eliminate the cause of
wheel binding.

ENGLISH
8
(Original instructions)
• Do not restart the cutting operation in
the workpiece. Let the wheel reach full
speed and carefully re-enter the cut.
The wheel may bind, walk up or kickback
if the power tool is restarted in the
workpiece
• Support panels or any oversized
workpiece to minimize the risk of wheel
pinching and kickback. Large
workpieces tend to sag under their own
weight. Supports must be placed under
the workpiece near the line of cut and
near the edge of the workpiece on both
sides of the wheel..
• Use extra caution when making a
"pocket cut" into existing walls or other
blind areas. The protruding wheel may
cut gas or water pipes, electrical wiring
or objects that can cause kickback.
Safety warnings specific for
sanding operations
• Do not use excessively oversized
sanding disc paper. Follow
manufacturers recommendations, when
selecting sanding paper. Larger sanding
paper extending beyond the sanding pad
presents a laceration hazard and may
cause snagging, tearing of the disc or
kickback.
Safety warnings specific for
polishing operations
• Do not allow any loose portion of the
polishing bonnet or its attachment
strings to spin freely. Tuck away or trim
any loose attachment strings. Loose and
spinning attachment strings can entangle
your fingers or snag on the workpiece.
Safety of others
• This appliance is not intended for use by
persons (including children) with
reduced physical, sensory or mental
capabilities, or lack of experience and
knowledge, unless they have been given
supervision or instruction concerning use
of the appliance by a person responsible
for their safety.
• Children should be supervised to ensure
that they do not play with the appliance.
Residual risks.
Additional residual risks may arise when
using the tool which may not be included in
the enclosed safety warnings. These risks
can arise from misuse, prolonged use etc.
Even with the application of the relevant
safety regulations and the implementation of
safety devices, certain residual risks can not
be avoided. These include:
• Injuries caused by touching any
rotating/ moving parts.
• Injuries caused when changing any parts,
blades or accessories.
• Injuries caused by prolonged use of a
tool. When using any tool for prolonged
periods ensure you take regular breaks.
• Impairment of hearing.
• Health hazards caused by breathing dust
developed when using your tool
(example:- working with wood,
especially oak, beech and MDF.)
Vibration
The declared vibration emission values
stated in the technical data and the
declaration of conformity have been
measured in accordance with a standard test
method provided by EN 60745 and may be
used for comparing one tool with another.
The declared vibration emission value may
also be used in a preliminary assessment of
exposure.
Warning! The vibration emission value during
actual use of the power tool can dier from
the declared value depending on the ways in
which the tool is used. The vibration level
may increase above the level stated.
When assessing vibration exposure to
determine safety measures required by
2002/44/EC to protect persons regularly
using power tools in employment, an
estimation of vibration exposure should
consider, the actual conditions of use and
the way the tool is used, including taking
account of all parts of the operating cycle
such as the times when the tool is switched
o and when it is running idle in addition to
the trigger time.

9
ENGLISH
(Original instructions)
Labels on tool
The following pictograms are shown on the
tool:
Warning! To reduce the risk of
injury, the user must read the
instruction manual.
Wear safety glasses or goggles
when operating this tool.
Wear ear protection when operating
this tool.
Electrical safety
This tool is double insulated;
therefore no earth wire is required.
Always check that the power supply
corresponds to the voltage on the
rating plate.
• If the supply cord is damaged, it must be
replaced by the manufacturer or an
authorised Black & Decker Service
Centre in order to avoid a hazard.
Features
This tool includes some or all of the
following features.
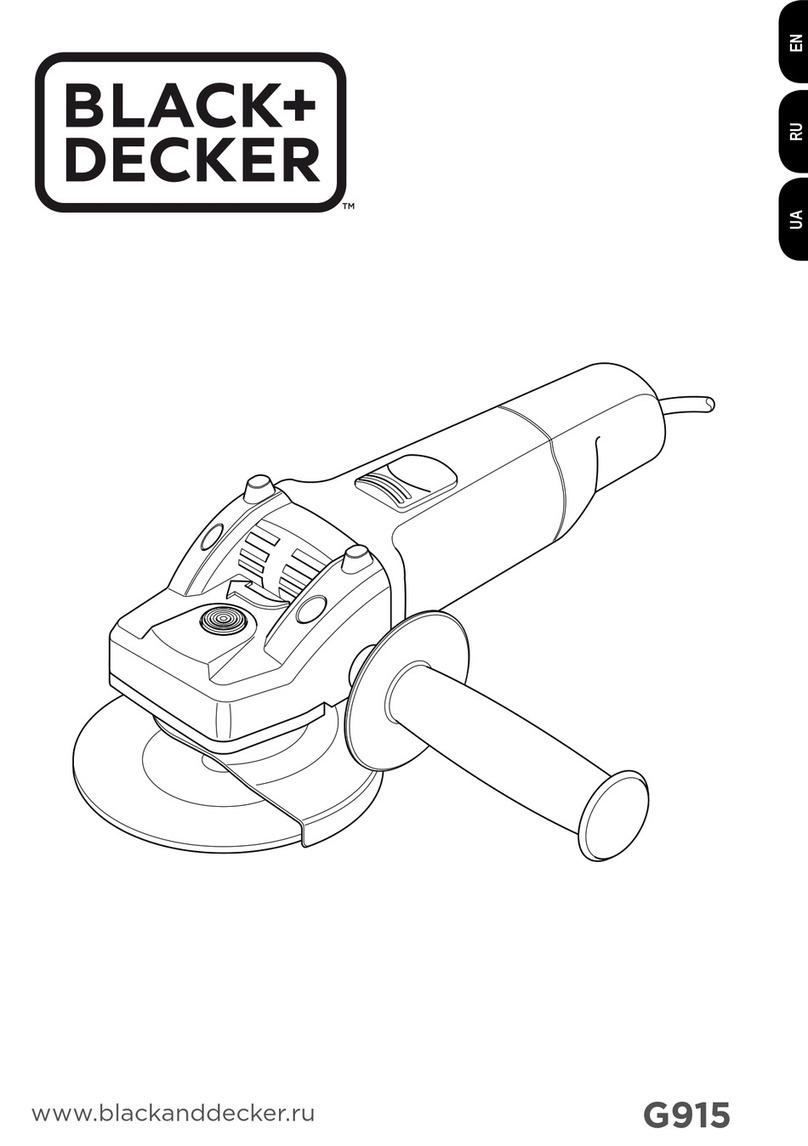
1. On/o switch
2. Side handle
3. Spindle lock
4. Guard
Assembly
Warning! Before assembly, make sure that
the tool is switched o and unplugged.
Fitting and removing the guard (Fi
g. A & B)
Fitting
• Place the tool on a table, with the spindle
(5) facing up.
• Release the clamping lock (7) and hold
the guard (4) over the tool as shown.
• Align the lugs (8) with the notches (9).
• Press the guard down and rotate it
counterclockwise to the required position.
• Fasten the clamping lock (7) to secure
the guard to the tool.
• If required, tighten the screw (6) to
increase the clamping force.
Removing
• Release the clamping lock (7).
• Rotate the guard clockwise to align the
lugs (8) with the notches (9).
• Remove the guard from the tool.
Warning! Never use the tool without the
guard.
Fitting the side handle
• Screw the side handle (2) into one of the
mounting holes in the tool.
Warning! Always use the side handle.
Fitting and removing grinding or
cutting discs (fi g. B - D)
Always use the correct type of disc for your
application. Always use discs with the
correct diameter and bore size (see
technical data).
Fitting
• Place the tool on a table, with the spindle
(5) facing up.
• Place the spring washer (6) over the
spindle and locate it on the shoulder (7).
• Place the guard (4) onto the tool as
shown.
• Place the flange (8) over the spindle with
the protruding pips towards the guard.
Make sure that the holes in the flange
align with the screw holes.
• Secure the flange with the screws (9).
Make sure that the screws are fully tight
and that the guard can be rotated.
Removing
• Use a screwdriver to remove the screws
(9).

10
ENGLISH (Original instructions)
• Remove the flange (8), guard (4) and
spring washer (6). Store these parts
carefully.
Warning! Never use the tool without the
guard.
Fitting the side handle
• Screw the side handle (2) into one of the
mounting holes in the tool.
Warning! Always use the side handle.
Fitting and removing grinding
discs, cutting discs or sanding flap
pads (fig. C - E)
Always use the correct type of disc for your
application.
Always use discs with the correct diameter
and bore size (see technical data).
Fitting
• Fit the guard as described above.
• Place the inner flange (10) onto the
spindle (5) as shown (fig. C). Make sure
that the flange is correctly located on the
flat sides of the spindle.
• Place the disc (11) onto the spindle (5) as
shown (fig. C). If the disc has a raised
centre (12), make sure that the raised
centre faces the inner flange.
• Make sure that the disc locates correctly
on the inner flange.
• Place the outer flange (13) onto the
spindle. When fitting a grinding disc, the
raised centre on the outer flange must
face towards the disc (A in fig. D). When
fitting a cutting disc, the raised centre on
the outer flange must face away from the
disc (B in fig. D).
• Keep the spindle lock (3) depressed and
tighten the outer flange using the
two-pin spanner (14) (fig. E).
Removing
• Keep the spindle lock (3) depressed and
loosen the outer flange (13) using the
two-pin spanner (14) (fig. E).
• Remove the outer flange (13) and the disc
(11).
Fitting and removing sanding
backing pads (fig. E & F)
For sanding, a backing pad is required. The
backing pad is available from your
BLACK+DECKER dealer as an accessory.
Fitting
• Place the inner flange (10) onto the
spindle (5) as shown (fig. F). Make sure
that the flange is correctly located on the
flat sides of the spindle.
• Place the backing pad (15) onto the
spindle.
• Place the sanding disc (16) onto the
backing pad.
• Place the outer flange (13) onto the
spindle with the raised centre facing away
from the disc.
• Keep the spindle lock (3) depressed and
tighten the outer flange using the two-pin
spanner (14) (fig. E). Make sure that the
outer flange is fitted correctly and that
the disc is clamped tightly.
Removing
• Keep the spindle lock (3) depressed and
loosen the outer flange (13) using the
two-pin spanner (14) (fig. E).
• Remove the outer flange (13), the sanding
disc (16) and the backing pad (15).
Fitting and removing hubbed
wheels and cups
Hubbed wheels and cups install directly on
the M14 threaded spindle (5).
Caution! To reduce the risk of damage to the
tool, wheel or brush must not touch guard
when mounted or while in use. Undetectable
damage could occur to the accessory,
causing wires to fragment from accessory
wheel or cup.
Fitting
• Thread the hubbed wheel or cup on to
the spindle (5) by hand.

11
ENGLISH
(Original instructions)
• Keep the spindle lock (3) depressed and
tighten the hub of the wheel or cup with
a wrench.
Removing
• Keep the spindle lock (3) depressed and
loosen the hub of the wheel or cup with
a wrench.
• Remove the wheel or cup from the
spindle (5).
Use
Warning! Let the tool work at its own pace.
Do not overload.
• Carefully guide the cable in order to
avoid accidentally cutting it.
• Be prepared for a stream of sparks when
the grinding or cutting disc touches the
workpiece.
• Always position the tool in such a way
that the guard provides optimum
protection from the grinding or cutting
disc.
Switching on and off
• To switch on, slide the on/off switch (1)
forward. Note that the tool will continue
running when you release the switch.
• To switch off, press the rear part of the
on/o switch.
Warning! Do not switch the tool o while
under load.
Soft Start Feature
The soft start feature allows a slow speed
build-up to avoid an initial jerk when
starting. This feature is particularly useful
when working in confined spaces.
No-Volt
The No-volt function stops the grinder
restarting without the switch being cycled if
there is a break in the power supply.
Hints for optimum use
• Firmly hold the tool with one hand
around the side handle and the other
hand around the main handle.
Surface grinding with grinding
wheels
• Allow the tool to reach full speed before
touching the tool to the work surface.
• Apply minimum pressure to the work
surface, allowing the tool to operate at
high speed. Grinding rate is greatest
when the tool operates at high speed.
• Maintain a 20˚ to 30˚ angle between the
tool and work surface.
• Continuously move the tool in a forward
and back motion to avoid creating
gouges in the work surface.
• Remove the tool from work surface
before turning tool o. Allow the tool to
stop rotating before laying it down.
Edge grinding with grinding
wheels
Wheels used for cutting and edge grinding
may break or kick back if they bend or twist
while the tool is being used to do cut-o
work or deep grinding.
To reduce the risk of serious injury, limit the
use of these wheels with a standard Type 27
guard to shallow cutting and notching (less
than 1/2 inch (13mm) in depth). The open
side of the guard must be positioned away
from the operator. For deeper cutting with a
Type 1 cut-o wheel, use a closed Type 1
guard.
• Allow the tool to reach full speed before
touching the tool to the work surface.
• Apply minimum pressure to the work
surface, allowing the tool to operate at
high speed. Grinding rate is greatest
when the tool operates at high speed
• Position yourself so that the
open-underside of the wheel is facing
away from you.
• Once a cut is begun and a notch is
established in the workpiece, do not
change the angle of the cut. Changing
the angle will cause the wheel to bend
and may cause wheel breakage. Edge
grinding wheels are not designed to
withstand side pressures caused by
bending.

12
ENGLISH (Original instructions)
• Remove the tool from the work surface
before turning the tool o. Allow the tool
to stop rotating before laying it down.
Do not use edge grinding/cutting wheels for
surface grinding applications because these
wheels are not designed for side pressures
encountered with surface grinding. Wheel
breakage and injury may result. Surface
finishing with sanding flap discs
• Allow the tool to reach full speed before
touching the tool to the work surface.
• Apply minimum pressure to work
surface, allowing the tool to operate at
high speed. Sanding rate is greatest
when the tool operates at high speed.
• Maintain a 5˚ to 10˚ angle between the
tool and work surface.
• Continuously move the tool in a forward
and back motion to avoid creating
gouges in the work surface.
• Remove the tool from work surface
before turning tool o. Allow the tool to
stop rotating before laying it down.
Using sanding backing pads
Choose the proper grit sanding discs for
your application. Sanding discs are available
in various grits. Coarse grits yield faster
material removal rates and a rougher finish.
Finer grits yield slower material removal and
a smoother finish.
Begin with coarse grit discs for fast, rough
material removal. Move to a medium grit
paper and finish with a fine grit disc for
optimal finish.
• Coarse 16 - 30 grit
• Medium 36 - 80 grit
• Fine Finishing 100 - 120 grit
• Very Fine Finishing 150 - 180 grit
• Allow the tool to reach full speed before
touching tool to the work surface.
• Apply minimum pressure to work
surface, allowing the tool to operate at
high speed. Sanding rate is greatest
when the tool operates at high speed.
• Maintain a 5˚ to 15˚ angle between the
tool and work surface. The sanding disc
should contact approximately one inch
(25mm) of work surface.
• Move the tool constantly in a straight line
to prevent burning and swirling of work
surface. Allowing the tool to rest on the
work surface without moving, or moving
the tool in a circular motion causes
burning and swirling marks on the work
surface.
• Remove the tool from work surface
before turning tool o. Allow the tool to
stop rotating before laying it down.
Precautions to take when sanding
paint
• Sanding of lead based paint is NOT
RECOMMENDED due to the difficulty of
controlling the contaminated dust. The
greatest danger of lead poisoning is to
children and pregnant women.
• Since it is difficult to identify whether or
not a paint contains lead without a
chemical analysis, we recommend the
following precautions when sanding any
paint:
Personal safety
• No children or pregnant women should
enter the work area where the paint
sanding is being done until all clean up is
completed.
• A dust mask or respirator should be worn
by all persons entering the work area. The
filter should be replaced daily or
whenever the wearer has difficulty
breathing.
Note: Only those dust masks suitable for
working with lead paint dust and fumes
should be used. Ordinary painting masks do
not oer this protection. See your local
hardware dealer for the proper respiratory
protection.
• NO EATING, DRINKING or SMOKING
should be done in the work area to
prevent ingesting contaminated paint
particles. Workers should wash and clean
up BEFORE eating, drinking or smoking.
Articles of food, drink, or smoking should
not be left in the work area where dust
would settle on them.

13
ENGLISH
(Original instructions)
Environmental safety
• Paint should be removed in such a
manner as to minimize the amount of
dust generated.
• Areas where paint removal is occurring
should be sealed with plastic sheeting of
4 mils thickness.
• Sanding should be done in a manner to
reduce tracking of paint dust outside the
work area.
Cleaning and disposal
• All surfaces in the work area should be
vacuumed and thoroughly cleaned daily
for the duration of the sanding project.
Vacuum filter bags should be changed
frequently.
• Plastic drop cloths should be gatheredup
and disposed of along with any dust
chips or other removal debris. They
should be placed in sealed refuse
receptacles and disposed of through
regular trash pick-up procedures. During
clean up, children and pregnant women
should be kept away from the immediate
work area.
• All toys, washable furniture and utensils
used by children should be washed
thoroughly before being used again.
Using cutting wheels
Do not use edge grinding/cutting wheels for
surface grinding applications because these
wheels are not designed for side pressures
encountered with surface grinding. Wheel
breakage and injury may result.
• Allow tool to reach full speed before
touching tool to work surface.
• Apply minimum pressure to work
surface, allowing tool to operate at high
speed. Cutting rate is greatest when the
tool operates at high speed.
• Once a cut is begun and a notch is
established in the workpiece, do not
change the angle of the cut. Changing
the angle will cause the wheel to bend
and may cause wheel breakage.
• Remove the tool from work surface
before turning tool o. Allow the tool to
stop rotating before setting it down.
Maintenance
Your BLACK+DECKER corded/cordless
appliance/tool has been designed to operate
over a long period of time with a minimum
of maintenance. Continuous satisfactory
operation depends upon proper tool care
and regular cleaning.
Warning! Before performing any
maintenance on corded/cordless power
tools:
• Switch off and unplug the appliance/tool.
• Or switch off and remove the battery
from the appliance/ tool if the
appliance/tool has a separate battery
pack.
• Or run the battery down completely if it is
integral and then switch o.
• Unplug the charger before cleaning it.
Your charger does not require any
maintenance apart from regular cleaning.
• Regularly clean the ventilation slots in
your appliance/tool/ charger using a soft
brush or dry cloth.
• Regularly clean the motor housing using
a damp cloth. Do not use any abrasive or
solvent-based cleaner.
• Regularly open the chuck and tap it to
remove any dust from the interior (when
fitted).

ENGLISH
14
(Original instructions)
EC declaration of conformity
MACHINERY DIRECTIVE
Angle Grinder - KG115
Black & Decker declares that these products
described under "technical data" are in
compliance with: 2006/42/EC,
EN60745-1:2009 +A11:2010;
EN60745-2-3:2011 +A2:2013 +A11:2014
+A12:2014
These products also comply with Directive
2004/108/EC (until 19.04.2016),
2014/30/EU (from 20.04.2016) and
2011/65/EU.
For more information, please contact Black
& Decker at the following address or refer to
the back of the manual. The undersigned is
responsible for compilation of the technical
file and makes this declaration on behalf of
Black & Decker.
R. Laverick
Engineering Manager
BLACK+DECKER Europe, 210 Bath Road,
Slough,
Berkshire, SL1 3YD
United Kingdom
01.2016
KG115
(Type 1)
Technical data
Input voltage Vac 230
Power input W 750
Rated speed min-1 11,000
Disc bore mm 22
Max disc thickness
grinding discs mm 6
cutting discs mm 3.5
Spindle size M14
Weight kg 2.1
LpA (sound pressure) 91 dB(A),
Uncertainty (K) 3 dB(A)
LWA (sound power) 102 dB(A),
Uncertainty (K) 3 dB(A)
Vibration total values (triax vector sum)
according to EN60745:
Surface grinding (ah,SG) 5,8 m/s2,
uncertainty (K) 1.5 m/s2
Cutting-o (ah) 2.5 m/s2,
uncertainty (K) 1.5 m/s2
Caution! Applications such as cutting-o
may have dierent vibration emissions.

15
ENGLISH
(Original instructions)
Protecting the environment
Separate collection. This product
must not be disposed of with normal
household waste.
Should you find one day that your
BLACK+DECKER product needs replace-
ment, or if it is of no further use to you, do
not dispose of it with household waste.
Make this product available for separate
collection.
Separate collection of used products
and packaging allows materials to be
recycled and used again. Reuse of
recycled materials helps prevent environmen-
tal pollution and reduces the demand for
raw materials.
Local regulations may provide for separate
collection of electrical products from the
household, at municipal waste sites or by
the retailer when you purchase a new
product.
BLACK+DECKER provides a facility for the
collection and recycling of BLACK+DECKER
products once they have reached the end of
their working life. To take advantage of this
service please return your product to any
authorised repair agent who will collect
them on our behalf.
You can check the location of your nearest
authorised repair agent by contacting your
local BLACK+DECKER oce at the address
indicated in this manual. Alternatively, a list
of authorised BLACK+DECKER repair
agents and full details of our after-sales
service and contacts are available on the
Internet at: www.2helpU.com.
Guarantee
Black + Decker is confident of the quality of
its products and oers an outstanding
guarantee. This guarantee statement is in
addition to and in no way prejudices your
statutory rights.
If a Black + Decker product becomes
defective due to faulty materials,
workmanship or lack of conformity, within
24 months from the date of purchase,
BLACK+DECKER guarantees to replace
defective parts, repair products subjected to
fair wear and tear or replace such products
to make sure of the minimum inconvenience
to the customer unless:
• The product has been used for trade,
professional or hire purposes.
• The product has been subjected to
misuse or neglect.
• The product has sustained damage
through foreign objects, substances or
accidents.
• Repairs have been attempted by persons
other than authorised repair agents or
Black + Decker service sta.
To claim on the guarantee, you will need to
submit proof of purchase to the seller or an
authorised repair agent. You can check the
location of your nearest authorised repair
agent by contacting your local
BLACK+DECKER oce at the address
indicated in this manual. Alternatively, a list
of authorised BLACK+DECKER repair agents
and full details of our aftersales service and
contacts are available on the Internet at:
www.2helpU.com

16
FRANÇAIS (Traduction des instructions initiales)
Usage prévu
Votre disqueuse BLACK+DECKER KG115 est
conçue pour couper le métal et la
maçonnerie avec le disque à découper ou à
meuler approprié. Cet outil est destiné à un
usage privé uniquement.
Consignes de sécurité
Avertissements de sécurité générale de
l'outil.
Attention ! Veuillez lire et prendre
connaissance de toutes les
instructions. Le non-respect des
instructions listées ci-dessous peut
entrainer un choc électrique, un incendie ou
des blessures graves.
Conservez ces avertissements et ces
instructions à titre de référence ultérieure.
Le terme « outil électrique » dans les
avertissements fait référence à votre outil
électrique alimenté par batterie (avec
cordon d'alimentation) ou votre outil
fonctionnant sur batterie (sans cordon).
1. Sécurité de la zone de travail
a. Maintenez la zone de travail propre et
bien éclairée. Un lieu de travail en
désordre ou mal éclairé augmente le
risque d’accidents.
b. N’utilisez pas les outils électroportatifs
dans un environnement présentant des
risques d’explosion ni en présence de
liquides, gaz ou poussières
inflammables. Les outils électroportatifs
génèrent des étincelles risquant
d’enflammer les poussières ou les
vapeurs.
c. Tenez les enfants et autres personnes
éloignés durant l’utilisation de l’outil
électroportatif. En cas d'inattention,
vous risquez de perdre le contrôle.
2. Sécurité électrique
a. La prise de l’outil électroportatif doit
être compatible avec la prise
d’alimentation. Ne modifiez en aucun
cas la prise. N’utilisez pas de prises
d’adaptateur avec des appareils ayant
une prise de terre. Le respect de ces
consignes réduit le risque de choc
électrique.
b. Évitez le contact physique avec des
surfaces mises à la terre telles que
tuyaux, radiateurs, fours et
réfrigérateurs. Il y a un risque élevé de
choc électrique si votre corps est relié à la
terre.
c. N’exposez pas l’outil électroportatif à la
pluie ou à l’humidité. La pénétration
d’eau dans un outil électroportatif
augmente le risque de choc électrique.
d. Préservez le câble d’alimentation.
N’utilisez pas le câble pour porter l’outil.
Ne le tirez pas pour le débrancher.
Maintenez le câble éloigné des sources
de chaleurs, des parties huilées, des
bords tranchants ou des parties de
l’appareil en rotation. Le risque de choc
électrique augmente si les câbles sont
endommagés ou emmêlés.
e. Si vous utilisez l’outil électroportatif à
l’extérieur, utilisez une rallonge
homologuée pour une utilisation à
l’extérieur. L’utilisation d’une rallonge
électrique homologuée pour les travaux à
l’extérieur réduit le risque de choc
électrique.
f. Si l’outil doit être utilisé dans un endroit
humide, prenez les précautions
nécessaires en utilisant un dispositif à
courant résiduel (RCD). L’utilisation d’un
tel dispositif réduit les risques
d’électrocution.
3. Sécurité personnelle
a. Restez vigilant, surveillez ce que vous
faites. Faites preuve de bon sens quand
vous utilisez un outil électroportatif.
N’utilisez pas l’outil lorsque vous êtes
fatigué ou après avoir consommé de
l’alcool ainsi que des médicaments. Un
moment d’inattention lors de l’utilisation
de l’outil peut entraîner de graves
blessures.
b. Portez un équipement de protection.
Portez toujours des lunettes de
protection. Selon le travail à eectuer, le
port d’équipement de protection tels que
masque anti-poussières, chaussures de
sécurité antidérapantes, casque ou
protection auditive, réduit le risque de
blessures.

17
FRANÇAIS
(Traduction des instructions initiales)
c. Évitez un démarrage imprévu. L’outil
doit être en position OFF (arrêt) avant
d’eectuer le branchement à
l’alimentation et/ou au bloc-batterie, de
le ramasser ou de le porter. Ne laissez
pas votre doigt sur le bouton de
commande en le transportant.
N’alimentez pas l’outil si le bouton est
activé. Ceci pourrait être à l’origine
d’accident.
d. Enlevez tout outil ou clé de réglage
avant de mettre l’appareil en marche.
Une clé ou un outil se trouvant sur une
pièce en rotation peut causer des
blessures.
e. Adoptez une position confortable.
Adoptez une position stable et gardez
votre équilibre en permanence. Vous
contrôlerez mieux l’outil dans des
situations inattendues.
f. Portez des vêtements appropriés. Ne
portez pas de vêtements amples ou de
bijoux. N’approchez pas les cheveux,
vêtements ou gants des parties des
pièces mobiles. Les vêtements amples,
les bijoux ou les cheveux longs peuvent
s’accrocher dans les pièces en
mouvement.
g. En cas d’utilisation d’appareils servant à
aspirer ou à recueillir les poussières,
assurez-vous qu’ils sont correctement
raccordés et utilisés. L’utilisation de tels
dispositifs réduit les dangers dus aux
poussières.
4. Utilisation des outils électroportatifs et
précautions
a. Respectez la capacité de l’outil. Utilisez
l’outil électroportatif correspondant au
travail à eectuer. Avec un outil
approprié, vous travaillerez mieux et en
toute sécurité.
b. N’utilisez pas un outil électroportatif
dont l’interrupteur est défectueux. Un
outil électroportatif qui ne peut plus être
mis en marche/arrêt présente un danger
et doit être réparé.
c. Retirez la prise de courant et/ou
débranchez le bloc-batterie avant
d’eectuer des réglages, de changer les
accessoires ou de ranger l’outil. Cette
mesure de précaution empêche de
mettre l’outil en marche accidentellement.
d. Rangez les outils électroportatifs hors
de portée des enfants. Les personnes ne
connaissant pas l’outil ou n’ayant pas lu
ces instructions ne doivent en aucun cas
l’utiliser. Les outils électroportatifs sont
dangereux lorsqu’ils sont utilisés par des
personnes non initiées.
e. Entretenez les outils électroportatifs.
Vérifiez que les parties mobiles
fonctionnent correctement et qu’elles ne
sont pas coincées. Vérifiez qu’il n’y a pas
de pièces cassées ou endommagées
susceptibles de nuire au bon
fonctionnement de l’outil. S’il est
endommagé, faites réparer l’outil avant
de l’utiliser. De nombreux accidents sont
dus à des outils électroportatifs mal
entretenus.
f. Maintenez les outils de coupe aiguisés et
propres. Des outils soigneusement
entretenus avec des bords tranchants
bien aiguisés se coincent moins souvent
et peuvent être guidés plus facilement.
g. Utilisez les outils électroportatifs, les
accessoires, etc., en suivant ces
instructions et en tenant compte des
conditions de travail, ainsi que du travail
à eectuer. L'utilisation des outils
électroportatifs à d'autres fins que celles
prévues peut vous mettre en situation
dangereuse.
5. Entretien
a. Faites entretenir votre outil électrique
par un réparateur habilité en utilisant
uniquement les pièces de rechange
identiques. Cela permettra de garantir la
sécurité de l'outil électrique.
Consignes de sécurité spécifiques
additionnelles
Avertissement ! Avertissements de
sécurité supplémentaires pour les
opérations de meulage, ponçage,
brossage, polissage ou
tronçonnage par abrasion

18
FRANÇAIS (Traduction des instructions initiales)
• Cet outil électrique est destiné à
fonctionner comme meule. Lisez tout
les avertissements de sécurité, les
instructions et les illustrations
accompagnant l'outil. Le non-respect
des instructions listées ci-dessous peut
entrainer un choc électrique, un incendie
ou des blessures graves.
• L'utilisation de l'appareil non conforme
à l'usage prévu est dangereuse et peut
provoquer des blessures corporelles.
• N'utilisez pas d'accessoires autre que
ceux spécialement conçus et
recommandés par le fabricant de l'outil.
Le simple fait de pouvoir fixer un
accessoire à votre outil ne signifie pas
que son utilisation est sécurisée.
• La vitesse nominale de l'appareil doit
être au moins égale à la vitesse
maximale indiquée sur l'outil électrique.
Les accessoires utilisés à une vitesse
supérieure à la vitesse nominale peuvent
se briser et se détacher.
• Le diamètre extérieur et l'épaisseur de
votre accessoire doivent être inférieurs
à la capacité nominale de votre outil
électrique. Les accessoires de taille
incorrecte ne peuvent être correctement
protégés ou contrôlés.
• La taille d'ancrage des disques ou de
tout autre accessoire doit être adaptée
au mandrin à collet de l'outil électrique.
Les accessoires comprenant des tailles
d'ancrage qui ne correspondent pas au
matériel de montage de l'outil électrique
seront déséquilibrés et entrainerons des
vibrations excessives pouvant aboutir à
une perte de contrôle.
• N'utilisez pas d'accessoire endommagé.
Avant chaque utilisation, vérifiez que
l'accessoire, tel que le disque, ne soit
pas ébréché, craquelé ou défectueux,
que la plaque ne soit pas fissurée ou
usée et que la brosse soit bien fixée et
en bon état. En cas de chute de l'outil
électrique ou de l'accessoire, vérifiez
qu'il ne soit pas endommagé ou
installez un accessoire en bon état.
Après avoir contrôlé et installé un
accessoire, placez-vous, ainsi que les
personnes présentes, à distance de
l'accessoire et faites tourner l'outil
électrique à vitesse maximale à vide
pendant une minute. Les accessoires
endommagés seront normalement
détruits pendant ce test.
• Portez un équipement de protection
individuelle. En fonction de l'utilisation,
utilisez un écran facial, des lunettes
protectrices contre les agents chimiques
ou des lunettes de sécurité. Si besoin,
portez un masque anti-poussière, des
protections auditives, des gants et un
tablier capable d'arrêter les petits
fragments abrasifs ou les pièces à usiner.
La protection oculaire doit pouvoir
arrêter les projections de débris générés
au cours de diérentes opérations. Le
masque anti-poussière ou le respirateur
doivent être capable de filtrer les
particules produites par vos travaux. Une
exposition prolongée à des bruits de forte
intensité peut provoquer une perte de
l'audition.
• Les personnes présentes doivent se tenir
à distance de la zone de travail. Toute
personne entrant dans la zone de travail
doit porter un équipement de protection
individuelle. Les fragments de pièce à
usiner ou d'accessoire cassé peuvent être
projetés au delà de la zone d'opération
immédiate et provoquer des blessures.
• Tenez l'outil électrique uniquement par
les surfaces isolées lorsque vous
eectuez une opération au cours de
laquelle l’accessoire coupant peut être
en contact avec des câble cachés ou
avec son propre câble d'alimentation. Si
l'accessoire coude découpe entre en
contact avec un câble « sous tension »,
les pièces métalliques de l’outil électrique
risquent de transmettre le courant et
infliger un choc électrique à l’opérateur.
• Éloignez le cordon de l’accessoire en
rotation. Si vous perdez le contrôle, le
cordon risque d'être coupé et vous
risquez de vous coincer la main ou le bras
dans l’accessoire en rotation.
• Ne posez jamais l’outil électrique avant
que l’accessoire ne soit à l'arrêt complet.
L’accessoire en rotation peut accrocher la
surface et vous faire perdre le contrôle de
l’outil électrique.

19
FRANÇAIS
(Traduction des instructions initiales)
• Ne faites pas fonctionner l’outil
électrique lorsque vous le transportez.
Un contact accidentel avec l’accessoire
de rotation peut accrocher vos
vêtements et vous tirer vers lui.
• Nettoyez régulièrement les orifices
d’aération de l’outil électrique. Le
ventilateur du moteur risque d'attirer la
poussière à l’intérieur du logement et
une accumulation excessive de métaux
peut provoquer des dangers électriques.
• Ne faites pas fonctionner l’outil
électrique à proximité de matériaux
inflammables. Des étincelles pourraient
enflammer ces matériaux.
• N'utilisez pas d’accessoires qui
nécessitent des liquides de
refroidissement. L’usage d’eau ou
d’autres liquides de refroidissement peut
entraîner une électrocution ou un choc
électrique.
Remarque : L'avertissement ci-dessus ne
s'applique pas aux outils électriques conçus
spécialement pour une utilisation avec un
système liquide.
Recul et mises en garde associées
Le recul est une réaction soudaine
provoquée par le pincement ou
l’accrochage d’une meuleuse en rotation,
d’une plaque, d’une brosse ou de tout autre
accessoire. L'accessoire en rotation cale
alors rapidement, ce qui projette l'outil
électrique dans la direction opposée à la
rotation de l'accessoire.
Par exemple, si une meule est accrochée ou
pincée par la pièce à usiner, le rebord de la
meule qui entre dans le point de pincement
peut accrocher la surface du matériau,
provoquant des sauts ou l’expulsion de la
meule. La meule peut alors dévier vers
l'opérateur ou dans la direction opposée
selon la direction de la meule au point de
pincement. Les meules abrasives peuvent
également se rompre dans ces conditions.
Le recul résulte d’un mauvais usage de
l’outil et/ou de l'inobservation des
procédures d'utilisation et peut être évité en
suivant les précautions appropriées
indiquées ci-dessous :
• Maintenez fermement l’outil électrique
et positionnez votre corps et vos bras
de manière à résister aux reculs. Utilisez
toujours la poignée auxiliaire, le cas
échéant, pour une maîtrise maximale du
recul ou de la réaction de couple au
cours du démarrage. L’opérateur peut
maîtriser les réactions de couple ou les
forces de recul s'il prend les précautions
appropriées.
• Ne placez jamais votre main à proximité
de l’accessoire en rotation. L’accessoire
peut rebondir sur votre main.
• Ne vous placez pas dans la zone où
l’outil électrique se déplacera en cas de
rebond. Le recul propulse l’outil dans le
sens opposé au mouvement de la meule
au point d’accrochage.
• Soyez particulièrement attentif lorsque
vous travaillez sur des angles, des
rebords coupants etc. Évitez d'accrocher
ou de faire rebondir l'accessoire. Les
coins, les rebords tranchants ont
tendance à accrocher l’accessoire en
rotation et provoquer une perte de
contrôle ou un recul.
• Ne fixez pas de chaîne coupante, de
lame à sculpter ou autre lame de scie
dentée. Ces lames provoquent souvent
des retours et des pertes de contrôle.
Avertissements spécifiques pour le
meulage et le tronçonnage par
abrasion
• Utilisez uniquement des types de meules
recommandés pour votre outil électrique
et le protecteur spécifique conçu pour la
meule choisie. Les meules pour lesquelles
l’outil électrique n’a pas été conçu ne
peuvent être protégées de manière
adéquate et sont dangereuses.
• La surface de meulage des meules à
moyeu déporté peut être montée sous le
bord du protecteur. Une meule qui n'est
pas montée correctement et qui dépasse
du protecteur ne peut pas être protégée
correctement.
• Le protecteur doit être fixé à l'outil
électrique et positionné de manière à
garantir une sécurité maximale, en
recouvrant un maximum de la partie de
la meule à laquelle l'opérateur est
exposé. Le protecteur permet de
protéger l’opérateur des fragments de
meule cassée et d’un contact accidentel
avec la meule.

FRANÇAIS
20
(Traduction des instructions initiales)
• Les meules doivent être utilisées
uniquement pour les applications
recommandées. Par exemple : n'utilisez
pas le côté à tronçonner de la meule
pour abraser. Les meules à tronçonner
par abrasion sont destinées au meulage
périphérique, l’application de forces
latérales peut les faire se briser en éclats.
• Toujours utiliser des flasques de meule
en bon état, de taille et de forme
adaptées à la meule choisie. Les
flasques doivent être appropriés afin de
réduire les risques de rupture de la
meule. Les meules à tronçonner par
abrasion peuvent être diérentes des
autres meules.
• N'utilisez pas de meules usées
provenant d’outils électriques plus
puissants. Les meules destinées à des
outil électrique plus puissants ne sont
pas adaptées à la vitesse supérieur d’un
outil plus petit et risquent d'éclater.
Mises en garde de sécurité
supplémentaires pour les
opérations de tronçonnage par
abrasion
• Ne bloquez pas et n'appliquez pas de
pression excessive sur la meule.
N'essayez pas de couper trop
profondément. Un excès de pression sur
la meule augmente la charge et la
possibilité de tordre ou coincer la meule
au cours de l'opération, ce qui favorise
les reculs ou cassures de la meule.
• Ne vous placez pas en face de et
derrière la meule. Durant l'opération, la
meule s'éloigne de votre corps et le recul
potentiel peut projeter la meule en cours
de fonctionnement et l'outil électrique
directement sur vous.
• Lorsque la lame se coince ou
s'interrompt sans raison, mettez l'outil
électrique hors tension et tenez-le
immobile jusqu'à ce qu'il s'arrête
complètement. N'essayez jamais de
retirer la meule à tronçonner de la
découpe tant que la meule est en
mouvement, pour éviter tout recul.
Recherchez la cause de l'incident et
prenez les mesures nécessaires pour y
remédier.
• Ne reprenez pas l'opération de découpe
dans la pièce de travail. Attendez que la
meule ait atteint sa vitesse maximale et
insérez-la à nouveau dans la découpe,
avec précaution. Si l'outil est redémarré
dans la coupure, la meule est susceptible
de se coincer, de remonter ou de reculer.
• Fixez les panneaux ou toute autre pièce
lourdes à traiter afin de réduire le risque
de pincement et de recul. Les grandes
pièces à traiter ont tendance à fléchir
sous leurs propre poids. Les supports
doivent être placés sous la pièce à traiter
près de la ligne de coupe et près des
rebords de la pièce de chaque côté du
disque.
• Soyez vigilant lorsque vous creusez une
cavité dans des murs ou autres zones
sans visibilité. La partie de la meule qui
dépasse peut couper des conduites de
gaz ou d'eau, des câbles électriques ou
objets susceptibles de créer un recul.
Mises en garde de sécurité
spécifiques aux opérations de
ponçage
• N'utilisez pas un disque abrasif aux
dimensions surproportionnées.
Respectez les recommandations des
fabricants lorsque vous choisissez le
papier abrasif. Un papier abrasif plus
grand qui dépasse du patin de ponçage
peut présenter un danger de lacération et
engendrer un accrochage ou déchirement
du disque, ou encore un mouvement de
recul.
Mises en garde de sécurité
spécifiques aux opérations de
polissage
• Ne laissez aucune partie libre du bonnet
de polissage ou de ses attaches tourner
librement. Mettez de côté ou tailler tout
moyen de fixation libre. Des moyens de
fixation libres ou en rotation peuvent
entrainer vos doigts ou s'accrocher à la
pièce à usiner.
Sécurité d'autrui
• Cet appareil n'est pas prévu pour être
utilisé par des personnes (y compris les
enfants) présentant des capacités
physiques, sensorielles ou mentales
réduites, ou manquant d'expérience et de
connaissances, sans surveillance ou sans
avoir reçu d'instructions concernant
l'utilisation de l'appareil de la part d'une
personne responsable de leur sécurité.
Table of contents
Languages:
Other BLACK DECKER Grinder manuals

BLACK DECKER
BLACK DECKER KG8215 User manual

BLACK DECKER
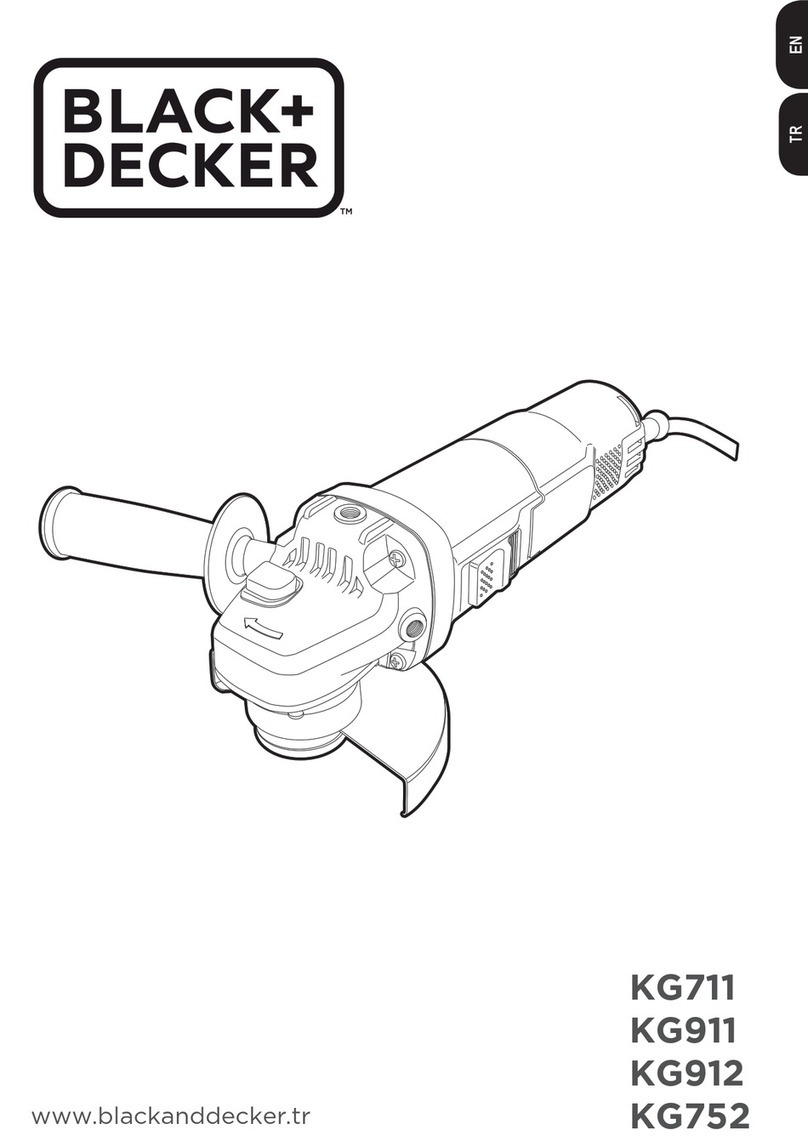
BLACK DECKER KG711 User manual

BLACK DECKER
BLACK DECKER BEG110 User manual

BLACK DECKER
BLACK DECKER KFBEG110 User manual

BLACK DECKER
BLACK DECKER BEG010 User manual

BLACK DECKER
BLACK DECKER ADBEG115 User manual

BLACK DECKER
BLACK DECKER G915 User manual

BLACK DECKER
BLACK DECKER G720P User manual

BLACK DECKER
BLACK DECKER G720 User manual

BLACK DECKER
BLACK DECKER KA401 User manual