Black Ridge 472E User manual
1 2
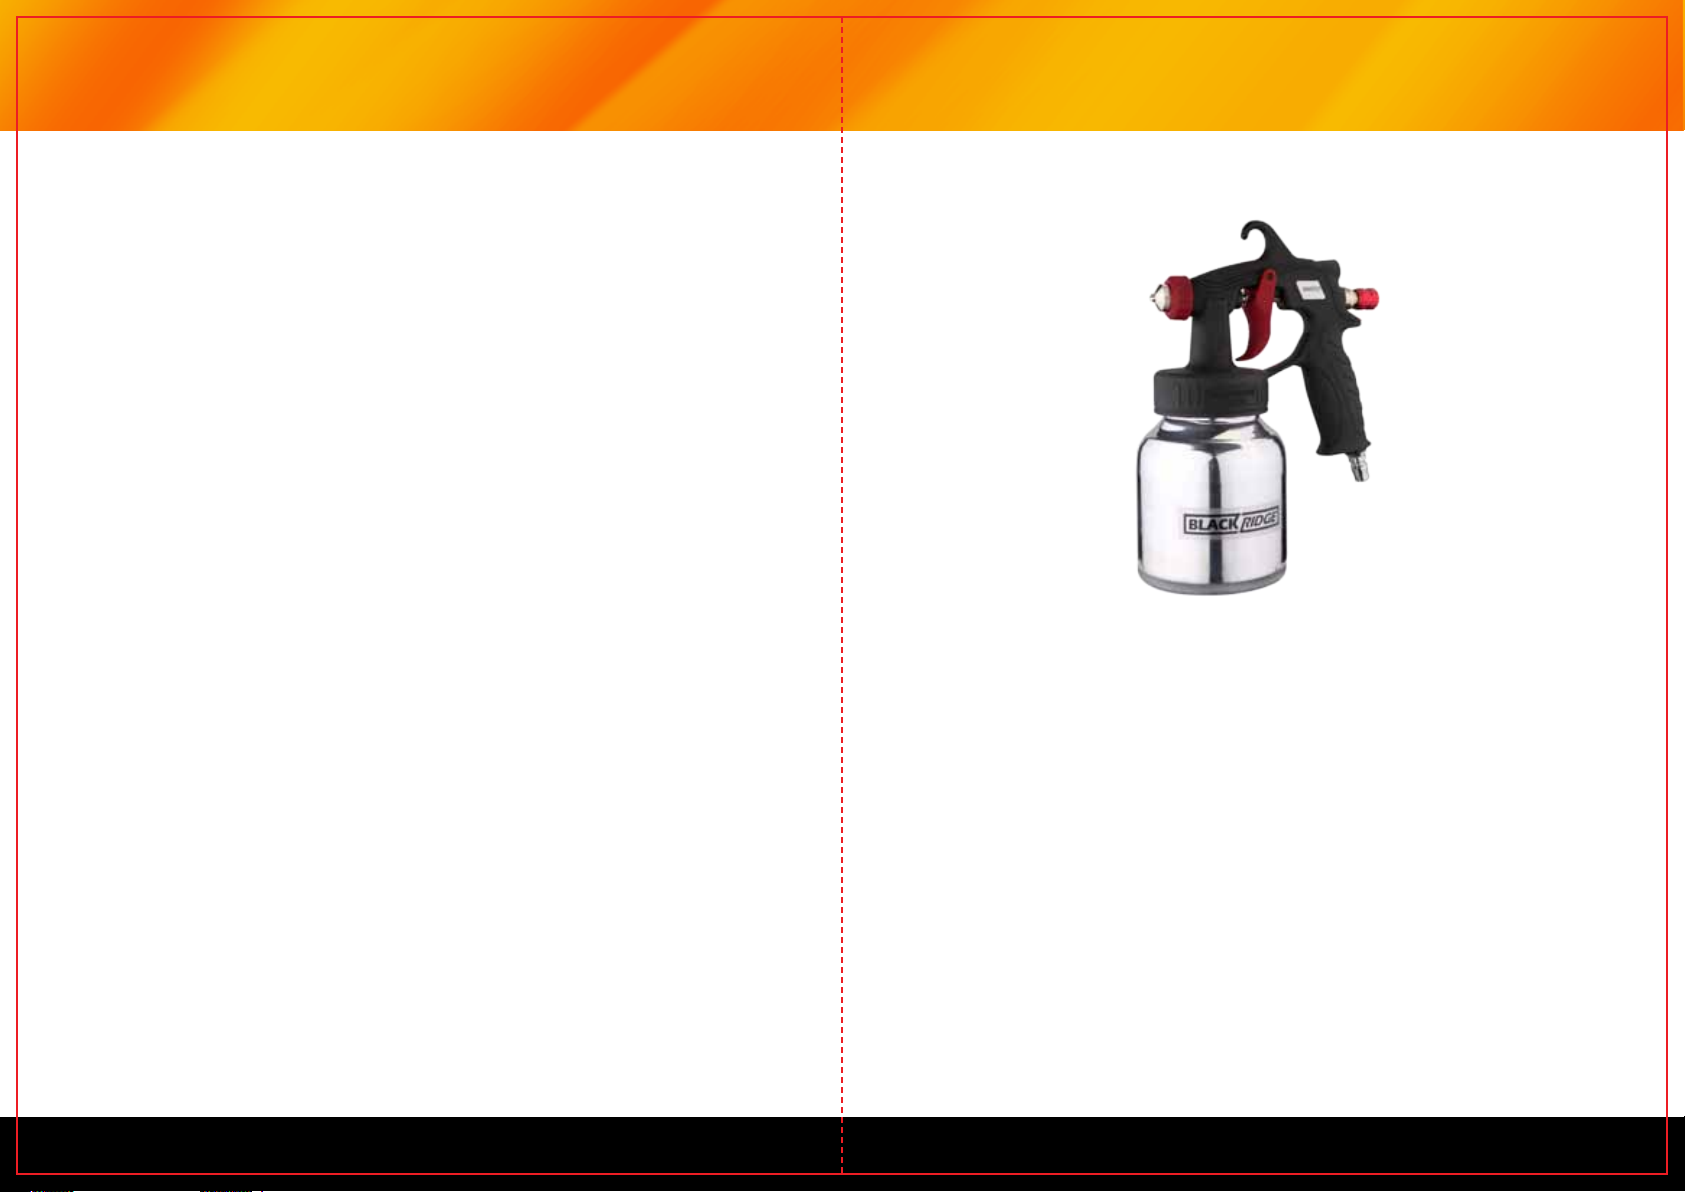
Model: 472E
Nozzle Size: 1.5mm (standard)
Max Operating Pressure: 30 PSI
Minimum Air Consumption: 60 LPM
Fluid Delivery: 0.18-0.24 LPM
Painting Fan: 160-180mm (at distance of 10”)
Cup Size: 600ml
Air Inlet: 1/4”
WARRANTY
This product is guaranteed against defects for a period of 12 months from date of
purchase. This warranty is provided by Super Cheap Auto Pty Ltd ACN 085 395
124 (Supercheap Auto) of 751 Gympie Rd Lawnton QLD 4501 Ph (07) 3482 7500.
Supercheap Auto will offer a repair, replacement product or store credit if the product
is assessed as being defective during the warranty period.
To claim under this warranty, take this product to the Front Service Desk of your nearest
Supercheap Auto store. For store locations, visit www.supercheapauto.com.au (AUS)
or www.supercheapauto.co.nz (NZ). You will need your receipt or proof of purchase.
Additional information may be requested of you to process your claim. Should you not
be able to provide proof of purchase with a receipt or a bank statement, identification
showing your name, address and signature may be required to process your claim.
This product may need to be sent to the manufacturer to assess the defect before
determining any claim. Faults or defects caused by product modification, misuse and
abuse, normal wear and tear or failure to follow user instructions are not covered under
this warranty.
Our goods come with guarantees that cannot be excluded under the Australian
Consumer Law. You are entitled to a replacement or refund for a major failure and
for compensation for any other reasonably foreseeable loss or damage. You are also
entitled to have the goods repaired or replaced if the goods fail to be of acceptable
quality and the failure does not amount to a major failure.
Any expenses incurred relating to the return of this product to store will normally have
to be paid by you. For more information contact your nearest Supercheap Auto store.
The benefits to the consumer given by this warranty are in addition to other rights and
remedies of the Australian Consumer Law in relation to the goods and services to
which this warranty relates.

3 43 4
Preparation before operating:
• Thoroughly mix the material, adding thinners as indicated by a paint
manufacturer or as desired. If the material appears too thick, add a little more
thinner. Always test and set your spray pattern on a piece of scrap material
prior to applying to your work piece or job surface. Be sure the material you
spraying is clean and free from lumps.
• Attach an air hose to the spray gun handle via the fitting. Make sure there are
no air leaks.
• Fill the cup 3/4 full. Screw cup onto the spray gun and make sure it is sealed well.
• When spraying it is important to have your compressor in a well ventilated
area away from where you are spraying to avoid damage to the compressor.
This damage can be caused by blocked filters due to overspray being drawn
into the filter.
When filling or refilling the material, disconnect your gun from the
air supply to avoid accidental spillage or spraying.
(for best results you should incorporate
an air regulator with filter as illustrated below).
• Connect the gun to the air supply and make sure the air pressure does not
exceed 30 PSI.
• Keep the gun at the right angles to your work. Keep the spray gun parallel to
the work surface at a distance of about 6” to 12”. Refer to illustration below:
Cluttered areas invite injuries. Avoid any ignition
sources, such as smoking, open flames and similar hazards.
Do not use machines or power
tools in damp or wet locations. Do not expose to rain. Keep work area well
lighted.
Children should not be allowed in the work area. Do
not let them handle machines, tools or extension cords.
When not in use, tools must be stored in a dry
location to inhibit rust or corrosion. Always lock up tools and keep out of reach
of children.
Always use the tool for the specific
purpose it was intended.
Always wear the appropriate clothing suited to the painting
application.
Always wear appropriate eye protection when
operating a spray gun.
Keep proper footing and balance at all times. Do not
reach over or across running machines.
Watch what you are doing and use common sense. Do not
operate any tools when you are tired.
Before using any tool, any part that appears
damaged should be carefully checked to determine if it will operate properly and
perform its intended function. Any part that is damaged should be replaced.
When servicing, use only
identical replacement parts.
Read warning labels on prescriptions to determine if your judgement or
reflexes are impaired while taking drugs. If there is any doubt, do not operate the
tool.

3 45 6
If gun does not operate properly,
check for:
Air leaks.
Improperly prepared materials.
Improperly cleaned gun.
If material sags or runs: Material may be too thin.
Gun may be stroked too slowly.
Gun may be held too close to the
work.
Trigger may be adjusted for too
dense a spray.
If material is hard to spray, check for: Air leaks.
Thick or unstrained material.
If spray pattern is distorted,
look for:
Accumulation of material on end of
liquid nozzle.
Clogged internal mix nozzle.
Foreign matter in material.
Gun held at angle to surface.
If gun does not spray,
look for:
Loose air hose connections at gun or
compressor.
Loose paint cup.
Clogged passages in liquid tube or
liquid nozzle
Loose or damaged liquid tube.
Loose damaged, or clogged internal
mix nozzle.
If spray pattern flutters,
look for:
Loose paint cup or liquid tube.
Dry or worn packing.
Loose packing.
Improperly strained or thinned
material.
Gun tipped too far, allowing air to
enter liquid tube along with paint.
• Learn to “trigger” your gun to start and stop the material properly. This means
the gun must be moving at the beginning of the stroke before the trigger is
pulled. Likewise the trigger must be released before the gun stops moving at
the end of the stroke. Refer to illustration below:
• Overlap your strokes on a flat surface just enough to secure an even coating.
A few strokes on your practice sheets will quickly develop the needle skill.
• Mask up the area that is not to be painted with paper and masking tape to
catch over spray.
• Different air nozzles are used for different work surfaces:
- Best for large flat surfaces such as walls, solid board
fences, truck bodies and industrial buildings.
- For odd-shaped pieces such as chairs, bicycles, car
body panels, toys and small furniture items.
Spray guns must be thoroughly cleaned after use, as paint materials dry
quickly in nozzle passages.
• To clean the spray gun, empty and wipe out the cup. Pour a small amount of
solvent or thinner in the cup, screw on tight, and hold trigger open until the
thinner has been blown through the nozzle. The gun should be shaken when
doing this to thoroughly wash out the cup.
• Stopping and releasing the spray at the nozzle by placing the finger tip over the
nozzle will cause the thinner to surge violently, and helps clean the material
passage in the gun.
• Wipe off the internal mix nozzle, liquid nozzle and cup with a soft cloth that has
been moistened with solvent.
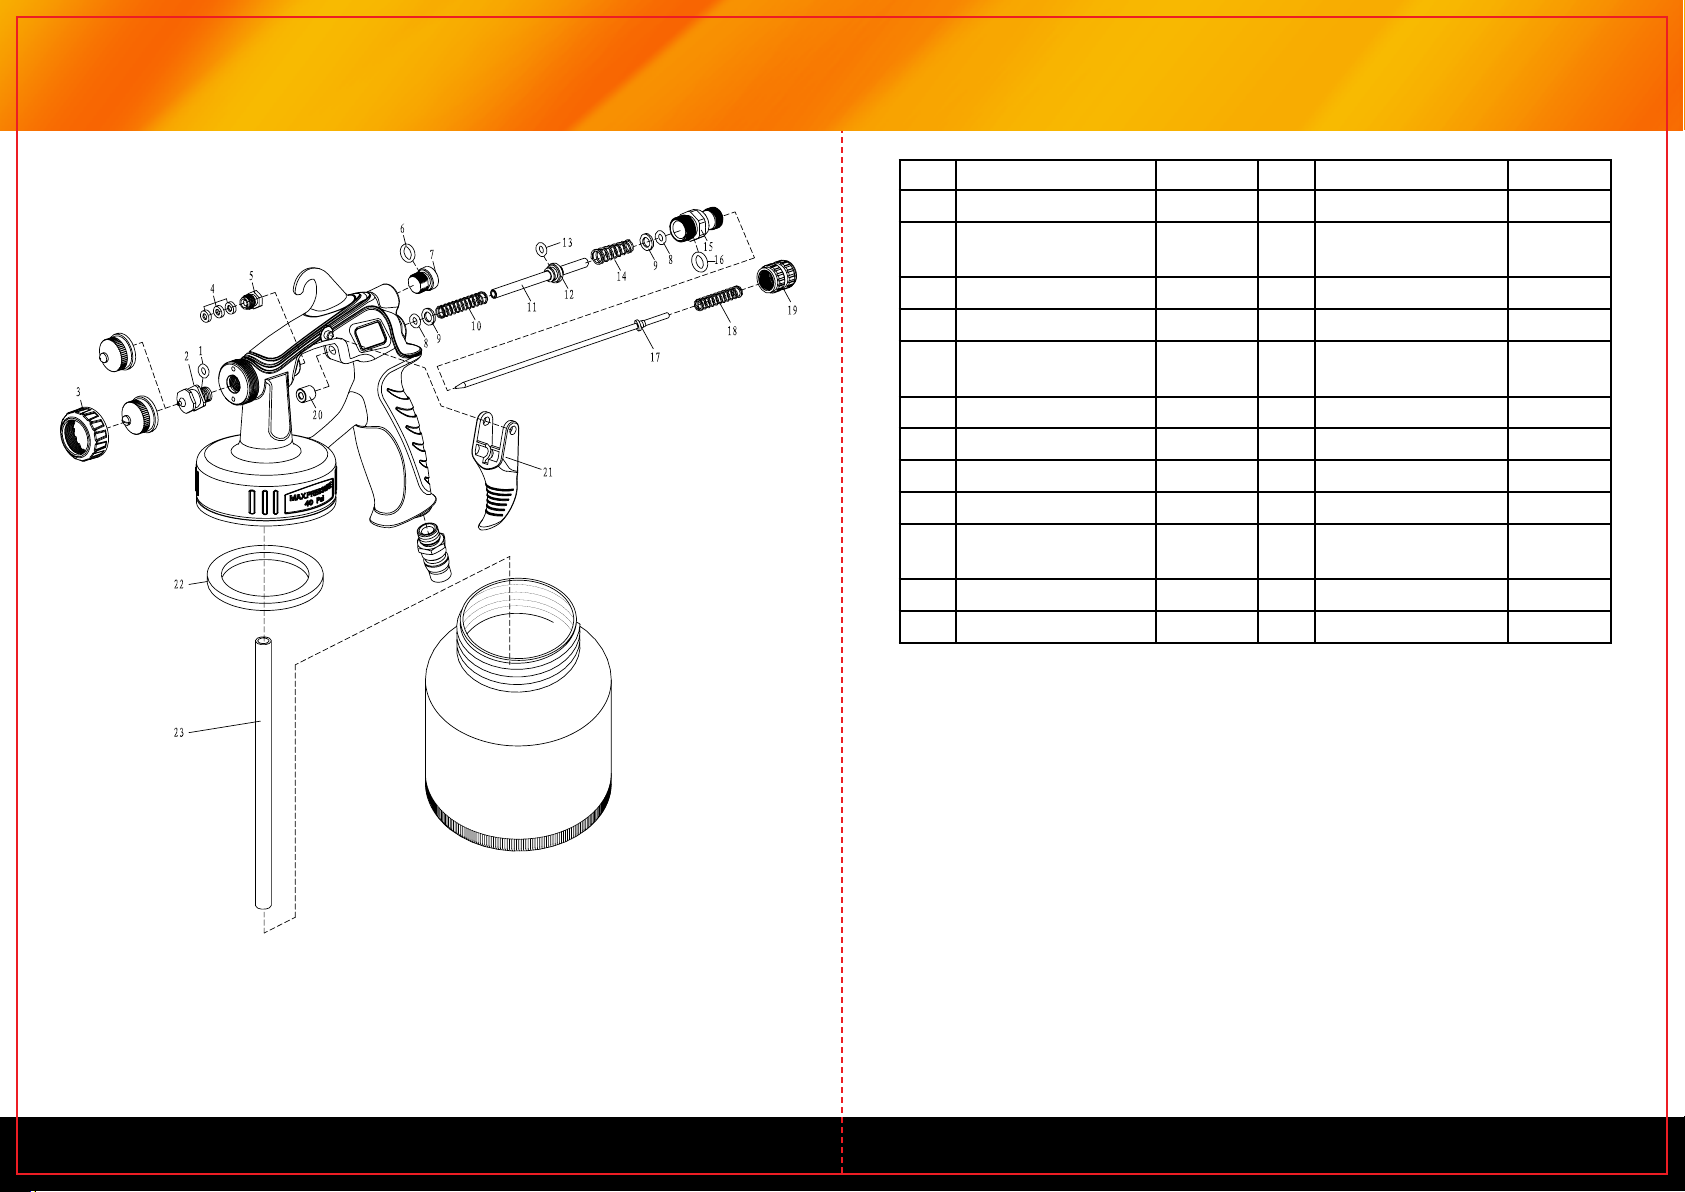
1 O-ring 5*1.5 1 13 O-ring 6.0*2 1
2 Material Nozzle 1 14 Needle Socket
Spring
1
3 Locking Knob 1 15 Needle Adj. Seat 1
4 Sealing Gasket 3 16 O-ring 9*1.5 1
5 Needle Sealing
Screw
1 17 Needle Seat 1
6 O-ring 4*2 1 18 Needle Adj. Spring 1
7 Sealing Screw 1 19 Needle Ajd. Knob 1
8 O-ring 4*2 2 20 Needle Socket Seat 1
9 Gasket 5 2 21 Trigger 1
10 Needle Socket
Spring
1 22 Sealing Gasket 1
11 Needle Socket 1 23 Material Tube(A) 1
12 Spring Seat 1
3 47 8
NOTE:
When spray painting consider the size of the job and the size of your air
compressor being used. When spray painting large jobs like a fence or car, a Belt
Drive Air compressor is recommended. Always refer to the duty cycle of your air
compressor before spray painting.
Table of contents
Other Black Ridge Paint Sprayer manuals


Popular Paint Sprayer manuals by other brands

ActiveProducts
ActiveProducts PRO Series quick start guide

Central Pneumatic
Central Pneumatic HVLP DETAIL SPRAY GUN 46719 Assembly and operating instructions

sunjoe
sunjoe SJ-APS-1G Operator's manual

WorkPro
WorkPro JS-PHA0118 Original operating instructions

Allpro
Allpro 289316 instructions

EUROPRO
EUROPRO EUROPROPULVE V5 user manual

Spraying Systems
Spraying Systems PulsaJet 10000AUH-03-Z1-EPFC user guide

Healthmark
Healthmark 80-10-01 instruction manual

HERO
HERO 3000 owner's manual

Emist
Emist EPIX360 user guide

Central Pneumatic
Central Pneumatic 00422 Assembly and operating instructions

Central Pneumatic
Central Pneumatic 62381 owner's manual


