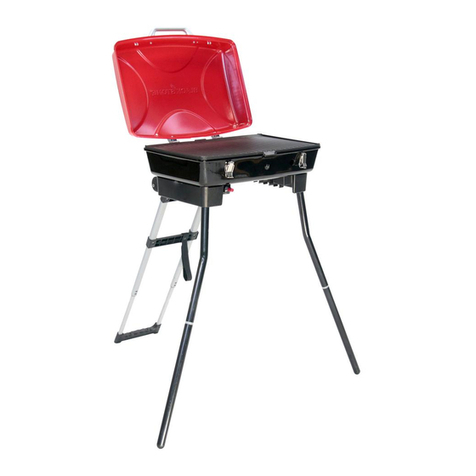
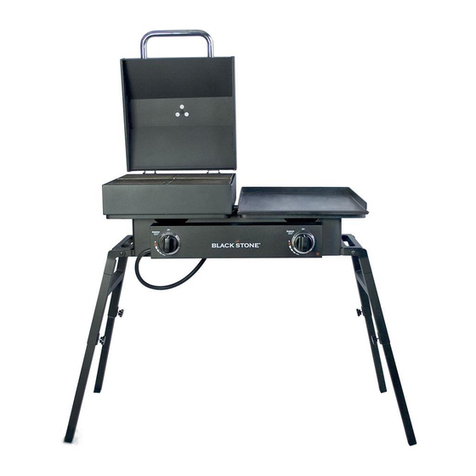
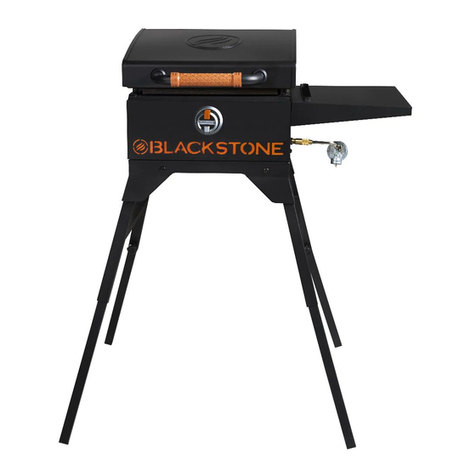
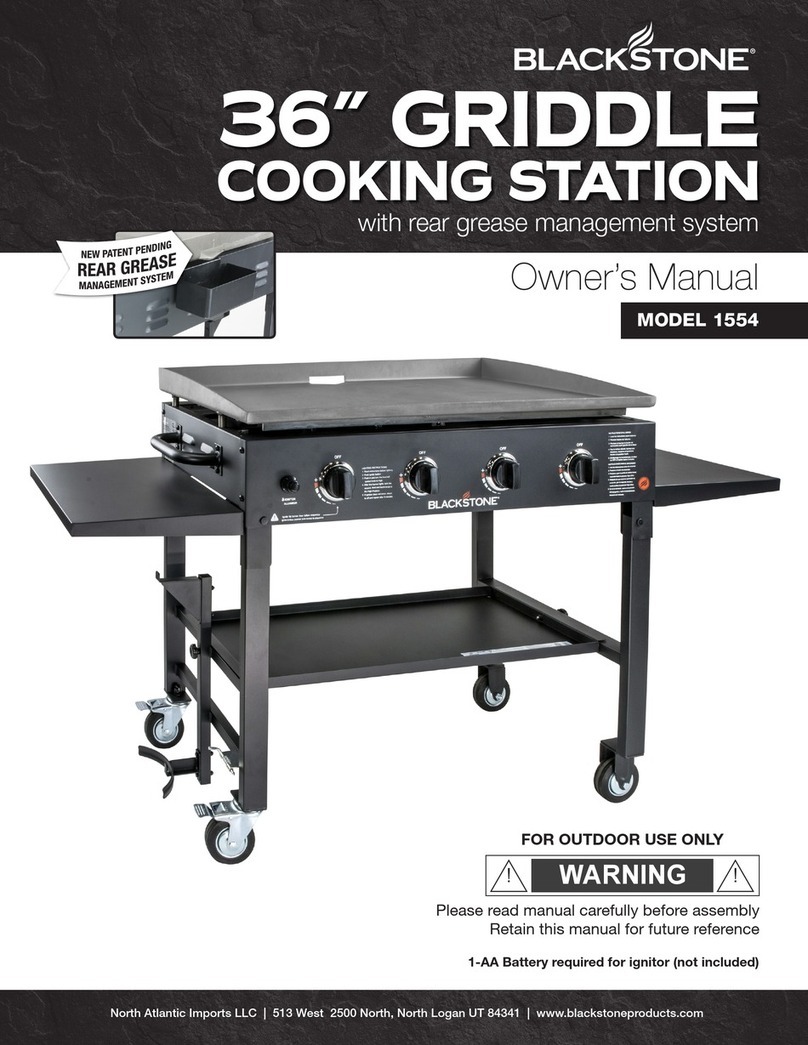
Black Stone 1819 User manual

GIDE & CACA
GIL CMO
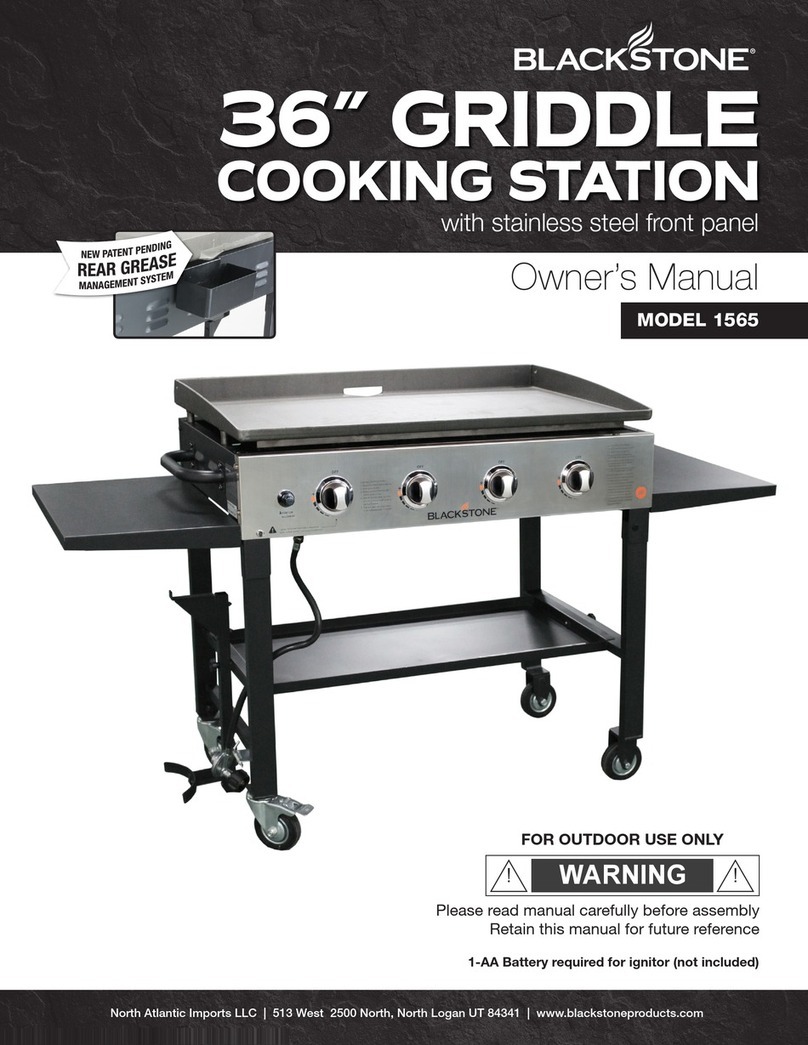
Owner’s Manual
MODEL 1819
FOR OUTDOOR USE ONLY
! !
WARNING
Please read manual carefully before assembly
Retain this manual for future reference
North Atlantic Imports LLC | 513 West 2500 North, North Logan UT 84341 | www.blackstoneproducts.com

www.blackstoneproducts.com
2
PRODUCT REGISTRATION
DANGER
DANGER: Indicates an imminently hazardous
situation which, if not avoided, will result in death or
serious injury.
WARNING
WARNING: Be alert to the possibility of serious bodily
injury if the instructions are not followed. Be sure to
read and carefully follow all of the messages.
CAUTION
CAUTION: Indicates a potentially hazardous
situation which,if not avoided, may result in minor or
moderate injury.
SAFETY SYMBOLS
The symbols and boxes shown below explain what each
heading means. Read and follow all of the messages
found throughout the manual.
To register your BLACKSTONE product please go to
www.blackstoneproducts.com/register
TABLE OF CONTENTS
Product Registration ...................... 2
For Your Safety............................... 3
Use and Care...............................4-5
List of Parts .................................6-7
Assembly Instructions .................8-9
Care, Maintenance,
& Troubleshooting......................... 10
Grill Warranty................................ 11
Customer Service......................... 12
Griddle Seasoning........................ 12
Model Number: __________________________________
Serial Number: ___________________________________
Date Purchased: _________________________________
To Installer/Assembler:
Leave these instructions with consumer.
To Consumer:
Keep this manual for future reference.
WARNING
WARNING
WARNING: Fuels used in liqueed propane gas appli-
ances, and the products of combustion of such fuels,
can expose you to chemicals including benzene, which
is known to the State of California to cause cancer and
cause birth defects or other reproductive harm. For
more information go to www.P65Warnings.ca.gov.
WARNING: This product can expose you to chemi-
cals including phthalates (DINP and DEHP), which are
known to the State of California to cause cancer. For
more information, go to www.P65Warnings.ca.gov.

3
This instruction manual contains important information
necessary for the proper assembly and safe use of the
appliance. Read all warnings and instructions before
assembling and using the appliance. Follow all warnings
and instructions when assembling and using the appliance.
Failure to follow these instruction could result in re or
explosion which could cause property damage, personal
injury, or death.
FOR YOUR SAFETY
If you smell gas:
1. Shut o gas to the appliance.
2. Extinguish any open ame.
3. If odor continues, keep away from the appliance
and immediately call your re department.
Failure to follow these instructions could result in re
or explosion which could cause property damage,
personal injury or death.
Do not store or use gasoline or other ammable liquids
or vapors in the vicinity of this or any other appliance.
DANGER
WARNING
WARNING:
It is the consumer’s responsibility to see that the Griddle
& Charcoal Grill Combo is properly assembled, installed,
and maintained. Failure to follow the instructions in
this manual could result in bodily injury and/or property
damage.
PRECAUTIONS:
• Do not operate the Griddle & Charcoal Grill Combo
any closer than 36-inches from any combustible
construction, including walls and ceilings. Never use
indoors.
• Do not use this appliance under overhead
combustible surfaces.
• If this regulator fails, it must be replaced with the
exact model. Please call customer service for a
BLACKSTONE authorized replacement part.
• Perform a visual inspection of the gas path, from the
tank connection to the element orices for any breaks,
leaks, cracks or intrusions. Begin at the tank and
continue to the gas line connection. Visually inspect
the knob mechanism for similar defects. Follow the
gas path to the elements. Look for abnormalities or
cracks on the element or orices at the center of the
grill box. Please contact customer service with any
questions or concerns.
WARNING
• This appliance shall be used only outdoors, and
shall not be used in a building, garage, or any other
enclosed area.
• This appliance is not intended to be installed
in or on recreational vehicles.
• The use of alcohol, prescription or non-prescription
drugs may impair the consumer’s ability to properly
assemble or safely operate the appliance.
• In the event of an oil or grease re do not attempt
to extinguish with water. Immediately call the re
department. A Type BC or ABC re extinguisher
may, in some circumstances contain the re.
• Do not leave the appliance unattended. Keep
children and pets away from the appliance at
all times.
• This appliance is not intended for and should
never be used as a heater.
• This appliance will be hot during and after use.
Use insulated oven mitts or gloves for protection
from hot surfaces or splatter from cooking liquids.
• Donotplaceammableitemsontheside
shelvesnearthegriddle.Especiallyaerosol
containersastheycanoverheatandresultinan
explosion,re,severepersonalinjury,ordeath.

www.blackstoneproducts.com
4
CAUTION
WARNING
CAUTION
CAUTION
Some parts may contain sharp edges, especially as
noted in these instructions. Wear protective gloves if
necessary.
TurncontrolsandgassourceortankOFFwhen
notinuse.
For outdoor residential use only. Do not use for
commercial cooking.
If ignition does NOT occur in 5 seconds, turn the
burner controls OFF, wait 5 minutes and repeat the
lighting procedure. If the burner does not ignite with
the valve open, gas will continue to ow out of the
burner and could accidentally ignite with risk of injury.
Call the BLACKSTONE Information Center for
help and missing parts, assembly questions, and
operation problems. Before returning the Griddle &
Charcoal Grill Combo to the store, call: USA 435.252.3030
SafetyTips
• When the Griddle & Charcoal Grill Combo is not in
use, turn the Griddle & Charcoal Grill Combo off.
• Never move the Griddle & Charcoal Grill Combo while
in operation or still hot.
• Use long-handled barbecue utensils and oven mitts to
avoid burns and splatters.
• Keep unit at least 36” away from walls, buildings,
vehicles or other structures when in use.
• Clean the Griddle & Charcoal Grill Combo often,
preferably after each cookout.
• If you notice grease or other hot material dripping from
the Griddle & Charcoal Grill Combo onto the valve or
regulator, turn off gas supply at once. Determine the
cause, correct it, then clean and inspect valve, hose
and regulator before continuing. Perform a leak test.
• Keep ventilation openings in cylinder enclosure free
and clear of debris.
• The regulator may make a humming or whistling noise
during operation. This will not affect safety or use of
the Griddle & Charcoal Grill Combo.
• If you have a problem with your Griddle & Charcoal
Grill Combo refer to the Troubleshooting Section on
page 10. If you can’t resolve the problem please call
customer support at 435.252.3030 or send an email to
• If the regulator frosts, turn off the Griddle & Charcoal
Grill Combo and LP bottle valve immediately. This
indicates a problem with the LP bottle and it should not
be used on any product. Return to supplier.
InstallationSafetyPrecautions
• Use the Griddle & Charcoal Grill Combo, as purchased.
• The Griddle & Charcoal Grill Combo installation
must conform with local codes, or in the absence of
local codes, with either the National Fuel Gas Code,
ANSI Z223.1/ NFPA 54, Natural Gas and Propane
Installation Code, CSA B149.1, or Propane Storage
and Handling Code, B149.2, or the Standard for
Recreational Vehicles, ANSI A 119.2/NFPA 1192, and
CSA Z240 RV Series, Recreational Vehicle Code, as
applicable.
• The Griddle & Charcoal Grill Combo is not for use in or
on recreational vehicles and/or boats.
• This Griddle & Charcoal Grill Combo is safety certied
for use in the United States only. Do not modify for use
in any other location. Modication will result in a safety
hazard.
• The pressure regulator supplied with the appliance
must be used. Replacement pressure regulators must
be those specied by the appliance manufacturer.
• Place dust cap on cylinder valve outlet whenever the
cylinder is not in use. Only install the type of dust cap
on the cylinder valve outlet that is provided with the
cylinder valve. Other types of caps or plugs may result
in leakage of propane.
SafetyMaintenance
• Keep appliance area clear and free from combustible
materials, gasoline and other ammable vapors
and liquids.
• Do not obstruct the ow of combustion and ventilation
air ow.
• Keep the ventilation opening of the cylinder enclosure
free and clear from debris.
• Visually check burner ames.
• Clean appliance, including special surfaces, with
recommended cleaning agents, if necessary.
• Check and clean burner/venturi tube for insects and
insect nests. A clogged tube can lead to re beneath
the appliance.
USE AND CARE

5
BurnerFlameCheck
Light burner, rotate knob from high to low. You should see
a smaller ame in low position than seen on high. Always
check ame prior to each use. If only low ame is seen
refer to “Sudden drop or low ame” in the Troubleshooting
section on page 10.
TurningtheGriddle&Charcoal
GrillComboO
Turn knob to the OFF position.
ValveCheck
Important: To check valve, rst push in knob and release,
knob should spring back. If knob does not spring back,
replace valve assembly before using the Griddle &
Charcoal Grill Combo. Turn knob to low position then turn
back to OFF position. Valve should turn smoothly.
GeneralGriddle&Charcoal
GrillComboCleaning
• Do not mistake brown or black accumulation of grease
and smoke for paint. Do not apply a caustic griddle/
oven cleaner to painted surfaces.
• Plastic parts: Wash with warm soapy water and
wipe dry. Do not use Citrisol, abrasive cleaners, de-
greasers or a concentrated oven cleaner on plastic
parts. Damage to and failure of parts can result.
• Painted surfaces: Wash with mild detergent or
nonabrasive cleaner and warm soapy water. Wipe dry
with a soft nonabrasive cloth.
• Baked-on grease deposits may require the use of an
abrasive plastic cleaning pad. Use only in direction of
brushed nish to avoid damage. Do not use abrasive
pad on areas with graphics.
StoringYourGriddle&Charcoal
GrillCombo
• Store in dry location.
• When an LP bottle is connected to the Griddle &
Charcoal Grill Combo, store outdoors in a well-
ventilated space and out of reach of children.
• Store Griddle & Charcoal Grill Combo indoors ONLY
if LP bottle is turned off, disconnected, and removed
from the Griddle & Charcoal Grill Combo and the LP
bottle is stored outdoors.
• When removing the Griddle & Charcoal Grill Combo
from storage, follow “Cleaning the Burner Assembly”
instructions before starting griddle.
CleaningTheBurnerAssembly
Follow these instructions to clean and/or replace parts of
burner assembly or if you have trouble igniting the Griddle
& Charcoal Grill Combo.
1. Turn gas OFF at control knob.
2. Detach electrode from burner.
NOTE: Removal/Detachment method will depend on
the burner conguration.
3. Carefully lift burner up and away from valve openings.
We suggest three ways to clean the burner tubes. Use
the one easiest for you. (A) Bend a stiff wire (a light
weight coat hanger works well) into a small hook. Run
the hook through burner tube several times.(B) Use
a narrow bottle brush with a exible handle (do not
use a brass wire brush), run the brush through burner
tube several times.(C) Wear eye protection: Use an
air hose to force air into the burner tube and out the
burner ports. Check each port to make sure air comes
out each hole.
4. Wire brush entire outer surface of burner to remove
food residue and dirt.
5. Clean any blocked ports with a stiff wire such as an
open paper clip.
6. Check burner for damage, due to normal wear and
corrosion some holes may become enlarged. If any
large cracks or holes are found replace burner.
7. Attach electrode to burner.
8. Carefully replace burners.
9. Attach burners to brackets on rebox.
FoodSafety
Food safety is a very important part of enjoying the
outdoor cooking experience. To keep food safe from
harmful bacteria, follow these four basic steps:
1. Clean: Wash hands, utensils, and surfaces with hot
soapy water before and after handling raw meat and
poultry.
2. Separate: Separate raw meats and poultry
from ready-to-eat foods to avoid cross
contamination. Use a clean platter and utensils when
removing cooked foods.
3. Cook: Cook meat and poultry thoroughly to kill
bacteria. Use a thermometer to ensure proper internal
food temperatures.
4. Chill: Refrigerate prepared foods and leftovers
promptly. For more information Visit the Canadian
partnership for Consumer Food Safety Education -
www.befoodsafe.ca

www.blackstoneproducts.com
6
WARNING
The manufacturer has made every eort to eliminate
any sharp edges. However, you should handle all
components with care to avoid accidental injury.
Please read all instructions thoroughly before
proceeding. Find a large, clean area in which to
assemble your Griddle & Charcoal Grill Combo.
Please refer to the assembly diagram as necessary.
NOTICE: Make sure all the plastic protection and
packaging is removed before assembling.
LIST OF PARTS
HowToTellIfMeatIsGrilledThoroughly
• Meat and poultry cooked on a griddle or oven
often browns very fast on the outside. Use a meat
thermometer to ensure food has reached a safe
internal temperature. Cut into food to check for visual
signs of being done.
• Whole poultry should reach 165°F/74°C. Juices should
run clear and esh should not be pink.
• Hamburgers made of any ground meat or poultry
should reach 160°F/71°C, and be brown in the middle
with no pink juices. Beef, veal and lamb steaks, roasts
and chops can be cooked to 145°F/63°C. All cuts of
pork should reach 160°F/71°C.
• NEVER partially grill meat or poultry and nish
cooking later. Cook food completely to destroy
harmful bacteria.
• When reheating takeout foods or fully cooked meats
like hot dogs, grill to 165°F/64°C , or until steaming hot.
1.Grill/GriddleBase(1pc)
2.GriddleTop(1pc)
3.LeftLegSet(1pc)
4.RightLegSet(1pc)
5.BottomShelf(1pc)
6.SideShelf(1pc)

7
LIST OF PARTS
Phillips-HeadScrewdriver
7.PropaneRegulatorCollar(1pc)
12.GreaseCup(1pc)
9.GrillGrate(1pc) 10.CharcoalGrate(1pc)
11.SideHandle(1pc)
13.WindGuard(Rear)(1pc)
15.WindGuard(L)
(1pc)
16.WindGuard(R)
(1pc)
17.PropaneTank
Hanger(1pc)
18.PropaneTank
Support(1pc)
14.GrillGrateHandle(1pc)
22.ThumbScrew
(2pcs)
23.M6x12Screws
(21pcs)
24.M6Nut(1pc)
8.BulkTankAdapterHose(1pc)
21.RightLegSupport
(2pcs)
ToolsNeeded:
19.Wheel(2pcs) 20.Knob(1pc)

www.blackstoneproducts.com
8
STEP 1
Remove the Griddle & Charcoal Grill Combo from the box
and lay the unit upside down on the at surface as shown
in the diagram below.
STEP 2
Install the 2 wheels to the right legs and using both braces
assemble the right legs together with 4 M6x12 screws.
Using an addition M6 Screw and Nut add the propane
tank hanger to the top leg support.
STEP 3
Install the legs to the body with 8 M6x12 screws being
sure the threaded holes and propane tank hanger are
facing outwards.
STEP 4
Place the Griddle & Charcoal Grill Combo on it’s legs
and secure the bottom shelf as well as the propane tank
support with the thumb screws, inserting them from the
outside of the unit as shown in the diagram below.
STEP 5
Install the side shelf with 2 M6x12 screws and press the
side shelf downward to lock in place.Hand-tighten the
propane regulator collar to the griddle. Be careful to not
over tighten.
STEP 6
Press the knob in place as shown in the diagram below.
Threaded
hole
Propane
tank hanger
M6x12
Screws
M6x12 screws
Propane tank
hanger hardware
Propane tank
support
Knob
Propane
Regulator Collar
ASSEMBLY INSTRUCTIONS

9
STEP 9
Assemble the wind guard with 2 M6x12 as shown in the
illustration below.
STEP 10
Secure the wind guard on the left side of the unit as
shown in the diagram below.
STEP 7
Add the handle to the base of the unit with
4 M6x12 screws.
M6x12 Screws
1lb.
Propane
Bottle
20 lb.
Propane
Tank
Grease
Cup
Adapter
Hose
!ATTENTION: Handle will be hot while in use. It
is not recommended to use more than 4 pounds
of charcoal at a time to avoid being burned.
STEP 8
Place the charcoal grate inside the grill on the
left side of the unit as shown in the diagram below.
STEP 11
Line up the four feet located below the griddle top and
set the griddle top in place on the unit above the burners.
Using the grill grate handle place the cast iron grill grate
in place on the rst or second tabs on the wind guard as
shown in the diagram below.
STEP 12
Place the rear grease cup in place as shown below. Attach
a 1 lb. propane bottle or a 20 lb bulk propane tank using
the adapter hose. Enjoycookingoutdoors!
Be sure to season your griddle top before use.
See page 12 for details.

www.blackstoneproducts.com
10
Regularly clean your Griddle & Charcoal Grill Combo
between uses and especially after extended periods of
storage. Ensure that the griddle top and its components
are suciently cool before cleaning. Never handle hot
parts with unprotected hands.
In order to extend and maintain the life and condition
of your Griddle & Charcoal Grill Combo, we strongly
recommend that the unit be covered when left outside for
any length of time, especially during the winter months.
FittingsandStorage
Annual checking and tightening of metal ttings is
recommended. Store the Griddle & Charcoal Grill
Combo in a cool dry place. Cover the burners with
aluminum foil in order to prevent insects or other
debris from collecting in the burner holes. If the griddle
top is to be stored indoors, the gas bottle must be
disconnected and left outside. The gas bottle should
always be stored outside, out of reach of children, and
in a dry, well-ventilated area away from any sources of
heat or ignition.
Troubleshooting
Problem PossibleCause Solution
Burnerwillnotlightusingthe
piezoelectricignitionsystem.
• Faulty regulator.
• Obstructions in the burner.
• Obstructions in gas jets or gas hose.
• Electrode is damaged/faulty igniter
• Empty LP bottle.
• Have the regulator checked or
replaced.
• Clean burner.
• Clean jets and gas hose.
• Change electrode and wire or
change igniter.
• Use a new LP bottle
Burnerwillnotlightwitha
match.
• Faulty Regulator.
• Obstructions in burner.
• Obstructions in gas jets or gas hose.
• Empty LP bottle.
• Have the regulator checked or
replaced.
• Clean Burner.
• Clean jets and gas hose.
• Use a new LP bottle
Fireinburnertubehasalow
ameorashback(ahissingor
roaringnoisemaybeheard)
• Obstructions in burner.
• Obstructions in gas jets or gas hose.
• Windy conditions.
• Clean burner.
• Clean jets and gas hose.
• Use grill in a more sheltered
position.
CARE,MAINTENANCE,&TROUBLESHOOTING

11
WARRANTY
NorthAtlanticImportsLLC,
90Day&LimitedWarranty
North Atlantic Imports LLC, the manufacturer of
BLACKSTONE Products, will warranty for 90 days
from purchase all parts, workmanship, and nishes
(against rust). It will be the manufacturer’s option as
to whether to repair or replace any of the above items.
If this Griddle & Charcoal Grill Combo fails due to a
defect in material or workmanship within 90 days from
the date of purchase, call (435) 252-3030 to arrange
for replacement parts.
Please retain a copy of your proof of purchase to
validate your warranty. You may be requested to send
in a copy of your receipt to conrm any warranty
requests.
All warranties are limited to the original purchaser
only. This warranty does not cover any liability on
the part of North Atlantic Imports LLC, its agents or
employees, for any indirect or consequential damages
for breach of warranty.
The purchaser must follow the manufacturer’s usage
instructions. Warranty coverage is void if this product
is ever used for commercial or rental purposes. Under
no circumstances is the manufacturer responsible
for damages from the failure to operate this product
properly.
Allwarrantycoverageexcludespaintloss,discoloration
or surface rusting, which are either expendable parts
that can wear out from normal use within the warranty
period, or are conditions that can be the result of
normal use, accident or improper maintenance.
After 90 days from the date of purchase, or if a valid
proof of purchase cannot be provided, you can
purchase replacement parts by calling (435) 252-
3030. (Part purchase price with shipping and handling
to be paid by customer.)
Formoredetailedexplanationof
thewarranty,readbelow:
North Atlantic Imports LLC warrants to the owner that the
product covered by this agreement is free from defects in
material and workmanship under normal use and service
for which it was intended if, but only if, it has been operated
in accordance with North Atlantic Imports LLC instructions
exclusively for domestic use, and not for private or public
club, institutional, or commercial purposes. North Atlantic
Imports LLC obligation under this warranty is limited to
replacing or repairing, free of charge, any part or parts that
may prove, to the satisfaction in North Atlantic Imports
LLC, to be defective under normal home use and service
within the following stated periods of time from the date
of purchase; a) for 90 days from purchase, all parts, nish,
and workmanship. Should any failure to conform to this
warranty become apparent during applicable warranty
periods stated above, the original purchaser must notify
North Atlantic Imports LLC of breach or warranty within the
applicable warranty period. North Atlantic Imports LLC shall
upon notice and compliance by the original purchaser with
such instructions, correct such nonconformity by repair or
replacement of the defective part or parts. Correction in the
manner provided above shall constitute a fulllment of all
obligations of North Atlantic Imports LLC with respect to
the quality of the product.
North Atlantic Imports LLC does not warrant this equipment
to meet the requirement of any safety code of any state,
municipality or other jurisdiction, and the original purchaser
assumes all risk and liability whatsoever resulting from
the use thereof, whether used in accordance with North
Atlantic Imports LLC instructions or otherwise. This
warranty does not cover and is intended to exclude any
liability on the part of North Atlantic Imports LLC its agents,
servants or employees whether under this warranty or
implied by law for any indirect or consequential damages
for breach on any warranty. The purchaser must establish
all applicable warranty periods pursuant to this warranty
by verifying the original purchase date by producing the
dated sales receipt. This warranty shall not apply to this
product or any other part thereof which has been subject to
accident, negligence, alteration, abuse, or misuse or which
has been repaired or altered without North Atlantic Imports
LLC written consent, outside of North Atlantic Imports LLC
factory. North Atlantic Imports LLC makes no warranty
whatsoever in respect to accessories or parts not supplied
with it. This warranty shall apply only within the boundaries
of the Unites States of America. This warranty gives the
original purchaser specic rights, and the original purchaser
may also have other rights, which vary from state to state.

www.blackstoneproducts.com
12
CUSTOMER SERVICE
GRIDDLE SEASONING
OurCustomerServicestais
heretohelpyou!
For questions regarding your BLACKSTONE product,
or if you need replacement parts, contact us at:
USA Support: 435.252.3030
We’re pleased to help you with any questions concerning
replacement parts or your warranty. Our customer service
sta can be reached Monday through Friday from 9:00 am
to 5:00 pm Mountain Standard Time.
VideoInstruction
Use a QR code reader on your smart
phone and watch an instructional
video on seasoning and maintaining
you Blackstone Griddle.
www.BlackstoneProducts.com/video
WhatisSeasoning
Seasoning is a process by which oil is baked into metal
to create a stick resistant surface and protect against
oxidization.
Blackstone Griddles come with a thin layer of soy oil on
them to protect against rust during shipping. You can wash
this o with warm soapy water prior to your initial seasoning.
WhatoilshouldIuse?
Some oils are better than others for seasoning. We
recommend Flax seed oil for your initial seasoning since it
creates a very durable bond, however, any of the following
oils can be used.
• Flax seed oil
• Extra Virgin Olive Oil
• Vegetable Oil
• Soy Oil
InitialGriddleSeasoning:
The basic idea behind your initial seasoning is to coat
your griddle with oil and heat the oil above its smoke
point to polymerize the oil and create a bond with the
griddle top. You will end up with a black, stick resistant
surface that is easy to clean.
1. Apply small amount of oil to the surface of the griddle
top and spread it around with a cloth or paper towel
(use tongs or metal spatula to hold the cloth or
paper towel).
2. Turn your griddle on medium-high heat
3. Heat the oil until it reaches its “smoke point” and let it
continue to heat on the griddle top until it stops smoking.
Your griddle top will start to discolor. This is good.
4. Let your griddle cool a little. Repeat steps 1 through 3 a
few times until you have a black surface on your griddle.
CleaningandMaintainingyourGriddle
To clean the griddle after each use, scrape gently with
a metal spatula or scraper and wipe down the griddle
surface with a cloth or paper towel. For tough food
residue, pour water onto the hot griddle surface and let it
boil the residue o.
After you are done using your griddle you should apply a
very thin coat of oil to maintain your seasoning bond and
protect it from rust. If rust or scaling (chipped seasoning)
occur, rub it o with steel wool or low grain sandpaper
and re-season the surface. Store your griddle in a cool,
dry place.
WhatawellseasonedGriddleshould
looklike
Your well seasoned griddle should be shiny black and
have a natural non-stick cooking surface. The more you
cook with and season your griddle top, the more black,
stick resistant and shiny it will become.

13
Q. What types of cooking oils can I use to season my griddle?
A. We recommend the following oils for seasoning purposes: olive oil, vegetable oil, canola oil, coconut oil
and sesame oil. Lard can also be used to season the griddle top. Refer to page 12 for griddle seasoning
instructions.
Q. Can I use dish detergent to clean my griddle?
A. Grease cutting dish detergents will erase the seasoning on the griddle. For tough spots use table salt
and hot water.
Q. Why does my griddle surface look dull and dry instead of shiny and black?
A. Season is a continuous process. Over time and the more often you season your griddle top, the more
shiny, black and non-stick it will become.
Q: Can I cut directly on the griddle top?
A: Yes, you can. Cutting on the griddle top will not harm it.
Q. What if my griddle starts to rust?
A. If rust appears on the griddle surface, rub it off with steel wool or low grain sandpaper and re-season
the surface. Take care to always completely dry your griddle before storing and keep away from rain and
sprinklers.
*CUSTOMERS IN HUMID OR COASTAL CLIMATES MAY REQUIRE MORE FREQUENT SEASONINGS AND THE USE OF
HEAVIER COOKING OILS TO AVOID RUSTING AND CORROSION.*
For more FAQ’s visit blackstoneproducts.com/faq
If you have any further questions or concerns, please feel free to contact our Customer Support directly
by calling (435) 252-3030 or visit us at www.blackstoneproducts.com and click the contact us under the
FREQUENTLY ASKED QUESTIONS ABOUT THE GRIDDLE TOP
ENJOY YOUR NEW BLACKSTONE PRODUCT!


MODELO 1819
North Atlantic Imports LLC | 513 West 2500 North, North Logan UT 84341 | www.blackstoneproducts.com
Manual del propietario
SOLO PARA USO EN EXTERIORES
! !
ADVERTENCIA
Lea el manual detenidamente antes de ensamblar
Conserve este manual para su consulta futura
CMO D PACA Y
PRIL A CRÓN

www.blackstoneproducts.com
16
REGISTRO DEL PRODUCTO
PELIGRO
PELIGRO: indica una situación inminente de riesgo
que si no se evita, puede derivar en muerte o lesiones
muy graves.
ADVERTENCIA
ADVERTENCIA: Esté alerta ante la posibilidad de
sufrir serios daños físicos si las instrucciones de este
manual no se cumplen. Lea y cumpla cuidadosamente
con todo lo indicado en los mensajes.
PRECAUCIÓN
PRECAUCIÓN: indica una situación potencialmente
peligrosa que, si no evita, puede ocasionar lesión leve
o moderada.
SIMBOLOS DE SEGURIDAD
Los símbolos y las cajas que se muestran abajo explican
el signicado de cada encabezado. Lea y cumpla todo lo
indicado en los mensajes que se encuentran en el manual.
Para registrar su producto BLACKSTONE, por favor
diríjase a www.blackstoneproducts.com/register
LISTA DE CONTENIDOS
Registro del producto................... 16
Para su seguridad ........................ 17
Utilización y cuidado ...............18-19
Lista de piezas y hardware......20-21
Instrucciones de montaje........22-23
Cuidado, mantenimiento,
& Solución de problemas ............. 24
Garantía de la parrilla ................... 25
Servicio al cliente ......................... 26
Condimentos plancha .................. 26
Número de modelo:_______________________________
Número de serie: _________________________________
Fecha de compra: ________________________________
Alinstalador/ensamblador:
Deje estas instrucciones con el consumidor.
Alconsumidor:
Guarde este manual para referencia futura.
ADVERTENCIA
ADVERTENCIA: Los combustibles utilizados en los
artefactos de gas propano licuado y los productos
de la combustión de dichos combustibles pueden
exponerlo a sustancias químicas, incluido el bence-
no, que el Estado de California considera que causa
cáncer y causa defectos de nacimiento u otros
daños reproductivos. Para obtener más información,
vaya a www.P65Warnings.ca.gov.
ADVERTENCIA
ADVERTENCIA: Este producto puede exponerlo a
productos químicos, incluidos los ftalatos (DINP y
DEHP), que el estado de California sabe que causan
cáncer. Para obtener más información, vaya a www.
P65Warnings.ca.gov.

17
Este manual de instrucciones contiene información
importante necesaria para armar el artefacto
adecuadamente y usarlo de manera segura. Lea todas
las advertencias e instrucciones antes de armar y
utilizar el artefacto. Cumpla con todas las advertencias
e instrucciones durante el montaje y utilización del
artefacto. El incumplimiento de estas instrucciones puede
ocasionar incendio o explosión, el cual puede causar
daño material, físico o la muerte.
PARA SU SEGURIDAD
Sihuelegas:
1. Apague el gas al aparato.
2. Apague cualquier llama abierta.
3. Si el olor pervsiste, aléjese del aparato y llame
inmediatamente a los bomberos.
El incumplimiento de estas instrucciones puede
provocar un incendio o una explosión que podrían
causar daños a la propiedad, lesiones personales o la
muerte.
No guarde o utilice gasolina u otros líquidos inam-
ables o vapores cerca de este artefacto o de algún
otro artefacto.
PELIGRO
ADVERTENCIA
ADVERTENCIA:
Es la responsabilidad del consumidor vericar que la parrilla
Combo de plancha y parrilla a carbón esté apropiadamente
ensamblada, instalada y con un mantenimiento adecuado.
El incumplimiento de estas instrucciones puede ocasionar
causar daño físico y/o material.
No coloque objetos inamables en los estantes
laterales cerca de la plancha. Especialmente en
envasesdeaerosolyaquepuedensobrecalentarsey
provocarunaexplosión,incendio,lesionespersonales
gravesolamuerte.
PRECAUCIONES:
• No opere la parrilla Combo de plancha y parrilla a
carbón de material combustible, inclusive paredes y
techos. Nunca lo utilice en interiores.
• No utilice este artefacto debajo de supercies
inamables.
• Si falla el regulador, éste debe ser reemplazado
con uno del mismo modelo. Por favor, llame a
servicio del cliente y pida un repuesto autorizado de
BLACKSTONE.
• Realice una inspección visual del paso del gas, desde
la conexión del tanque a los oricios del elemento y
revise que no haya rajaduras, pérdidas, quebraduras
o intrusiones. Comience en el tanque y continúe
por toda la conexión de la línea de gas. Inspeccione
la perilla y evalúe defectos similares. Siga el paso
del gas hacia los elementos. Revise que no haya
anormalidades o rajaduras en el elemento u oricios
en el centro de la parrilla. Por favor, contáctese con
servicio al cliente si tiene alguna pregunta o duda.
ADVERTENCIA
• Este artefacto debe utilizarse solamente en
exteriores, y no debe ser utilizado en un edicio,
garaje, u otra área cerrada.
• Este artefacto no está diseñado para ser instalado
en vehículos recreacionales.
• El uso de alcohol y medicamentos con o sin
prescripción médica puede incapacitar la habilidad
del consumidor para armar adecuadamente y
hacer funcionar el artefacto de manera segura.
• En el caso que ocurra un incendio por
aceite o grasa, no intente extinguirlo con
agua. Comuníquese inmediatamente con el
departamento de bomberos. Un extinguidor de
incendios tipo BC o ABC puede, en algunos casos,
contener el fuego.
• No deje nunca el aparato solo. Mantenga a los
niños y animales alejados del artefacto en todo
momento.
• Este artefacto no está diseñado para y nunca
debería ser utilizado como calefactor.
• Este artefacto estará caliente durante y después
de su utilización. Use guantes de cocina aislantes
o guantes que lo protejan de supercies calientes
o de salpicaduras de líquidos de cocina.

www.blackstoneproducts.com
18
UTILIZACIÓN Y CUIDADO
PRECAUCIÓN
PRECAUCIÓN
Algunas partes podrían contener bordes losos,
especialmente las indicadas por estas instrucciones.
Utilice siempre guantes de protección de ser
necesario.
Diseñado solo para uso residencial en exteriores. No
lo utilice para uso comercial.
Comuníquese con el centro de información de la
parrilla de BLACKSTONE si usted necesita ayuda,
repuestos, preguntas acerca del montaje, o problemas
con su funcionamiento. Antes de devolver la parrilla
Combo de plancha y parrilla a carbón a la tienda,
llame a USA 435.252.3030 o escríbanos a support@
blackstoneproducts.com
Advertenciasparaunainstalaciónsegura
• Utilice la parrilla Combo de plancha y parrilla a carbón,
tal como la compró.
• La instalación de la parrilla Combo de plancha y
parrilla a carbón debe cumplir con códigos locales,
o en la ausencia de los mismos, con el Código
Nacional de Gas Combustible, ANSI Z223.1/ NFPA
54, o el Código de Instalación de Gas Natural y
Propano, CSA B149.1, el Código de Manipulación y
Almacenaje de Propano, B149.2, o las Normas para
Vehículos Recreacionales, ANSI A 119.2/NFPA 1192,
y las Series RV CSA Z240, el Código de Vehículos
Recreacionales, como corresponda.
• La parrilla Combo de plancha y parrilla a carbón
no está diseñada para su uso en o sobre vehículos
recreacionales y/o en botes.
• La parrilla Combo de plancha y parrilla a carbón
cuenta con certicación de seguridad para su
utilización en los Estados Unidos únicamente. No
modique su utilización en ninguna otra locación. Su
modicación conllevará poner en peligro su seguridad.
• Se debe utilizar el regulador de presión que se
suministra con el aparato. El reemplazo de los
reguladores de presión deberán ser los que especica
el fabricante del artefacto.
• Coloque la tapa protectora de polvo en la válvula de
salida del cilindro, siempre que el cilindro no esté en
uso. Únicamente instale la tapa protectora de polvo en
la válvula de salida del cilindro que se suministra con
la válvula del cilindro. Otros tipos de tapa o tapones
pueden dar como resultado pérdida de gas propano.
MantenimientoSeguro
• Mantenga el área del artefacto limpia y libre de
materiales combustibles, gasolina y otros vapores y
líquidos inamables.
• No obstruya el ujo de combustión y la ventilación del
ujo de aire.
• Mantenga las aberturas de ventilación del cilindro
libres de obstrucciones y sin basura.
• Revise visualmente las llamas del quemador.
• Limpie el artefacto, inclusive las supercies especiales
con agentes de limpieza recomendadas, como
corresponda.
• Revise y limpie el quemador/ tubo Venturi de insectos
y nido de insectos. Un tubo obstruido puede resultar
en fuego debajo del artefacto.
RecomendacionesdeSeguridad
• Cuando la parrilla Combo de plancha y parrilla a carbón no
esté en uso, apáguela.
• Nunca mueva la parrilla Combo de plancha y parrilla a
carbón cuando esté en uso o cuando todavía esté caliente.
• Utilice utensilios para barbacoa con mango largo y guantes
aislantes para evitar quemaduras o salpicaduras.
• Mantenga la unidad al menos a 36’’ lejos de paredes,
edicios, vehículos y otras estructuras cuando esté en uso.
• Limpie la plancha Combo de plancha y parrilla a carbón a
menudo, preferiblemente después de cada comida al aire libre.
• Si nota grasa u otro material caliente goteando de la parrilla
Combo de plancha y parrilla a carbón hacia la válvula
o regulador, cierre el suministro de gas de inmediato.
Determine la causa, corríjala, luego limpie e inspeccione la
válvula, manguera y regulador antes de continuar. Realice
una prueba de pérdida.
• Mantenga las aberturas de ventilación del cilindro libres de
obstrucciones y sin basura.
• El regulador puede hacer un ruido como de zumbido o
silbido durante su funcionamiento. Esto no afectará la
seguridad o uso de la parrilla Combo de plancha y parrilla
a carbón.
• Si usted tiene un problema con su parrilla Combo de
plancha y parrilla a carbón, consulte la sección Solución de
problemas en la página 34. Si usted no puede solucionar
el problema, por favor comuníquese con “servicio al
cliente” al 435.252.3030 o escríbanos a support@
blackstoneproducts.com
• Si el regulador se congela, apague la parrilla Combo
de plancha y parrilla a carbón y el botella de propano
inmediatamente. Esto indica un problema con el botella
de propano y no debería utilizarse en ningún producto.
Devuélvaselo al proveedor.

19
ADVERTENCIA
PRECAUCIÓN
Apague la fuente de gas y controles del tanque de gas
cuando no se esté utilizando.
Si el encendido NO ocurre en 5 segundos, desconecte
los controles de los quemadores, espere 5 minutos
y repita el proceso de encendido. Si el quemador no
enciende con la válvula abierta, el gas continuara
saliendo por el quemador y puede accidentalmente
encenderse ocasionando lesiones.
ControldelaLlamadelQuemador
Encienda el quemador, gire la perilla desde la posición
high (alto) a low (bajo). Deberá observar una llama
pequeña en la posición baja, que la antes observada en
la posición alta. Siempre controle la llama antes de cada
uso. Si solo puede observar una llama pequeña, consulte
la sección “Llama pequeña o caída repentina de la llama”
en la sección Solución de problemas de la página 24.
Cómoapagarlaplancha
Gire la perilla hacia la posición de apagado OFF
Controldelaválvula
Importante: Para revisar la válvula, primero empuje la
perilla y suelte, la perilla deberá volver a su forma original.
Si la perilla no vuelve a su forma original, reemplace
la válvula antes de usar la parrilla de plancha. Gire la
perilla a la posición de fuego lento (Low) y luego vuelva
a la posición de apagado OFF. La válvula debe girar
suavemente.
Limpiezageneraldelaplancha
• No confunda la acumulación de grasa marrón o
negra y humo por pintura. No aplique limpiador de
parrilla cáustica o limpiador de horno a las supercies
pintadas.
• Partes plásticas: lave con agua tibia con jabón y
seque. No utilice Citrisol, limpiadores abrasivos,
desengrasantes o limpiadores de horno concentrados
sobre partes plásticas. Esto puede resultar en daño o
falla de las piezas.
• Supercies pintadas: lave con detergente suave o
limpiador no abrasivo y con agua tibia con jabón.
Seque con un paño suave no abrasivo.
• Los depósitos de grasa tras haber cocinado requieren
el uso de una almohadilla de limpieza plástica
abrasiva. Use únicamente en dirección al acabado
para evitar daños. No utilice la almohadilla abrasiva in
las áreas con grácos.
AlmacenamientodelaparrillaCombode
planchayparrillaacarbón
• Almacene en un lugar seco.
• Cuando el tanque de gas LP esté conectado a
la parrilla Combo de plancha y parrilla a carbón,
almacene en exteriores en un espacio bien ventilado y
fuera del alcance de los niños.
• Almacene la parrilla Combo de plancha y parrilla a
carbón en interiores SOLAMENTE si el tanque de
gas LP está apagado y desconectado de la parrilla
Combo de plancha y parrilla a carbón y almacene en
exteriores.
• Cuando remueve la parrilla Combo de plancha y
parrilla a carbón del almacenaje, cumpla con las
instrucciones de “limpieza del montaje del quemador”
antes de hacer funcionar su parrilla.
Limpiezadelmontajedelquemador
Siga estas instrucciones para limpiar y/o reemplazar
piezas del montaje del quemador o si usted tiene algún
problema de encendido de su parrilla Combo de plancha
y parrilla a carbón.
1. Gire la perilla de control a la posición OFF.
2. Separe el electrodo del quemador. Nota: El método
de extracción o desprendimiento dependerá de la
conguración del quemador.
3. Cuidadosamente, levante el quemador y retire de
las aperturas de la válvula. Sugerimos tres maneras
para limpiar los tubos del quemador. Utilice la que
sea más fácil para usted. (A) Doble un alambre en
forma de gancho (un colgador de ropa liviano o
percha funciona bien). Pase el gancho por los tubos
del quemador varias veces. (B) Utilice un cepillo de
botella angosto con una manija exible (no utilice un
cepillo de alambre de cobre). Pase el cepillo por los
tubos del quemador varias veces. (C)Utilice protección
para los ojos: Use una manguera de aire para forzar
aire hacia el tubo del quemador y hacia afuera de
los puertos del quemador. Revise cada puerto para
asegurarse que pueda salir aire por cada agujero.
4. Cepille la supercie exterior del quemador y remueva
residuos de comida y basura.
5. Limpie los puertos bloqueados con un alambre rígido,
como por ejemplo un sujetapapeles.
6. Revise que el quemador no este dañado. Debido
al uso normal y a la corrosión, algunos agujeros
pueden agrandarse. Si hubiera alguna sura grande o
encuentra agujeros, reemplace el quemador.
7. Coloque el electrodo al quemador
8. Cuidadosamente, reemplace quemadores.
9. Adjunte los quemadores a los soportes en el fogón.

www.blackstoneproducts.com
20
SeguridadAlimentaria
La seguridad alimentaria es una parte muy importante
para disfrutar de la experiencia culinaria al aire libre. Para
mantener la comida libre de bacterias dañinas, asegúrese
de cumplir con estos cuatro pasos:
1. Limpieza: Lávese las manos, los utensilios y las
supercies con agua caliente con jabón antes y
después de manipular la carne cruda (roja o blanca).
2. Separación: Separe la carne cruda de los alimentos
listos para el consumo para evitar la contaminación
cruzada.
3. Cocción: Cocine la carne completamente para
eliminar bacterias. Use un termómetro para vericar
que los alimentos alcancen la temperatura interna
adecuada.
4. Refrigeración: Refrigere los alimentos preparados
y los que no se consumieron lo más rápido posible.
Para más información, visite La Asociación
Canadiense para la Educación de los Consumidores
sobre la Seguridad Alimentaria. - www.befoodsafe.ca
ComoSabersilaCarneestá
AdecuadamenteCocida
• La carne asada a la parrilla o en el horno
frecuentemente se dora muy rápido. Utilice un
termómetro para carne para vericar que los alimentos
alcancen una temperatura interna segura. Corte la
carne para vericar visualmente si ya está lista.
• La temperatura de las aves como unidad debe
alcanzar los 165° F/74°C. El jugo de las mismas debe
ser transparente y la carne no debe tener un color
rosado.
• La temperatura de las hamburguesas hechas con
carne molida de res o de ave debe alcanzar los
160°F/71°C, y el color de su centro debe ser marrón,
sin jugos de color rosado. La carne de res, ternera,
cordero, carne asada y chuletas pueden alcanzar
145°F/63°C. Todos los cortes de cerdo deben alcanzar
160°F/71°C.
• NUNCA cocine las carnes rojas o blancas parcialmente
para volver a cocinarla más tarde. Cocine los alimentos
completamente para eliminar las bacterias dañinas.
• Cuando recaliente comida rápida o carne
completamente cocida, tales como salchichas,
cocínelas a 165°F/64°C o hasta que alcance
temperaturas altas.
LISTA DE PARTES
ADVERTENCIA
El fabricante ha puesto todo su esfuerzo para eliminar
los bordes losos. Sin embargo, uno debe manipular
los componentes con cuidado para evitar lesiones
accidentales.
Por favor, lea todas las instrucciones completamente
antes de proceder. Utilice un área grande y limpia para
montar su parrilla Combo de plancha y parrilla a carbón.
Por favor, consulte el diagrama de montaje, de ser
necesario.
Atención: Asegúrese de quitar toda la protección plástica
y embalaje antes del montaje.
1.BasedeParrilla/Plancha(1pc)
2.Plancha(1pc)
3.PiernaIzquierda(1pc)
4.PiernaDerecha(1pc)
5.EstanteInferior(1pc)
6.EstanteLateral(1pc)
Other manuals for 1819
1
Table of contents
Languages:
Other Black Stone Grill manuals

Black Stone
Black Stone THE DASH 1610 User manual

Black Stone
Black Stone 6001 User manual

Black Stone
Black Stone 1565 User manual

Black Stone
Black Stone 1555 User manual

Black Stone
Black Stone 1924 User manual

Black Stone
Black Stone OMNIVORE 2249 User manual

Black Stone
Black Stone 1620 User manual

Black Stone
Black Stone On The Go 1939 User manual

Black Stone
Black Stone OMNIVORE 2311 User manual

Black Stone
Black Stone 1825 User manual