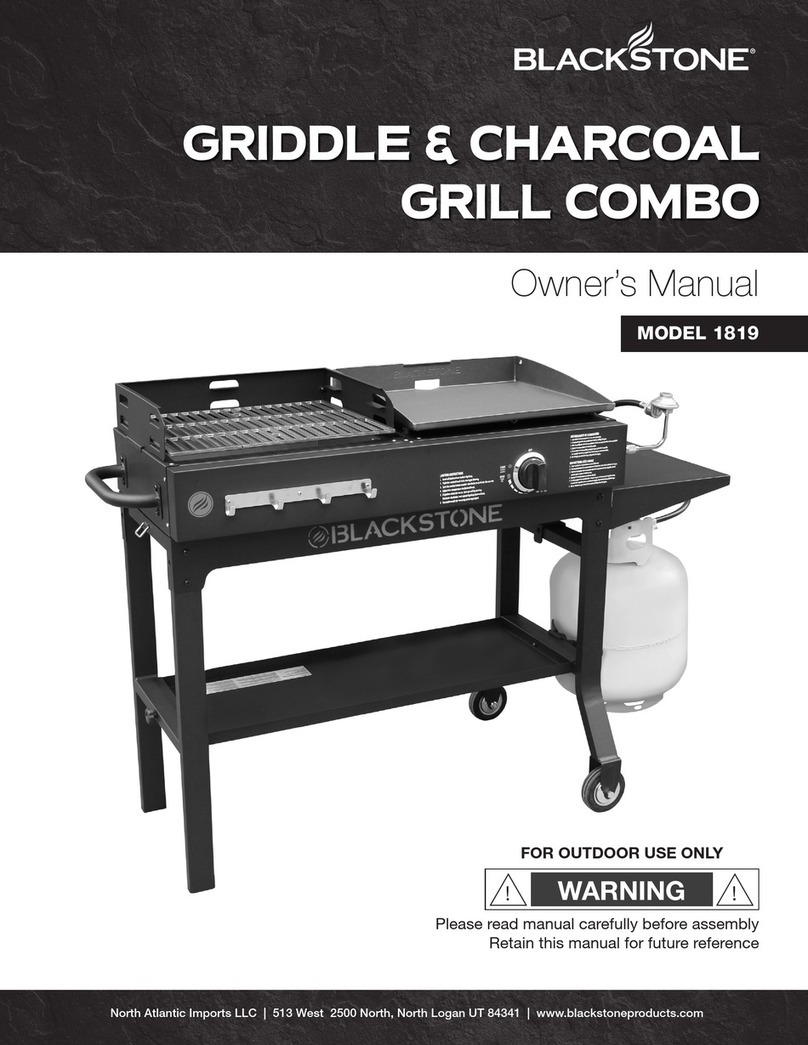
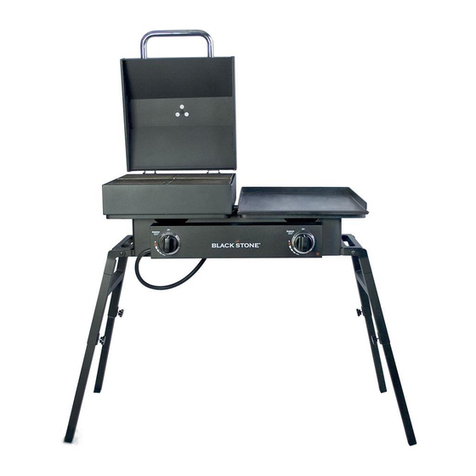
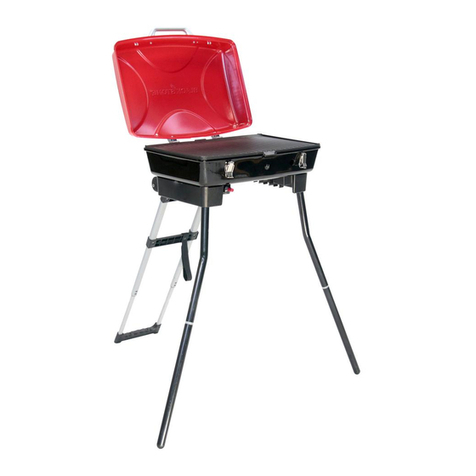
Black Stone On The Go 1939 User manual

North Atlantic Imports LLC | 1073 West 1700 North Logan, UT 84321 | Blackstoneproducts.com
OWNER’S MANUAL
5003433
17” GRIDDLE
COOKING STATION
Model 1939

!DANGER
•NEVER opperate this appli-
ance within 10ft (3.0 m) of
any structure, combust-
able material or other
gas cylinder.
•NEVER operate this appli-
ance within 25 ft (7.5 m) of
any flammable liquid.
Failure to follow these
instructions may result
in fire, explosion or burn
hazard which could cause
property damage, personal
injury or death.
!WARNING
INSTALLER/ASSEMBLER:
Leave these instructions
with consumer.
!WARNING
CONSUMER:
Retain this manual for
future reference.
!WARNING
This instruction manual
contains important informa-
tion necessary for the proper
assembly and safe use
of the appliance.
!WARNING
Read all warnings and
instructions before assem-
bling the appliance.
!WARNING
Follow all warnings and
instructions while using
the appliance.
!WARNING
This product may expose
you to chemicals including
Di(2-ethylhexyl)phthalate
(DEHP), which are known
to the State of California
to cause cancer and
birth defects or other
reproductive harm.
For more information, go to
www.P65Warnings.ca.gov.
!DANGER
Do not store or use gaso-
line or other flammable
liquids or vapors in the
vicinity of this or any other
appliance.
!DANGER
An LP cylinder not
connected for use shall not
be stored in the vicinity of
this or any other appliance.
!DANGER
Never operate this appli-
ance unattended.
!DANGER
When cooking with oil or
grease, have a type BC
or ABC fire extinguisher
readily available.
!DANGER
IF YOU SMELL GAS:
1. Shut o gas to appliance.
2.Extinguish any open flame.
3.Open lid.
4.If odor continues, keep
away from appliance and
immediately call your gas
supplier or your fire
department.
Failure to follow these
instructions could result
in fire or explosion which
could cause property
damage, personal injury or
death.
Model 1939 | Owner’s Manual |
B

!DANGER
•NEVER opperate this appli-
ance within 10ft (3.0 m) of
any structure, combust-
able material or other
gas cylinder.
•NEVER operate this appli-
ance within 25 ft (7.5 m) of
any flammable liquid.
Failure to follow these
instructions may result
in fire, explosion or burn
hazard which could cause
property damage, personal
injury or death.
!WARNING
INSTALLER/ASSEMBLER:
Leave these instructions
with consumer.
!WARNING
CONSUMER:
Retain this manual for
future reference.
!WARNING
This instruction manual
contains important informa-
tion necessary for the proper
assembly and safe use
of the appliance.
!WARNING
Read all warnings and
instructions before assem-
bling the appliance.
!WARNING
Follow all warnings and
instructions while using
the appliance.
!WARNING
This product may expose
you to chemicals including
Di(2-ethylhexyl)phthalate
(DEHP), which are known
to the State of California
to cause cancer and
birth defects or other
reproductive harm.
For more information, go to
www.P65Warnings.ca.gov.
!DANGER
Do not store or use gaso-
line or other flammable
liquids or vapors in the
vicinity of this or any other
appliance.
!DANGER
An LP cylinder not
connected for use shall not
be stored in the vicinity of
this or any other appliance.
!DANGER
Never operate this appli-
ance unattended.
!DANGER
When cooking with oil or
grease, have a type BC
or ABC fire extinguisher
readily available.
!DANGER
IF YOU SMELL GAS:
1. Shut o gas to appliance.
2.Extinguish any open flame.
3.Open lid.
4.If odor continues, keep
away from appliance and
immediately call your gas
supplier or your fire
department.
Failure to follow these
instructions could result
in fire or explosion which
could cause property
damage, personal injury or
death.
!DANGER
If a fire should occur, keep
away from the appliance
and immediately call your
fire department. DO NOT
attempt to extinguish an oil
or a grease fire with water.
!DANGER
•This appliance is for outdoor
use only, and is not to be
used in a building, garage, or
any other enclosed area.
•This device should not be
used in or on recreational
vehicles or boats.
•This appliance is not be
used on or under any apart-
ment or condominium
balcony or deck.
| Owner’s Manual | Model 1939
C

TABLE OF CONTENTS
It is the consumer’s responsibility to see that the unit is properly assem-
bled, installed, and maintained. Failure to follow the instructions in this
manual could result in bodily injury and/or property damage.
!DANGER
Indicates an imminently
hazardous situation which,
if not avoided, may result in
death or serious injury.
!WARNING
Indicates the possibility of
serious bodily injury if the
instructions are not followed.
!CAUTION
Indicates a potentially
hazardous situation which,
if not avoided, may result in
minor or moderate injury.
SAFETY ALERT KEY
Read and follow all the notices
throughout the manual.
������������������������������������������
��������������������������
���������������������������������
����������������������������������������
��������������������������������������
����������������������������������
���������������������������������������
���������������������������
������������������������������������
��������������������������������������
����������������������������������������
����������������������������������������
��������������������������
������������������������������������������
�����������������������������
����������������������������������
�����������������������������������������
����������������������������������������
������������������������������������������
����������������������������
����������������������������
����������������������������������������������������
�������������������������������������������������
��������������������������������
���������������������������������������
���������������������������������������������������
����������������������������������������������������
������������������������������������������������������
��������������������������������
��������������������������������������������
��������������������������������������������������
�������������������������������������������������
������������������������������������������������������
��������
����������������������������������������������������
�����������������������������������
����������������
������������������������
��������������������������������
��������������������������������
������������
������������������������������������������
��������������������������
���������������������������������
����������������������������������������
��������������������������������������
����������������������������������
���������������������������������������
���������������������������
������������������������������������
��������������������������������������
����������������������������������������
����������������������������������������
��������������������������
������������������������������������������
�����������������������������
����������������������������������
�����������������������������������������
����������������������������������������
������������������������������������������
����������������������������
����������������������������
����������������������������������������������������
�������������������������������������������������
��������������������������������
���������������������������������������
���������������������������������������������������
����������������������������������������������������
������������������������������������������������������
��������������������������������
��������������������������������������������
��������������������������������������������������
�������������������������������������������������
������������������������������������������������������
��������
����������������������������������������������������
��������
��������
��������
��������
��������
����������������
����������������
����������������
����������������
�����������������������������������
����������������
������������������������
��������������������������������
��������������������������������
������������
Model Number ___________________________________
Serial Number____________________________________
Date Purchased __________________________________
REGISTER YOUR
PRODUCT
Registration allows our Customer Service Representatives to quickly
provide assistance with your Blackstone product if needed.
The North Atlantic Imports LLC 1-Year Warranty covers replacement parts up
to one year aer the date of purchase. (Please reference the Warranty chapter
for more information.) To enable this warranty, you will need to provide:
• Proof of Purchase/ Receipt/ Order Details
• Your Blackstone product’s Serial Number
• Your Blackstone product’s Model Number
Your Blackstone product’s Serial and Model numbers can be found on your
griddle’s Origin Label. (The Origin Label is a large silver sticker found on the
body of your appliance.)
Register Your Product
CONTENTS
01. REGISTER YOUR PRODUCT ..................................01
02. FOR YOUR SAFETY ..........................................02
Section 01. General Safety .............................................02
Section 02. Griddle Safety Instructions................................04
03. ASSEMBLY GUIDE ...........................................06
04. FUEL | 16.4 OZ. PROPANE BOTTLE ...........................14
Section 01. 16.4 oz. Liquid Propane Bottle..............................14
05. CARE & MAINTENANCE.....................................16
Section 01. General Care...............................................16
Section 02. Griddle Seasoning Instructions............................18
Section 03. Cleaning the Burner Assembly ............................20
Section 04. Cleaning Your Griddle.....................................22
06. IGNITION | PIEZO-ELECTRIC................................24
07. TROUBLESHOOTING ........................................25
Section 01. Piezo-Electric Ignition Troubleshooting ...................25
Section 02. Griddle Gas Flow ..........................................26
08. F.A.Q.........................................................28
09. WARRANTY.................................................29
Model 1939 | Owner’s Manual |
D

TABLE OF CONTENTS
It is the consumer’s responsibility to see that the unit is properly assem-
bled, installed, and maintained. Failure to follow the instructions in this
manual could result in bodily injury and/or property damage.
!DANGER
Indicates an imminently
hazardous situation which,
if not avoided, may result in
death or serious injury.
!WARNING
Indicates the possibility of
serious bodily injury if the
instructions are not followed.
!CAUTION
Indicates a potentially
hazardous situation which,
if not avoided, may result in
minor or moderate injury.
SAFETY ALERT KEY
Read and follow all the notices
throughout the manual.
������������������������������������������
��������������������������
���������������������������������
����������������������������������������
��������������������������������������
����������������������������������
���������������������������������������
���������������������������
������������������������������������
��������������������������������������
����������������������������������������
����������������������������������������
��������������������������
������������������������������������������
�����������������������������
����������������������������������
�����������������������������������������
����������������������������������������
������������������������������������������
����������������������������
����������������������������
����������������������������������������������������
�������������������������������������������������
��������������������������������
���������������������������������������
���������������������������������������������������
����������������������������������������������������
������������������������������������������������������
��������������������������������
��������������������������������������������
��������������������������������������������������
�������������������������������������������������
������������������������������������������������������
��������
����������������������������������������������������
�����������������������������������
����������������
������������������������
��������������������������������
��������������������������������
������������
������������������������������������������
��������������������������
���������������������������������
����������������������������������������
��������������������������������������
����������������������������������
���������������������������������������
���������������������������
������������������������������������
��������������������������������������
����������������������������������������
����������������������������������������
��������������������������
������������������������������������������
�����������������������������
����������������������������������
�����������������������������������������
����������������������������������������
������������������������������������������
����������������������������
����������������������������
����������������������������������������������������
�������������������������������������������������
��������������������������������
���������������������������������������
���������������������������������������������������
����������������������������������������������������
������������������������������������������������������
��������������������������������
��������������������������������������������
��������������������������������������������������
�������������������������������������������������
������������������������������������������������������
��������
����������������������������������������������������
��������
��������
��������
��������
��������
����������������
����������������
����������������
����������������
�����������������������������������
����������������
������������������������
��������������������������������
��������������������������������
������������
Model Number ___________________________________
Serial Number____________________________________
Date Purchased __________________________________
REGISTER YOUR
PRODUCT
Registration allows our Customer Service Representatives to quickly
provide assistance with your Blackstone product if needed.
The North Atlantic Imports LLC 1-Year Warranty covers replacement parts up
to one year aer the date of purchase. (Please reference the Warranty chapter
for more information.) To enable this warranty, you will need to provide:
• Proof of Purchase/ Receipt/ Order Details
• Your Blackstone product’s Serial Number
• Your Blackstone product’s Model Number
Your Blackstone product’s Serial and Model numbers can be found on your
griddle’s Origin Label. (The Origin Label is a large silver sticker found on the
body of your appliance.)
Register Your Product
Q. What types of cooking oils can I use to season my griddle?
A. We recommend the following oils for seasoning purposes: olive oil,
vegetable oil, canola oil, coconut oil, ax seed oil and sesame oil. (Please
reference the Griddle Seasoning Instructions section of the Care &
Maintenance chapter.)
Q. Can I use dish detergent to clean my griddle?
A. Grease cutting dish detergents will erase the seasoning on the griddle and
should not be used aer griddle is seasoned. For tough spots use table salt
and hot water and always coat with a thin layer of oil once you are nished
cleaning. (For griddle cleaning instructions, please reference the Cleaning
Your Griddle section of the Care & Maintenance chapter.)
Q. Why does my griddle surface look dull and dry instead of shiny
and black?
A. Seasoning is a continuous process. Over time and the more oen you use
your griddle top, the more shiny, black and non-stick it will become.
Q: Can I cut directly on the griddle top?
A: Yes, you can. Cutting on the griddle top will not harm it.
Q. What if my griddle starts to rust?
A. If rust appears on the griddle surface, rub it o with steel wool
or low grit sandpaper and re-season the surface (youtube.com/
watch?v=thPE2IgnSiI). Take care to always completely dry your griddle
before storing and keep away from rain and sprinklers. It is also important to
keep your griddle covered. (For proper storage techniques, please reference
the General Care section of the Care & Maintenance chapter.)
For more FAQ’s visit blackstoneproducts.com/faq
F.A.Q.
OUR CUSTOMER
SERVICE STAFF IS
HERE TO HELP YOU!
For questions regarding your
Blackstone product, or if you need
replacement parts, please register
your griddle at
blackstoneproducts.com/register
and contact us at:
PHONE:
435-252-3030 ext 1
EMAIL:
support@blackstoneproducts.com
ONLINE:
blackstoneproducts.com/pages/support
We are pleased to help you with any
questions concerning griddle use,
replacement parts, or your warranty.
Our customer service sta can be
reached Monday through Friday
from 7:00 am to 5:00 pm Mountain
Standard Time.
F.A.Q.
| Owner’s Manual | Model 1939
01
If grease or other hot material
drips from appliance onto valve,
hose or regulator:
STEP Turn o gas
supply immediately.
STEP Determine the cause
and correct it.
STEP Clean and inspect
valve, hose and regulator
before continuing.
STEP Perform a leak test.
(Please reference the Leak Test
Instructions in the Fuel chapter.)
For problems with this appli-
ance, please reference the
Troubleshooting chapter.
FOR YOUR SAFETY
Before proceeding, make certain that you understand the FOR YOUR
SAFETY section of this manual. Hazardous fire or explosion may result if
instructions are ignored.
Section 01
GENERAL SAFETY
PRECAUTIONS
• Do not use this appliance under
overhead combustible surfaces.
• When not in use, turn OFF appli-
ance by rotating the appliance
control knobs to the OFF position
and closing the fuel valve.
If the information in the above
statements is not followed exactly,
serious injuries, re, or death
may occur.
SAFETY TIPS
• Do not place empty cooking
vessel on the appliance while
in operation. Use caution when
placing anything in cooking
vessel while the appliance is
in operation.
• Do not move the appliance when
in use. Allow the cooking vessel
to cool to 115°F (45 °C) before
moving or storing.
• Use long-handled barbecue
utensils and oven mitts to protect
against burns and splatters.
!WARNING
Keep children and pets away
from appliance at all times.
This appliance is not
intended for use by children.
Close supervision is neces-
sary when any appliance is
used by or near children.
!WARNING
This appliance is not
intended for and should
never be used as a heater.
Do not use for purposes
other than intended.
!WARNING
The use of alcohol, prescrip-
tion or non-prescription
drugs may impair the
consumer’s ability to prop-
erly assemble or safely
operate the appliance.
!WARNING
The appliance must be
isolated from the gas supply
piping system by closing its
individual manual shuto
valve during any pressure
testing of the gas supply
piping system at test pres-
sures equal to or less than
1/2 psi (3.5 kPa).
!CAUTION
For residential and house-
hold use only. DO NOT use
for commercial cooking.
For Your SafetyModel 1939 | Owner’s Manual |
02

If grease or other hot material
drips from appliance onto valve,
hose or regulator:
STEP Turn o gas
supply immediately.
STEP Determine the cause
and correct it.
STEP Clean and inspect
valve, hose and regulator
before continuing.
STEP Perform a leak test.
(Please reference the Leak Test
Instructions in the Fuel chapter.)
For problems with this appli-
ance, please reference the
Troubleshooting chapter.
FOR YOUR SAFETY
Before proceeding, make certain that you understand the FOR YOUR
SAFETY section of this manual. Hazardous fire or explosion may result if
instructions are ignored.
Section 01
GENERAL SAFETY
PRECAUTIONS
• Do not use this appliance under
overhead combustible surfaces.
• When not in use, turn OFF appli-
ance by rotating the appliance
control knobs to the OFF position
and closing the fuel valve.
If the information in the above
statements is not followed exactly,
serious injuries, re, or death
may occur.
SAFETY TIPS
• Do not place empty cooking
vessel on the appliance while
in operation. Use caution when
placing anything in cooking
vessel while the appliance is
in operation.
• Do not move the appliance when
in use. Allow the cooking vessel
to cool to 115°F (45 °C) before
moving or storing.
• Use long-handled barbecue
utensils and oven mitts to protect
against burns and splatters.
!WARNING
Keep children and pets away
from appliance at all times.
This appliance is not
intended for use by children.
Close supervision is neces-
sary when any appliance is
used by or near children.
!WARNING
This appliance is not
intended for and should
never be used as a heater.
Do not use for purposes
other than intended.
!WARNING
The use of alcohol, prescrip-
tion or non-prescription
drugs may impair the
consumer’s ability to prop-
erly assemble or safely
operate the appliance.
!WARNING
The appliance must be
isolated from the gas supply
piping system by closing its
individual manual shuto
valve during any pressure
testing of the gas supply
piping system at test pres-
sures equal to or less than
1/2 psi (3.5 kPa).
!CAUTION
For residential and house-
hold use only. DO NOT use
for commercial cooking.
For Your Safety
INSTALLATION SAFETY
This appliance is safety certified
for use in the United States and/
or Canada only. Do not modify
for use in any other location.
Modification will result in a safety
hazard and void warranty.
Use this appliance, as purchased,
only with LP (propane) gas and regu-
lator/valve assembly supplied.
Appliance installation must
conform with local codes, or in
the absence of local codes, with
either the National Fuel Gas Code,
ANSI Z223.1/ NFPA 54, Natural
Gas and Propane Installation Code,
CSA B149.1, or Propane Storage
and Handling Code, B149.2, or the
Standard for Recreational Vehicles,
NFPA 1192, and CSA Z240 RV Series,
Recreational Vehicle Code, as
applicable.
HOW TO TELL IF
MEAT IS COOKED
THOROUGHLY
Meat and poultry cooked with this
appliance oen browns very fast on
the outside.
Use a meat thermometer to be sure
food has reached a safe internal
temperature and cut into food to
check for visual signs of doneness.
When reheating takeout foods
or fully cooked meats like hot
dogs, cook to 165° F/74°C , or until
steaming hot.
Poultry
165° F or 74°C
Juices should run clear and esh
should not be pink.
Beef or Poultry Hamburger
160° F or 71°C
Juices should not be pink and esh
should be brown in the middle.
Beef, Veal, & Lamb
Steaks/Chops
145° F or 63°C
Beef, Veal, & Lamb Roasts
145° F or 63°C
ALL cuts of Pork
160° F or 71°C
Juices should not be pink.
MEAT COOKING
TEMPERATURES
!DANGER
This appliance is not for
frying turkeys.
!WARNING
NEVER partially cook meat
or poultry to finish cooking
later. Cook food completely
to destroy harmful bacteria.
FOOD SAFETY
Food safety is an important part
of enjoying the outdoor cooking
experience. To keep food safe from
harmful bacteria, follow these four
basic steps:
CLEAN: Wash hands, utensils,
and surfaces with hot soapy water
before and aer handling raw meat
and poultry.
SEPARATE: Separate raw meats
and poultry from ready-to eat
foods to avoid cross contamina-
tion. Use clean platter and utensils
when removing cooked foods
from appliance.
COOK: Cook meat and poultry
thoroughly to kill bacteria. Use ther-
mometer to ensure proper internal
food temperatures.
CHILL: Refrigerate prepared foods
and leovers promptly.
For more information visit
foodsafety.gov or Canadian
Partnership for Consumer Food
Safety Education online at
befoodsafe.ca
For Your Safety | Owner’s Manual | Model 1939
03

• Maximum weight on side shelf (if
present) is 10 lbs.
• The grease tray must be removed
and emptied aer each use.
• Do not remove grease tray until
griddle has completely cooled.
• Do not obstruct the ow of
combustion and ventilation air.
• Clean griddle oen, prefer-
ably aer each use. (Please
reference the Cleaning Your
Griddle section of the Care &
Maintenance chapter.)
Section 02
GRIDDLE SAFETY INSTRUCTIONS
!WARNING
Ensure that the fuel nozzle
is housed within the
burner opening.
!WARNING
Adding a large amount
of cold or frozen food (or
food with significant water
content) to a hot griddle may
cause griddle to warp.
TURNING GRIDDLE OFF
Turn all knobs to OFF position. Turn
fuel o at the source.
!WARNING
Do not leave the lid
closed for more than 30
minutes while cooking.
For Your SafetyModel 1939 | Owner’s Manual |
04

• Maximum weight on side shelf (if
present) is 10 lbs.
• The grease tray must be removed
and emptied aer each use.
• Do not remove grease tray until
griddle has completely cooled.
• Do not obstruct the ow of
combustion and ventilation air.
• Clean griddle oen, prefer-
ably aer each use. (Please
reference the Cleaning Your
Griddle section of the Care &
Maintenance chapter.)
Section 02
GRIDDLE SAFETY INSTRUCTIONS
!WARNING
Ensure that the fuel nozzle
is housed within the
burner opening.
!WARNING
Adding a large amount
of cold or frozen food (or
food with significant water
content) to a hot griddle may
cause griddle to warp.
TURNING GRIDDLE OFF
Turn all knobs to OFF position. Turn
fuel o at the source.
!WARNING
Do not leave the lid
closed for more than 30
minutes while cooking.
For Your Safety
| Owner’s Manual | Model 1939
05

ASSEMBLY GUIDE
EXPLODED VIEW
PARTS
QTY
1.1a
Bottom Panel
1
1.1b
Right Panel
1
1.1c
Le Panel
1
1.1d
Back Panel
1
1.2a
Bae Panel
1
1.2b
Background Panel
1
PARTS
QTY
1.2c
Front Panel
1
1.3a
Control Knob
1
1.3b
Zinc Tapping Screw
2
1.3c
Knob Bezel
1
1.4
Gas Rail
1
1.5a
Ignition Needle
1
PARTS
QTY
1.5b
Nickel Tapping Screw
1
1.6
H Burner
1
1.7
M6x12 Screws
4
1.8a
M4 Screws
2
1.8b
Hex Nuts
2
2.1
Griddle Top
1
4.1
7
2.1
2.2
4
2.3
2.4
2.5
2.6
5.3
5.4
5.5
5.6
5.7
5.1
5.2
6
3
1.1a
1.1b
1.1c
1.1d
1.8a
1.2a
1.2b
1.2c
1.3a
1.3b
1.3c
1.4
1.5a
1.6
1.5b
1.7
5.8a
5.8b
5.9
1.8b
9
Model 1939 | Owner’s Manual |
06
Assembly Guide

ILLUSTRATED PARTS LIST
1 Body (1 piece) 2 Griddle Top with Hood (1 piece) 3 Side Shelf (1 piece)
4 Handle (1 piece) 5 Legs (1 piece) 6 Regulator (1 piece)
7 Grease cup (1 piece) NOT INCLUDED - LP Gas Bottle
PARTS
QTY
2.2
Hood
1
2.3
Hood Washers
2
2.4
Cap Nuts
2
2.5
Rotation Shas
2
2.6
M6x20 Screws
2
4.1
Handle Grommets
2
PARTS
QTY
5.1
Rear Support Panel
1
5.2
Front Support Panel
1
5.3
Right Leg Assembly
1
5.4
Le Leg Assembly
1
5.5
Leg Extensions
4
5.6
Thumbscrews
2
PARTS
QTY
5.7
Leg Caps
4
5.8a
M8x19 Screws
4
5.8b
M8 Nuts
4
5.9
Locking Pins
2
8
Aluminum Rivets
14
9
M6x16 Screws
14
| Owner’s Manual | Model 1939
07
Assembly Guide

!WARNING
The manufacturer has made
every eort to eliminate any
sharp edges. However, you
should handle all compo-
nents with care to avoid
accidental injury.
Some parts may contain
sharp edges, especially
as noted in these instruc-
tions. Wear protective
gloves if necessary.
!WARNING
The use of alcohol, prescrip-
tion or non-prescription
drugs may impair the
consumer’s ability to prop-
erly assemble or safely
operate the appliance.
!CAUTION
Two people are recom-
mended for the assembly
of this product.
ASSEMBLY INSTRUCTIONS
Please read all instructions thoroughly before proceeding. Make sure all
the plastic packing material is removed before assembling
Find a large, clean area to assemble your griddle. Please refer to the parts list
and assembly diagrams as necessary.
Griddle assembly involves large components; therefore, it is advised to
have two people assemble the unit.
STEP Remove the griddle body from packaging. Push the griddle top
forward, unlock the pin from the 4 holes and place griddle top and hood on
at surface.
STEP Place the griddle body upside down on a at surface. Then,
remove the eight (8) M6x12 bolts on the griddle body and set aside.
Model 1939 | Owner’s Manual |
08
Assembly Guide

STEP Remove the stand from the packaging and use the (8) M6x12
bolts (removed during step 2) to attach the legs to the bottom of the
griddle body.
STEP Open the stand legs. when the legs are fully opened, the locking
pins will engage. To close the legs, pull the locking pins.
TOOLS NEEDED: Phillips Head
Screwdriver & Adjustable Wrench
Locking Pin
| Owner’s Manual | Model 1939
09
Assembly Guide

STEP Loosen the thumbscrews on the stand legs, then extend the four
leg extensions in the stand legs. Adjust each leg extension to desired height,
then tighten the thumbscrew to secure.
STEP Place the gridle upright. Loosen the four (4) bolts on the right
side of the griddle body, then hang the side shelf on the bolts and press down
to lock the shelf in place. Retighten the bolts to keep the side shelf stable.
Model 1939 | Owner’s Manual |
10
Assembly Guide

STEP Ensure that the ignition needle is set 3-7mm above the
burner tube.
STEP Place the griddle top
and hood on the griddle body by
aligning the 4 pins to the holes of
the body. Make sure the pins are
fully seated in the holes, then push
the griddle top and hood back to
lock the griddle in place.
Make sure the front pins are fully
seated in the holes, then push the
griddle top and hood back to lock
the griddle in place.
3-7 mm
| Owner’s Manual | Model 1939
11
Assembly Guide

STEP Attach the handle on the griddle hood with the two (2) M6
screws and grommets (found in handle).
STEP Hang the grease cup on the back of the griddle body in the center
of the unit.
Model 1939 | Owner’s Manual |
12
Assembly Guide

STORING YOUR
GRIDDLE
Store griddle in a cool, dry loca-
tion. Always cover griddle if stored
outdoors. Choose from a variety of
griddle covers oered by Blackstone.
When protecting griddle with so
cover, use the “tenting” method to
prevent water from accumulating
on griddle top. “Tenting” involves
placing an object (a bowl, tennis
ball or PVC pipe) beneath so cover
in the center of griddle in order to
allow water to slide o. “Tenting”
helps prevent rust.
FIRST TIME CLEANING
GRIDDLE COOKING SURFACE:
Blackstone Griddles are pre-treated
with cooking oil to prevent rust and
damage during shipping. For rst
time use, wash griddle with hot,
soapy water.
THIS IS THE ONLY TIME YOU
SHOULD USE SOAP ON THE
GRIDDLE COOKING SURFACE.
Rinse and dry completely. Proceed
with seasoning instructions. (Please
reference the Griddle Seasoning
Instructions section)
!WARNING
NEVER APPLY COLD
WATER ACROSS THE
WHOLE SURFACE OF A
HOT GRIDDLE AT ONCE.
This may cause warping.
!CAUTION
DO NOT USE SOAP ON
THE GRIDDLE COOKING
SURFACE. This will destroy
the griddle’s seasoning.
NEED HELP?
Register your Blackstone product at
blackstoneproducts.com/register and
contact Blackstone Customer Service for
missing parts, assembly and operation
questions:
PHONE:
435-252-3030 ext 1
EMAIL:
support@blackstoneproducts.com
ONLINE:
blackstoneproducts.com/pages/support
Care & Maintenance
STEP Insert the gas regulator into the gas line of the griddle. Turn the
collar of the gas regulator clockwise to secure it to the gas line.
STEP Screw in the LP bottle into the gas regulator, turning the
tank clockwise.
STEP Proceed to
the Griddle Seasoning
Instructions section of the
Care & Maintenance chapter.
Enjoy cooking outdoors on
your Blackstone 17” Griddle
Cooking Station!
| Owner’s Manual | Model 1939
13
Assembly Guide

DISCONNECTING THE
. OZ LP BOTTLE
STEP Griddle must be
o and cool.
STEP Disconnect regulator
from the gas line by unscrewing
the collar.
STEP Unscrew LP bottle from
the regulator.
LP LIQUEFIED
PETROLEUM GAS
LP gas is nontoxic, odorless and
colorless when produced. For
safety and easy detection, LP gas
has been given an odor similar to
rotten cabbage.
LP gas is highly ammable and
may ignite unexpectedly when
mixed with air.
. OZ LP BOTTLE
REQUIREMENTS
Use only a 3.8 x 7.8 inch, 16.4oz
propane bottle.
LP bottle must be constructed and
marked in accordance with the
specications for LP bottles, U.S.
Department of Transportation
(DOT) or the Standard for Cylinders,
Spheres and Tubes for the
Transportation of Dangerous Goods,
CAN/CSA-B339.
Only cylinders marked “propane”
should be used.
!WARNING
The LP gas supply cylinder
must be disconnected when
this appliance is not in use.
FUEL | . OZ.
PROPANE BOTTLE
Section 01
. OZ LIQUID PROPANE BOTTLE
PLEASE NOTE: The gas regulator is
intended be used at an angle towards the
rear of the griddle as shown above.
Fuel | 16.4 oz. Propane BottleModel 1939 | Owner’s Manual |
14

DISCONNECTING THE
. OZ LP BOTTLE
STEP Griddle must be
o and cool.
STEP Disconnect regulator
from the gas line by unscrewing
the collar.
STEP Unscrew LP bottle from
the regulator.
LP LIQUEFIED
PETROLEUM GAS
LP gas is nontoxic, odorless and
colorless when produced. For
safety and easy detection, LP gas
has been given an odor similar to
rotten cabbage.
LP gas is highly ammable and
may ignite unexpectedly when
mixed with air.
. OZ LP BOTTLE
REQUIREMENTS
Use only a 3.8 x 7.8 inch, 16.4oz
propane bottle.
LP bottle must be constructed and
marked in accordance with the
specications for LP bottles, U.S.
Department of Transportation
(DOT) or the Standard for Cylinders,
Spheres and Tubes for the
Transportation of Dangerous Goods,
CAN/CSA-B339.
Only cylinders marked “propane”
should be used.
!WARNING
The LP gas supply cylinder
must be disconnected when
this appliance is not in use.
FUEL | . OZ.
PROPANE BOTTLE
Section 01
. OZ LIQUID PROPANE BOTTLE
PLEASE NOTE: The gas regulator is
intended be used at an angle towards the
rear of the griddle as shown above.
Fuel | 16.4 oz. Propane Bottle
PLEASE NOTE: The regulator may make
a humming or whistling noise during
operation. This will not aect safety or use
of griddle.
. OZ LP BOTTLE
SAFETY TIPS
• Before opening LP bottle valve,
the regulator must be prop-
erly connected.
• Place dust cap on bottle valve
outlet whenever bottle is
not in use.
• Only install the type of dust cap
on the bottle valve outlet that is
provided with bottle valve. Other
types of caps or plugs may result
in leakage of propane.
• When appliance is not in use,
turn o all control knobs and LP
bottle valve.
• Keep ventilation openings in
bottle enclosure free and clear
of debris.
• If regulator fails in unit, it must
be replaced with a Blackstone
approved model and must only
be replaced by a professionally
licensed, authorized dealer.
Failure to comply will void
the warranty.
• If regulator frosts, turn o griddle
and LP bottle valve immediately.
This indicates a problem with
bottle and it should not be used
on any product. Return bottle to
supplier!
!DANGER
•NEVER store a spare LP
cylinder/bottle under or
near the appliance or in an
enclosed area.
•NEVER fill a LP cylinder/
bottle beyond 80% full.
•DO NOT store an LP tank/
bottle in an area where
children play.
•LP cylinder should only
be stored outside and in a
cool, dry place.
•NEVER leave an LP tank/
bottle inside a vehicle
which may become over-
heated by the sun.
If the information above is
not followed exactly, a fire
causing death or serious
injury may occur.
An overfilled or improp-
erly stored cylinder is a
hazard due to possible gas
release from the safety relief
valve. This could cause
intense fire with risk of
property damage, serious
injury or death.
If you see, smell or hear gas
escaping, immediately get
away from the LP cylinder
and appliance and call
fire department.
16.4 oz. Propane Bottle | Fuel
PLEASE NOTE: The regulator may make
a humming or whistling noise during
operation. This will not aect safety or use
of griddle.
. OZ LP BOTTLE
SAFETY TIPS
• Before opening LP bottle valve,
the regulator must be prop-
erly connected.
• Place dust cap on bottle valve
outlet whenever bottle is
not in use.
• Only install the type of dust cap
on the bottle valve outlet that is
provided with bottle valve. Other
types of caps or plugs may result
in leakage of propane.
• When appliance is not in use,
turn o all control knobs and LP
bottle valve.
• Keep ventilation openings in
bottle enclosure free and clear
of debris.
• If regulator fails in unit, it must
be replaced with a Blackstone
approved model and must only
be replaced by a professionally
licensed, authorized dealer.
Failure to comply will void
the warranty.
• If regulator frosts, turn o griddle
and LP bottle valve immediately.
This indicates a problem with
bottle and it should not be used
on any product. Return bottle to
supplier!
!DANGER
•NEVER store a spare LP
cylinder/bottle under or
near the appliance or in an
enclosed area.
•NEVER fill a LP cylinder/
bottle beyond 80% full.
•DO NOT store an LP tank/
bottle in an area where
children play.
•LP cylinder should only
be stored outside and in a
cool, dry place.
•NEVER leave an LP tank/
bottle inside a vehicle
which may become over-
heated by the sun.
If the information above is
not followed exactly, a fire
causing death or serious
injury may occur.
An overfilled or improp-
erly stored cylinder is a
hazard due to possible gas
release from the safety relief
valve. This could cause
intense fire with risk of
property damage, serious
injury or death.
If you see, smell or hear gas
escaping, immediately get
away from the LP cylinder
and appliance and call
fire department.
16.4 oz. Propane Bottle | Fuel | Owner’s Manual | Model 1939
15

CARE & MAINTENANCE
Regularly clean your appliance between uses, especially after extended
periods of storage. In order to extend the life and condition of unit,
follow best practices detailed in this manual.
Section 01
GENERAL CARE
!WARNING
When not in use, turn
unit controls and
gas source OFF.
!WARNING
This appliance will be hot
during and after use. Use
insulated oven mitts or
gloves for protection from
hot surfaces or splatter from
cooking liquids.
!CAUTION
NEVER handle hot parts
with unprotected hands.
!CAUTION
Small variations in manu-
facturing and raw materials
can cause some griddles to
be slightly warped. A slight
warp will disappear when
the griddle is heated in
preparation for cooking.
VALVE CHECK
Ensure gas is off at the supply shut
off valve before checking appli-
ance valves. Knobs must be locked
in OFF position.
STEP To check valves, push
in knobs and release. Knobs should
spring back.
STEP If knobs do not spring
back, replace valve assembly before
using appliance.
STEP Rotate knobs to LOW
position then turn back to OFF posi-
tion. Knobs should turn smoothly.
GENERAL CLEANING
Ensure that the appliance and its
components are sufficiently cool
before cleaning.
• Be sure to keep the ventilation
opening(s) of the cylinder enclo-
sure free and clear from debris.
• Baked-on grease deposits may
require the use of an abrasive
plastic cleaning pad. Use only
in direction of brushed nish to
avoid damage.
• DO NOT use abrasive pad on areas
with graphics.
• If a bristle brush is used to clean
any of the cooking surfaces,
ensure no loose bristles remain on
cooking surfaces prior to cooking.
Care & MaintenanceModel 1939 | Owner’s Manual |
16
Table of contents
Languages:
Other Black Stone Grill manuals

Black Stone
Black Stone THE DASH 1610 User manual

Black Stone
Black Stone 1819 User manual

Black Stone
Black Stone OMNIVORE 2249 User manual

Black Stone
Black Stone 1565 User manual

Black Stone
Black Stone OMNIVORE 2311 User manual

Black Stone
Black Stone 1924 User manual

Black Stone
Black Stone GRIDDLE 1554 User manual

Black Stone
Black Stone 1555 User manual

Black Stone
Black Stone 6001 User manual

Black Stone
Black Stone 1620 User manual