Blackmagicdesign SmartView Duo User manual

Welcome
2
Welcome to SmartView & SmartScope
We hope you share our dream for the television industry to become a truly creative industry by allowing
anyone to have access to the highest quality video.
Video monitoring is needed everywhere in a facility. SmartView Duo provides two completely independent
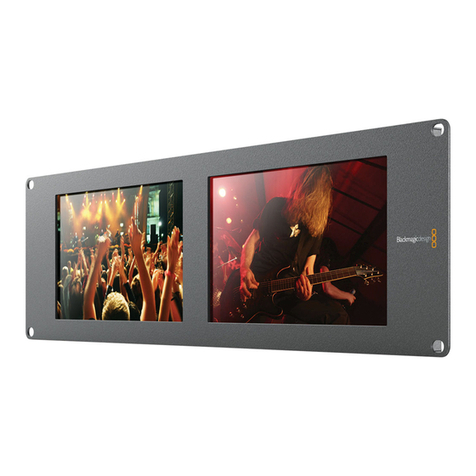
and beautiful 8 inch LCDs in a 3RU rack housing less than an inch thick. SmartScope Duo features two
independent 8" LCDs with waveform scope functionality, allowing you to monitor your video levels on the
fly. SmartView HD provides an amazing 17" LCD in a 6RU rack housing less than an inch thick. All SmartView
monitors support SD, HD and even 2K video via 3G-SDI!
Video monitoring is designed to work straight out of the box and our free utility software provides the user
with an easy and intuitive configuration tool.
This instruction manual should contain all the information you’ll need on installing your SmartView or
SmartScope, although it’s always a good idea to ask a technical assistant for help if you are not sure what IP
addresses are, or if you don’t know much about computer networks. SmartView and SmartScope are easy
to install, however, there are a few slightly technical preferences you may need to set after you install it.
We think it should take you approximately 5 minutes to complete installation. Please check our website at
www.blackmagicdesign.com and click the support page to download the latest updates to this manual and
SmartView software. Lastly, please register your unit when downloading software updates so we can keep
you updated when new software is released. We are constantly working on new features and improvements,
so we would love to hear from you!
Grant Petty
CEO Blackmagic Design
SmartView HD
SmartView Duo
SmartScope Duo

Contents
SmartView & SmartScope Operation Manual
Getting Started
Introducing SmartView and SmartScope 4
Plugging in Video Sources 5
Plugging in Your Computer 6
Installing the Blackmagic SmartView Utility 6
Updating the Software
How to Update the SmartView and SmartScope Software 7
Adjusting Monitor Settings
Monitor Settings Pane 9
Copy/Paste Display Settings 11
Using SmartScope Duo
What is Blackmagic SmartScope? 12
Video Monitor Display 13
Waveform Display 14
Vectorscope Display 15
Parade Display 16
Histogram Display 17
Audio Metering Display 18
419 Connecting to a Network
Direct Ethernet Connection 19
Connecting to an Ethernet Network Switch 19
Direct Ethernet Connection Diagram 20
Ethernet Network Switch Connection Diagram 21
Adjusting Network Settings
Network Settings Pane 22
Add Device 23
Using Tally
Tally Port Pin Connections 24
Optimizing the Viewing Angle
Optimizing the Viewing Angle 25
Help
Developer Information
Blackmagic 2K Format 28
Blackmagic SmartView Ethernet Protocol v1.3 31
Warranty Information
24
8
12 25
27
26
722
36

Getting Started
4
Introducing SmartView and SmartScope
SmartView monitors are perfect for any facility which requires rack-based monitoring. To simply get up and
running the only thing you need to do is plug in power and connect an SDI source!
SmartView Duo has two monitors for simultaneous display of different video signals. One can display a YUV
4:2:2 signal while the other receives RGB 4:4:4. One monitor could be showing NTSC while the other shows
PAL. There are many possible combinations but it is all as simple as connecting a single SDI cable to each
monitor!
SmartScope Duo has all the same features as SmartView Duo plus can be used to display waveform,
vectorscope and other popular scopes for monitoring video and audio levels in real time.
SmartView HD is a single 17" LCD which is perfect for confidence monitoring in full resolution HD!
All SDI input connections on SmartView and SmartScope support auto-detection of SD, HD or 3G-SDI
including 2K video.
If you have a SmartScope Duo, you'll also want to connect a USB cable to your Mac or Windows computer
and install the SmartView Utility software so you can select the desired scopes.
If you want to remotely adjust settings for multiple SmartView and SmartScope units from one computer,
you can connect them together via Ethernet. This means you won't have to run around to each unit with a
computer and USB cable each time you want to adjust settings.
That's all you need to get started! Please read on for more detailed instructions on connecting SmartView
and SmartScope, configuring monitor settings in the SmartView Utility and connecting to a network.
SmartView Duo
SmartScope Duo
SmartView HD

Getting Started
5
Plugging in Video Sources
SmartView and SmartScope monitors feature regular BNC connectors to connect to SDI equipment
including switchers, cameras, capture cards, decks and disk recorders.
Getting a picture
Step 1. Power on the unit and connect a video source to an SDI input. The video should immediately be
visible. SD, HD and 2K signals are automatically detected and supported by the SDI input and
loop-through output connections.
Step 2. When no video signal is received by the unit, backlighting will be automatically switched off to
save power until the next valid video signal is received.
Daisy-chaining Monitors
Each SmartView and SmartScope monitor has its own independent 3G-SDI input as well as a loop-through
output. You can connect multiple monitors together to relay the same input signal:
Step 1. Power on unit 1. Connect a video source to an SDI input. The video should immediately be
visible.
Step 2. Power on unit 2. Connect an SDI cable from a loop output of unit 1 to an SDI input on unit 2.
The chain can go on as long as all units are powered separately to support the loop-through SDI output.
If you have a SmartScope Duo, you'll probably want to loop Monitor 1 to Monitor 2 so both displays present
information about the same input signal.
Congratulations! If you want to adjust monitor settings on your SmartView or SmartScope, or to select
scopes on SmartScope Duo, read on to learn about installing and using the Blackmagic SmartView Utility.

Getting Started
6
Plugging in your computer
You can configure SmartView or SmartScope monitor settings by connecting to your computer locally with
USB 2.0 and installing the Blackmagic SmartView Utility.
This same USB cable can be used for applying occasional internal software updates downloaded from the
Blackmagic Design website. Software updates can provide new features, compatibility with new hardware
and support for new formats. The Blackmagic SmartView Utility software runs on both Mac OS X and
Windows computers.
Your computer display resolution needs to be 1280 x 800 or higher to display the Blackmagic
SmartView Utility.
Installing the Blackmagic SmartView Utility
If you wish to adjust monitor settings on SmartView or SmartScope, or select a scope on SmartScope Duo,
you will need to install the Blackmagic SmartView Utility software.
The Blackmagic SmartView Utility runs on the latest Lion and Mountain Lion versions of Mac OS X. On the
Windows platform, the Blackmagic SmartView Utility runs on both 32 and 64-bit versions of Windows 7 and
Windows 8 with the latest service packs installed. Testing on previous versions of these operating systems
is not conducted so it is always best to keep up to date with the latest versions of Mac OS X and Windows.
The Blackmagic SmartView Utility only needs to be installed on one computer but can be installed on
multiple networked computers if desired.
While the DVD supplied with SmartView contains the software installer, we recommend you visit
www.blackmagicdesign.com to ensure you have the latest version.
On Mac OS X, open the supplied DVD, or downloaded disk image, and drag the Blackmagic SmartView
Utility to your Applications folder.
On Windows, open the supplied DVD, or downloaded zip file, and double-click on the SmartView installer.
Follow the onscreen prompts to install the software
Mac OS X installation: Drag the Blackmagic SmartView Utility to
the Applications folder

7Updating the Software
7
How to update the SmartView and SmartScope Software
Once the Blackmagic SmartView Utility is installed and launched, you may be prompted to update the
internal software of your SmartView or SmartScope for new software features.
Step 1. Launch the Blackmagic SmartView Utility.
Step 2. Connect your SmartView or SmartScope to the computer via USB 2.0.
Step 3. If no internal software upate is required, your SmartView is up to date and ready to use and the
Blackmagic SmartView Utility will open as normal.
If you have connected your SmartView or SmartScope and an internal software update is required:
Step 1. When prompted, simply click YES. The update may take about 5 minutes to complete.
Step 2. The message: "The firmware has been successfully updated" should appear at completion of
the update.
Step 4. Click OK.
This message will appear if an internal software update
is required.
The update will take about 5 minutes to complete.
Blackmagic SmartView Utility application icon

Adjusting Monitor Settings
8
When launched, the Blackmagic SmartView Utility will immediately search for connected SmartView or
SmartScope units.
Click on the SmartView or SmartScope unit you have connected via USB and it will become highlighted. You
can now adjust its display settings.
If you are connected to a network, the SmartView Utility will also search for any SmartView or SmartScope
units by using the Bonjour service discovery protocol. Any discovered units will be listed in the SmartView
Monitors pane with an Ethernet network icon next to their names. To learn how to configure network settings
using the Blackmagic SmartView Utility, turn to the section "Adjusting Network Settings".
The Blackmagic SmartView Utility automatically searches for any SmartView and SmartScope units connected locally with USB
or over a network.
Blackmagic SmartView Utility application icon
The selected SmartScope Duo is connected locally via USB. The
Ethernet icons next to SmartView HD and SmartView Duo units
show they are connected through a network rather than via USB.

Adjusting Monitor Settings
9
Monitor Settings Pane
Display
When using a SmartView, this menu is permanently set to Video Monitor. If you have a SmartScope
connected, this drop down menu allows you to choose from a list of scopes or you can select Video Monitor
if you simply want to see the video image.
This setting can also be adjusted when connected with Ethernet.
Set
When SmartView units are connected, the Set drop down menu allows you to select between
displaying standard definition formats in 4:3 or 16:9 aspect ratio. When viewing widescreen anamorphic
standard definition video, choose to display SD in the 16:9 aspect ratio. When viewing traditional 4:3 aspect
ratio standard definition video, choose to display SD in the 4:3 aspect ratio, otherwise the video image will
appear stretched.
When SmartScope is connected, the Set drop down menu allows you to select additional options for the
selected display:
Video Monitor: When viewing widescreen anamorphic standard definition video, choose to display
SD in the 16:9 aspect ratio. When viewing traditional 4:3 aspect ratio standard definition video, choose
to display SD in the 4:3 aspect ratio, otherwise the video image will appear stretched.
Waveform: No additional settings.
Vectorscope: Select whether your input is based on 100% or 75% color bar test signals.
RGB Parade: No additional settings.
YUV Parade: No additional settings.
Histogram: No additional settings.
Audio dBFS: Select which pair of audio channels to monitor.
Audio dBVU: Select which pair of audio channels to monitor.
Brightness, Contrast, Saturation
Adjust the sliders to make changes to the brightness, contrast and saturation settings of your SmartView or
SmartScope when set to Video Monitor. These settings can also be adjusted when connected with Ethernet.
With SmartScope you can select between scopes or video
monitoring from the Display drop down menu.
Set "SD Aspect to 16:9" when viewing anamorphic standard
definition video.
SmartView Duo and SmartScope Duo monitor settings can be
adjusted independently or together.

Adjusting Monitor Settings
10
Adjust Both Monitors Together
When this setting is enabled, any changes made to the brightness, contrast and saturation will be applied
to both independent SmartView Duo or SmartScope Duo monitors. Yellow borders will appear on both
monitors in the software interface to indicate that any changes to brightness, contrast and saturation will be
applied to both.
Deselect this setting if you wish to make independent changes to the two monitors. Click on Monitor 1 or
Monitor 2 and a yellow border will appear so you know that changes to brightness, contrast and saturation
will only be applied to the selected monitor.
You can enable or disable the "Adjust both monitors together" setting when connected to SmartView Duo
or SmartScope Duo via Ethernet or USB.
Identify Monitor
Check the Identify box to display a white border on a selected monitor. If you have several SmartView and
SmartScope units on a network, this setting makes it easy to identify the selected monitor. The white border
will appear both on the LCD and in the Blackmagic SmartView Utility software interface.
If this setting is used in conjunction with the "Adjust both monitors together" setting, the white border will
be displayed on both SmartView Duo or SmartScope Duo monitors.
You can use the Identify monitor setting with Blackmagic SmartView Utility when connected to the unit via
Ethernet or USB.
A yellow border will appear around the selected monitor(s) in the
Blackmagic SmartView Utility.
A white border will appear around the selected monitor(s) when the Identify checkbox is enabled.

Adjusting Monitor Settings
11
Copy/Paste Display Settings
If you have already set up one SmartView unit with monitor settings that you would like to apply to others,
you can copy and paste those settings to other units. You can copy SmartScope settings to a SmartView
unit, but only settings applicable to SmartView will be copied. To copy and paste display settings:
Step 1. Click on the unit from which you want to copy settings in the SmartView Monitors pane.
Step 2. Go to the Device menu, or click the action button (gear icon) and choose Copy Display
Settings (Ctrl-C, Cmd-C)
Step 3. Now click on the unit whose monitor settings you wish to change in the SmartView Monitors
pane.
Step 4. Go to the Device menu, or click the action button (gear icon) and choose Paste Display
Settings (Ctrl-V, Cmd-V)
Copying and pasting display settings can also be done when connected with Ethernet.
Copy and Paste Display Settings

Using SmartScope Duo
12
What is Blackmagic SmartScope?
Previously, broadcast quality television and post production scopes were incredibly expensive custom
solutions that only let you see one scope at a time on a tiny screen! Some scopes look ugly and don’t really
look good in front of your client.
With SmartScope Duo you get the addition of waveform monitors which allow you to see any aspect of your
video signal on your dual monitors in real time. Any adjustments made to the input signal in the Blackmagic
SmartView Utility can immediately be seen on SmartScope Duo! Furthermore, each input signal can be sent
to either monitor via the SDI loop out, meaning you can use the right hand monitor to display the scope for
the signal going into the left hand monitor.
The scopes displayed by SmartScope Duo are selected in the Blackmagic SmartView Utility software. Select
your scopes from the Display drop down menu in the Monitor Settings pane.
The following pages explain how each scope display is used, so you get a deeper understanding of how
each type of display can help you.

Using SmartScope Duo
13
Video Monitor Display
The Video Monitor display is a handy confidence monitor so you can see the video that is being received
by SmartScope.
If your input signal is SD, you can select between displaying it in either 4:3 pillarbox or 16:9 from the Set drop
down menu. Any changes made to the Brightness, Contrast or Saturation can be immediately seen in this
view. Note that changing these settings only affects the monitor, not the video signal, so the scopes will not
be affected by any saturation or brightness changes.
It can often be handy to use one monitor as your Video Monitor and another as your scope view. To do this,
use a short cable to connect the SDI loop out from Monitor 1 to the SDI in of Monitor 2.
Set standard definition to display in 16:9 or 4:3 aspect ratios.

Using SmartScope Duo
14
Waveform Display
The Waveform Display provides a digitally encoded waveform similar to traditional luminance waveform
monitors, which is used to monitor and adjust the luma (brightness) levels of your video signal.
Traditional luminance waveform monitors only supported composite analog standard definition
video. However SmartScope's waveform view works in high definition as well as standard definition,
so you have a consistent and easy way to adjust luma levels even when monitoring high definition digital
video formats!
Select Waveform from the Display dropdown menu. You will want to make sure the blacks in your waveform
do not drop below 0% and the whites do not exceed 100% as this means you are getting illegal luma values.
The waveform monitor is a graphical representation of the image, showing luma values in the same position
relative to those within the frame. For example, if part of your sky is overexposed you will see it in the same
position on the waveform display as it appears in the frame.
Depending on your footage, your waveform will look different. If you are monitoring video which is high
contrast, you might not see any values in the mid grays. The picture on the left shows a waveform for an
evenly exposed image with a dark patch on the bottom left and brighter values from the centre of the frame
out to the right.
Waveform Display showing Luminance values
Waveform Display has no additional settings.

Using SmartScope Duo
15
Vectorscope Display
The Vectorscope Display uses a vector view to show the colors in a video signal. Depending on the standard
of color bar test signals used in your facility, select either 100% or 75% from the Set drop down menu.
Some people think you can use a vectorscope to check for illegal levels, however this is not correct. The
Parade RGB display should be used for checking for illegal colors. The reason you cannot use a vectorscope
to check for illegal levels is that both chroma and luminance values are required. For example, colors near
the white or black points in video cannot be as saturated as the much stronger colors, which can be used in
the mid-grays. Because Vectorscope Display only shows colors, and not luminance values, it cannot be used
solely to check for illegal colors.
Vectorscope Display is the best tool for checking color levels from older, analog videotape where you need
to adjust chroma levels. Just play back the color bar segment of the videotape, and then adjust the chroma
and hue settings to set the colors of the video within the square boxes in the graticule.
Vectorscope Display is also perfect for color grading, as you can easily see if your video is correctly white
balanced or if there is a color tint. If your video has a color tint, the Vectorscope display will drift off center,
and you might see two center dots. Normally the blanking in the video signal will create a dot in the center
of the vectorscope, and this is because the blanking in the video is black video without any color. Blanking
provides a useful reference point to help recognize areas of black video without any color information.
If your video has a color tint, you should see the blacks move off color and off center. The degree of shift
represents the amount of color tint in your video and you can see the shift in both the white and black
details of your video. This makes Vectorscope Display valuable for removing color tint and regaining correct
white balance.
Vectorscope Display lets you push colors in your video to the limits, without accidentally adding unwanted
color tints to blacks and whites. While color balance can be monitored on both the RGB Parade display and
Vectorscope Display, color balance issues will often be easier to see in the Vectorscope Display.
When color correcting footage of skin tone, particularly faces, you will want to keep your warm color
saturation along a line at approximately 10 o'clock on the vectorscope. This is known as the "fleshtone line"
and is based on the color of blood beneath the skin's surface. The fleshtone line is therefore applicable to
all skin pigmentations and is the best way to ensure the skin tones of your talent look natural.
Vectorscope Display showing the "fleshtone line".
Set your Vectorscope to 100% or 75% color bar test signals.

Using SmartScope Duo
16
Parade Display
RGB and YUV Parade displays are perfect for color correction, checking for illegal colors and checking levels.
When color correcting, select RGB Parade from the Display drop down menu. RGB Parade view displays the
full height of the individual red, green and blue color channels. Monitoring the levels of each color channel
makes color correction straightforward and it is also easy to view color balance in the blacks, mids and
whites of the video signal. RGB Parade display enables you to identify details common to the red, green and
blue channels, making it simple to color balance and remove unwanted color tints.
It’s important when color correcting to make sure the video levels are full but not clipped. If you want
to increase the video level, make sure it doesn’t go above upper RGB limit or you will encounter illegal
levels. Some equipment won’t let you generate illegal 100% RGB levels, however other equipment will.
SmartScope Duo lets you see illegal levels whenever they occur.
Illegal video can also happen in the black and white levels. In some color correction systems, black levels can
be lowered to below the black point of 0%. If you observe illegal black levels, just add some “lift” or gain
to eliminate them but check the 100% graticule level to make sure the whole video signal has not lifted and
generated illegal colors in the whites.
To check YUV levels, select YUV Parade from the Display drop down menu. This view is useful because the
luma (brightness) values are separated from the chroma (color) values, which is the format of video signals
for television broadcast. The left waveform shows the luma information and the second and third waveforms
show the chroma information. YUV Parade view is useful for calibrating a video signal's chroma values to
a color bar test pattern, so that colors are represented accurately and the signal being broadcast will be
displayable by television sets.
Color correcting is a constant adjustment process to attain the best looking images without generating
illegal levels!
RGB Parade view.
YUV Parade view.
Select between RGB Parade and YUV Parade from the Display
drop down menu.
Color Correction Terminology
Blacks – black levels in the video signal
Mids – mid-gray levels in the video signal
Whites – white levels in the video signal

Using SmartScope Duo
17
Histogram Display
Histogram Display is most familiar to graphic designers and camera operators. Histogram Display shows
the distribution of white to black information and lets you monitor how close the detail is to being clipped
off in the whites or blacks of the video. Histogram Display also lets you see the effects of gamma changes
in the video.
Black video is shown on the left of the display, and whites are shown on the right. All video should usually
be found between the 0% and 100% intervals of the Histogram Display. Your video is being clipped if it
moves below 0% or above 100%. Video clipping can be really bad when you’re on a shoot, as detail in the
blacks and whites must be preserved if you subsequently want to perform color-correction in a controlled
environment. When shooting, keep the video above the black clip, and below the white clip, so you can
have more freedom later to adjust colors without whites and blacks appearing flat and lacking in detail.
When color-correcting, you might decide to clip your video, and in which case Histogram Display will show
the effect of clipping the video, and how much it is being clipped. You can even use gamma to create a
similar look, with less clipping, while retaining more detail.
You cannot really use Histogram Display to check for illegal levels although you can use it to see illegal
blacks and whites. Histogram Display does not show colors and so the histogram might appear to show
legal levels, even though your video may contain illegal colors. Again, RGB Parade Display provides the
best way to watch out for illegal levels as it shows them in both the color and luminance elements of the
video signal.
Histogram Display showing distribution of whites to blacks.
Histogram Display has no additional settings.

Using SmartScope Duo
18
Audio Metering Display
The Audio Metering Displays show you the audio levels in the embedded audio of the SDI video signal. Up
to 16 channels of embedded audio are de-embedded and then displayed in either dBVU or dBFS format.
The VU meter shows average signal levels, is easy to use and very common on older equipment. VU is
calibrated to the SMPTE recommendation of a 1 kHz tone test signal set to -20 dBFS.
dBFS is essentially a meter of the overall digital audio signal and is common on modern digital equipment.
The right hand audio scope can monitor two channels of audio, which can be selected from the Set drop
down menu. e.g., CH 1 & 2, CH 3 & 4, etc. The audio scope presents audio in an X-Y view so you can see
audio balance issues, out of phase conditions and whether an audio track is mono or stereo. Mono audio
should appear as a single vertical “in phase” line. If the line is horizontal, then your audio is “out of phase”
and could cancel out (i.e., loss of audio) when received by downstream equipment. Audio phase is one of
the most common audio faults in large facilities, where cables can be incorrectly connected.
When monitoring stereo signals, the line of the right hand audio scope fans out to represent the difference
between the left and right audio channels. The more stereo sound contained in the audio track, the more
circular the line will appear. If the audio contains minimal stereo content, then the scope will appear more
concentrated around the vertical axis.
Dialog audio tends to appear as a vertical line, whereas music with plenty of stereo content will cause the
scope to puff out. This is because mono audio is L+R, and will display on the vertical axis, whereas stereo
content is L-R, and will display on the horizontal axis to show the stereo difference.
Audio Metering Display showing peak levels and audio balance.
Select audio channels from the Set drop down menu.

Connecting to a Network
19
By connecting SmartView or SmartScope to a network, you can adjust monitor settings for multiple
units remotely.
While SmartView and SmartScope monitors display video without needing any configuration, any network
settings need to be configured prior to deployment. Network configuration can only be performed using a
direct USB 2.0 connection to a computer.
Direct Ethernet
Remote monitor configuration can be performed via a direct Ethernet connection to your computer.
No network switch is required in this configuration, which is great if you need to install and set up quickly.
Additional units can be daisy-chained together using the active loop-through Ethernet OUT port on each
unit. Power must be supplied to all units in the chain.
If you want to connect several units without using IP addresses from your existing studio network, or if you
don't have an existing network, simply connect them directly to the Ethernet port on your computer. This is
also a fast way to connect SmartView and SmartScope units via Ethernet as you don't need to run any cables
back to a network switch.
Ethernet Network Switch
If you want to connect several units to your studio's network, you only need to connect one SmartView or
SmartScope to the network switch and the rest can be daisy-chained to each other using the active loop-
through Ethernet OUT port on each unit so only a single port on your switch is used. This way you won't
have to run multiple cables back to a network switch. Power must be supplied to all units for daisy-chaining
to work.
Connecting to a network switch allows any computer on the network to change a unit's settings. Any Mac
or Windows laptop computer can also change settings via a WiFi connection if your network includes a
wireless access point.
You will need to carry out the following steps to connect SmartView or SmartScope to a local area IP
based network.
Step 1. Securely connect and switch on the power supply included with your unit.
Step 2. Connect the unit to a network switch, or directly to a computer, with a standard RJ45
Ethernet cable.

Connecting to a Network
20
Direct Ethernet Connection Diagram
You can connect the Ethernet port of a computer directly to a unit without needing a network switch.
Additional units can be daisy-chained to each other so you don't have to run multiple cables back to a
network switch. Power must be supplied to all units.
Other manuals for SmartView Duo
2
This manual suits for next models
2
Table of contents
Other Blackmagicdesign Monitor manuals
Blackmagicdesign
Blackmagicdesign SmartView Duo User manual
Blackmagicdesign
Blackmagicdesign Blackmagic Video assist User manual
Blackmagicdesign
Blackmagicdesign Video Assist User manual

Blackmagicdesign
Blackmagicdesign SmartView 4K User manual
Blackmagicdesign
Blackmagicdesign SmartView Duo User manual
Blackmagicdesign
Blackmagicdesign MultiView Series User manual

