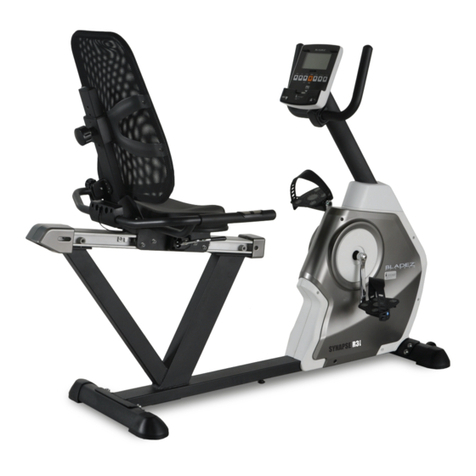
BLADEZ R6 User manual

Revised: 10/27/06
BLADEZ R6 RECUMBENT CYCLE
OWNER’S MANUAL
BLADEZ Corporation
20155 Ellipse
Foothill Ranch, CA 92610
Phone: 949-206-8152
Fax: 949-206-0013

R6 RECUMBENT CYCLE
1
INTRODUCTION
Congratulations for selecting the R6 Recumbent Cycle as your primary source of fitness.
The Bladez R6 offers many exercise programs that benefit users of all levels and ages. The
R6 is designed to make your workouts more effective and enjoyable.
Please read this manual carefully before using the R6. This will allow you to get a full
understanding of all the features the Bladez Recumbent Cycle provides. If you have
questions or concerns, please contact BLADEZ Corporation or any authorized BLADEZ
FITNESS distributors in your area.
BLADEZ Corporation
20155 Ellipse
Foothill Ranch, CA 92610
Phone: 949-206-8152
Fax: 949-206-0013
BEFORE YOU BEGIN
It is very important to become familiar with the frequently used components of your R6.

R6 RECUMBENT CYCLE
2
TABLE OF CONTENTS
SECTION PAGE
1. IMPORTANT SAFETY INSTRUCTIONS ........................................................3
2. ASSEMBLY INSTRUCTIONS ....................................................................... 5
3. PARTS LIST .................................................................................................20
4. EXPLODED VIEW........................................................................................22
5. COMPUTER CONSOLE ..............................................................................23
6. COMPUTER OPERATION ...........................................................................26
7. TV USER’S GUIDE ......................................................................................38
8. WARRANTY.................................................................................................41

R6 RECUMBENT CYCLE
3
SECTION 1
IMPORTANT SAFETY INSTRUCTIONS
Read all instructions before using the Recumbent Cycle.
Notice: Before using this or any other exercise equipment consult your family physician
or health care professional to develop a well planned exercise program to fit your health
needs. If you encounter any pain or breathing discomfort while working out, STOP!,and
consult a physician before continuing.
WARNING!
1. It is wise to always unplug this appliance from the electrical outlet immediately after use.
2. Keep children away from machine while in use.
3. Do not wear loose or dangling clothing while using the cycle.
4. Maximum user weight of this cycle is 300 lbs.
5. Keep a minimum clearance of 18” on each side and 24” at the rear of the cycle for
safety.
6. It is mandatory that you unplug the cycle prior to cleaning to reduce the risk of electric
shock, serious burns, and the risk of injuries.
7. The cycle should never be left unattended when in operation. Unplug the cycle from the
outlet when not in use or when servicing the cycle.
8. Close supervision is necessary when this appliance is used by or near children, invalids,
or disabled persons.
9. Use this appliance only for its intended use as described in this manual.
10.Do not use any attachment not recommended by the manufacturer.
11.Never operate this appliance if it has a damaged cord or plug, or if it is not working
properly. Call your service center for any service concerns before taking your cycle in for
repair.
12.Keep the cord away from heated surfaces.
13.Never drop or insert any object into any opening.
14.Do not use outdoors.
15.Do not operate where aerosol (spray) products are being used or where oxygen is being
administered.
16.To disconnect, turn all controls to the off position, then remove plug from outlet.
17.This appliance is intended for household use only.
SAVE THESE INSTRUCTIONS

R6 RECUMBENT CYCLE
4
IMPORTANT SAFETY INSTRUCTIONS CONTINUED
POWER SUPPLY
Your R6 Recumbent Cycle uses 2 two prong external power supplies for use on a nominal
110-120-volt circuit. Use only the power supplies provided with your R6 Recumbent Cycle.
If you misplace a power supply, please contact Bladez for an original replacement. Use of
the wrong power supply may cause damage to your R6 Recumbent Cycle. No adapter or
extension cords should be used with this product.
CLEANING
Clean with soap and slightly damp cloth only; never use solvents.

R6 RECUMBENT CYCLE
5
SECTION 2 - ASSEMBLY INSTRUCTIONS
SCREWS BAG
(108) Allen Bolt M8x15--20PCS
(5) Washer 18x9x2.0t--20PCS
(109) Bolt M8x56--4PCS
(110) M8 Acorn Nut--4PCS
(112) Spring Washer M8x2.0t--4PCS
(113) Washer 20x9x2.0t--4PCS
(118) 6mm Allen Wrench--1PCS
(115) 5mm Allen Wrench--1PCS
(116) 4mm Allen Wrench--1PCS
(41) Self Tapping Screw ST4x25--4PCS (91) Allen Bolt M6x35--2PCS
(114) Allen Bolt M8x45--2PCS
(110) M8 Acorn Nut--2PCS
(112) Spring Washer M8x2.0t--2PCS
(5) Washer 18x9x2.0t--2PCS
(117) Open Spanner--1PCS
(129) Allen Bolt M8x20--4PCS
(5) Washer 18x9x2.0t--4PCS

R6 RECUMBENT CYCLE
6
ASSEMBLY INSTRUCTIONS CONTINUED
1. Assembly Parts
MP3 Sound Cable (23)
Handrail (59)
Seat (102)
Backrest (103)
Rear Stabilizer (74)
Front Stabilizer (66)
Upright (80)
Handle (96)
Adapter (36)
Spacer (90)
Bottle Holder (107)
Bottle (106)
Left Rear
Cover (48)
TV Computer (101)
Computer (97)
Wireless Chest
Band (126)
Front
Frame (1)
Rear Frame (44)
AC-AC Adapter (127)
Pedal Assembly (R) (120)
Pedal Assembly (L) (119)
Right Rear
Cover (49)
Book Shelf
(
104
)
Seat Sliding Base (51)
Base Tube Strengthening
Plate (128)

R6 RECUMBENT CYCLE
7
ASSEMBLY INSTRUCTIONS CONTINUED
STEP 1. Assembling the Front Stabilizer
如右圖所示,用螺絲(109),華司
(113)(112),袋帽(110)將前腳管
(66)組到前架上(1),用十字開口
扳手(117)將袋帽擰緊.
彈簧華司
華司
袋帽
傘頭馬車螺絲
Spring Washer M8х2.0t—2PCS (112)
Washer 20х9х2.0t—2PCS (113)
M8 Acorn Nut—2PCS (110)
Bolt M8х56—2PCS (109)
Refer to the drawing to the
right. Attach the Front
Stabilizer (66) to the Front
Frame (1) with Bolts (109),
Washers (112), (113) and
Acorn Nuts (110). Then tighten
the nuts with Open Spanner
(117).

R6 RECUMBENT CYCLE
8
ASSEMBLY INSTRUCTIONS CONTINUED
STEP 2. Assembling the Rear Stabilizer
如右圖所示,用螺絲(109),華司
(113)(112),袋帽(110)將後腳管
(74)組到後架上(44),用十字開口
扳手(117)將袋帽擰緊.
彈簧華司
華司
袋帽
傘頭馬車螺絲
Spring Washer M8х2.0t—2PCS (112)
Washer 20х9х2.0t—2PCS (113)
M8 Acorn Nut—2PCS (110)
Bolt M8х56—2PCS (109)
Refer to the drawing to the right.
Attach the Rear Stabilizer (74) to
the Rear Frame (44) with Bolts
(109), Washers (112), (113) and
Acorn Nuts (110). Then tighten
the nuts with Open Spanner
(117).

R6 RECUMBENT CYCLE
9
ASSEMBLY INSTRUCTIONS CONTINUED
STEP 3. Assembling the Front and Rear Frames
步驟 A:先將手握心跳線前架段
(17)與手握心跳線後架段(50)對
接,然後將後架(44)插入前架(1),
用螺絲(108),華司(5)將後架與前
架組立,用6mm 內六角扳手(118)
將螺絲擰緊.
步驟 B:用螺絲(129),華司(5)將底
管補強平鐵片(128)與前後架組
立,用6mm 內六角扳手(118)將螺
絲擰緊.
華司
傘頭內六角螺絲M8x15--4PCS(108)
傘頭內六角螺絲M8x20--4PCS(129)
Washer 18х9х2.0t—8PCS (5)
Allen Bolt M8х15—4PCS (108)
Allen Bolt M8х20—4PCS (129)
Step A: Connect the Hand Pulse
Wires (17), (50) between the
Front Frame and the Rear
Frame, and then insert the Rear
Frame (44) into the Front Frame
(1). Assemble the frames with
Bolts (108), Washers (5) and
6mm Allen Wrench (118).
Step B: Attach the Base Tube
Strengthening Plate (128) to the
frames with Bolts (129),
Washers (5) and 6mm Allen
Wrench (118).

R6 RECUMBENT CYCLE
10
ASSEMBLY INSTRUCTIONS CONTINUED
STEP 4. Assembling the Uprights
步驟 A:1.將手握心跳線前架段(17)與手握
心跳線立管段(83)對接,控制線下段(105)與
控制線中段(122)對接;
2.用立管下端露出的魔術帶綁住 TV Cable
線(134)及電視電源線(133),然後順着魔術
帶方向朝上拉,從立管後線塞孔拉出,如右
下圖所示;
3.將立管(80)插入前架(1),用螺絲(108),華司
(5)將立管與前架組立,用6mm 內六角扳手
(118)將螺絲擰緊.
華司
傘頭內六角螺絲M8x15--6PCS(108)
Washer 18х9х2.0t—6PCS (5)
Allen Bolt M8х15—6PCS (108)
Step A: 1. Connect the Hand Pulse Wires
(17), (83) between the Front Frame and
the Upright, and then connect the Hand
Pulse Wires (105), (122).
2. Tie up the TV Cable (134) and the TV
Power Cable (133) with the out Guide
Thread from the lower Upright. Then pull
them out with the Guide Thread from the
hole on the wire plug. Refer to the lower
picture.
3. Insert the Upright (80) into the Frame
(1), and then assemble the Upright and
Front Frame with Bolts (108), Washers
(5) and 6mm Allen Wrench (118).

R6 RECUMBENT CYCLE
11
ASSEMBLY INSTRUCTIONS CONTINUED
STEP 5. Assembling the Computer
步驟 A:用十字開口扳手(117)將電子表
上的螺絲(100)擰下.
步驟 B:將電子表內出線如圖 B對接,注
意按口不可接錯,(98)與(83)對接,(99)與
(122)對接.
步驟 C:1.用螺絲(100)將電子表組到立
管(80)上,用十字開口扳手(117)將螺絲
擰緊;
2.將TV Cable 線(134),電視電源線(133)
插入電視電子表,注意接口不可插反.
B
C
Step A: Unfasten the Screw (100)
from the Computer with Open
Spanner (117).
Step B: Connect the out wires from
the Computer; connect (98) to (83)
and (99) to (15).
Step C: Attach the Computer to the
Upright (80) with Screws (100) and
Open Spanner (117).
2. Plug one end of the TV Cable (134)
and the TV Power Cable (133) into
the TV Computer. Make sure not to
plug the wrong end.

R6 RECUMBENT CYCLE
12
ASSEMBLY INSTRUCTIONS CONTINUED
STEP 6. Assembling the Computer Seat, Handrail, Seat Sliding Base,
Spacers and Rear Covers
步驟 A:用螺絲(108),華司(5)將座墊(102)
組到座墊滑動件(51)上,用6mm 內六角扳
手(118)將螺絲擰緊.
殺拉頭十字自攻螺絲ST4.0x25--4PCS(41)
傘頭內六角螺絲M6x35--2PCS(91)
華司
傘頭內六角螺絲M8x15--4PCS(108)
傘頭內六角螺絲M8x45--2PCS(114)
袋帽
彈簧華司
Self Tapping Screw ST4.0х25--4PCS (41)
Allen Bolt M6х35—2PCS (91)
Washer 18х9х2.0t—6PCS (5)
Allen Bolt M8х15—4PCS (108)
Allen Bolt M8х45—2PCS (114)
M8 Acorn Nut 2PCS (110)
Spring Washer M8х2.0t—2PCS (112)
Step A: Attach the Seat (102) to the
Seat Sliding Base (51) with Bolts
(108), Washers (5) and 6mm Allen
Wrench (118).

R6 RECUMBENT CYCLE
13
ASSEMBLY INSTRUCTIONS CONTINUED
步驟 B:用螺絲(114),華司
(5)(112),袋帽(110)將扶手(59)與
座墊滑動件組立,同時用十字開
口扳手(117)與6mm 內六角扳手
(118)將螺絲鎖緊.
步驟 C:先將座墊滑動座(51)上調
節把手(93)按圖箭頭方向朝上
扳,然後將座墊滑動座按鋁管
(84)方向滑入鋁管槽中,松開調
節把手就可將座墊滑動座卡住.
步驟 D:1.用螺絲(91)將塑膠墊片
(90)組到鋁管(84)上,用4mm 內
六角扳手(116)將螺絲擰緊;
2.將手握心跳線後架段(50)與手
握心跳線把手段(63)對接.
Step B: Attach the Handrail
(59) to the Seat Sliding Base
with Bolts (114), Washers (5),
(112), and Acorn Nuts (110).
Then tighten the bolts with
Open Spanner (117) and 6mm
Allen Wrench (118).
Step C: Turn the Grip (93) of
the Seat Sliding Base (51) in
the direction shown in the
drawing to the right, slide the
Seat Sliding Base onto the
Aluminous Tube (84) and then
release the Grip.
Step D: 1.Attach the Spacers
(90) to the Aluminous Tube
(84) with Bolts (91) and 4mm
Allen Wrench (116).
2. Connect the Hand Pulse
Wires (50), (63) between the
Rear Frame and the Handrail.

R6 RECUMBENT CYCLE
14
ASSEMBLY INSTRUCTIONS CONTINUED

STEP 7. Assembling the Backrest
步驟 E:用十字開口扳手(117),螺絲
(41)將後飾蓋左右(48)(49)組到後架
上.
華司
傘頭內六角螺絲M8x15--4PCS(108)
Step E: Attach the Rear Covers
(48), (49) to the Rear Frame with
Screws (41) and Open Spanner
(117).
Washer 18х9х2.0t—6PCS (5)
Allen Bolt M8х15—4PCS (108)

R6 RECUMBENT CYCLE
15
ASSEMBLY INSTRUCTIONS CONTINUED
STEP 8. Assembling the Handle
如右圖所示,用螺絲(108),華司(5)將靠
背(103)與座墊滑動件組立,用6mm 內
六角扳手(118)將螺絲鎖緊.
如右圖所示,用螺絲(108),華司(5)將搬
運扶手(96)與後架(44)組立,用6mm 內
六角扳手(118)將螺絲鎖緊.
華司
傘頭內六角螺絲M8x15--2PCS(108)
Assemble the Backrest (103) and
the Seat Sliding Base with Bolts
(108), Washers (5) and 6mm Allen
Wrench (118).
Washer 18х9х2.0t—2PCS (5)
Bolt M8х15—2PCS (108)
Assemble the Handle (96) and Rear
Frame (44) with Bolts (108),
Washers (5) and 6mm Allen Wrench
(118).

R6 RECUMBENT CYCLE
16
ASSEMBLY INSTRUCTIONS CONTINUED
STEP 9. Assembling the Bottle Holder
步驟 A:用5mm 內六角扳手(115)將組
在立管(80)上的螺絲(82)卸下.
步驟 B:1.用螺絲(82)將水壺架(107)組
到立管(80)上,用5mm 內六角扳手
(115)將其擰緊;
2.將水壺(106)插入水壺架(107)中.
Step A: Unfasten the Bolt (82)
from the Upright (80) with 5mm
Allen Wrench (115).
Step B: 1. Attach the Bottle Holder
(107) to the Upright (80) with Bolts
(82) and 5mm Allen Wrench (115).
2. Insert the Bottle (106) into the
Bottle Holder (107).

R6 RECUMBENT CYCLE
17
ASSEMBLY INSTRUCTIONS CONTINUED
STEP 10. Assembling the Pedals
步驟 A:將塑膠護帶按圖 A所示扣到腳
踏板上.
步驟 B:用十字開口扳手(117)按圖 B箭
頭方向將腳踏板擰緊.
步驟 C:如需拆卸腳踏板,用十字開口扳
手(117)按圖 C箭頭方向將腳踏板卸下.
Step A:Attach the Pedal Belt to the
Pedal.
Step B:Tighten the Pedal in the
arrow’s direction in Picture B with
Open Spanner (117).
Step C:If needed, disassemble the
Pedal as the arrow’s direction in
Picture C with Open Spanner (117).

R6 RECUMBENT CYCLE
18
ASSEMBLY INSTRUCTIONS CONTINUED
STEP 11. Assembling the Bookshelf
STEP 12. Attaching the Transformer
如右圖所示將書報架鐵條(104)插入
電子表(97).
步驟 A:將AC-AC 電源適配器(127)接
頭如圖 A所示插入前架(1)電源接口,
在插入前請核對電源適配器與鐵管
上電源貼紙的參數,注意接口不要插
錯.
Insert the Book Shelf (104) into the
Computer (97).
Step A: Plug one end of the AC-AC
Adapter (127) into the front Frame
(1) Power Jack. Before plugging in,
make sure to check carefully the
specifications on the Adapter and
the label on the frame. Make sure
not to plug into the wrong jack.

R6 RECUMBENT CYCLE
19
ASSEMBLY INSTRUCTIONS CONTINUED
STEP 13. Attaching the TV Computer Power Supply and TV Signal
Connector
Assembly is now complete.
步驟 B:將AC-AC 電源適配器(127)接
頭插入家中電源,如圖 B所示,電子表
即可起用.
注意:在插入電源前,請仔細核對
AC-AC 電源適配器參數(如輸入電壓,
輸出電壓等).
步驟 A:將電視線(可選配),電源適配
器(36)按圖所示分別接入前架(1)電視
電源接口與 TV Cable 接口, 在插入前
請核對電源適配器與鐵管上電源貼
紙的參數,TV Cable 插入有貼貼紙 TV
Cable 處的接口,注意接口不要插錯.
步驟 B:1.將電視線(可選配)插入家中
有線電視接口,如圖 B右圖所示.
2.將電源適配器(36)接入家中電源,如
圖B左圖所示,電視電子表即可起用.
注意:在插入電源前,請仔細核對電源
適配器的參數(如輸入電壓,輸出電壓
等).
Step B:Plug the other end of the AC-AC
Adapter (127) into your home
Power Jack then the Computer
is ready for use.
Note: Before plugging into the power,
check carefully the specifications of
the AC-AC Adapter (such as the
input voltage, the output voltage).
Step A:Plug one end of the TV
cable (optional) and the Adapter
(36) into the TV Power jack and
the TV Cable jack. Make sure to
check carefully the specifications
on the Adapter and the label on
the frame, make sure not to plug
into the wrong jack.
Step B: 1. Plug the other end of
the TV Cable (optional part) into
your home CATV jack.
2. Plug the other end of the
Adapter (36) into your home
power jack. The Computer is
ready for use.
Note: Before plugging into the
power, check carefully the
specifications of the AC-AC
Adapter (such as the input
voltage, the output voltage).
TV Cable (optional)
Table of contents
Other BLADEZ Exercise Bike manuals

BLADEZ
BLADEZ R300II User manual

BLADEZ
BLADEZ VeloPro HW3018B User manual

BLADEZ
BLADEZ 200R User manual

BLADEZ
BLADEZ Echelon GS User manual

BLADEZ
BLADEZ Zephyr User manual

BLADEZ
BLADEZ Synchro GS User manual

BLADEZ
BLADEZ SC3iB User manual

BLADEZ
BLADEZ U300 User manual

BLADEZ
BLADEZ KZ1 User manual

BLADEZ
BLADEZ U250 User manual

BLADEZ
BLADEZ AEROPRO H930 User manual

BLADEZ
BLADEZ U500i User manual

BLADEZ
BLADEZ U300 User manual

BLADEZ
BLADEZ JET BIKE User manual

BLADEZ
BLADEZ Spinpower HW3017 User manual

BLADEZ
BLADEZ SXPRO User manual

BLADEZ
BLADEZ Master GS User manual

BLADEZ
BLADEZ U400 User manual

BLADEZ
BLADEZ R300 User manual

BLADEZ
BLADEZ PTS68 Master Bike User manual