TRIPURO
PREMIUM FILTER SYSTEM
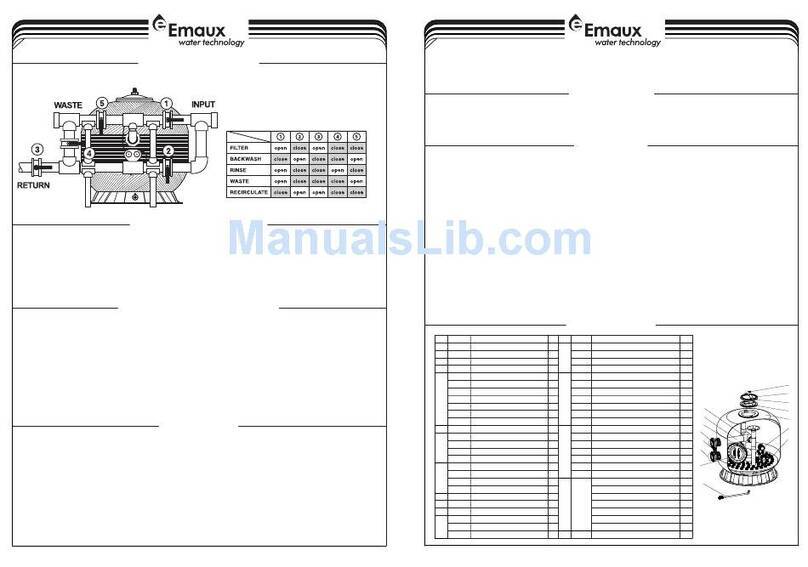
Turn on the water supply and
check for leaks.It is recom-
mend that you ush at least 2 litres of
water through the system.Write
the installation and lter change dates
on the label.
• On installation allow room
around the clamp ring to grip
and rotate
• Minimum 30mm vertical
clearance below base of
housing for cartridge change
• On replacing cartridge in
sump, align arrow on
cartridge top metal plate with
arrow on sump– insert and
rotate clockwise as per “IN”
arrow to stop
• To reconnect to head, align
arrows on head and sump,
push sump into head and
rotate clamp ring anti-
clockwise
• Apply new change date label
over existing main product
label
The lter feeds from the outer
most push t tting (on the
right when viewed from the front,
marked ‘in’). Cut the ¼” O.D. inlet/
outlet tubing (not supplied) to the
correct lengths,ensuring the cut ends
are square and clean.
A- Fit the outlet tubing to the‘out’
connector.
B- Fit the inlet tubing to the‘in’
connector.
To remove a tube, simply push down on
the collet whilst pulling on the tubing.
For optimal performance, please follow the instructions in this installation guide.
Using a TRIPURO system outside of these operating parameters may result in poor
performance and could invalidate the warranty.
Valved Head Installation Guide
TRIPURO
PREMIUM FILTER SYSTEM
1
Select the ‘snap t’or rotary
wall plate mounting.Please
note,the rotary wall plate should be
used if varying positions are required.
5A
B
3
Screw the‘snap t’ bracket or
rotary wall plate into the
marked location.If the rotary wall plate
option has been used, attach the
bracket to the wall plate at the required
angle, using the screw provided. Always
ensure the location lug is pointing
upwards.
Locate the lter head into the
bracket until you feel it click
into place (it will only t one way - with
the black location arrows directly
facing you).
2
Measure & mark the centres
of your desired lter location.
6
4
Installation/ReplacementTips
• Change cartridge at not more
than 6 monthly intervals
• Change cartridges when
capacity is reached or when
pressure falls below 10psi
• Flush for 2 minutes following
initial installation and
cartridge change
OperationTips
Do not use with water that is microbiologically unsafe or of
unknown quality without adequate disinfection before or
aer the system. Install in cold water applications only.
The contaminants removed by this water lter are not
necessarily present in all water. Systems certied for cyst
reduction may be used on disinfected water that may
contain lterable cysts.
For cooler applications only, not intended for use in general
plumbed-in applications.
We recommend regular replacement of the lter cartridges - change the
cartridge at least every 6 months.
Do not install if water pressure exceeds 120psi. If your water pressure exceeds
80psi, you must install a pressure limiting valve. Do not install where water
hammer conditions may occur. If water hammer conditions exist you must
install a water hammer arrester. Contact a plumbing professional if you are
uncertain how to check for these conditions. Installation and use must comply
with all state and local plumbing laws and regulations. Improper installation
may result in property damage due to water leakage.
Warning
