Blue I Water Technologies HydroGuard Expert Pool User manual
HydroGuard Expert Pool Manual
Draft 09 May 2006
Swimming Pool Quality
Communication and Monitoring

Preface
Intended Use
This manual is for qualified and trained pool service technicians who will install and service the
HydroGuard Water Quality Controllers. It provides instructions on how to install the Expert Pool
Communicator with and existing HydroGuard controller, as well as how to monitor using the
internet.
Table of Contents
Preface............................................................................................................................................. 2
Intended Use ............................................................................................................................... 2
Table of Contents............................................................................................................................ 2
Overview of Chapters................................................................................................................. 3
Overview......................................................................................................................................... 3
Remote Monitoring..................................................................................................................... 3
System Components.................................................................................................................... 4
Hardware Installation...................................................................................................................... 4
Selecting a Location................................................................................................................ 4
Site Requirements and Installation ............................................................................................. 5
Hardware Installation.............................................................................................................. 5
Configuring the controller........................................................................................................... 7
Confirming Proper Operation.....................................................................................................8
Website and Monitoring ................................................................................................................. 9
Website ....................................................................................................................................... 9
Current Values and Pool Overview .......................................................................................... 10
Historical Values and Graphical Features................................................................................. 11
Alarm Information.................................................................................................................... 12
Troubleshooting............................................................................................................................ 13
2

Overview of Chapters
This document is divided into chapters and appendices functionally according to the various steps
involved in installing and operating the HydroGuard system.
Chapter Description
Chapter 1:
Precautions Describes the intended product use and provides general precautions
Chapter 2:
Overview Provides a general overview of Expert Pool’s operation
Chapter 3:
Hardware Installation
Instructs how to install the Expert Pool Communicator andhow to integrate it
with a HydroGuard controller
Chapter 4:
Software Installation and
Operation
Instructs how to install and use the use the Expert Pool website to monitor the
HydroGuard controller
Overview
The Expert Pool Communicator continuously transmits information from the HydroGuard
Controller(s) and allows for remote monitoring of the HydroGuard controller(s). This is
accomplished via a wireless connection using cellular GPRS technology. A single Expert Pool
Communicator can be used to monitor up to 5 HydroGuard Controllers, in the same location
(within 100 m).
Remote Monitoring
The Expert Pool Communicator provides real-time, fully web-based monitoring. The
communicator accepts HydroGuard's alarms and readings and transmits them to a web-based
application server. In the event of user-selected alarm conditions, the communicator can send a
notification via SMS (cellular Short Message Service to pool managers, inspectors, service
technicians, and other authorized pool maintenance personnel.
The communications between HydroGuard and pool maintenance personnel is bidirectional.
HydroGuard settings can be managed remotely through any internet connection and even from a
mobile telephone.
Caution: Remote control of pool water chemistry is potentially dangerous to bathers. The
HydroGuard remote monitoring and control service is set by default to monitoring
and reporting only. Remote control is available only upon special request.
3
System Components
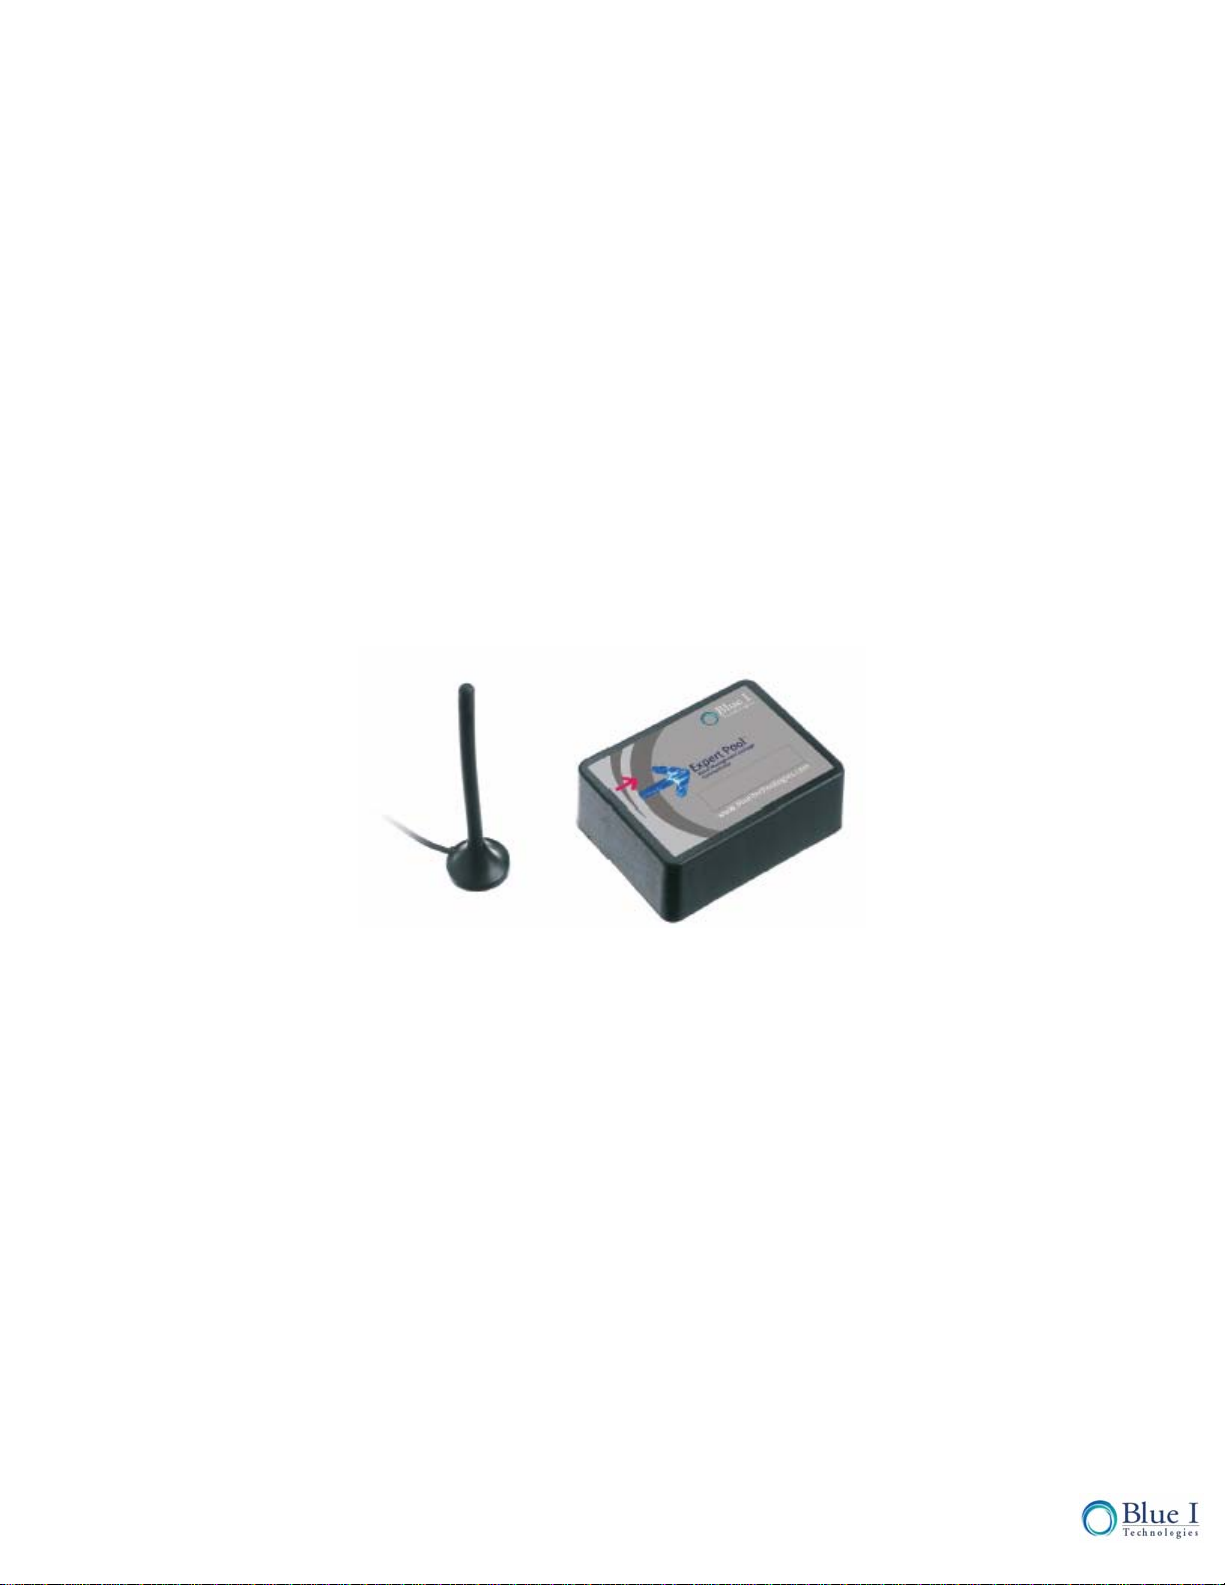
The Expert pool Communicator (Figure 1) is a single unit comprised of the following
components:
Communicator – a small enclosure that contains electronics for communication, the SIM
card, and the connections to the controller, the antenna, and the power input
connection.
Antenna – Receives and sends information wirelessly to and from controller.
Power Adapter – Provides power to communicator. Converts power supply from source of
either 110V or 220V AC to 9V DC 800 mA.
SIM card (not provided) – small, primarily plastic card that fits in the communicator and
provides information to connect to cellular network. This card is provided by a variety of
cellular companies and is used in most newer cellular phones. Please contact Blue I
Technologies for a list of suppliers in your area.
Figure 1: Expert Pool Communicator and Components
Hardware Installation
The installation process starts with the manual installation and connection of the Expert Pool
communicator to the controller, as described in this chapter. Once installed, the controller can be
monitored via the Expert Pool website, which is explained in Chapter 4.
Selecting a Location
The location where the Communicator is installed is dependent on various considerations:
Dry Area – The communicator includes electronic circuitry that may short circuit, and is
susceptible to corrosion with high ambient moisture levels.
4

Pool Chemicals - Pool chemicals can be corrosive to electronic circuitry. It is highly
recommended that the communicator is not installed adjacent to the pool chemicals storage area
or the dosing systems themselves.
Minimum Distance from Cellular Signal - The communicator must be installed such that the
antenna is able to be located in an area with sufficient cellular signal (from the carrier of the SIM
card). How to determine this will be explained in 3.2.
Note: The communicator box is IP 55 rated, but should still be prevented from water or chemical
exposure to increase the lifetime of operation. Ensure that the location does not compromise the
equipment. The antenna may not be extended, but the cable from the communicator to the
controller may be extended up to 100m (300 ft) to allow for cellular signal to be obtained and/or
for the communicator to be located away from water or chemical hazards.
Site Requirements and Installation
The HydroGuard communicator is wall mounted. It is advisable to install it where the pool
operator and technician can easily view.
Hardware Installation
The following procedure will determine the required location of the communicator in order to
receive cellular signal.
A SIM card from a cellular provider will need to be obtained. The SIM card will need to allow
for data transfer using GPRS and should have a minimum data plan of 10 MB/month. Blue I can
provide you with a list of approved cellular providers in your area.
1. Remove the cover from the Expert Pool Communicator. Figure 2 displays the main
components inside the expert pool communicator.
2. Lift the cover from the SIM card holder and place the SIM card into the holder with the
notch facing up and to the right.
3. Close the holder and slide to lock in place. The card will only fit one way so do not force
it. If there is resistance, check for proper card orientation.
4. Attach the antenna line to the threaded connection on the bottom of the communicator
5. Place the antenna in a location that is expected to receive strong consistent cellular signal.
Do not modify the antenna/wire or connection to allow for this; move the communicator
if necessary (see below for more information).
6. Plug in the power to the communicator into a 110V or 220V AC plug
5
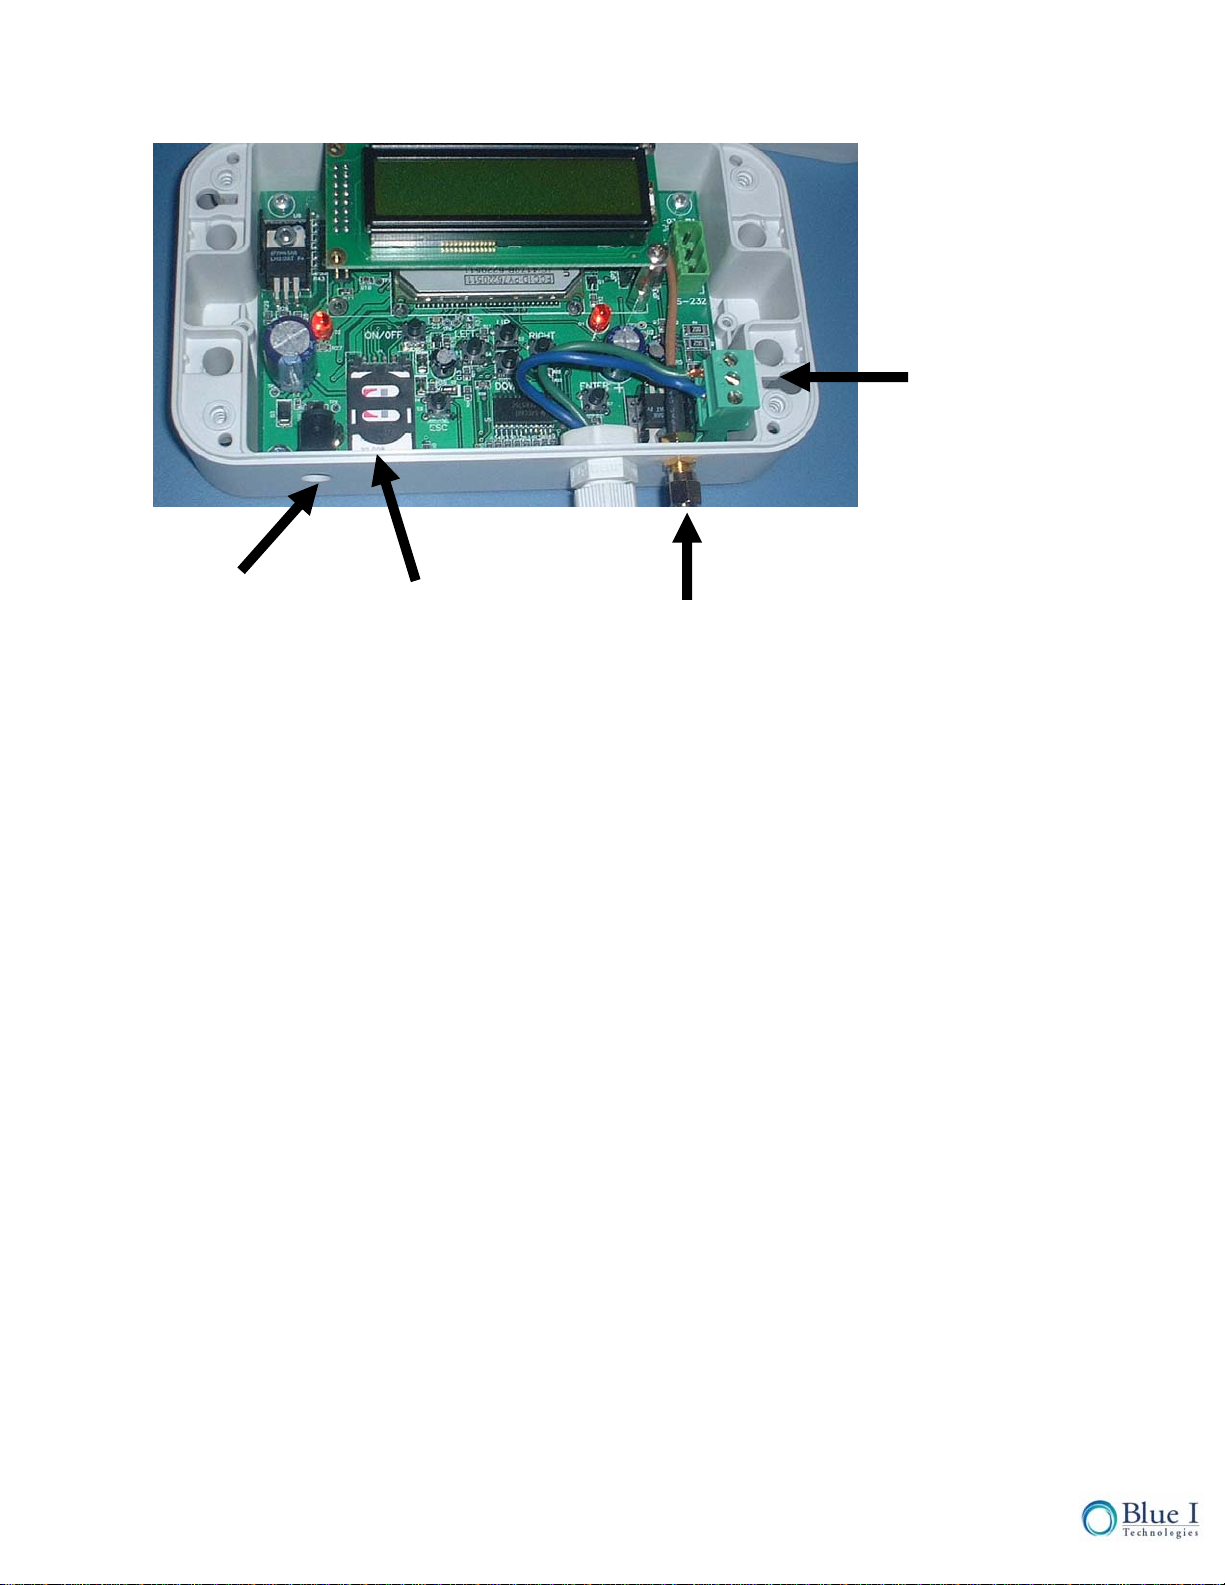
+
- RS-485
Connector
Power
connection SIM
Card Antenna
Figure 2: Expert Pool Communicator – Internal Components
7. Wait about one minute for the LCD screen to light and wait to see the screen that displays
“Reception %”
8. If needed, relocate the antenna and communicator until a consistent cellular signal with
greater than 10% is obtained. Reception strength of 40-50% is very good, so if possible
move the antenna to obtain signal strength in this range or higher, since low reception
strength will result in inconsistent operation.
9. The communicator may be located up to 100m (330 ft) from the controller, because of the
RS 485 protocol. Make sure that the controller is less than 100m (330 feet) from the
communicator. If it is not, repeat step 9 keeping the communicator within 100m of the
controller.
10. Disconnect the power supply and mount the communicator to a stable wall
11. Connect one end of a 2-wire cable to the RS485 communicator terminal block on the
communicator. For example purposes, it is assumed that the wire colors are black and
white:
a. Connect the Black wire to the top (+) position of the communicator terminal
block
b. Connect the White wire to the bottom (-) position of the communicator terminal
block.
c. If multiple controllers are to be connected to the same communicator, continue
the two wires to the next controllers (“daisy-chain” together), up to a total of 5
d. The total wire length may not exceed 100m.
6

Turn off the power to the controller and connect the other end of the 2-wire cable the communication
terminal block on the controller board, with the black wire to the bottom (+) position and the white wire at
the top (-) position on the controller terminal block, as shown in
12. Figure 3. The wire may be extended up to 100m as needed.
13. Replace the communicator cover and secure with the supplied screws
14. Reconnect the power supply
+
-
Figure 3: Connection of RS485 wire to Controller Control Panel
Configuring the controller
1. Enter the technician menu
a. Press Scroll
b. Press Up and down together
2. Press Scroll until “Address” appears
3. Set the Address to 1
a. Press Enter
b. Enter the technician password
c. Press Enter - twice
d. Press down until 1 appears
4. If multiple controllers are connected, assign addresses in order from 1 up to a maximum
of 5.
7

Co
The following outlines the messages that should appear on the LCD screen of the communicator.
ng is working properly.
b. Reception strength (%)
3. Con m 10% (50% is very good).
.The next screen will display
b. “APN” (which is the password required to access a cellular providers network –
use one)
5. Con
the con . If it is not, the communicator will not work
properly and the SIM card is likely not installed properly.
6.
b. # unicator and is used for tracking and
purposes
7. Thea.
G
quickly through:
MS and Checking Alarm
b. HG: 1
Confirm th ontroller connected to
the commu a le controllers are connected, it will show the address of each
ontroller for which a connection is present.
lem
ormation will continue to cycle through to
rovide a constant update as to the connection status.
nfirming Proper Operation
This will allow you to determine if everythi
1. Unplug the power supply and reconnect, and the LCD screen will light in after about a
minute
2. The first screen will display
a. The communicator software version
fir that the reception strength is above
4a. Op: “ cellular provider”
some carriers may not
firm that the name appearing on the screen is the carrier of the SIM card installed in
troller, which may be abbreviated
The next screen will display
a. Serial number
c. This is the serial number of the comm
troubleshooting
next screen will display
Connecting to GPRS site
8. The next screen will display
a. Checking for connected H
9. The next 3 screens will cycle
a. Checking in Data, Checking S
at a number appears after “HG:”. This is the address of the c
nic tor. If multip
c
If the screens do not display information similar to what is described above there is a prob
with that part of the connection process. The inf
p
8

Website and Monitoring
Website pert Pool website and the system requirements for its
www.poolexpert.net
This section describes how to use the Ex
use.
1. Go to and the login page will appear, as shown in Figure 4.
your username and password and press enter
password. You will need the serial number from the back of the communicator to
obtain the appropriate user name and password. first
2. Enter
a. Contact your authorized dealer or Blue I Technologies to obtain a username and
3. If the username and password are accepted, the site will load and the graph of the
pool at the first location will appear, Figure 5.
a. If you have access to multiple locations, select the site and pool from the pull
down menus
Figure 4: Login Screen of Expert Pool Website
9

Current Values and Pool Overview
The current values of the pool including: Total Cl, Free Cl, pH, ORP, Temperature, Turbidity,
and Flow Rate are displayed in a bar graph. If an optional feature is not installed (i.e. Total Cl,
Turbidity and/or Flow) the bar will be shown in gray. The current communicator connection
status and alarm information is displayed below the graph. Unlike the controller display, all
current alarms will be displayed; not just the one with the highest priority/importance. Lastly,
the links for additional information are contained on the left side of the window. The figure
below is an example of the pool overview screen.
Figure 5: Initial Pool Summary Display: Current Values, Alarms and Relay Operation
10

Historical Values and Graphical Features
Click on the History link to open the pool history graph and the graph will be displayed as shown
in Figure 6.
Note: In order to view the graph feature, your computer must have Active X installed, and you
must be using internet explorer. If Active X is not installed, please click on Tee Graph and
download and install the file. If you are not sure, try to view the graph and if no graph appears,
exit and install Active X.
The graph will show data for the past 3 days. To view data for a specific date, click on the book
icon and select a date and click ok and the data will be displayed for that date and the previous
week.
Select which data are to be presented by checking or un-checking the boxes at the bottom of the
graph. To display the actual data points, check the box marked “Click to turn Display Value
on/off”. If the display value is on (checked), clicking on a data point will show the number value
of that point.
Figure 6: Historical graph of Pool Conditions
By clicking on the graph and dragging a box around a potion of the data, you can zoom-in to get
more information about what happened during a particular time period as shown in Figure 7.
11
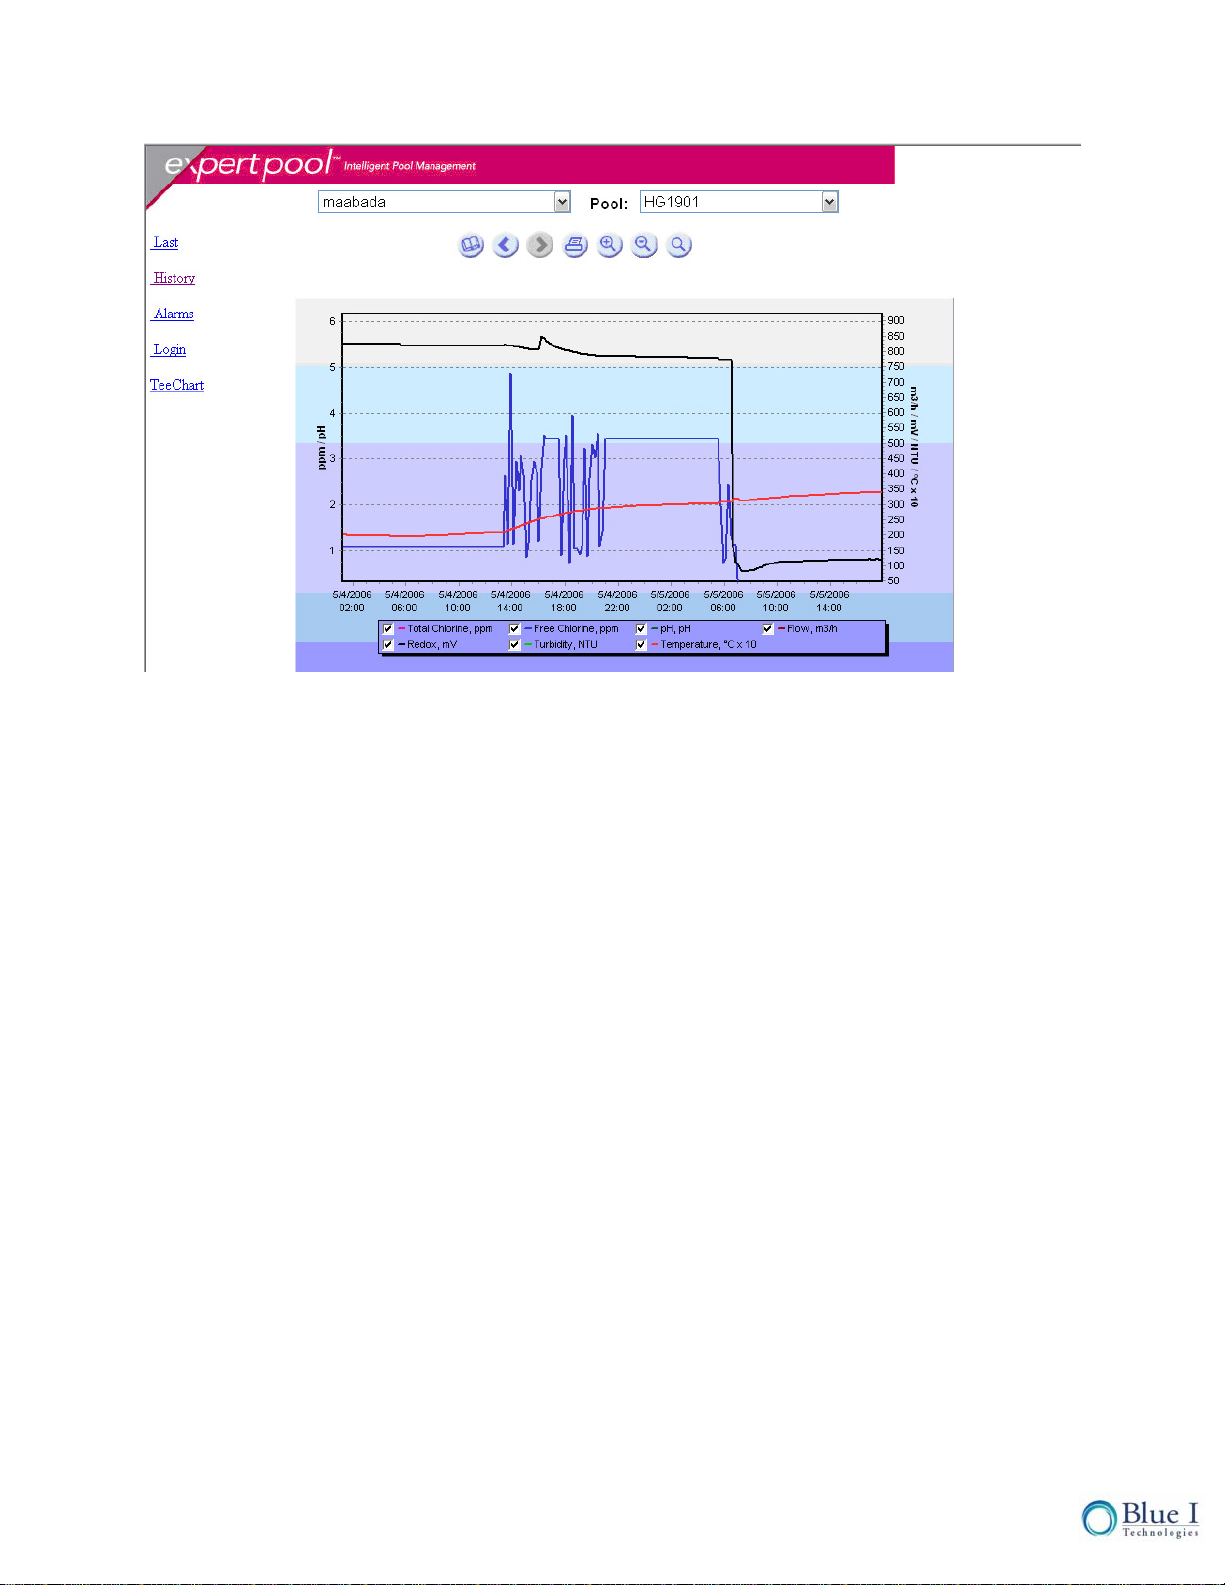
Figure 7: Zoom-in of Historical Graph
Alarm Information
Click on the Alarm link to open the pool alarm history table, Figure 8. The alarms will be
presented with start time, end time and duration. Alarms that have not been resolved will be
shown in red. If you have access to multiple sites or multiple pools within a sit, the site and pool
may be selected from the pull-down menus. The figure below is an example of the alarm
information page. Data may be sorted by begin date, end date, duration, description or device by
clicking on the column heading for which you would like to sort. The default is begin date.
12
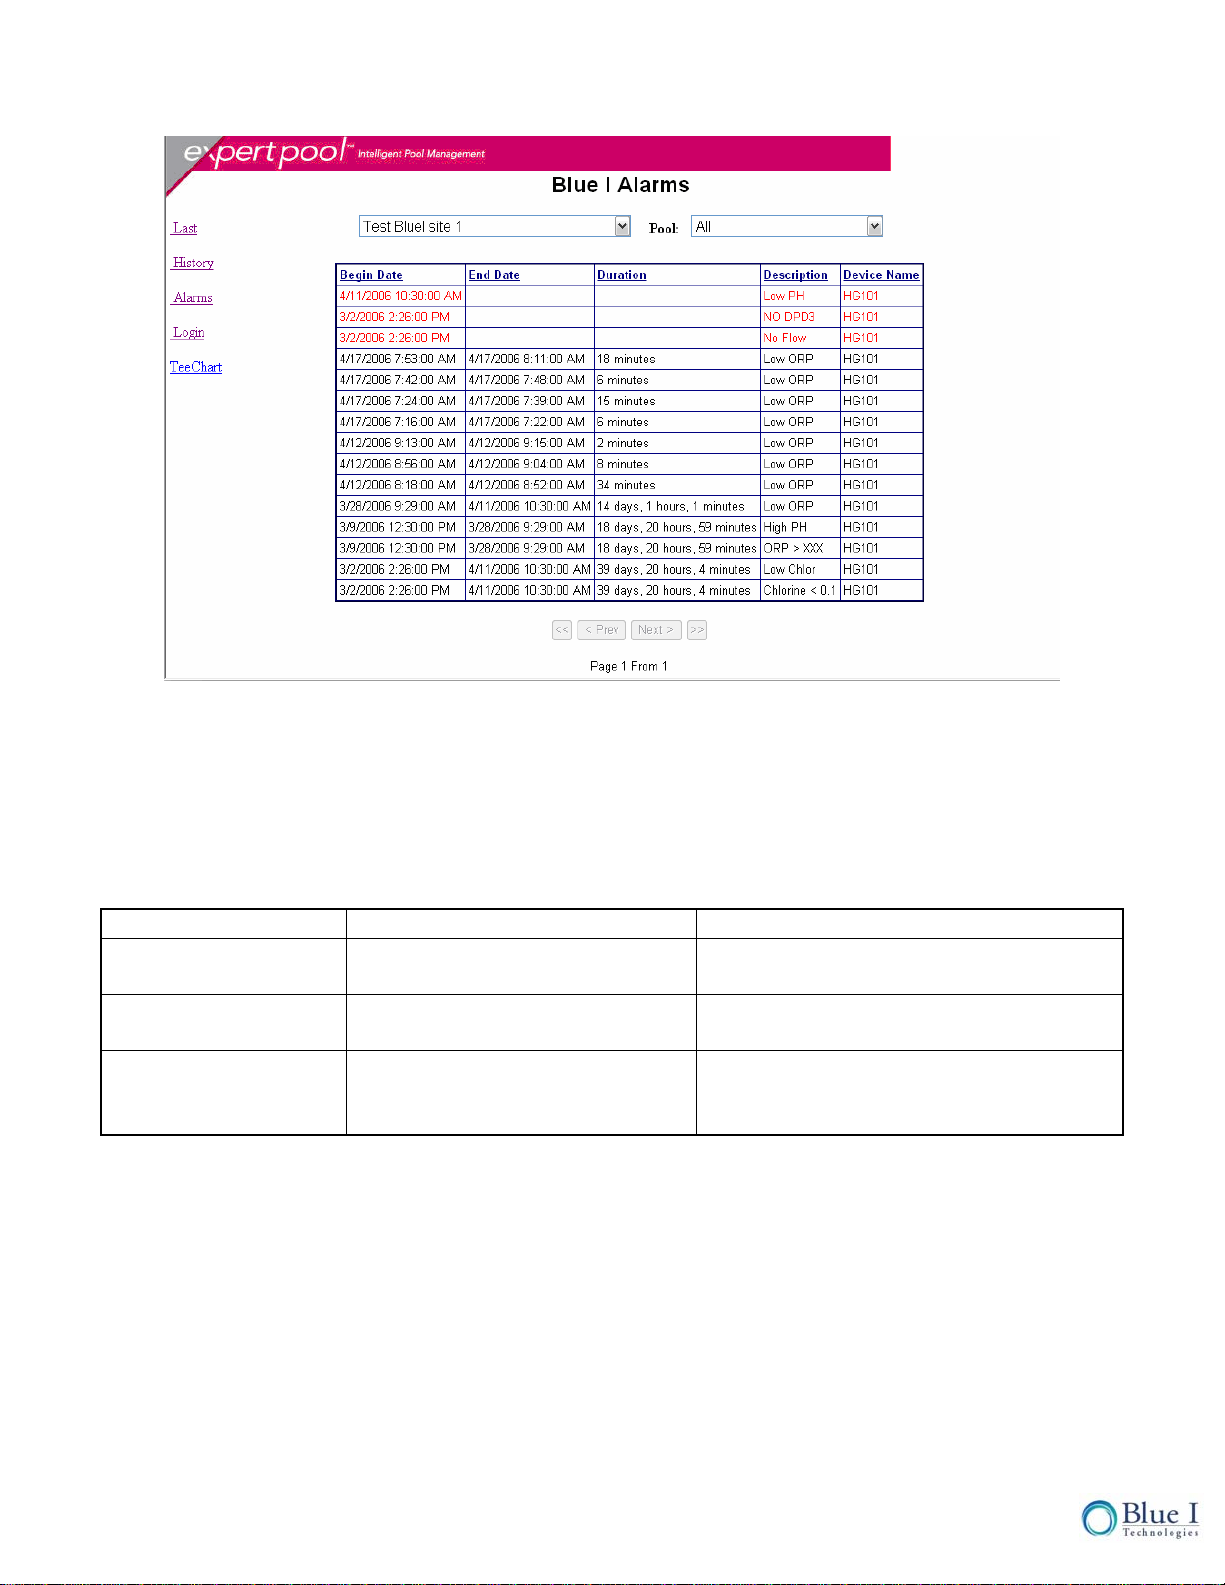
Figure 8: Alarm History Table
Troubleshooting
If there is a problem with receiving information from the controller/communicator, the following
issues should be checked first.
LCD Display Problem Corrective Action
Reception < 10% poor signal move communicator and antenna to
location with stronger signal
HG: "no number" No connection between
communicator and controller Check wire connection, switch wires
between RS485 terminal blocks
OP: "no carrier or
wrong carrier" SIM card not connected
properly
Check SIM card installation. Confirm
that SIM and provider have GPRS
ability active
13

No part of this publication may be reproduced, transmitted, transcribed, stored in a retrieval system, or translated n
TRADEMARKS AND PATENTS
YDROGUARD IS THE REGISTERE NOLOGIES LTD.
DISCLAIMER
LUE I TECHNOLOGIES LTD. DOES NOT ACCEPT ANY RESPONSIBILITY FOR ANY DAMAGE OGIES
into any language or any computer language, in any form or by any third party, without the prior written permissio
of Blue I Technologies Ltd.
H D TRADEMARK OF BLUE I TECH
PATENTS ISSUED AND/OR PENDING AT THE TIME OF THIS PRINTING
B
CAUSED TO ITS PRODUCTS BY UNAUTHORIZED PERSONNEL. USE OF NON-BLUE I TECHNOL
REAGENTS AND/OR REPLACMENT COMPONENTS VOIDS ALL WARRANTIES
14
Table of contents


