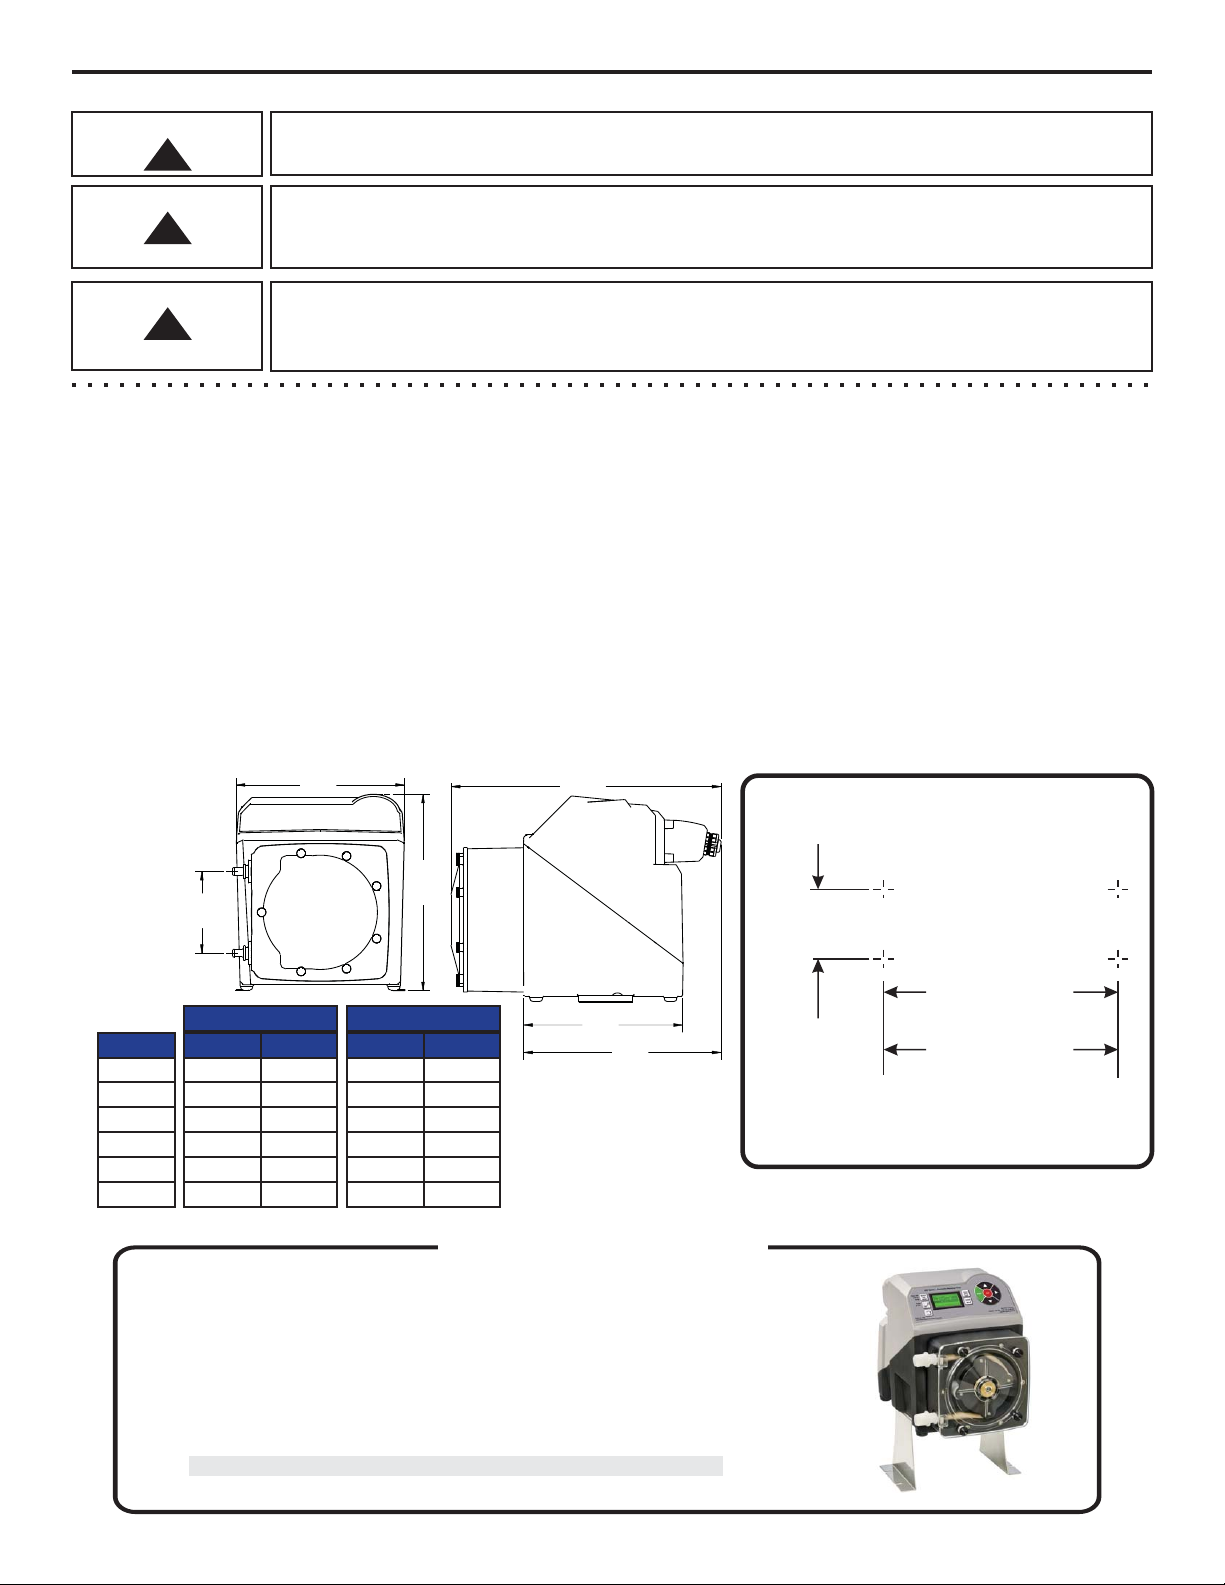
Blue-White industries A3V series User manual


This manual suits for next models
1
Other Blue-White industries Water Pump manuals

Blue-White industries
Blue-White industries FLEXFLO A2P Series User manual

Blue-White industries
Blue-White industries FLEXFLO A1A Series User manual

Blue-White industries
Blue-White industries flexflo A-100N User manual

Blue-White industries
Blue-White industries ProSeries Chem-Feed CFPS-1 User manual

Blue-White industries
Blue-White industries CHEM-PRO PROSERIES CD3 Operating instructions

Blue-White industries
Blue-White industries flexflo A-100N User manual

Blue-White industries
Blue-White industries flexflo A-100NV User manual

Blue-White industries
Blue-White industries FLEXFLO M1 Series User manual

Blue-White industries
Blue-White industries ProSeries Chem-Feed CFS-1AA-XAAA User manual

Blue-White industries
Blue-White industries CHEM-FEED MD1 Series User manual


Popular Water Pump manuals by other brands

Sandpiper
Sandpiper ST1 Service & operating manual

Graco
Graco 25T818 Instructions, Repair and Parts

Oase
Oase Optimax 10.000 operating instructions

EINHELL
EINHELL GC-GP 6538 Original operating instructions

Sealey
Sealey Power PRODUCTS TP96.V2 instructions

Pfeiffer Vacuum
Pfeiffer Vacuum HiPace 2300 operating instructions


Drummond
Drummond 63892 Owner's manual & safety instructions

GORMAN-RUPP PUMPS
GORMAN-RUPP PUMPS 80 Series Installation, operation, and maintenance manual with parts list

GORMAN-RUPP PUMPS
GORMAN-RUPP PUMPS 80 Series Installation, operation and maintenance manual

Fieldmann
Fieldmann FVC 2001-EK manual

Pentair
Pentair STA-RITE owner's manual

Wilo
Wilo Sub TWU 3-HS Series Installation and operating instructions