BlueChip AXON NGC 77 User manual

TABLE OF CONTENTS
Features of the AXON ............................................................................................................... 8
How to use the Hold Pedal........................................................................................................ 9
How to use the Mono Input....................................................................................................... 9
How to use the optional sound module ................................................................................... 10
First settings............................................................................................................................. 10
How to install the guitarinterfaceand the pickups ................................................................. 10
How to connect your MIDI equipment.................................................................................... 10
How to mountan AXON in a 19" rack.................................................................................. 11
AUDIO OUTPUT of the optional sound module................................................................... 11
Reloading the defaultsettings.................................................................................................. 11
Display usage........................................................................................................................... 11
Global Parameter..................................................................................................................... 12
BASIC CHAN................................................................................................................ 12
PBEND RANGE............................................................................................................ 12
SEND PBDRG............................................................................................................... 13
NOTE OFF L ................................................................................................................. 13
LOCAL MODE.............................................................................................................. 13
VU METER ................................................................................................................... 14
TUNE BASE.................................................................................................................. 14
TUNING AID ................................................................................................................ 14
GUITAR NO .................................................................................................................. 15
Sensitivity....................................................................................................................... 15
GUITAR NUMBER/ NAME ......................................................................................... 15
COPY SCRATCH.......................................................................................................... 15
COPY ARRANGE......................................................................................................... 16
COPY SEGMENT ......................................................................................................... 16
COPY CHAIN ............................................................................................................... 16
SEND SCRATCH ..........................................................................................................17
SEND ARRANGE .........................................................................................................17
SEND ALL..................................................................................................................... 17
REC. SCRATCH............................................................................................................ 17
REC. ARRANGE........................................................................................................... 17
RECALL...................................................................................................................... 17
ADC MONITOR............................................................................................................ 17
How to store Scratch versus Arrange data............................................................................... 18
Scratch Mode...........................................................................................................................18
STRG MODE.................................................................................................................19
HOLD MODE................................................................................................................19
EDTSEGM.................................................................................................................... 20
SCRATCH NAME......................................................................................................... 20
Arrange Mode.......................................................................................................................... 20
STRG SPLIT.................................................................................................................. 21
FRET SPLIT .................................................................................................................. 22
PICK SPLIT 1 and 2 ...................................................................................................... 22
EDTSEGM....................................................................................................................
23
ARRANGE NAME....................................................................................................... 23
Segmentparameter................................................................................................................... 24
PROGRAM.................................................................................................................... 24
VOLUME....................................................................................................................... 24
TRANSPOSE................................................................................................................. 24
QUANTIZE.................................................................................................................... 24
PAN POS........................................................................................................................ 25
PAN SPREAD................................................................................................................ 25
REVERB ........................................................................................................................ 26
FINGR PICK.................................................................................................................. 26
VLCTY SENS................................................................................................................ 26
VLCTY OFFS................................................................................................................ 26
TRIGGER LEV.............................................................................................................. 26
PICK CTRL ................................................................................................................... 28
PIPOSITION ................................................................................................................ 28
PIVALUE...................................................................................................................... 28
P2 POSITION ................................................................................................................ 28
P2 VALUE...................................................................................................................... 28
Chain Mode ............................................................................................................................. 29
Step................................................................................................................................. 29
Mode .............................................................................................................................. 29
TYPE and VALUE ......................................................................................................... 30
Appendices .............................................................................................................................. 31
MIDI channel/ string assignment................................................................................... 31
How to change a preset via MIDI IN ............................................................................. 31
Troubleshooting ............................................................................................................. 32
Specifications ................................................................................................................. 36
SYSTEM EXCLUSIVE IMPLEMENTATION............................................................. 37
MIDI IMPLEMENTATION........................................................................................... 38
GENERAL MIDI (GM) tables....................................................................................... 39
GENERAL MIDI Sound Set Groupings........................................................................ 39
GENERAL MIDI Sound Set.......................................................................................... 39
GENERAL MIDI Percussion Set................................................................................... 40
GENERAL MIDI controller table.................................................................................. 41


FRONTPANEL
Level of the MONO input
The LCD-Display is rich in contrastand shows thecurrentpresets as wellasthedifferent
parameters.
Parameter selection; the+ buttonmoves thecursor to the next,the - buttonmoves thecursor
to theprevious parameter.
The Value + , - buttons are used eitherto select Sratch,Arrange or Chain presets, or to edit
the parameter values.
Access to GLOBAL parameters.
Switches the AXON to the ARRANGE mode withaccess to 64differentARRANGE presets
aswell as the possibility to editthem.
The STORE button is used for saving and copying.
The OK button serves to confirm the text at the display, to leave and call up submenusas well
asto confirm the saving and copying.
Change to the CHAIN mode in order to call up a pre-programmed preset series withthechain
footswitch. The chain parameters are also edited in this mode.
Change to the SCRATCH mode. 128different SCRATCH presets are available. Moreover
access to arrangement possibilities.
Power ON/ OFFswitch.

Back Panel
Input for power adapter 12V,1500mA, AC.
MIDI OUTjack.The AXON sends out its MIDI data at thisjack.
MIDI INjack.The AXON receives program change commands as wellas system exclusive
data via this jack.System exclusive data can also be sent to the optional sound board SB-676
whichis sold by BLUE CHIP,too.
MIDI THRU jack. All data arrive via MIDI IN and aretransmitted furtherthrough this jack.
At the unused pins of this jack,the stereo audio signals ofthe Sound board areavailable. For
thatpurpose, use the special cable whichis included withthe Sound board.
Before turning on the AXON, this switch has to be set to BASS or LEAD guitar.
CHAIN footswitchjack.It enables you to activate pre-programmed preset series attheNGC
77respectively presets atthe NGC 60with an optional footswitch.
HOLD footswitchjack.The footswitch belongs to the delivery of the AXON and can be used
for different functions ofthe hold mode whichcan be programmed.
INTERFACE jack. Please connect the 13pin cable ofyour guitar orbass interface to this
input.
GUITAR OUTjack. Thepickup signals ofyour guitar can be unchanged transmitted from this
jack.
MONO INjack.Itenables you to connect monophonic signals with line or microphone level.

Features ofthe AXON
YourAXON is fittedwithanovelmethod ofpitchrecognition
working so quicklyand safelythatyoucan use yourAXON also
witha bass guitar. Atpresent,no comparable device offersyou
thisfeature.
The AXON is uniquebecause itrecognizes the pick positionof
each string, and the AXON offersyou new possibilitiesto
control yourMIDI instrument.
Your AXON is able to reduce the MIDI outputdata stream asfar
aspossible toa minimum.Accordingto thesetting of thepreset
parameter, furtherreliefs are the result.At previous devices,
Pitch Bend data load the MIDI interfacestrongly.
If youdid not work witha comparable device before,youwill
get to know some terms which are perhaps new for you.
Therefore, we would like to explain here the extraordinary
possibilities you can use withyourAXON.
The most interestingand the most extraordinary featuresof your
AXONareundoubtedlythedifferentsplitpossibilities.
You can set a string split in order to divide the six stringsof your
guitarintotwo parts. In each part,yourMIDI instrumentcould
give out another sound.For thatpurpose, you will fixa split
point- in thiscase a stringnumber- in order toset the border
between thetwo parts.
Assign a fret split in order to divide the neck of yourguitarinto
two parts.
Think of an accord accompaniment which youplay in low-
pitched registers withan optional sound. Then you change toa
solo which is played in higher notes with another sound.In this
case, the split point is a fretnumber.
You get an impressive play by the possibility ofpick splitting.
Two split points can be defined to split the pick range between
the pickup and theneck intothree pick regions. Anindividual
sound can be assigned to each of these regions.
At each of the three split possibilities, you can additionallyuse
the pick control function.You can change the value of each
MIDI controller withthe pick position. Keyboard players often
use a modulation wheel in order to produce vibrato or filter
effects.With the pick control functionyou have the same
possibilities, only by changing the pick position.
AXON NGC 77- VERSION 4.00

How to usethe Hold Pedal
The Hold Pedal can be used toplayan additional,thirdsound of
yourMIDI instrument.In this case, the currentsplit becomes
temporarily ineffectiveand you can use another sound.All notes
whichsound while releasing thepedal will sound untilthenext
pressure on the Hold Pedal. Play a chord by depressed Hold
Pedal. Without mutingthe chord, you release the Hold Pedal
now and the Hold sound willbe locked. You can playagain with
the currentpreset to yourchord accompaniment. Afterpressing
once more, you can play a new chord,theold one willbe
replaced by a new one. Or you simply turnoff the chord while
pressing once the Hold Pedal shortly withoutplayingat that
time.
Additionally, the pick control functioncan be used aswellfor
the Hold sound.
Afterpressing the Hold Pedal, youcan also send a pre-
programmed MIDI controller to the MIDI instrument.This
could be the controllerNo. 64(Sustain),the controllerNo. 65
(Portamento) or even the controller No. 93 (Chorus).
Afterpressing the Hold Pedal you are moreover able to freeze
the already played tones in order to playonly on yourguitar.
Then, all other MIDI sounds are suppressed. You can also realize
abypass functionin order to hear temporarily yourguitarsound
alone.
How to usetheMono Input
All instrumentswithpickups can be directly connected by ajack
cable to the MONO inputof yourAXON. At the frontof the
AXON is the potentiometer which helps you to set the
sensitivity of the MONO input. Please consider thatnot all
features of the AXON are available when usingtheMONO
input.The extremely fast pitch recognition is inactive. Inthis
case you work witha pitch recognition which isa little bit
slower. But it iscomparable to devices which were already
offered by competitors. String Split, Pick Split and the Pick
Control functionare no longer available.
The Fret Split depends now on the pitch because yourAXON
does not know anything about your frets.Think of a violin or
think of instruments which you have to connect by a
microphone. There are no limits to your imagination but you can
not foresee the results in each case. We had already achieved
good results using guitar and bass.
AXON NGC 77- VERSION 4.00

How to usethe optional sound module
If your AXON is fittedby an embedded sound module, 128
GENERAL MIDI SOUNDS in excellent qualitywill
immediately be available foryou.Additionally,the sound
module has an installed reverb as well asa chorus effectwhich
can be called up by the AXON. Combined witha sequencer or
similar devices you have access to 480 sounds. Furthermore, 11
differentdrumkits are available. The complete effectrange
consists of 11reverb types, 11chorus types aswell as 42
variation programmes. Please take details from theenclosed
description of the sound module.
If you use a sequencer program, please connecttheMIDI OUT
of yourAXON to the MIDI IN of yourcomputer, and the MIDI
IN of yourAXON to the MIDI OUT of the computer. In this
case the GLOBAL parameter "LOCAL" on the AXON has tobe
LOCAL ON.
First settings
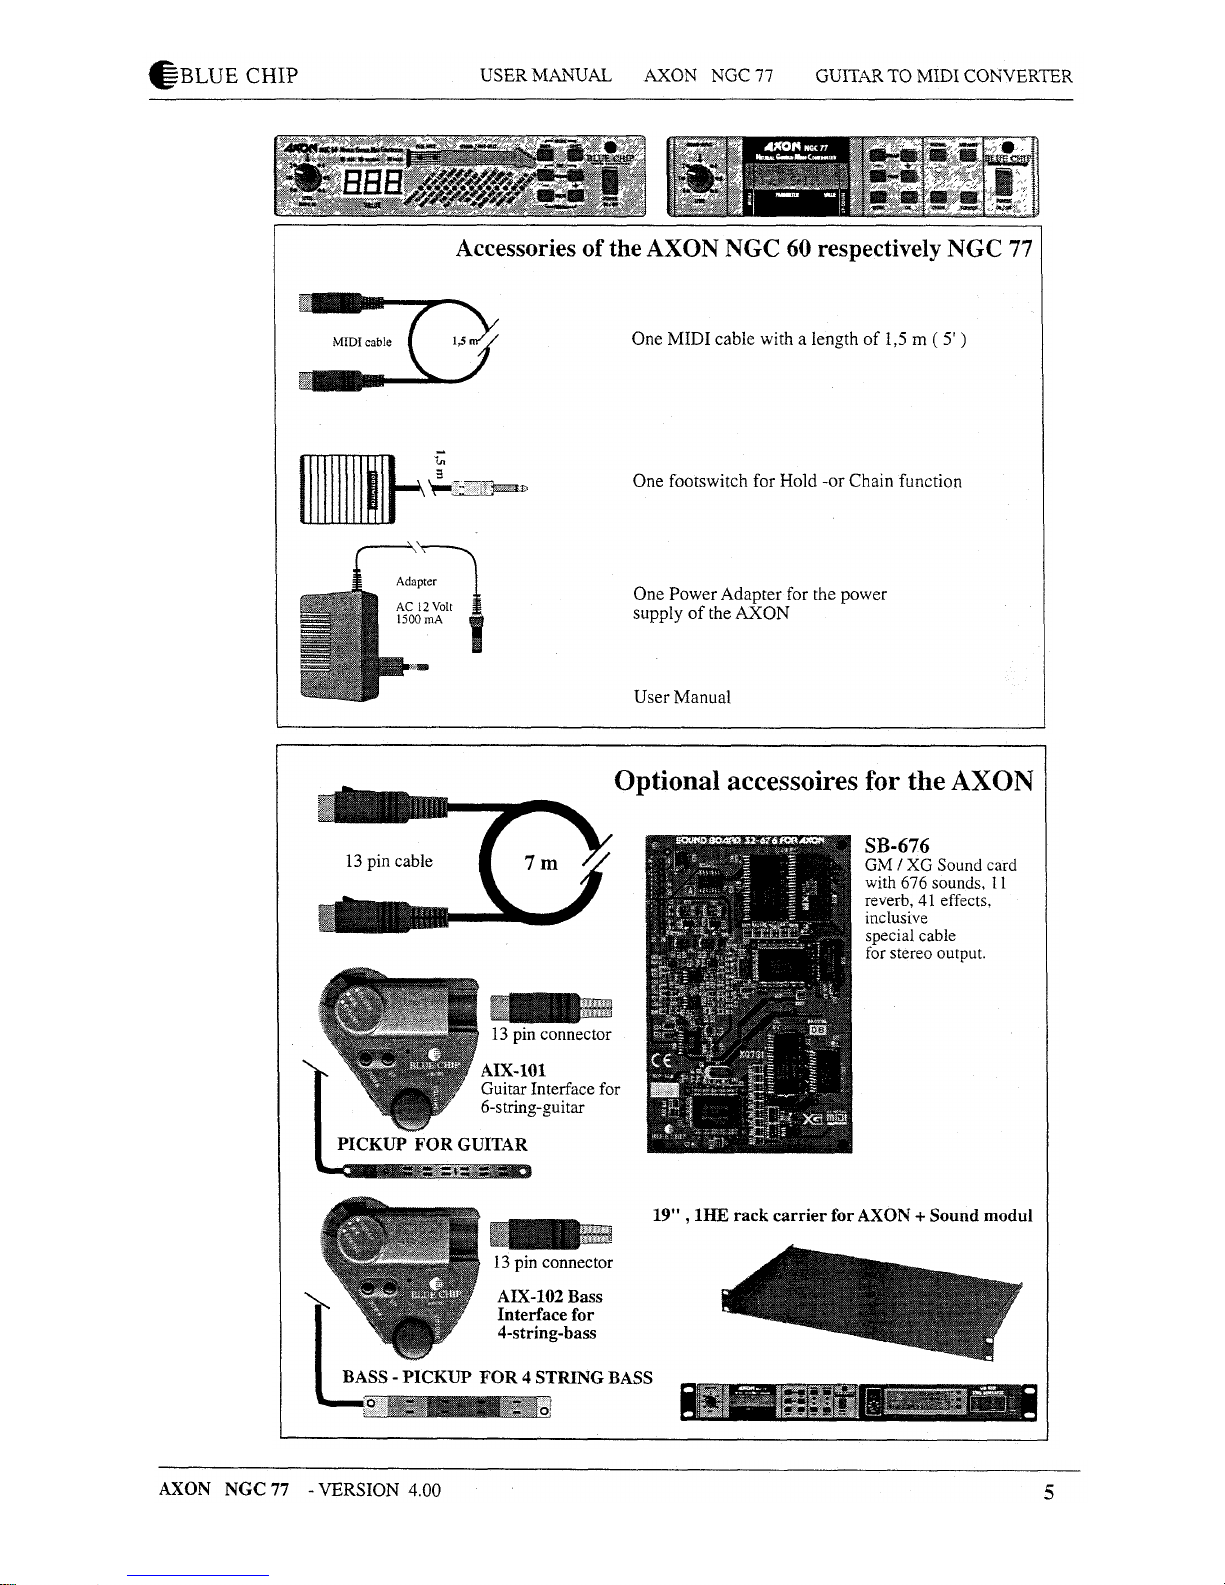
How to install the guitar interface and the pickups
For thatpurpose, please read the installationinstructionofyour
guitarinterface.
How toconnect your MIDI equipment
Please connect the MIDI OUT of yourAXON to the MIDI IN of
your MIDI instrument. For thatpurpose, use a commercial 5 pin
DIN cable (MIDI cable).
If you use a sequencer program, please connect the MIDI OUT
of your AXON to the MIDI IN of yourcomputer, and the MIDI
OUT of the computer to the MIDI IN of the sound module.Your
synthesizer should be polyphonical (minimum 7 voices) and has
to handle up to six or seven MIDI channels. Please adjustyour
synthesizer so, that it receives channels 1 to 7. (The channels 1-6
are for each string of your guitar and the channel 7 isfor the
HOLD PEDAL function). After you connected your synthesizer
with the AXON, please switch on the synthesizer first and wait
untilit had initialized before starting the AXON. Afterturning
on the AXON, it sends the most important information to the
synthesizer in order to make the configuration aseasy and quick
aspossible. Not all synthesizers accept these information.
Therefore, you should definitely check the Pitch Bend range at
your synthesizer.

How to mount an AXON in a 19" rack
You can mount yourAXON ina 19"rack byusingthe optional
installation frame. In order to fix,use only the original screws. If
you preferanother form of mounting,remove firstthe rubber
footfrom the bottom of the AXON. Please use only screws of
the type M3 to fixthe 19"rack withthe bottom of the AXON
and take care that the screws do not reach longer than4 mm into
the AXON. Longer screws can damage theinside of the device.
AUDIO OUTPUT ofthe optional sound module
The AUDIO OUTPUT isrealized by the unusedpinsof the
MIDI THRU socket. For thatpurpose, take the special cable
which is included withyour AXON.
Reloading the default settings
Keep the SCRATCH key pressed whileturningon theAXON.
For a short time you will see"ALL DATAINITIALIZED" inthe
display. Beware thatall previous presets thatyou made willbe
lost in thiscase. If necessary, store yourdata witha Sysex
Dump.
Display usage
The possibilities offered by the AXON requirea large numberof
parameters, that can be programmed according to yourwishes.
In order to get accustomed quickly to the usage of theAXON
here you willfind some general information about the preset
structure.
Each
of
the
four
MODEs (GLOBAL, SCRATCH
.
ARRANGE
and CHAIN) consists of several parameters whichcan be called
up in the display by pressing the + or - parameter keys. A single
+sign on the right edge of the display shows thatyou are in the
uppermost
lineoftheparameter
list.
Asingle-sign
characterizes the end of a parameter list. Please use the - key in
order to get to the previous parameter. A +/-sign shows thatyou
are somewhere within the list; the + and - keys help youto go
up or to go down in the menu.
Someparameters include submenus with further parameters.
You recognize a reference to a submenu by an arrow pointingto
the bottom. It is positioned on the leftedge of the display. Press
the OK key to change to the submenu. In the submenu, you can
move again withthe +- keys. There could be an arrow on the left
edge ofthe display pointing at the top. It signalizes thatyou can
press the OK key in order to leave the submenu, and returnback
to thepoint where the submenu was called up.

Global Parameter
Ifyouuse yourAXON for the first time youhave to checkthe
settingsof some global parameterin correspondence to your
MIDIinstrument:
Please check thebasic MIDI channeland tuneyourguitarwith
theembedded tuningaid ofyourAXON. If you are in a hurry
and if you wouldlike to play immediatelywithyourAXON, read
theexplanations in the sectionsBASIC CH and tuningof the
guitar.You mustensure thatthe connectedMIDIinstrument
receives Pitch Bend Range information,otherwise youset this
valueat yourMIDI instrumenton 12. Then youleapover all
furtherparameters for the presentand you can testthe factory
presets.
In order to change one of the GLOBAL parameter, switchyour
AXON into the GLOBAL mode. Please press firstthe GLOBAL
key. If the GLOBAL LED lights,yourAXON is in the GLOBAL
mode. With the +- keys, youmove the blinkingcursorin theline
in which the desired parameter is shown. Please changethe
shown value withthe +- keys. Ifyouare satisfiedwiththe
setting,leave the GLOBAL mode and change again to the
SCRATCH, ARRANGE or CHAIN mode by pressing the
corresponding key. You seethe currentmode on the appropriate
LED.
BASIC CHAN
Basic MIDI channel 1-10
Your AXON needs maximal seven successive MIDI channelsin
order to control a connected MIDI tone generator. One channelis
necessary for each string and an additionalchannelis requiredif
you would like to use the special functionof the Hold Pedal.
With the basic MIDI channel you assign the firstof seven
channels which will be used by yourAXON. All furtherchannels
follow implicitly.
PBEND RANGE
Pitchbend Range OFF/I...24
Since your connected MIDI instrument should convert the pitch
changes ofyour guitar correctly, you have to set the Pitch Bend
Range of your MIDI instrument to the same value asthis one on
the AXON. The value shows the maximum number of semitone
steps that can be converted with Pitch Bend information,without
triggering a new note on your MIDI instrument. IfyourMIDI
instrument allows, this value should be set to at least 12.For bass
guitars it isespecially recommended to set iteven higher, to 24.
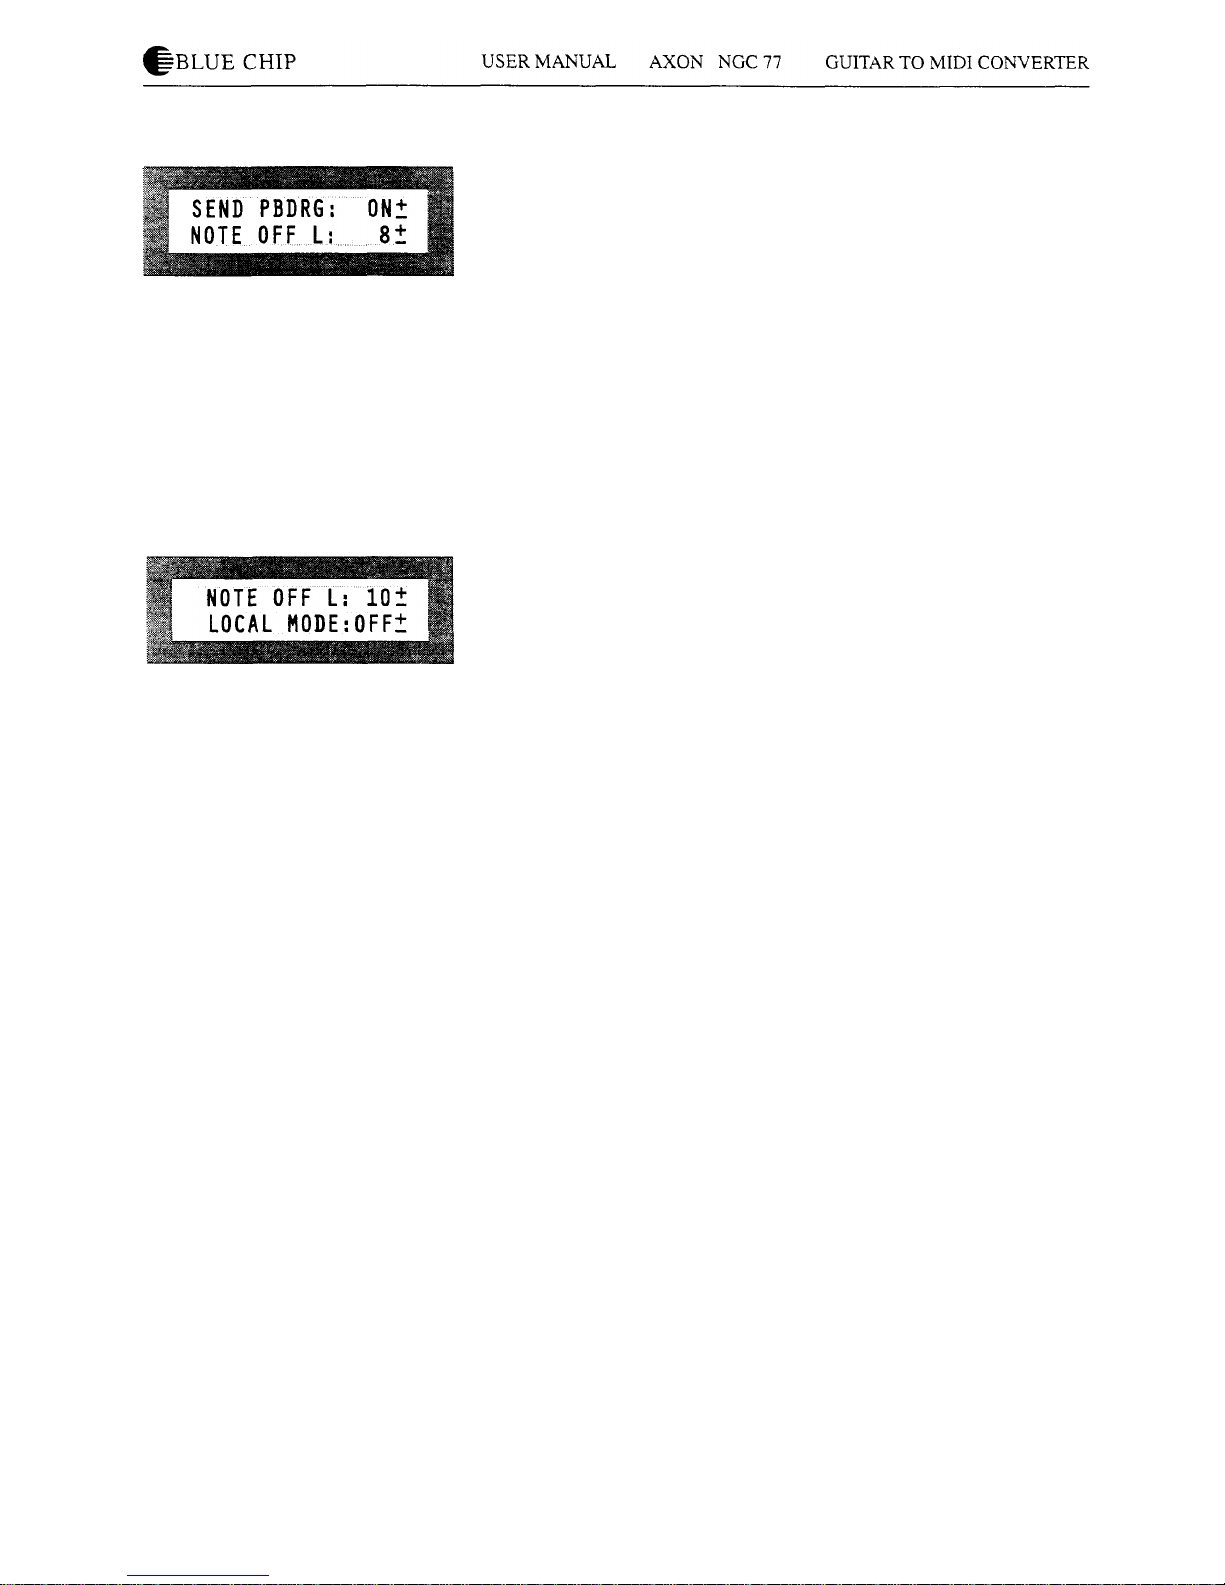
SEND PBDRG
Send Pitchbend Range ON/OFF
This parameter has to be ON if yourMIDI instrumentstores
Pitch Bend Range in each preset separately. Inthiscase the
AXON sends the PitchBend Range informationaftereach
program change immediately again. This isnecessary by most
KORG synthesizers, and probably by some other manufacturers.
IfyourMIDI instrumentsstore Pitch Bend Range globally, just
like the AXON itself, this parameter should be OFF.If yourare
notfamiliar withyourMIDI instrument,you shouldset this
parameter to ON. Then yourAXON willpossibly give outsome
unnecessary MIDI data butyouwillhardlynotice it.
NOTE OFF L
Note off limit 10...30
This level sets thepointon the decay envelope where theNOTE
OFF event willbe sent. The higherthe setting,the shorter the
note will be; the lower thesetting,thelongerthe note willbe
sustained.
LOCAL MODE
Local Mode : ON/OFF
OFF:
The MIDI data thatare received by yourAXON are directly
transferred to the embedded sound module. Programm change
commands do not influenceyourAXON. Naturally,you can
keep changing the presets of yourAXON withthe buttons.
Concerning the receive, your AXON is now like a GM-expander.
This functionaddresses especially to persons who work witha
sequencer: All MIDI data, the AXON generates duringplay, are
exclusively given out via MIDI OUT. The sequencer will send
datathrough its MIDI OUT. Please connect the MIDI OUT of
your sequencer to the MIDI IN of your AXON in order to direct
itto yourembedded sound module. The AUDIO OUT signals
are transferred via the non-used pins of the MIDI THRU of your
AXON. Forthat purpose, use the special cable included
with
your AXON.
ON:
Ifyou don't use a sequencer, you should set this parameter to
ON. Your AXON controls now the embedded sound module and
programme change commands influenceyourAXON.
Additionally, the general MIDI sound name is shown while
editing the segment parameters. Of course, your AXON keep
sending data via MIDI OUT.Then, you can connect futherMIDI
instruments to the MIDI OUT.Ifyou do not have an embedded
sound module, you should set LOCAL on ON in order to
benefitfrom preset changes via MIDI IN.
VU METER
Level Meter ON/OFF
When strings are played,the display shows 6 small VU-Meters
for six strings. The normal display appears again whenthedecay
reaches -40dB. This functioncan be suppressed by turningthe
VU-Meter OFF(key).
TUNE BASE
Tune Base -99...+99
YourAXON generates MIDI sounds relatingto a tunebase of
440Hz plusa deviation which isset by this parameter. If your
musiciansplay instrumentswhich can only be tunedwithgreat
effort(for example a piano), itisbetter, youfityourAXON to
this situation.We recommend the following procedures if the
tunebase deviates from 440 Hz: You tunefirst the open A string
carefullyby ear on the basis of the instrument (for example a
piano).Then, press the OK button.At the display, the following
textappears: "PICK THE OPEN A STRING". While playing
now the open A string,your AXON analyses the coming
vibrationand sets itselftheTune Base Parameter at thecorrect
value. Naturally,you can change the value also with the +-
buttons,ifyouknow exactly the value. Then you tunethe
remaining strings ofyour guitarwiththe embedded tuningaid of
yourAXON. If you playalone, you should set the tunebase on
the value0.
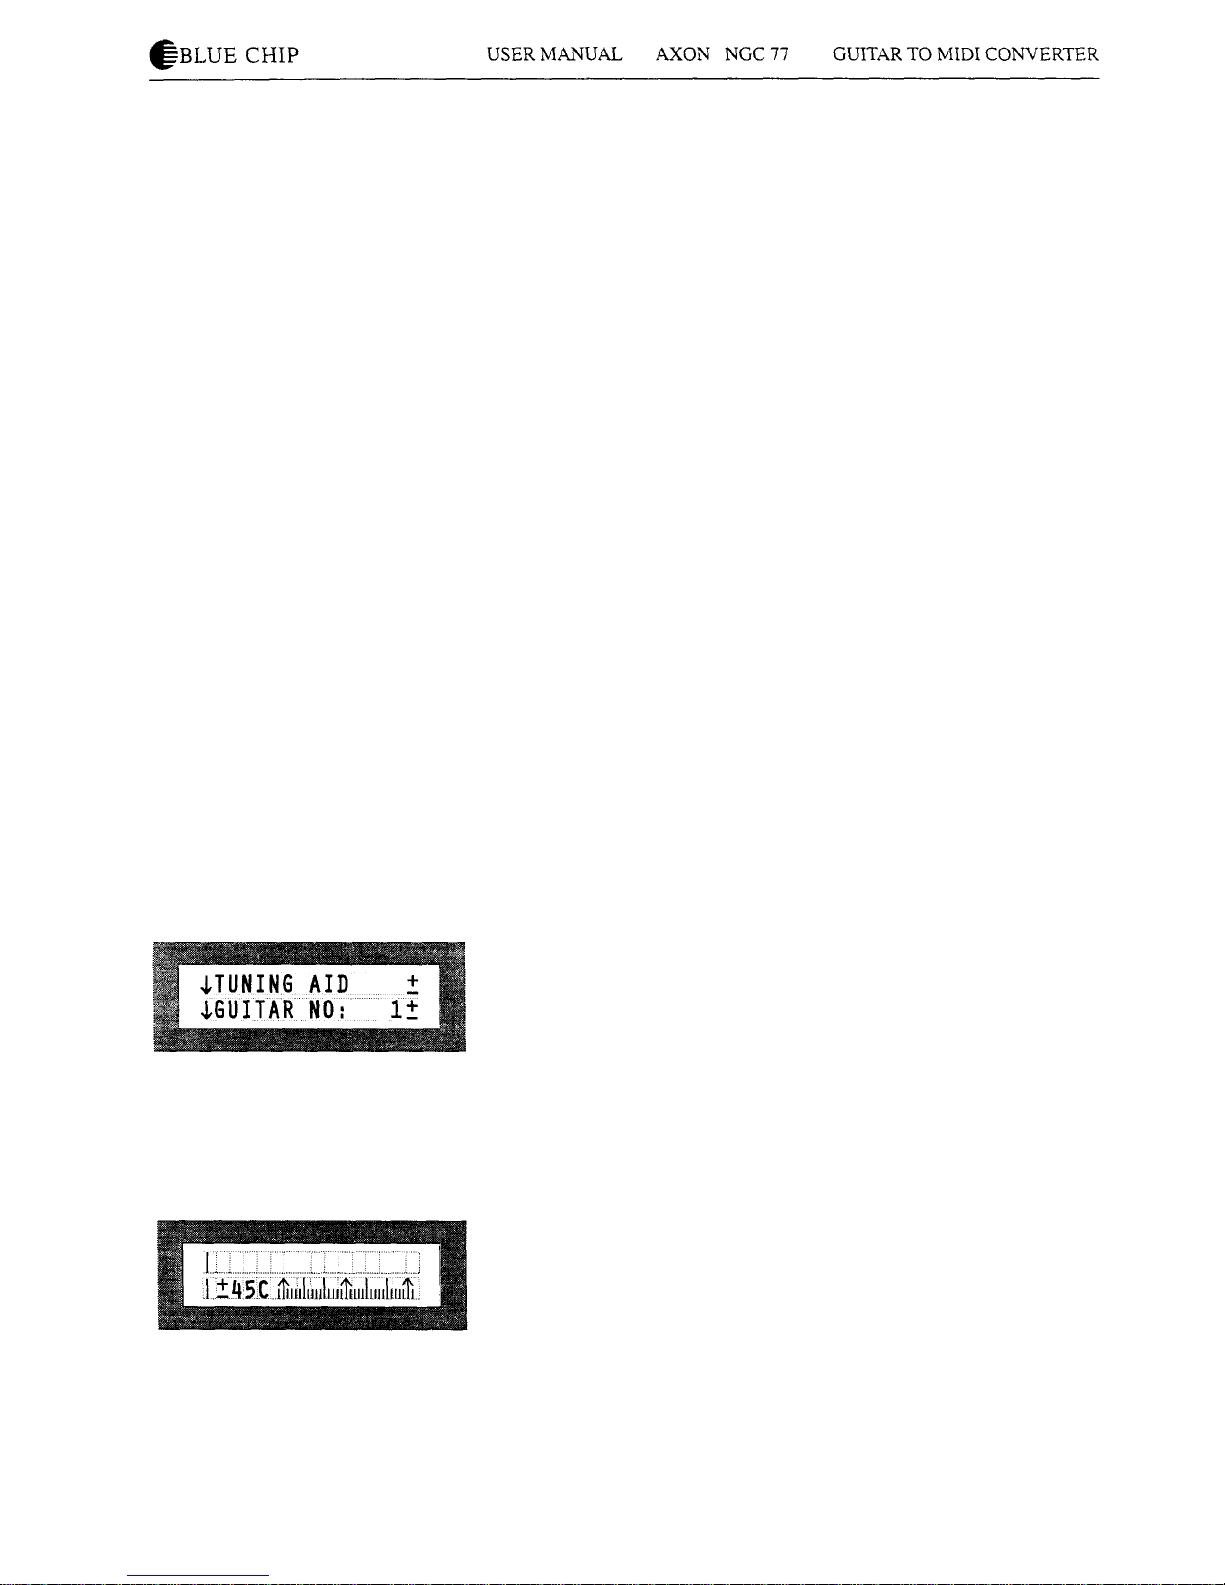
TUNING AID
How to call up the tuningaid
It is important thatyourguitaris tunedwithina certain pitch
tolerance, sothat the AXON can properly interpret MIDI pitch
values. Press OK. You will seea display similar to a chromatic
guitartuner. Tune each string so that the pointer is above the
middle arrow. The leftarrow of the tuningscale marks a
deviation of-45cent (0,45of a semitone), the right arrow
deviates +45 cents from the current tunebase. Ifthe Tune Base
Parameter ison 0,the middle arrow corresponds to a tuning
calibration of 440Hz. Ifthe Tune Base Parameter isset for +50
for example, the middle arrow correspond to a pitch that is a
quarter step higher than 440 Hz. Note: Tuning aid isa feature
that will allow to tune your guitar to the AXON quickly and
simply, whereas Tune Base allows you to tunethe AXON to
your guitar.

GUITAR NO
The AXON allows youto set preferencesfor upto fourdifferent
totallyseparate guitars or bass guitars. If for example, you
changeguitars duringa concert,you don't have to changeall the
sensitivitysettings for thatinstrument,you merely changeto the
appropriate guitarnumber (name) in yourAXON.
Sensitivity
The AXON converts audio signalsintodigitalinformation.They
are very sensitive to overloading. Butyou shouldn'tdrive your
AXON too low. Your AXON helps you to set the sensitivity
optimally. Press the OK button.The stringnames are now shown
at the display. Play on yourguitarand use all strings. You should
play all strings loudly, even at least 8 times. Later on those
strings are faded out on the displaythatare alreadyadjusted.If
yourAXON adopted the optimal settingfor all strings, the
followingtext appears on the display:
ALL ADJUSTED
PRESS OK.
You can call upthisfunctionasoftenasyoulike, perhapsin
order to increase thesensitivitylater. For thatpurpose,you
repeat the above mentioned procedure, but youplay less
powerful on yourguitar. YourAXON will thenincrease the
sensitivity.Please consider thatyoucan overload yourAXON
later by playingloudly whichcan lead to faultyMIDI data.
GUITAR NUMBER/ NAME
Please scroll yourcursor withthe +/- parameter buttonsto the
line whichindicates the guitarname. Press the OK button,the
cursor flashes now over the firstletter. Change theletterwiththe
+/- value buttons. While pressing either the + or the - parameter
buttonsyou reach the next or the previous column. Program the
desired name letter by letter into yourAXON and leave the
menu with the OK button.
COPY SCRATCH
How to copy a scratch preset
Press the OK buttonand scroll your cursor withthe +/-
parameter keys in the line "SOURCE SCR:". Set withthe +/-
value buttonsthe desired scratch preset you would like to copy.
Change with the +/- parameter buttons to the line "DEST.SCR:"
and setwiththe +/-value buttons the target preset to which you
want to copy. Then scroll the cursor with the+ parameter button
in the line displayingthe following text "COPY: OK" and press
the OK buttonin order to start copying. Ifyou decide youdon't

wantto complete the copy, move the cursortoanotherline,and
press OK. This willreturnyou to the main Global Menupage.
COPY ARRANGE
How to copy Arrange Presets
Press the OK buttonand move thecursor withthe +- parameter
keys in the line "SOURCE ARR:". Set yourdesired Arrange
Preset with the +- value keys. Change with the +- parameter
buttons to the line "DEST. ARR:" and assign here the desired
target preset withthe +- value keys aswell. Then positionthe
cursor with the + parameter key to the line displaying the text
"COPY: OK" and press the OK button in order to start copying.
Ifyou decide you don't wantto complete the copy, move the
cursorto another line, and press OK. This willreturnyouto the
main Global Menu page.
COPY SEGMENT
How to copy segment parameters
Press the OK button and move the cursor with the +- parameter
keys in the line "SOURCE SGM:". Set the segment withthe +-
value buttons which you would like to copy. Change to the line
"DEST.SGM:" withthe +/- parameter keys and assign here the
desired target segment withthe +/- value buttons,too. Then set
the cursor with the + parameter key to the line displayingthe
text "COPY: OK." and press the OK button in order to start
copying. You can abort the functionby moving the cursor in
another line and hittingthe OK key: Then you are again at the
global menu page.
COPY CHAIN
How to copy a chain preset
Press the OK button and move the cursor to the line "SOURCE
CHN:" withthe +/- parameter keys. Set the preset whichyou
would like to copy with the +/- value buttons. Change to theline
"DEST. CHN:" with the +/- parameter keys and assign here the
desired target preset with the +/- value buttons, too. Then set the
cursor with the + parameter key to the line with the text "COPY:
OK." and press the OK button in order to start copying. You can
abort the function by moving the cursor in another line and
hitting the OK key: Then you are again at the global menu page.
^BLUE
CHIP
USER
MANUAL AXON
NGC
77
GUITAR
TO
MIDI
CONVERTER
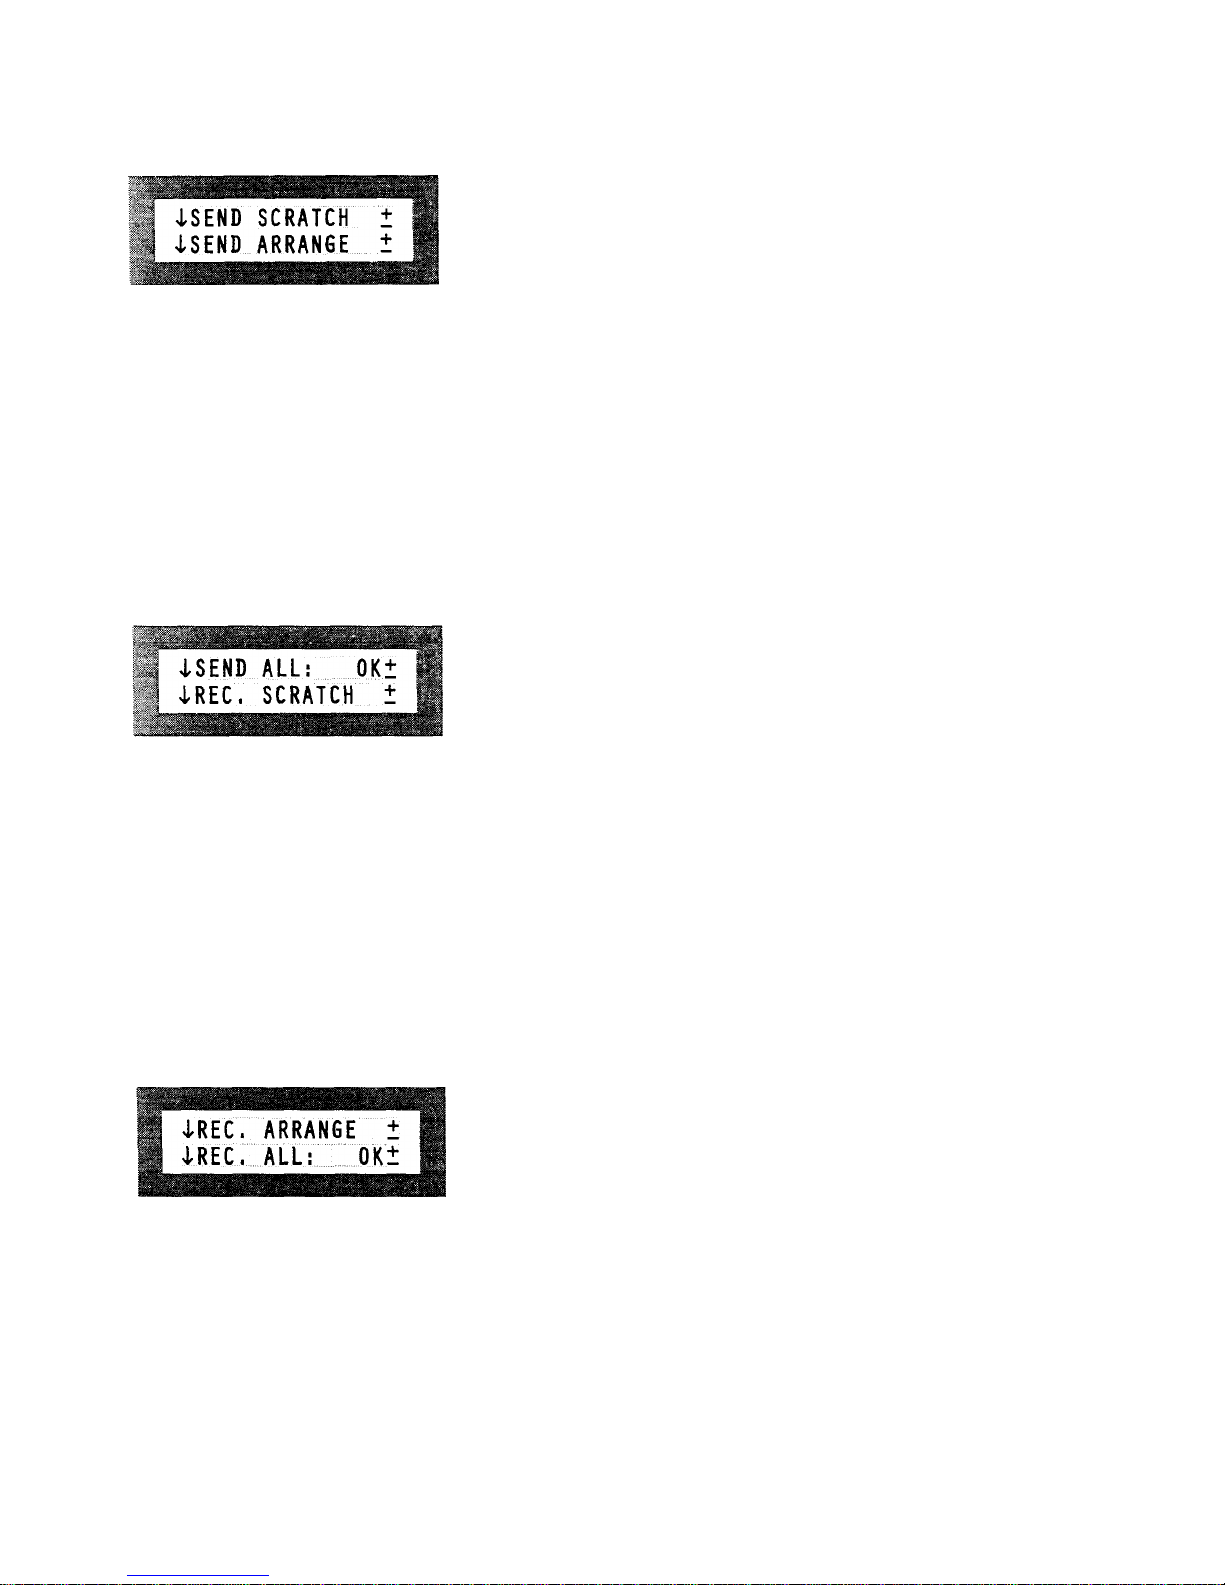
SEND SCRATCH
How to send a Scratch preset (as a system-exclusive-message=
sysex)
Please set the Scratch numberyou wouldlike to send withthe
+/- value buttons.Position the cursor in the line "SEND:" with
the+/- parameter keys and hitOK. You can abort thefunction
by moving the cursor in another lineand pressing theOK
button.Then you are again at theglobal menu page.
SEND ARRANGE
How to send an Arrange preset (as a system exclusive message =
sysex)
The procedure is identicalto sending Scratch Presets.Please
look at the section SEND SCRATCH.
SEND ALL
How to send SCRATCH/ARRANGE and CHAIN Preset data
Press the OK buttonin order to transfer the settingsof all presets
whichare now system exclusive data.
REC. SCRATCH
How toreceive a Scratchpreset (as a system exclusivemessage
=sysex)
Use the +/-keys to setthe number of theScratch Preset thatwill
be overwrittenby the received data. Move the cursortothe line
"RECEIVE:" with the parameter buttonsand hit OK. You can
abort the functionwhile scrolling the cursor in anotherlineand
pressing the OK key. Then you are again at the global menu
page.
REC. ARRANGE
How to receive an Arrange preset (as a system exclusive
message = sysex). The procedure is identical to receiving
Scratch Presets. Please look at the section REC. SCRATCH.
REC. ALL
How to receive SCRATCH / ARRANGE and CHAIN Preset
data. Press the OK button in order to receive all presets.
ADC MONITOR
ADC display
It shows the values ofthe AD converter in hexadecimal notation.
This functionis only for error diagnostic.
^BLUE
CHIP
USER MANUAL
AXON
NGC 77 GUITAR TO
MIDI
CONVERTER
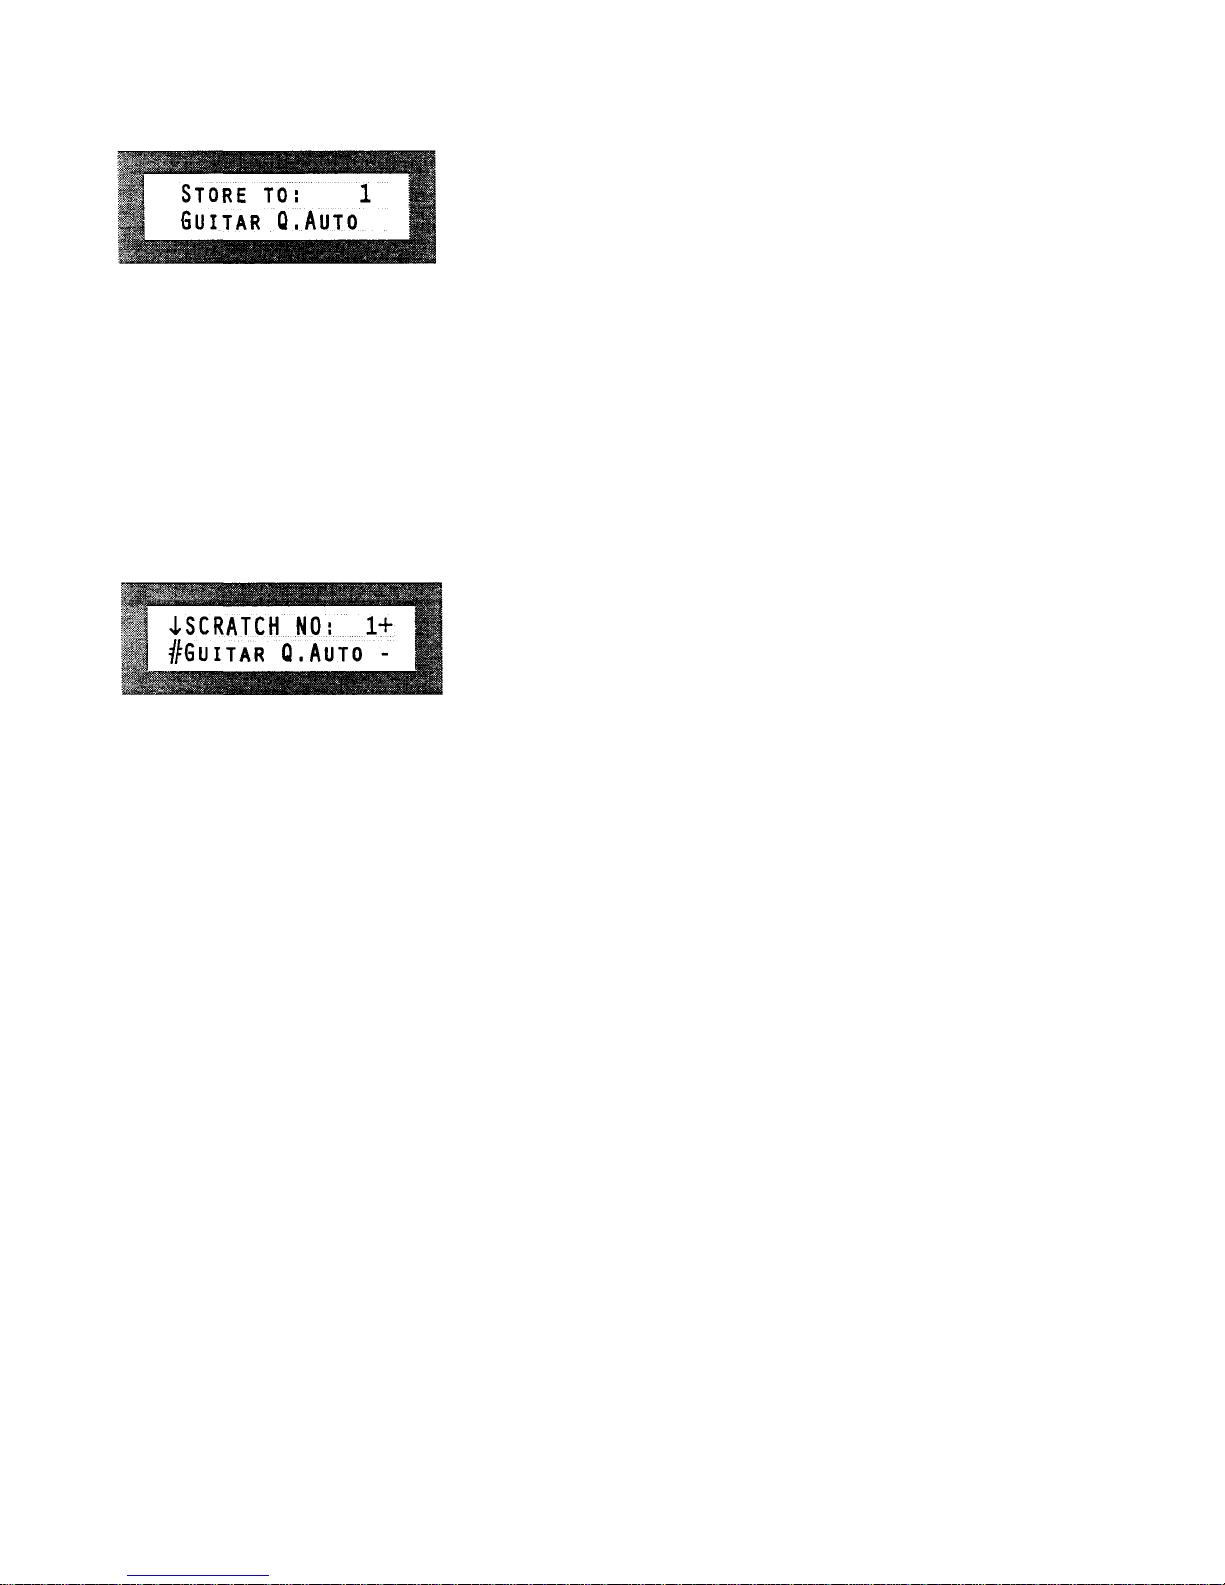
How to storeScratch versus Arrange data
All changes made on the actualpreset don'tdestroy theoriginal
preset data. In order to store the Scratch/ Arrange parameter
permanently aftera change in a preset, please press the store
button.The display line shown here indicates the currentpreset
number, the line at the bottom presents the corresponding preset
name. You can choose an optional preset numberwiththe+/-
value buttons, the preset name willbe actualizedanalogously.
Hit the OK buttonin order to store the preset data at the
indicated cursor place. Except of the +/- value buttonseach other
key aborts the procedure and prevents fromoverwritingdata
erroneously. In any case, the display returnsto the previous
position.
Scratch Mode
Scratch presets I...128
The SCRATCH Mode includes presets whichcan simplybe
programmed butwithoutthe possibility to split. The pick control
functionas well asthe differentpossibilities ofthe Hold Pedal
are available withoutlimitations.Press the Scratchbuttonin
order to activate the Scratch mode. You call up the different
Scratch presets withthe +/- value buttons.For thatpurpose,you
can also use the UP/ DOWN keys of yourguitarinterface.They
have always the same effectasthe corresponding +/- value
button.In order to change the Scratch preset scroll the cursor
withthe +/- parameter keys to the line displaying thefollowing
text: "SCRATCH NO:" and press the OK button. In this manner,
you come to the main menu of the current Scratchpreset. There
are three parameters: STRG MODE, HOLD MODE aswell as
EDT SEGM.

^BLUE
CHIP
USER MANUAL
AXON
NGC 77 GUITAR TOMIDICONVERTER
STRG MODE
Stringmode (separate/common)
SEPARATE
Aseparate MIDI channelis assigned toeach stringin the
following order:
El:Basic MIDI channel
B2: Basic MIDI channel+1
G3: Basic MIDI channel+2
D4: Basic MIDI channel+3
A5: Basic MIDI channel+4
E6: Basic MIDI channel+5
This setting allows thegreatest flexibility.In theArrange Mode,
thismode is active and cannotbe changed,in the ScratchMode
you can freelychoose thisparameter.
COMMON
In the Common Mode, all stringsofyourguitarare assigned
onlyto thebasis channel.In order toavoid conflictswithstill
soundingnotes ofthe same channel,no Pitch BendInformation
is sent in this mode, ifmore thanone note is played.By thisway
solo playingis possible althoughwithrestrictions.IfyourMIDI
instrumentcan only receive at one MIDI channel,youshould
use thismode.
Ifyoursequencer does notallow to record on 6 MIDI channels
at thesame time you have to use thismode as well.
HOLD MODE
Hold mode (common/ separate/ sustain/controller)
While pressing the Hold Pedal, you can access to fourdifferent
functions:"Common, separate, sustainand controller".
COMMON
While pressing the Hold Pedal, no other MIDI data are sent.A
previous chord will be kept frozen on yourMIDI instrumentas
long asyou keep the pedal down. Herewith,you realize also a
bypass function,i.e. aslong as you press the Hold Pedal inthis
mode, your AXON doesn't give out furtherMIDI data.
SEPARATE
AfurtherMIDI channel isavailable.
In the Common String Mode itis the basis channel +2, in the
Separate Mode it is the basis channel+7.
You can for example underlay a solo withan optional
accompaniment. Forthatpurpose, you play a chord while
pressing the Hold Pedal and releasing it then.You can now play
again with your AXON and at an additional channel the already
played chord sounds. Ifyou press the Hold Pedal again, all
notes are turned off andyou can play a new chord again.
SUSTAIN
While pressing the Hold Pedal, the controller 64(Sustain)witha

^BLUE
CHIP
USER MANUAL
AXON
NGC 77 GUITAR TO
MIDI
CONVERTER
maximum value of 127(7Fh) is given out.Play noteson your
guitar.Every note youplay aslong as you have the Pedal
pressedwill be sustained, much like the sustainpedal on a
piano. Leaving the pedal releases the sustainednotes.The same
controller (64) is given out again,but withthe value0. All
playednotes willsound then normally.
CONTROLLER:(0...127)
It ispossible to callupone of the 128MIDI controller. While
pressing the Hold Pedal, the selected controlleris given outwith
themaximum value 127(7Fh). As you release theHold Pedal
again, the controller will be sent out value 0.Appropriate
controllers are Sustain (64), Portamento (65) or for example
Chorus (93). In the appendix, you can finda detailed list of all
MIDI controllers.
EDT SEGM
Here youcan choose one of the two segment pages: NORMAL
or HOLD.
Normal (NORM)
This submenu contains segment parameters whichare set forthe
currentScratch preset (timbre, volume,transposing ...)
Hold (HOLD)
In this submenu you assign the sound parameter whichyou
would like to use while pressing the Hold Pedal in SEPARATE
Hold Mode.
Scroll the cursor with the +/- parameter buttons to the current
segment and call up the desired segment byusing the +/- value
keys and hit the OK button. From this submenu you returnto
the previous position withthe OK key.
SCRATCH NAME
In order to rename a Scratch preset, move the cursor to the line
with the current name and hit OK. Now the cursor flashes over
the first letter. Change this letter with the +/- value buttons. You
reach the next/ previous column with the +/- parameter keys.
Please enter your desired name and leave this menu with the OK
button.
Arrange Mode
Arrange presets I...64
Incontrast to the Scratch presets you can access to different
split possibilities within the Arrange presets. These splits can
also be combined.
Press first the Arrange button to select Arrange mode. Usingthe
+/- value keys, you can choose one of the 64possible Arrange
presets. Forthis purpose you can also use the UP/DOWN
Table of contents


