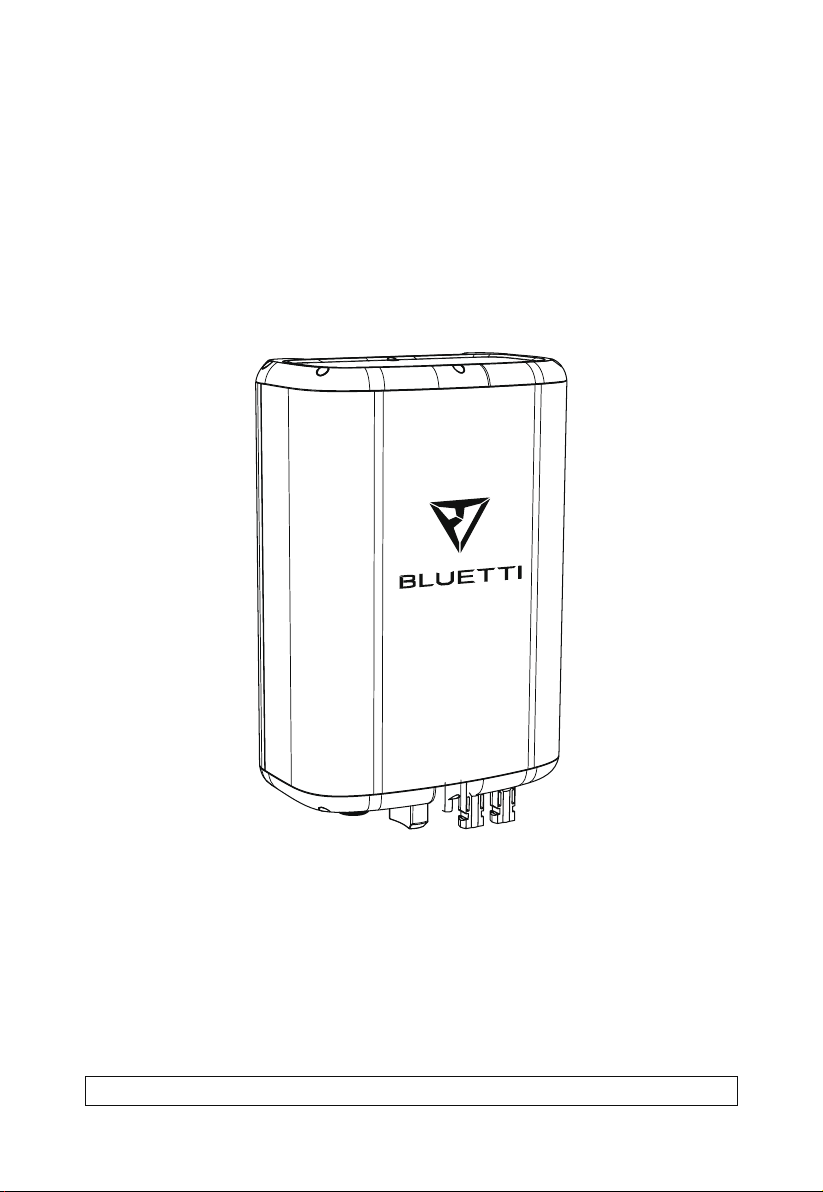
Bluetti D300S User manual

D300S PV DROP DOWN MODULE
Please read this manual before use and follow its guidance. Keep this manual for future reference.
USER MANUAL
Please read this manual before use and follow its guidance. Keep this manual for future reference.

Contents
BRIEF INTRODUCTION ………………….………………………...…….......….......01
WHAT`S IN THE BOX ……………………………………..................................…. 01
FEATURES OF D300S………………………...................................................…. 02
INSTALLATION ……………………………………............................................…. 03
TECHNICAL SPECIFICATIONS……………………….....................................…. 06
SAFETY INSTRUCTION ………………………................................................…. 07
DECLARATION …………………………………...............................................…. 08
BRIEF INTRODUCTION
D300S created by BLUETTI Tech Team to allow your EP500/Pro, AC300 to have a chance
to connect with Roof/Rigid panels for 2400W Max. Solar charging, especially users who
already have installed rigid solar panels and PV grid-connected inverters, and the solar
panel array's total open-circuit voltage exceeds the EP500/Pro, AC300 input
limit(140V/150V), D300S will be perfect to adjust the total voltage and match the input
requirements of EP500/Pro, AC300.
- 01 -
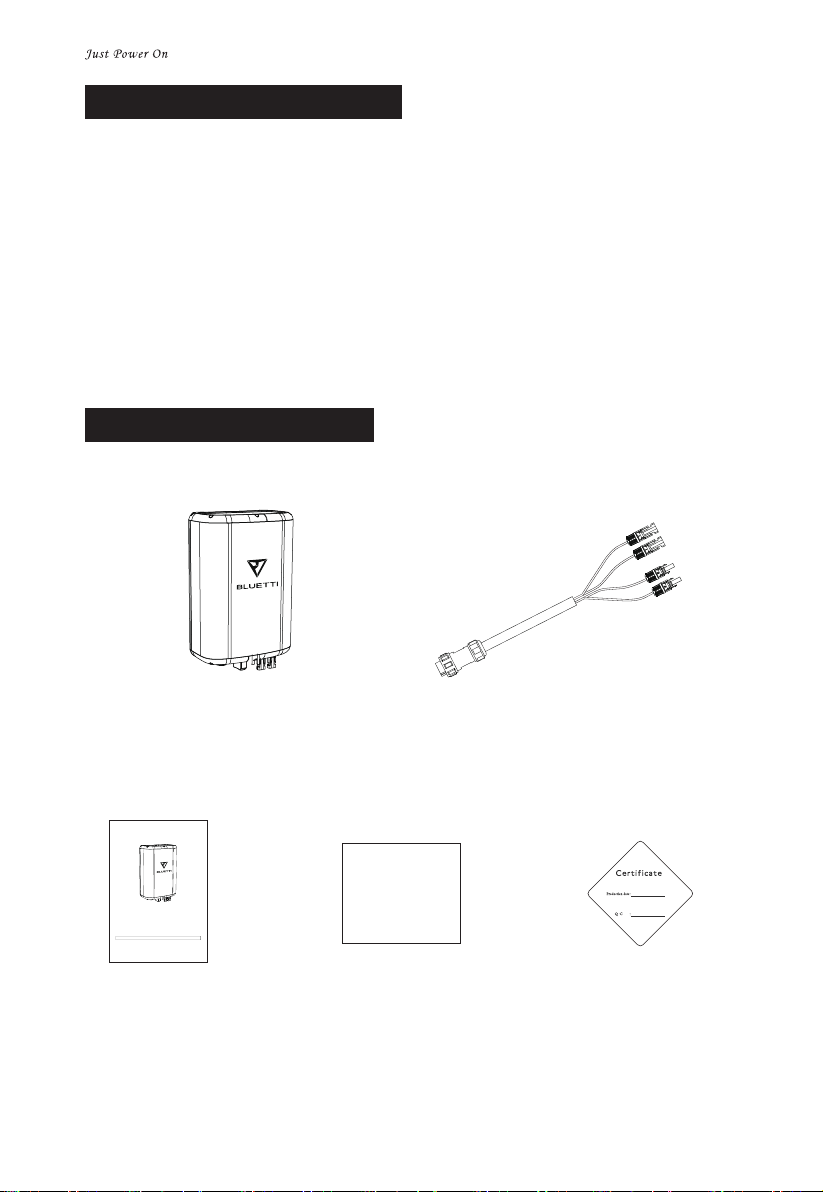
WHAT`S IN THE BOX
D300S PV Drop Down Module
x1 pcs
Certificate of QC Pass
x1 pcs
Warranty Card
x1 pcs
User Manual
x1 pcs
DC Output Cable(Aviation to MC4*2)
x1 pcs
USER MANUAL
Please read this manual before use and follow its guidance. Keep this manual for future reference.
Warranty Card
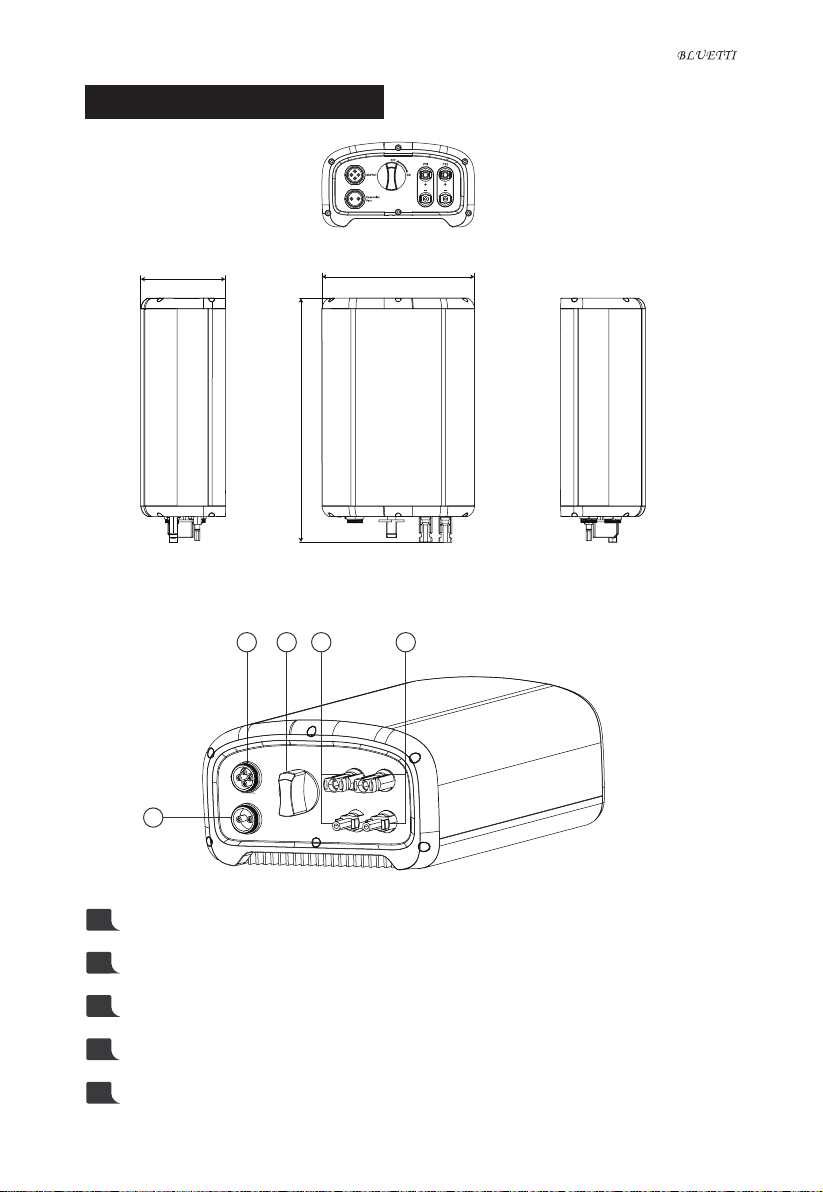
FEATURES OF D300S
- 02 -
5
1 2 3 4
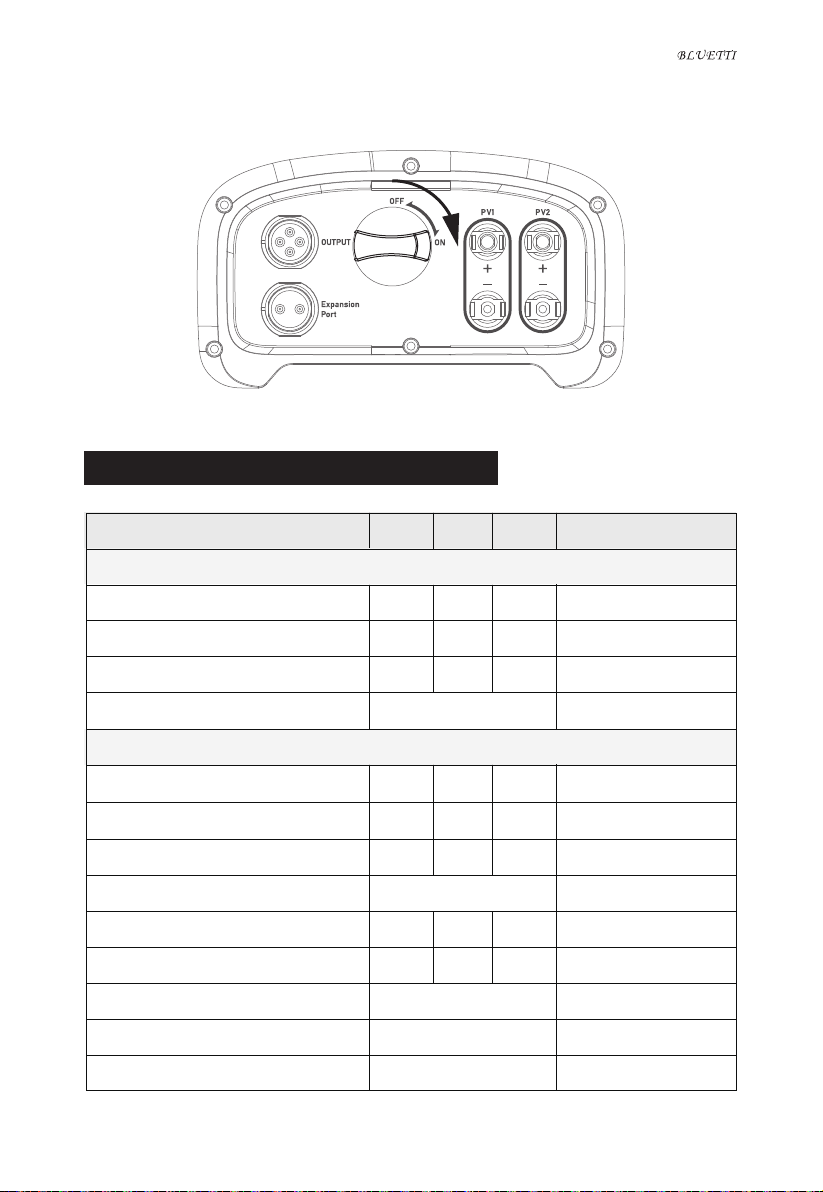
03 NO1. MPPT(PV1 indicates DC1,Connect with your solar panels)
04 NO2. MPPT(PV2 indicates DC2,Connect with your solar panels)
05 Expansion Port: For future updating via 485 communication port.
Main Switch of D300S: please turn OFF during installation.
02
01 Output Port: connect to power the power station.
8.5 in4.7 in
13.7 in
INSTALLATION
- 03 -
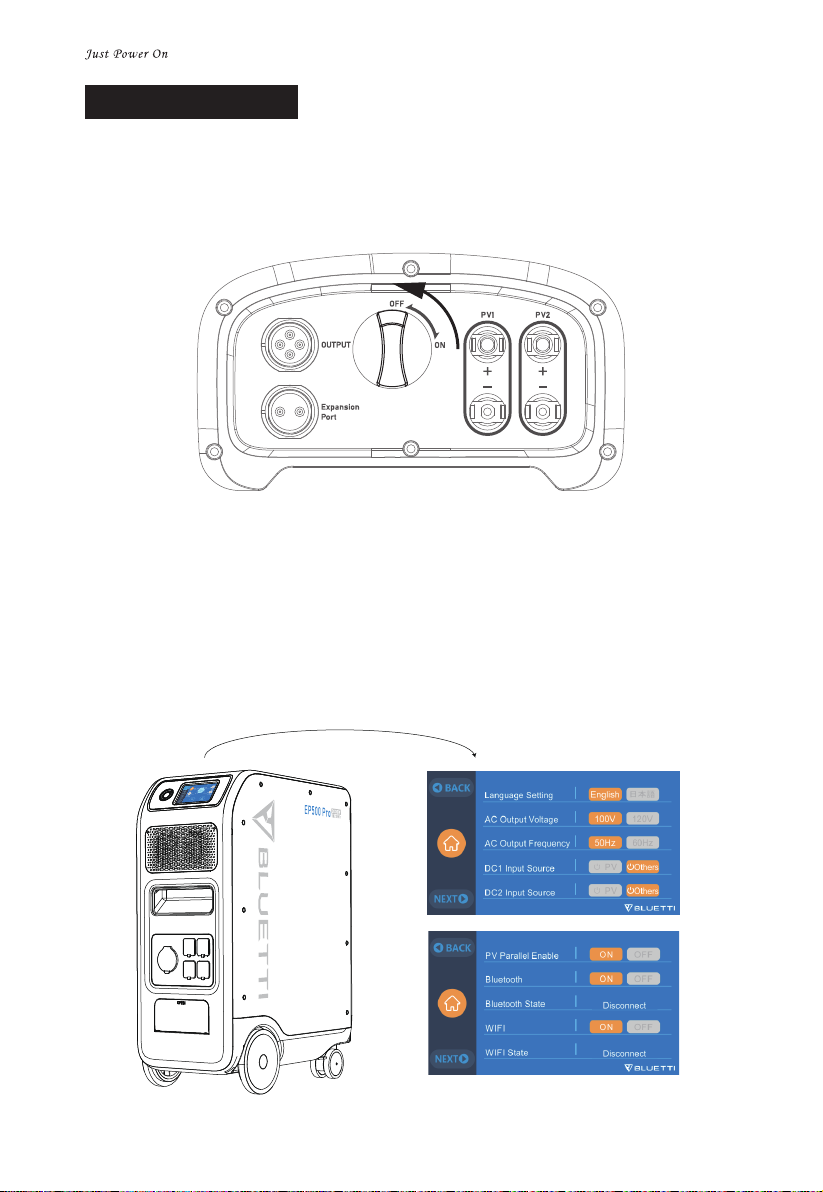
Step1.
Please turn OFF the switch.
The Main Switch of D300S is kept in the OFF state to ensure safety during installation.
Step2.
For EP500Pro/AC300, set DC1 Input Source, DC2 Input Source to Others on screen(Main-
page - Settings), PV Parallel Enable to ON.
- 04 -
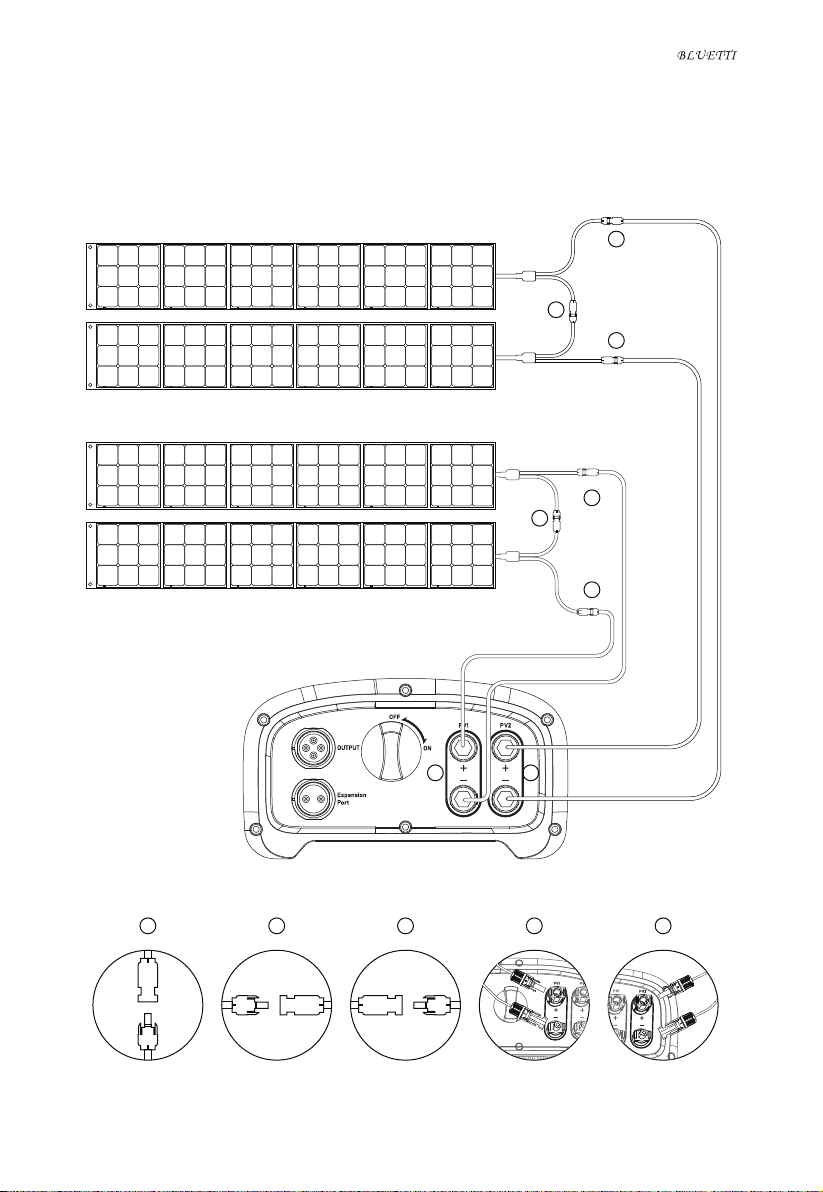
Step3.
The roof solar panels are connected to D300S as shown in the figure.
Please make sure that one set of solar panels is connected to PV1, and the other set of
solar panels is connected to PV2. Be careful not to mix them.
a
a
b
ed
c
b
c
+
+
-
-
Example for rigid panels connecting to D300S in parallel.
ab c ed
- 05 -
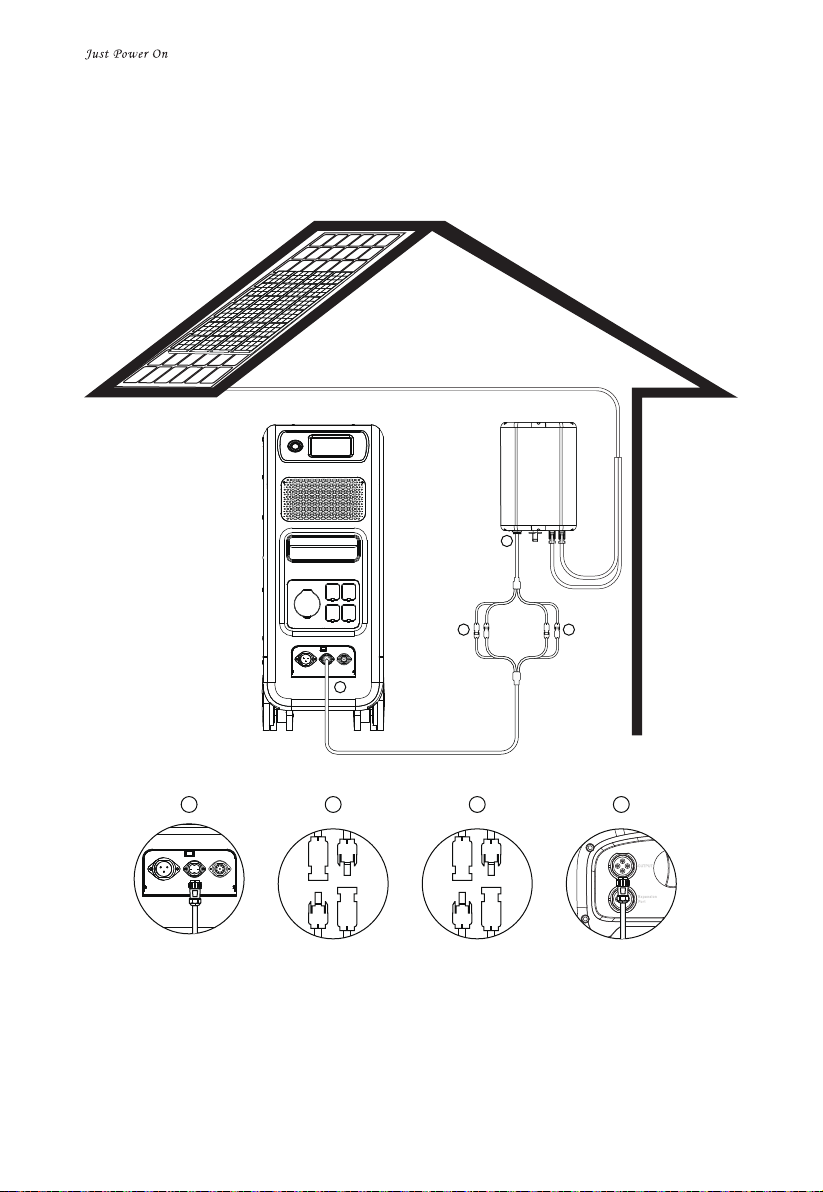
Step4.
Connect EP500Pro with D300S with DC Output Cable(Included).
a
b
a
b
c
d
c d
a.DC Output Cable to EP500Pro
b.DC1 poles to PV1 poles
c.DC2 poles to PV2 poles
d.DC Output Cable to D300S
- 06 -
TECHNICAL SPECIFICATIONS
Step5.
Turn the main switch from OFF to ON to activate the solar charging system.
List Min.Rated
Power of Output
Voltage
Current
Short-circuit Protection
3000W
135V
26A
/
65V
/
/
120V
/
/
/
/
/
/
360V
/
Supported
85℃
95℃
Supported
97.8%
>140VDC
3000W
500V
15A
/
115V
/
Supported
Power of Input
MPPT Voltage
Current
Dual MPPT
Internal Over-heated
Radiator Over-heated
Short-circuit Protection
Max. Efficiency
Output Over-voltage Protection
Max.Note
DC output
PV input
Open circuit voltage 550V
/
/
/
/
Stop Output Function
<20VDC
Dual MC4 Plugs

SAFETY INSTRUCTION
Please check whether D300S is damaged, cracked, liquid leakage, heat or other abnormali-
ties or AC line is damaged before operating. If any, please stop using the product immedi-
ately and contact the seller;
Keep a distance of 50mm between D300S and other objects.
Avoid exposing to direct sunlight when the solar system is working and DO NOT place the
D300S near heat sources.
It is prohibited to place the equipment in an environment with flammable, explosive gas,
or smoke. Since D300S relies on the shell to dissipate heat, over-temperature of the shell
will lead to damage.
DO NOT attempt to replace the internal components of the equipment by any unautho-
rized personnel.
DO NOT operate in wet conditions. Please let the unit dry completely before using if the
equipment becomes wet.
Please ensure proper ventilation while in use, inadequate ventilation may cause perma-
nent damage to the equipment.
Do not place anything on the top of D300S, please install it where people cannot touch it.
DO NOT move the unit while operating as vibrations and sudden impacts may lead to
poor connections to the hardware inside.
In case of fire, only a dry powder fire extinguisher is suitable for the product.
For safety purposes, please use only the original charger and cables designed for the
equipment. We are not liable for damage caused by third-party equipment and may
render your warranty invalid.
- 07 -
< 2000m
IP54
350*216*120mm/13.7*8.5*4.7in
7KG/15.4lb
-10℃
-20℃
25℃
25℃
40℃
40℃No condensation
Ambient Temp.
Storage Temp.
Altitude
Protection Level
Dimensions
Net Weight
Table of contents
Popular Control Unit manuals by other brands

Festo
Festo Compact Performance CP-FB6-E Brief description

Elo TouchSystems
Elo TouchSystems DMS-SA19P-EXTME Quick installation guide

JS Automation
JS Automation MPC3034A user manual

JAUDT
JAUDT SW GII 6406 Series Translation of the original operating instructions

Spektrum
Spektrum Air Module System manual

BOC Edwards
BOC Edwards Q Series instruction manual

KHADAS
KHADAS BT Magic quick start

Etherma
Etherma eNEXHO-IL Assembly and operating instructions

PMFoundations
PMFoundations Attenuverter Assembly guide

GEA
GEA VARIVENT Operating instruction

Walther Systemtechnik
Walther Systemtechnik VMS-05 Assembly instructions

Altronix
Altronix LINQ8PD Installation and programming manual


