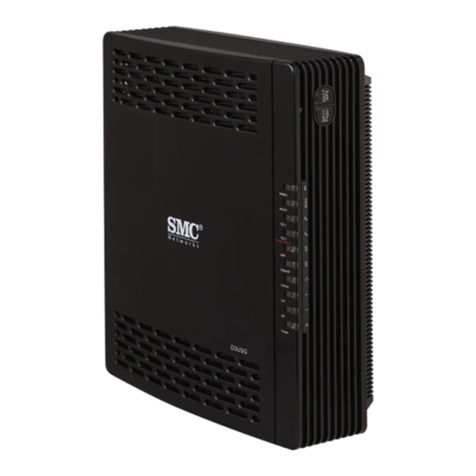
BlueUp BlueBeacon Gateway W User manual

BlueUp S.r.l.s.
Loc. Belvedere, Ingresso 2, 53034 Colle di Val d'Elsa SI) - ITALY
Ph. 347 4123206, Fax 0577 043101
E-mail: [email protected], Web: www.blueupbeacons.com
VAT N. IT 01373980521
BlueBeacon Gateway
User manual
Introduction
BlueBeacon Gateway is a BLE-beacon gateway with BLE and LAN/WLAN interfaces that
allows to communicate with BLE beacons new software manages both scanning for
generic BLE beacons and connecting to BlueBeacon beacons).
BlueBeacon Gateway is offered in two alternative versions:
•BlueBeacon Gateway D for desktop applications;
•BlueBeacon Gateway W for wall installations.
BlueBeacon Gateway D is provided in a plastic enclosure suitable for desktop applications
optional mounting kit is available). It is available in one version:
- D/A00: with integrated omnidirectional BLE antenna.
BlueBeacon Gateway W is provided in an elegant plastic enclosure suitable for wall or
ceiling installation. It is available in three versions:
- W/A00: with integrated omnidirectional BLE antenna;
- W/A05: with internal 5dB-directive BLE antenna;
- W/SMA: with SMA connector for external BLE antenna.
Possible applications with BlueBeacon Gateway are:
- remote monitoring and management of beacons;
- localization of BLE beacons tags) for RTLS and access control;
- distributed monitoring systems of environmental parameters, using BlueBeacon Sensor
with temperature, humidity and pressure sensors);
Before you start using a BlueBeacon Gateway, verify that it is undamaged and carefully
read the instructions in this user manual, particularly the indications in the "Safety" section.
BlueUp S.r.l.s. disclaims any and all liability if the devices are used in modes and
environments incompatible for keeping the product’s intact, safe and in operation.
BlueUp S.r.l.s. - 2018 V1.0– 26/06/2018 1/28

Technical characteristics
Hardware
Platform: Quad Core 1.2GHz Broadcom BCM2837 64bit CPU
Connectivity: Ethernet, WiFi
Radio (Bluetooth)
Version: 4.1 Bluetooth Smart Low Energy)
Frequency: 2.402 to 2.480 GHz
Antenna: D/A00: desktop-version with integrated omnidirectional chip antenna;
W/A00: wall-version with integrated omnidirectional chip antenna;
W/A05: wall-version with internal 5dB-directive antenna;
W/SMA: wall-version with SMA connector for external antenna.
Electrical specifications
Voltage: 5VDC micro-USB)
Current: 1.5A typ.)
Mechanical and environmental specifications
Size: Ver. D: 100 x 73 x 30 mm
Ver. W: 120 x 120 x 45 mm excluding flanges)
Mounting kit: Ver. D: none
Ver. W: wall-mounting plastic flange
IP protection: IP40
Operating temperature: -20°C to +60°C
BlueUp S.r.l.s. - 2018 V1.0– 26/06/2018 2/28

Safety
These information are an integral and essential part of the product BlueBeacon Gateway )
and must be delivered to the user. Read them carefully as they contain important
information regarding the installation, use and maintenance.
Warnings
BlueBeacon Gateway W must be intended for use for which it was designed. Any other
use is considered improper and therefore dangerous.
Before you start using BlueBeacon Gateway W, verify that it is undamaged.
DO NOT use BlueBeacon Gateway W in potentially explosive atmospheres. The presence
of flammable gas or fumes is a serious safety hazard.
Make sure that BlueBeacon Gateway W is always kept in a dry environment.
The company BlueUp S.r.l.s. disclaims any liability for damages caused by an inadequate
use of the device and the failure to observe the information provided herein.
Power
The device must be powered via the micro-USB port with a 5VDC power-supply. Use an
AC/DC plug-in power adapter with USB output and USB-to-microUSB power cable. The
power supply must be capable of supplying a current of at least 1.5A. The external power
adapter must comply with applicable standards and regulations in the country of use.
Do not power the device with power voltages other than 5VDC. Power supply with
voltages other than 5VDC may irreversibly damage the device, as well as cause potential
safety hazards.
Waste disposal
In implementing the Directives 011/65/EU and 01 /19/EC on the restriction of the
use of hazardous substances in electrical and electronic equipment and the
disposal of waste.
The crossed bin symbol on the appliance or its packaging indicates that at the end of the
product’s life, it must be collected separately from other waste. The user must, therefore,
take the remote control to an authorized disposal center for collection of electronic and
electrical waste, or return it to the dealer when purchasing a new similar appliance, on a
one to one basis. Appropriate separate collection for the subsequent forwarding of the
product sent for recycling, treatment and environmentally compatible disposal helps to
prevent negative environmental and health effects and promotes the reuse and/or
recycling of materials making up the equipment. Illegal dumping of the product by the user
entails the application of administrative sanctions in the current provisions of law.
For more information about the collection systems, contact your local authorities.
BlueUp S.r.l.s. - 2018 V1.0– 26/06/2018 3/28

In implementing Directive 006/66/EC on the reduced use of hazardous substances
in batteries and the disposal of the same.
The crossed bin symbol on the appliance or its packaging indicates that the batteries must
not be disposed of with the rest of the household waste, as they may contain substances
that are potentially harmful to the environment and health. Remove the old battery from the
device and turn it in at the appropriate collection points.
Disclaimer
This manual is intended to provide a brief summary of our knowledge and some guidance
regarding the use of the device and its accessories. The information contained herein has
been provided by sources that BlueUp S.r.l.s. considers to be dependable and is accurate
to the best knowledge of the company. This sheet is not intended to be an inclusive
document on worldwide hazard communication regulations. The information is provided in
good faith. Each user of this material needs to evaluate the conditions of use and define
the appropriate protective mechanisms to prevent the exposure of persons, property
damage or release to the environment.
BlueU S.r.l.s. assumes no res onsibility for injury to the reci ient or third ersons,
or for any damages resulting from misuse of the device and its arts.
BlueUp S.r.l.s. - 2018 V1.0– 26/06/2018 4/28

Device connection and setu
BlueBeacon Gateway comes with the following default network configurations:
•Ethernet network interface: Enabled with DHCP
•Wifi network interface: Disabled
To access the BlueBeacon Gateway administration interface, you need a LAN
infrastructure with at least one device offering IP address assignment DHCP Server).
Usually any commercial router integrates a DHCP Server.
Connect BlueBeacon Gateway with an ethernet cable to your LAN network, then power
BlueBeacon Gateway via the MicroUSB connector - we recommend using a power supply
with the following features:
•Input: 100-240V ~ 50 / 60Hz
•Output: 5V 1.5A �
Once powered, BlueBeacon Gateway will begin the boot process of the operating system
and the necessary software components. When the green LED will start to flash
heartbeat-blink) BlueBeacon Gateway will be fully operational.
In case of incorrect network configuration or problems such that the BlueBeacon Gateway
administration interface is no longer reachable on the network, it is possible to restore the
factory settings using the reset button located on the bottom of the device under the
Ethernet connector) . By keeping this button pressed for at least 5 seconds, the green LED
will remain on and the device will start the reset procedure. At the end of the procedure,
BlueBeacon Gateway will automatically reboot and the green LED will flash again
indicating the correct execution of the software on board.
BlueUp S.r.l.s. - 2018 V1.0– 26/06/2018 5/28
5VDC ETH
ETH
5VDC

Get into the administration interface
BlueBeacon Gateway has a web interface to manage all its features. The web interface is
reachable at the IP address of the device.
BlueBeacon Gateway comes with a pre-configured ethernet interface to use DHCP.
So, in order to access the web interface the first time you boot BlueBeacon Gateway, you
need a device usually a commercial router) with DHCP Server functionality enabled.
When your router has assigned an IP address to the BlueBeacon Gateway you need to
identify the IP address assigned and then point your browser to this IP.
Figure 1 shows an example of identifying the IP address assigned to the BlueBeacon
Gateway by a SpeedTouch router.As you can see, BlueBeacon Gateway is identified by its
hostname which consists of the string BBGW-CPU_SERIAL_NUMBER.
BlueUp S.r.l.s. - 2018 V1.0– 26/06/2018 6/28

Administration interface: Login
Once the BlueBeacon Gateway IP address is identified, to access the administration
interface, simply point the browser to the BlueBeacon Gateway IP address, as shown in
Figure 2.
At this point, the login screen will appear on the browser Figure 3).
The default password to be used at the first start is blueup.
Once logged in, you will be redirected to the index page of the BlueBeacon Gateway
administration interface.
BlueUp S.r.l.s. - 2018 V1.0– 26/06/2018 7/28
!
"
#$

Administrative interface: Overview
Figure 4 shows an overview of the BlueBeacon Gateway administration interface.
On the left side you can see the sidebar of the menus, where are the buttons to access the
following pages:
•System Info : contains information and system configurations
•Network Settings : allows you to view and edit network configurations
•BlueBeacon Cloud : allows you to register BlueBeacon Gateway at the BlueBeacon
Cloud portal and then monitor and manage the beacon remotely
•Beacons : displays information about the beacon currently received by BlueBeacon
Gateway
•HTTP Callbacks : allows you to configure HTTP callbacks to automatically send
beacon data to a server
•Beacon RSSI : displays a plot of the received signal strength indication RSSI)
•Docs : documentation related to the REST APIs provided by BlueBeacon Gateway
At the top you can view the topbar, where in the top right menu you have access to the
features of:
•Reboot , restart of BlueBeacon Gateway
•Shutdown , shutdown of BlueBeacon Gateway
•ogout from the administration interface
BlueUp S.r.l.s. - 2018 V1.0– 26/06/2018 8/28

BlueUp S.r.l.s. - 2018 V1.0– 26/06/2018 9/28
%

Administrative interface: System Info
The System Info tab displays the main information and system configurations Figure 5).
System information is grouped into:
•General Info : general information
◦Firmware version : version of the BlueBeacon Gateway software package
◦Hostname : system hostname, default BBGW-CPU_SERIAL_NUMBER
◦System Timezone : system timezone, the default value is Europe / Rome, but it
can be changed by selecting the timezone among those available
◦System Time 11: system date and time, varies according to the chosen timezone
◦System Uptime : system uptime, indicates how long BlueBeacon Gateway is
active
•Device Identifiers : unique serial identifiers of the system
◦Machine ID : unique id generated when first started
◦CPU Serial : unique ID of the CPU
◦uSD Serial : unique ID of the SD-CARD
•Network Interfaces : configuration of active network interfaces
•ogin Password : allows you to change the password for accessing the BlueBeacon
Gateway administration interface
•Firmware Upgrade : allows you to upgrade the software developed by BlueUp
requires the upload of the software package released by BlueUp)
Administrative interface: Network Settings
The Network Settings tab displays and allows you to configure the BlueBeacon Gateway
network interfaces Ethernet and WiFi) Figure 6).
For each network interface you can choose whether to use DHCP or static IP, configure
the default gateway and the DNS servers to be used.
Regarding the wireless network interface, you will also need to specify:
WLAN country code: country code to select from those available
1 BlueBeacon Gateway in the basic version, does not have a dedicated RTC but sets and maintains the
system time using NTP Network Time Protocol). The NTP protocol defines a client / server mechanism
with which an operating system can keep the system time synchronized using NTP remote servers.
Therefore, to be able to maintain the system time, it will be necessary that BlueBeacon Gateway is
connected to a LAN that allows BlueBeacon Gateway to reach the remote NTP servers on the web.
BlueUp S.r.l.s. - 2018 V1.0– 26/06/2018 10/28

WLAN SSID: the name of the wireless network to which BlueBeacon Gateway will have to
connect
WLAN Password: the access password for the wireless network
Once you have configured the network interfaces, you will need to press the Save button
to save the configurations. To apply the new network configurations it is necessary to
restart the BlueBeacon Gateway reboot using the appropriate button on the drop down
menu located on the topbar).
At the next restart, you can verify that the new network settings have been correctly
applied also through the System Info page, in the Network Interfaces section Figure 7).
BlueUp S.r.l.s. - 2018 V1.0– 26/06/2018 11/28
&

BlueUp S.r.l.s. - 2018 V1.0– 26/06/2018 12/28
'()*)

BlueUp S.r.l.s. - 2018 V1.0– 26/06/2018 13/28
+()*)

Administration interface: BlueBeacon Cloud
The BlueBeacon Cloud tab allows you to manage the BlueBeacon Gateway connection
with the BlueUp BlueBeacon Cloud backend system.
If you have an account on the BlueBeacon Cloud system, you can authorize BlueBeacon
Gateway to monitor and synchronize your registered beacons on the BlueBeacon Cloud.
Authorizing BlueBeacon Gateway cloud access, the following features will be available:
•monitoring and uploading of beacons’ data on BlueBeacon Cloud - this feature
allows you to remotely monitor, through the BlueBeacon Cloud portal, the operating
status, the battery level and the beacon signal strength that BlueBeacon Gateway is
receiving
•synchronization of the configuration with BlueBeacon Cloud - this feature allows you
to reconfigure the beacons remotely, using the BlueBeacon Cloud portal;
BlueBeacon Gateway will periodically check any modified configurations and apply
them to the beacons.
In Figure 8, the interface for entering the credentials for accessing the BlueBeacon Cloud
portal is shown. The login credentials will be used to establish a pairing between the user
account and the BlueBeacon Gateway. Once the pairing is created, BlueBeacon Gateway
will be authorized to use the cloud features offered.
In Figure 9, the management interface of the beacon registered on the BlueBeacon Cloud
portal is shown. Once access to the BlueBeacon Gateway is allowed, the user can view
the beacons registered on his account and the configuration status synchronized / not
synchronized). Through the synchronization configuration interface it is possible to
configure the BlueBeacon Gateway to synchronize the configuration of the beacons at
intervals of time every half hour, every hour or once a day at a pre-set time). If configured,
the AutoSync mechanism allows you to apply to beacon any changes made to the beacon
remotely on the BlueBeacon Cloud portal.
BlueUp S.r.l.s. - 2018 V1.0– 26/06/2018 14/28

BlueUp S.r.l.s. - 2018 V1.0– 26/06/2018 15/28
,-.!)

BlueUp S.r.l.s. - 2018 V1.0– 26/06/2018 16/28
/01!1
.!)

Administration interface: Beacons
The Beacons tab displays information about the beacon currently received by BlueBeacon
Gateway.
There are various sub-menus that allow you to filter the beacons according to some
criteria:
•BlueUp beacons : shows only the BlueUp beacons
•iBeacon : shows all the beacons that transmit packages in Apple iBeacon format
•Eddystone : shows all the beacons that transmit packages in Google Eddystone
format
•Quuppa : shows all the beacons that transmit packets in Quuppa format
•Sensor : shows all the beacons that transmit packets in BlueUp Sensor format
The Settings menu, on the other hand, allows you to configure some values related to the
reception of the beacon:
•Beacon Timeout : is the timeout after which a beacon is removed from the list of
received beacon
•Frame Timeout : is the timeout after which a specific frame transmitted by a beacon
is removed from the list of frames transmitted by the beacon
•Pathloss Exponent : is a parameter used to estimate the distance of the beacon; this
parameter must be calibrated according to the environment in which the beacon
and BlueBeacon Gateway are located.
Within the time interval that goes from t1 when the beacon 01-123460 is no longer
received by BlueBeacon Gateway) up to t1 + BeaconTimeout, the beacon 01-123460 will still be
included in the list of beacon received the timestamp for the last received packet will be
t0). After BeaconTimeout seconds, the beacon will be removed from the list of received
beacons.
BlueUp S.r.l.s. - 2018 V1.0– 26/06/2018 17/28

Decreasing the BeaconTimeout value will result in a greater reactivity of the system in the
detection of the disappearance of the beacon, however in environments with many
obstacles this could lead to frequent oscillations insertions / removals) of the beacon
within the list of beacon received.
Suppose the 01-123460 beacon is transmitting two frames, an iBeacon frame and an
Eddystone frame. Suppose then that the beacon is reconfigured eg via smartphone) and
the Eddystone frame is disabled. At the instant t1, when the beacon starts to transmit only
the iBeacon frame, the Eddystone frame is always present in the list of frames relating to
the beacon 01-123460 on BlueBeacon Gateway. Only after FrameTimeout seconds have
elapsed, BlueBeacon Gateway, having no longer received the Eddystone frame from the
beacon 01-123460, will remove this frame from the list of frames transmitted by the
beacon 01-123460.
By decreasing the value of FrameTimeout, you will get a greater reactivity of the system in
detecting changes in configuration of the beacon. However, it is also necessary to set this
value according to the configuration used for the beacon, because if the value of
FrameTimeout is lower than the beacon's advertising interval, there will be continuous
oscillations insertions / removals) of the frames transmitted by the beacon.
BlueUp S.r.l.s. - 2018 V1.0– 26/06/2018 18/28

Administration interface: HTTP Callbacks
The HTTP Callbacks tab allows the user to schedule HTTP callbacks to send beacon data
periodically to a pre-set server.
If HTTP callbacks are configured, BlueBeacon Gateway will periodically make one or
more) HTTP call to the configured address by sending a JSON code containing the
beacon data within the body of the HTTP call.
To configure an HTTP callback, the following parameters must be specified:
•Callback Mode : the callback category
◦Periodic : periodic callback scheduled at regular time intervals
▪Interval : time interval in seconds) to which the callback is scheduled
◦ocation : scheduled periodic callback every 1 second, only for beacon in
iBeacon format, used to set up localization systems, the JSON integrates RSSI
data averaged over a time interval of 1s and contains values useful for
estimating the beacon's position
•UR : the URL to be called for the HTTP callback
•Filter : any filtering on the frames sent by the beacons
Figure 10 shows the interface for inserting and configuring an HTTP callback.
As of firmware version v4.2, the data sent by BlueBeacon Gateway are accompanied by a
signature that allows to perform a further verification of integrity and authentication. The
signature is calculated on the JSON relative to the array of beacons using a HMAC-
SHA256 algorithm that has as key a one-key based based constituted by SHA256 hash of
the concatenation of GatewayID, Gateway password and the timestamp attached to the
data sent.
Example
Data sent in HTTP POST from BlueBeacon Gateway:
{
"gateway": "00000000087569a7",
"beacons": [
{
"bdaddr": "e0:37:a2:3d:bb:08",
"timestamp": "2018-04-16 12:19:46.914 GMT+0200 CEST)",
"rssi": -62,
"connectable": true,
"ibeacon": [
{
"rssi": -65,
"uuid": "acfd065ec3c011e39bbe1a514932ac01",
"major": 0,
"minor": 18000,
"measuredPower": -62,
"timestamp": "2018-04-16 12:19:49.57 GMT+0200 CEST)"
BlueUp S.r.l.s. - 2018 V1.0– 26/06/2018 19/28

}
],
"model": 4,
"serial": 18000,
"battery": 83
},
…
],
"timestamp": 1523873989372,
"signature": "62685d5e3fa064de3d1021ca01f02bd24ff737b4e45c2bcbb941b1287b840bc3"
}
The one-time password for the HMAC-SHA256 algorithm is computed as the SHA256
hash of the concatenation of:
otk = SHA256 gateway || password || timestamp)
The signature is calculated as:
signature = HMAC-SHA256 JSON.stringify beacons), OTK)
BlueUp S.r.l.s. - 2018 V1.0– 26/06/2018 20/28
23"!)
This manual suits for next models
1
Table of contents
