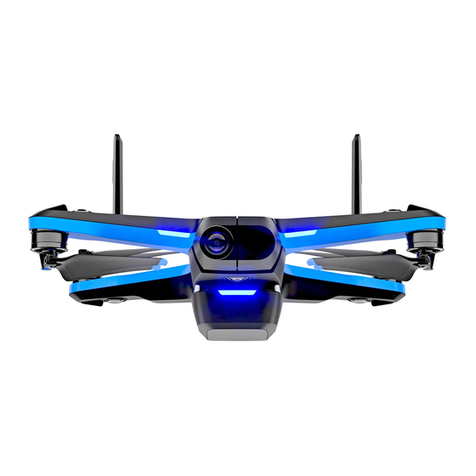
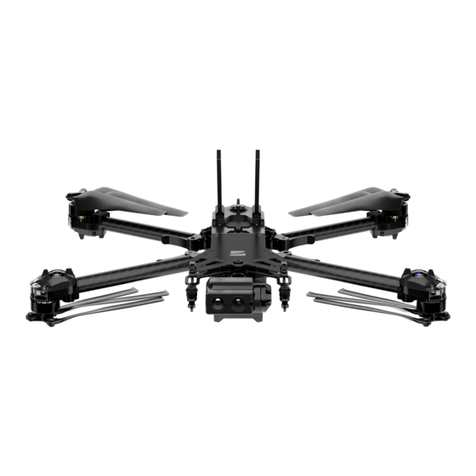
Skydio X2D User manual

Skydio X2D
User Guide
Effective: April 6, 2021
Table of
contents
X2 Equipment and Software
Skydio X2 and accessories
What’s included with your Skydio AEF software
add-on? Additional equipment needed
Flying Safely
Safety guidelines
Where to fly
First flight
Getting started
Hardware overview
Charging your system
Assembly
Pairing devices
Pre-Flight Operations
Check software versions
Import maps
Plan your waypoint mission
Pre-flight inspection
Configure device settings
Encrypt media
Device Settings
Drone settings
Height Ceiling
Obstacle Avoidance (AEF only)
Show Thermal
Return Behavior
Enable Narrow Band
Lights
GPS Night Flight
Controller settings
Gimbal Speed
Invert Wheels
Flight Speed
Flight Mode
Flight Telemetry

Launching
Flying Skydio X2
Flight screen
Device Settings Menu
Signal Strength Indicator
1
1
2
3
4
4
6
6
7
7
10
13
18
19 19
21
22
24
25
26
28 29
29
30
31
32
33
33
34
35
35
35
36
36
37
38
39 39
39
40
Table of
contents
Battery Indicator
Color Camera Settings
Subject Indicator
Thermal Camera PIP
Skills Menu
Skill Settings
Recording Indicator
Return to Home
Map View
Fly to Waypoint
Home points
Flight controls
Flight skills
Skills
Manual
Waypoints
Orbit Point (AEF only)
Track in Place (AEF only)
Zoom
Returning
Return height & behavior
GPS vs Visual Return (AEF Only)
Landing
Post-flight Operations Reviewing
and offloading content
Reviewing and offloading encrypted edia
Disassembly
GPS Night Flight
How to fly in GPS Night Flight mode Safety
considerations for GPS Night Flight
Hand Launching and Landing
Hand launching
Hand landing
Emergency Procedures Lost
connection during flight
Lost GPS
Low battery
Emergency landing

40
40
42
43
43
43
44
44
45
45
46
47
50
50
50
51
53
54
55
58 59
60
62
64 64
65
67
70 71
74
75 75
76
77 77
77
78
78
Table of
contents
X2 Batteries
Charging your X2 batteries
Battery best practices and safety guidelines
Maintenance
Software updates
Tightening arm clamps
Replacing propellers
Replacing hard stops
Battery care
Troubleshooting
Specifications
Aircraft
Handset
Controller Software
Skydio Autonomy
Primary Camera System
Thermal Camera System
Navigation Camera System
System Security
Compliance information
FCC
California Prop 65 Warning
IC
X2D Appendix: Skydio QGC
What’s included with your Skydio AEF software
add-on in Skydio QGC?
Pre-flight Operations
Preparing offline maps
Flight controls
Main flight screen interface
Mission Toolbar
Media Controls
View/Palette Menu
Flight Information Bar
Skydio X2 Status Bar
Map View
Camera Settings
Launching
79
79
79
80
80
84
87
91

95
98
103 103
103
104
104
105
106
106
106
107 107
107
108
109 110
112 112
117
121
121
121
122
122
123
124
125
127
Table of
contents
Flying Skydio X2
Creating and executing a mission
Rally Points
Setting a Rally Point
Returning to Rally Point
Landing
GPS Night Flight in Skydio
QGC How to fly in GPS Night Flight mode
Safety considerations for GPS Night Flight
Exiting the Skydio QGC App
128 128
132
132
133
134
135 136
137
138
X2 EQUIPMENT AND SOFTWARE
Skydio X2 and accessories
Skydio X2 and its various accessories can be purchased à la carte or in one of our bundles. Below is a list of all Skydio X2
system equipment:
101114
1

4
1. Skydio X2 Drone
2
5
8
9
3
6
7
9. 100W Adaptor &
Cable
12

13 16 17 15
2. Skydio Enterprise Controller
3. Controller Neck Strap & D-ring
Bracket
4. X2 Battery
5. X2 Dual Charger
6. 2x 256GB SD cards (pre
installed)
7. Tactical Soft Case
8. Admin Hard Shell Case
10. 65W Adaptor
11. USB-C Cable
12. Microfiber Cloth
13. X2 Propeller Kit (6x CW, 6x CCW, 12x
screws)
14. Torque Driver
15. T3 Driver
16. Hard Stops & Hard Stop Screws
17. Security Key (X2D only)
1 Skydio X2 - User guide © 2021 Skydio, Inc. All rights reserved.
X2 EQUIPMENT AND SOFTWARE
What’s included with your Skydio Autonomy
Enterprise Foundation (AEF)TM software add-
on?
If you purchased the Skydio Autonomy Enterprise Foundation (AEF)TM software add-on, you unlock advanced, enterprise-caliber
autonomy functionality for your Skydio X2. AEF for X2 features are listed in the table below:
Feature Description Main use cases Key benefits
Close Proximity Obstacle
Avoidance
Visual
Return-to-Home
The drone can fly closer to
obstacles.
Close (~10”)
Minimal (~4”)
Disabled
Standard (~34”)
(out-of-the-box with X2)
Ability to RTH purely using
visual wayfinding when flying in
GPS denied environments
• Situational awareness •
Inspection
• Situational awareness •
Inspection
Allows closer flight for indoor
navigation e.g. through large
doorways and up-close
inspection of detailed assets
Provides robust and safe RTH
in high-RF or GPS-denied
environments (e.g below
bridges)
Superzoom Blends the six 4K navigation cameras to
create an
omnidirectional view. Allows
the user to zoom digitally with
algorithmic image stabilization
• Situational awareness See farther, and in all directions
without moving the
drone - reduces pilot cognitive
load

Point-of-Interest Orbit
Drone will navigate itself while revolving
around a user-defined point on a map
• Situational awareness Enables
surveillance and overwatch of any
structure or
locale
Track-in-place Ability to visually track a car or person from
a fixed position
from farther away
Vertical View Gimbal can vertically look straight up
above the drone
• Situational awareness Enables covert surveillance from farther
standoff distances
• Inspection Allows for overhung inspections such as ceilings,
bridges, and canopies
2 Skydio X2 - User guide © 2021 Skydio, Inc. All rights reserved.
X2 EQUIPMENT AND SOFTWARE
Additional equipment needed
You will need to purchase a USB-C flash drive which will be
used for the following:
• Drone software updates
• Skydio Enterprise Controller software updates
• Transferring offline maps
• Exporting logs
The requirements for the drive are:
• USB-C interface (used on both the drone and
Controller)
• User must format the drive filesystem to ExFat
• Must be at least as big as the files you plan to
transfer
(at least 8 GB is recommended)
• We recommend purchasing the Ultra Dual Drive USB
Type-C from SanDisk

3 Skydio X2 - User guide © 2021 Skydio, Inc. All rights reserved.
FLYING SAFELY
Safety
guidelines
Keep your fingers away from
moving propellers at all times.
Skydio X2 is not weatherproof –
don’t fly in rain, snow, fog, high
winds, etc.
Clean all of the cameras so
Skydio X2 can see clearly.
Use caution around thin branches, utility
lines, ropes, wires, netting, chain link
fencing, etc.
Fly cautiously over bodies of water more
than 30ft (9.1m) across.
Check your propellers for damage before
flying.
Skydio X2 does not avoid moving objects
or cars.
Skydio X2 obstacle avoidance is off during GPS
Night Flight mode and can be impaired when in
low light & poor visibility. Fly with extreme
caution under these conditions.
Follow FAA guidelines and local, state
and federal laws when using your Skydio
X2.

4 Skydio X2 - User guide © 2021 Skydio, Inc. All rights reserved.
FLYING SAFELY
• Because Skydio X2 navigates visually during the day, it’s
essential to keep all of its cameras clean. Use the
included cleaning cloth (or any clean microfiber cloth) to
ensure that all cameras are dust and smudge-free
before every flight.
• Battery - Skydio X2 uses magnets to retain the battery
which may attract metallic debris. Prior to installing any
battery, visually inspect the magnets on the bottom of
the Skydio X2 and the end of the battery, including
connectors, to make sure the magnets are clean and
free of debris so the battery fits securely in place.
Verify the battery is fully seated in the aircraft prior to
takeoff. DO NOT use if damage has occurred to
magnets or battery.
• Ensure all propellers are firmly attached and free of nicks,
cracks, or other visible damage. Never fly with
damaged propellers.
WARNING: Keep your fingers away from the
propellers anytime they’re spinning such as
during launch, flight, and landing. Attempting to
touch the propellers or the drone during flight,
launch, or landing has a high risk of severe injury.
Exercise caution when holding Skydio X2 in windy
environments, as gusts may cause the propellers to
spin. Skydio X2 should not be flown when winds or
gusts are above 25 mph/40kmh.
• When landing, Skydio X2 descends straight down and
does not avoid obstacles. Ensure your landing area
is flat and clear of obstacles. Stay clear of the
landing area to avoid injury.
• Do not intentionally try to crash Skydio X2.
• When following a car or other vehicle, follow while off-
road or on a closed course. Never use Skydio X2
over public roadways.
• While Skydio X2 is optimized for use outdoors, it can be
flown indoors in certain environments with caution.
Only fly indoors in large, open areas with good
lighting, like large warehouses, gymnasiums, or
similar spaces. If you fly indoors, avoid flying near
glass, mirrors, solid textureless walls, dark areas, or
polished, reflective flooring.
• The Skydio X2’s metal frame may become hot to the touch
in high-temperature environments or direct sunlight,
even if powered off. The metal frame may also
become hot if powered on while on the ground for long
periods of time.
• Do not fly over bodies of water more than 30 ft.
across.
• Skydio X2 can’t see certain visually challenging obstacles.
Do not fly around thin branches, telephone or power
lines, ropes, netting, wires, chain link fencing or other
objects less than ½ in. in diameter.
• Do not fly around transparent surfaces like windows or
reflective surfaces like mirrors greater than 23 in.
wide.
• If your Skydio X2 does hit an obstacle it can’t see, it will
do its best to stabilize itself and continue the flight.
• When the sun is low on the horizon, it can temporarily blind
Skydio X2’s cameras depending on the drone’s angle.
Your drone may be cautious or jerky when flying
directly toward the sun.
• Your Skydio X2 can fly up to 35 mph/57 kmh (ground
speed) or 25 mph/40 kmh (air speed) under most
conditions. When Obstacle Avoidance is set to “Close,”
“Minimal,” “Disabled” (AEF add-on), or when GPS Night
Flight is enabled, X2’s max speed will be reduced. See
Obstacle Avoidance under the Drone Settings section on
page 30 for more information.
• Skydio X2 may instruct you to land if it encounters an
error or determines the environment is not safe for flying.
When instructed to do so, immediately fly Skydio X2 to the
safest area nearby and land.
• Flying at high altitudes may significantly increase the time
required to return and safely land the Skydio X2. You,
the pilot in command, are responsible for managing the

vehicle’s altitude, range, and battery level at all times.
• Be sure to pay attention to any in-app messages.
• Skydio X2 is NOT A TOY and should not be used or
handled by a person under the age of 18.
Go to https://skydio.com/safety and https://skydio.com/support for more information and helpful tips,
videos, and articles.
5 Skydio X2 - User guide © 2021 Skydio, Inc. All rights reserved.
FLYING SAFELY
Where to fly
• You are responsible for your Skydio X2 at all times.
Always follow FAA guidelines for flying UAS. Check
resources like knowbeforeyoufly.org or apps like
B4UFLY for more info.
• DO NOT fly directly over people or crowds.
• Keep Skydio X2 within visual line of sight at all times,
unless you have received express permission to fly
beyond visual line of sight from a civil aviation
authority like the FAA.
• Skydio X2 is not weatherproof and requires good visibility.
Do not fly in any precipitation, including rain, fog, or
snow.
First flight
• Skydio X2 should not be flown when winds or gusts are
above 25 mph/40kmh.
• Do not fly your drone in temperatures below 14° F (-10° C)
or above 109° F (43° C). When flying in temperatures
below 32° F (0° C), ensure your batteries are pre-
warmed to 50° F (10° C) prior to takeoff. Endurance
may be degraded when operating near temperature
limits.
• The Skydio X2 only avoids obstacles that are not in
motion. Cars, boats, balls, animals, other drones,
other people, or similar moving objects may not be
avoided. You should exercise extreme caution
and good judgment when flying with other people
around.
Before you begin your first flight with your Skydio X2, please read and follow all of the safety tips
and guidelines listed above and at https://skydio.com/safety.
For your first flight, we recommend finding a clear, open space away from others on level ground with at least 10 feet of
clearance in every direction (including above).
Make sure nothing is obstructing the propellers at your launch location. Although flying Skydio X2 is easy and intuitive, it’s a good idea
to give yourself and others a little space when flying for the first time. Always be alert and aware of your surroundings during use.
CAUTION: For your first flight with Skydio X2, Skydio strongly recommends flying your Skydio X2 in normal daylight or
brightly lit conditions will full obstacle avoidance to get comfortable with the system before attempting to fly at night or with
reduced obstacle avoidance. Obstacle avoidance is disabled when in GPS Night Flight Mode.

6 Skydio X2 - User guide © 2021 Skydio, Inc. All rights reserved.
GETTING STARTED /
HARDWARE OVERVIEW
Hardware
overview
Skydio X2
1. Chassis
2. Navigation Camera x6
3. Gimbal
7
4. Motor Pod x4
(includes RGB/IR/Strobe LEDs)
5. Propeller Hub
6. Propeller Blade
(6x clockwise, 6x counter
clockwise)
7. Arm x4
8. Arm Clamp x4
9. Antenna(s), depending on radio
configuration
4
10. microSD Card Ports & Seal
11. USB-C Port & Port Seal
5
8
1
2
11

6
9
4
3 12. Cooling Outlet x2 (do not
cover)
13. Hard Stop x4 14. X2 Battery
15. Gimbal Isolator x3
15
10
13
14
12
11
10
7 Skydio X2 - User guide © 2021 Skydio, Inc. All rights reserved.
GETTING STARTED / HARDWARE
OVERVIEW Skydio X2
(cont.)
16. Thermal Camera
17. Color Camera
18. Gimbal Pitch Motor
19. Gimbal Roll Motor
20. Cooling Inlet
21. Skydio X2 Label

20
17
16
18 19
21
CAUTION: The Skydio X2 is not weatherproof. Do not operate in any precipitation, including rain, fog, snow, or similar
environments.

8 Skydio X2 - User guide © 2021 Skydio, Inc. All rights reserved.
GETTING STARTED / HARDWARE OVERVIEW
Skydio Enterprise Controller
1. Left Joystick
2. Right Joystick
11
3. Menu/Back Button
4. D-pad
5. C1 Button - Toggle Obstacle
1
Avoidance (AEF only),
customizable
6. C2 Button - Toggle Lights,
3
customizable
7. RTH (Return to Home) Button
8. Power Button
9. Launch/Land Button
10. Pause Button
11. Controller Clamshell
(contains embedded
antennas)
with Quick Start Clip
12. Device Screen
12
5 6 8 9 7
19
2
4
10
13. R1 Button, Shutter/Record 14. Right Wheel, Zoom
15. L1 Button, Boost
16. Left Wheel, Gimbal Tilt 17. R2 Button, Toggle Map
18. L2 Button, Toggle Camera (Thermal to Color)
19. Hard Reset Button
20. USB-C Port
21. Cooling Fan
22. Neckstrap/Tripod (¼-20) Mount
13 15 14 16 17 18
20

21 22
CAUTION: The Skydio Enterprise Controller is not weatherproof. Do not operate in any precipitation, including rain, fog,
snow, or similar environments. The Skydio Enterprise Controller is also not resistant to small debris—do not rest the
controller in fine sand, dirt or on similar terrain where particles can get trapped in the fan.
9 Skydio X2 - User guide © 2021 Skydio, Inc. All rights reserved.
GETTING STARTED / CHARGING YOUR SYSTEM
Charging your system
Skydio X2
The best way to charge your Skydio X2 batteries is by using the Skydio X2 Dual Charger.
To charge your Skydio X2 batteries, follow the steps below.
WARNING: Never expose batteries to extreme hot or cold temperatures. Follow instructions and warnings for battery
storage and use in the X2 Batteries section of this manual.
How to charge via X2 Dual Charger
1. Slide your X2 batteries into the Skydio X2 Dual
Charger, ensuring that the connector between the
charger and each battery is fully seated.
NOTE: You can also choose to charge a single X2 battery using
the Skydio X2 Dual Charger.
2. Connect your Skydio X2 Dual Charger to the provided
100W power USB-C power adaptor.
3. Plug the power adaptor into a 100-240V power
source. The LEDs on the battery will begin to flash
when the unit
is charging.
NOTE: The Skydio X2 Dual Charger is capable of
simultaneously providing current to two batteries, but the
charging system will prioritize fully charging a single battery.
When charging has completed, the LEDs on the battery will

power off.
10 Skydio X2 - User guide © 2021 Skydio, Inc. All rights reserved.
GETTING STARTED / CHARGING
YOUR SYSTEM Skydio X2
(cont.)
How to charge via Skydio
X2
1. Slide the X2 battery into the battery tray
towards the gimbal until it is magnetically
held in place.
2. Connect your Skydio X2 to the provided
USB charging cable and 100W adaptor. You
may also use the 65W adaptor that comes
included with the Skydio Enterprise
Controller.
3. Plug the power adaptor into a 100-240V
power source. Skydio X2 will power on and
the battery LEDs will begin to flash when
charging.
When charging has completed, the drone will
power off.
X2 Battery Charge Levels
When X2 is powered on or the battery is
charging, the LEDs on the battery will
indicate the current state of charge. When
X2 is powered off or the battery is detached,
you can view the battery’s state of charge by
tapping on the battery button to light up the
LEDs.
1 LED 2 LEDs 3 LEDs 4 LEDs

0–37% charged 38–62% charged 63–87%
charged 88–100% charged
11 Skydio X2 - User guide © 2021 Skydio, Inc. All rights reserved.
GETTING STARTED / CHARGING
YOUR SYSTEM Skydio
Enterprise Controller
How to charge
Connect your Skydio Enterprise Controller to
the provided USB charging cable and 65W
adaptor. You may also use the 100W
adaptor that comes included with the X2
Dual Charger, or any adaptor that is 18W or
above, to charge your controller.
• The controller will boot up and the LEDs on
the front of the controller will begin to flash
blue when charging, as well as a single LED
next to the USB-C charging port. You will
also see a charge level
displayed on the controller screen.
• When charging has completed, the LEDs
will show solid blue for 1 minute and then
power OFF.
NOTE: The Skydio Enterprise Controller
supports charging while in use, including
flying X2.
Skydio Enterprise
Controller Charge Levels
When the controller is powered on or
charging, the LEDs on the front of the
controller will indicate the current state of
charge. When the controller is powered off,
you can view the controller’s state of charge
by tapping on the power button to light up
the LEDs.

1 LED, solid red 1 LED, solid yellow 1
LED, solid blue 2 LEDs, solid blue 3 LEDs,
solid blue 4 LEDs, solid blue 5% or less 6%–15%
16%–37% 38%–62% 63%–87% 88%–100%
CAUTION: Do not fly when the Skydio Enterprise Controller battery is low. If the controller reaches low battery level when in
flight, pilot the drone to a safe location and land immediately.
12 Skydio X2 - User guide © 2021 Skydio, Inc. All rights reserved.
GETTING STARTED / ASSEMBLY
Assembly
Skydio X2
Step 1 — Extend arms
WARNING: Propeller blades are sharp. Handle with care.

NOTE: When unfolding the arms, exercise care to ensure arms
are rotated in the correct direction.
1. To unfold arms, start by opening the arm clamp
located where the arm attaches to the body.
2. Rotate all 4 motor arms 180 degrees. You will feel a
“click” when the motor arm has reached the correct
position.
NOTE: If you feel any resistance when opening the arms, you
may need to push outward (horizontally) on the arm to unseat
it before unfolding.
3. Fold the arm clamps to the locked position on all four
arms. Ensure that the paint on the arm clamp lines up
with the paint on the arm.
13 Skydio X2 - User guide © 2021 Skydio, Inc. All rights reserved.
GETTING STARTED / ASSEMBLY
Skydio X2 (cont.)
Step 2 - Verify microSD cards are
installed
Verify that 2 UHS Speed Class 3 (or faster) microSD cards are
inserted in the microSD card slots located on the left side of the
aircraft.
1. Logs Card - For supporting future software offerings. Do not
remove.
2. Media Card (closest to battery) — Stores all media captured
by the drone. Offload your media by
connecting your X2 to a computer using the provided USB-C cable,
or remove this card and use a microSD card reader.
Step 3 — Insert battery
Hold Skydio X2 upside down and slide the X2 battery into the
battery tray towards the gimbal until it is magnetically held in place.
To remove, simply pull on the battery and slide it out of the battery
tray.
Step 4 - Deploy antennas
Gently push each antenna inward to release it from the storage
position. Once released, the antennas will spring into a vertical
position perpendicular to the drone body.
1

2
14 Skydio X2 - User guide © 2021 Skydio, Inc. All rights reserved.
GETTING STARTED / ASSEMBLY
Skydio X2 (cont.)
Step 5 - Power on Skydio X2
Power on your Skydio X2 by holding the power button on the
battery for 3 seconds.
NOTE: This is the suggested order of operations when
assembling your X2 for the first time. However, it is not
necessary to unfold the X2 arms and antennas prior to
installing the battery and powering on the drone. On
subsequent setups, you can insert the battery and power on
the aircraft first, then unfold the arms and antennas while the
drone is booting up. This is a great way to reduce the overall
time from assembly to flight.
Other manuals for X2D
2
Table of contents
Other Skydio Drone manuals
