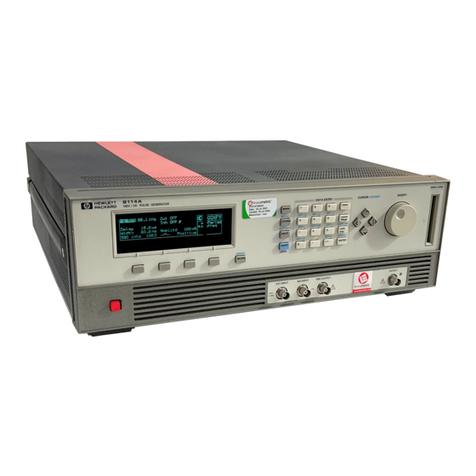
BNC 555 Series User manual

-~
ARTISAN
®
~I
TECHNOLOGY
GROUP
Your definitive source
for
quality
pre-owned
equipment.
Artisan Technology
Group
Full-service,
independent
repair
center
with
experienced
engineers
and
technicians
on staff.
We
buy
your
excess,
underutilized,
and
idle
equipment
along
with
credit
for
buybacks
and
trade-ins
.
Custom
engineering
so
your
equipment
works
exactly as
you
specify.
•
Critical
and
expedited
services
•
Leasing
/
Rentals/
Demos
• In
stock/
Ready-to-ship
•
!TAR-certified
secure
asset
solutions
Expert
team
ITrust
guarantee
I
100%
satisfaction
All
tr
ademarks,
br
a
nd
names, a
nd
br
a
nd
s a
pp
earing here
in
are
th
e property of
th
e
ir
r
es
pecti
ve
ow
ner
s.
Find the Berkeley Nucleonics 555 at our website: Click HERE

Berkeley Nucleonics Corporation
2955 KernerBlvd.
San Rafael, CA 94901
Phone (415) 453-9955
Fax (415) 453-9956
www.berkeleynucleonics.com
555 Series
Pulse Generator
User's Manual
BNC
Artisan Technology Group - Quality Instrumentation ... Guaranteed | (888) 88-SOURCE | www.artisantg.com
- i -
Contents
INTRODUCTION....................................................................................1
Technical Support .............................................................................................................. 1
Parts List............................................................................................................................ 1
Warranty ............................................................................................................................ 1
Safety Issues...................................................................................................................... 1
CONTROLS & CONNECTORS..............................................................5
Front Panel......................................................................................................................... 5
Display Layout and Indicators ............................................................................................ 5
Keypads .............................................................................................................................. 5
Parameter Adjustment Knob ............................................................................................. 6
BASIC OPERATION ...............................................................................7
Overview............................................................................................................................ 7
QuickStart ........................................................................................................................... 8
Selecting Menus ................................................................................................................ 9
Selecting Menu Items ....................................................................................................... 9
Numeric Input Mode ......................................................................................................... 9
Item Edit Mode ................................................................................................................ 10
Alphanumeric Input Mode .............................................................................................. 10
MENUS ................................................................................................. 11
CHANNELMenu .............................................................................................................11
Enable/Disable ...................................................................................................................11
Timing Parameters ............................................................................................................11
Pulse Configuration...........................................................................................................11
Special Functions .............................................................................................................. 12
Gated Operation............................................................................................................... 12
MODE Menu................................................................................................................... 12
Modes............................................................................................................................... 12
RATE Menu..................................................................................................................... 13
To Period .......................................................................................................................... 13
GATE/TRIGGER Menu ................................................................................................. 13
Gate/Trigger Mode .......................................................................................................... 14
Artisan Technology Group - Quality Instrumentation ... Guaranteed | (888) 88-SOURCE | www.artisantg.com
- ii -
SYSTEM Menu ............................................................................................................... 14
Computer Communication Parameters ........................................................................... 14
Keypad Controls .............................................................................................................. 15
Miscellaneous .................................................................................................................. 15
STORE Menu.................................................................................................................. 15
Storing a Configuration..................................................................................................... 15
Configuration # ................................................................................................................. 16
Name ................................................................................................................................. 16
RECALLMenu ............................................................................................................... 16
Recalling a Configuration................................................................................................. 16
Configuration # ................................................................................................................. 16
Name ................................................................................................................................. 16
AUXILIARY Menus ........................................................................................................ 17
BASIC OPERATION .............................................................................18
COMPUTER INTERFACE ....................................................................21
Serial Port Pinout ............................................................................................................. 21
Programming Command Types and Format ................................................................... 21
IEEE 488.2 Common Command Format ......................................................................... 21
SCPI Command Keywords ............................................................................................... 22
SCPI Command and Query Format ................................................................................. 22
SCPI Keyword Separator ................................................................................................. 23
SCPI Option Keyword...................................................................................................... 23
SCPI Specific and Implied Channel ................................................................................. 23
SCPI Parameter Types ..................................................................................................... 23
Error Codes...................................................................................................................... 23
INTERFACE EXAMPLES .....................................................................25
SPECIFICATIONS ................................................................................31
Internal Rate Generator ................................................................................................. 31
Channel Timing Parameters ............................................................................................ 31
Output Channel Parameters ............................................................................................ 31
External Trigger and Gate .............................................................................................. 31
Computer Interface ......................................................................................................... 32
General............................................................................................................................. 32
MENU SUMMARY................................................................................33
MAINTENANCE ...................................................................................37
Artisan Technology Group - Quality Instrumentation ... Guaranteed | (888) 88-SOURCE | www.artisantg.com
- iii -
CUSTOM FEATURES ...........................................................................39
35 Volt Option.................................................................................................................. 39
Artisan Technology Group - Quality Instrumentation ... Guaranteed | (888) 88-SOURCE | www.artisantg.com
- iv -
Artisan Technology Group - Quality Instrumentation ... Guaranteed | (888) 88-SOURCE | www.artisantg.com
- 1 -
INTRODUCTION
This manual is designed to familiarize you with the Berkeley Nucleonics Model 555 pulse
generator. Rather than the usual array of knobs and switches, the 555 uses a menu-driven user
interface with “on-line” help -- once you learn the basics of operating your 555, you may never
need to refer to this manual again.
The 555 has some unique features that are designed exclusively for use as a laser trigger signal
generator, but can also be used as a general purpose pulse generator. Because it employs a
flexible microprocessor-controlled architecture, the 555 can be customized to fit your exact
requirements -- contact Berkeley Nucleonics for details.
Technical Support
For questions or comments about operating the 555 -- contact Berkeley Nucleonics via one of
the following methods.
- Phone - (415)453-9955
- Fax - (415)453-9956
- Internet - www.berkeleynucleonics.com
Parts List
The following parts are included with the 555 -- contact Berkeley Nucleonics if any parts are
missing.- 555 Pulse Generator
- AC Power Cord
- User’s Manual
Warranty
In addition to a 30-day money back guarantee, the 555 has a one-year limited warranty from
the date of delivery. This warranty covers defects in materials and workmanship. Berkeley
Nucleonics will repair or replace any defective unit. Contact us for information on obtaining
warranty service. Warranty does not apply to defects resulting from:
- Improper or inadequate maintenance or calibration;
- Unauthorized modification or misuse;
- Operation outside of the published environmental specifications for the product;
- Improper site preparation or maintenance.
Artisan Technology Group - Quality Instrumentation ... Guaranteed | (888) 88-SOURCE | www.artisantg.com
- 2 -
Berkeley Nucleonics does not warrant the operation of this product to be uninterrupted or error
free. This product is not intended for medical or life-support use, for the detonation of
explosive devices, or for any other application that could cause bodily harm in the event of a
product malfunction. The user assumes all risks associated with such use of this product.
Safety Issues
Normal use of test equipment presents a certain amount of danger from electrical shock be-
cause testing must be performed where exposed voltage is present. An electrical shock causing
10 milliamps of current to pass through the heart will stop most human heartbeats. Voltage as
low as 35 VDC or RMS AC should be considered dangerous and hazardous since it can
produce a lethal current under certain conditions. Higher voltages pose an even greater threat
because such voltage can easily produce a lethal current. Your normal work habits should
include all accepted practices that will prevent contact with exposed high voltage, and steer
current away from your heart in case of accidental contact with a high voltage. You will signifi-
cantly reduce the risk factor if you know and observe the following safety precautions:
1. To avoid the risk of electric shock, do not remove the instrument cover. Servic-
ing of the instrument should only be performed by trained, qualified personnel.
2. Do not position the instrument in such a manner that makes it difficult to remove
the AC power cord.
3. Use an insulated floor material or a large, insulated floor mat to stand on, and an
insulated work surface on which to place equipment. Make certain such
surfaces are not damp or wet.
4. Use the time-proven “one hand in the pocket” technique while handling an
instrument probe. Be particularly careful to avoid contact with metal objects
that could provide a good ground return path.
5. When testing AC powered equipment, remember that AC line voltage is usually
present on power input circuits, such as the on-off switch, fuses, power trans-
former etc.
Artisan Technology Group - Quality Instrumentation ... Guaranteed | (888) 88-SOURCE | www.artisantg.com
- 3 -
6. Never work alone. Someone should always be nearby to render aid if neces-
sary. Training in CPR first aid is highly recommended.
7. Safety symbols used on the instrument
- Instruction Manual symbol
(user must refer to the instruction manual)
- On/Standby switch symbols:
On
Standby
Artisan Technology Group - Quality Instrumentation ... Guaranteed | (888) 88-SOURCE | www.artisantg.com
- 4 -
Artisan Technology Group - Quality Instrumentation ... Guaranteed | (888) 88-SOURCE | www.artisantg.com
- 5 -
CONTROLS & CONNECTORS
Front Panel
Display Layout and Indicators
A 4 line x 20 character vacuum fluorescent display module displays parameters and status
information. The status information is located in the upper-left corner of the display, between
the two brackets. There are three enunciators:
•Vertical Arrow Indicates there are additional pages to the current menu.
•Blinking Light Indicates the unit is actively generating pulses, or armed and
waiting for an external trigger.
•Musical Note Indicates the function key has been pressed.
The upper-right side of the display contains the title of the currently displayed menu. The rest of
the display is used for system parameters. The display brightness may be adjusted allowing the
instrument to be used under various lighting conditions.
Keypads
Three keypad areas provide fast access to various menus and easy editing of system param-
eters. •Channel Keypad Provides one touch access to the menus for setting up the
channel parameters. Pressing the appropriate letter will dis-
play the parameters for the corresponding channel.
•Arrow Keypad The up/down arrows are used to increment/decrement the
current parameter (indicated by the blinking cursor). The po-
sition of the cursor controls the step size for each increment.
The right/left arrow moves the cursor to different positions
within the current parameter. The NEXT key selects the next
parameter in the currently displayed menu. The blue Function
key allows the keys to select the blue function.
•Numeric Keypad Allows numbers and alphanumeric values to be entered.
When entering alphanumeric values, pressing a key will dis-
play the first letter shown on the keypad. Repeated key
presses will toggle through all the letters, both upper and
lower case, shown on the keycap.
Artisan Technology Group - Quality Instrumentation ... Guaranteed | (888) 88-SOURCE | www.artisantg.com
- 6 -
To enter two letters which appear on the same keycap, select
the first character, then use the right arrow to shift to the next
position and enter the next letter. When data entry is com-
plete the ENTER key must be pressed.
Parameter Adjustment Knob
An alternate to the Arrow Keypad, the Parameter Adjustment Knob may be used to adjust the
current parameter. The step size is controlled by the position of the cursor, however turning the
knob faster will increase the step size. Pushing the knob will perform functions similar to the
NEXT key and switch to the next parameter in the currently displayed menu.
Artisan Technology Group - Quality Instrumentation ... Guaranteed | (888) 88-SOURCE | www.artisantg.com
- 7 -
Basic Operation
Overview
The Model 555 Pulse Generator is designed to provide maximum flexibility, while maintaining a
simple interface. A basic understanding of the architecture of the instrument will aid in fully
exploiting its capabilities. Referring to the figure above, the timing generator is divided into two
sections: the Internal System Timer & Mode Generator and the Channel Timer & Mode
Generator.
The Channel Timer functions as a 'non-retriggerable, delayed, one shot' pulse generator. This
means that the timer will only generate one delayed pulse for every start pulse received. Once
the channel timer has started counting, additional start pulses will be ignored until the pulse has
been completed (nonretriggerable). The start pulse for each channel is provided by the internal
To pulse generated by the Internal System Timer. Whether or not a pulse is generated for each
To pulse is determined by the Channel Mode Generator. Standard modes include:
Normal a pulse is generated for each To pulse
Single Shot a pulse is generated at the first To pulse
Output
Pulses
Output
MUX
Internal
To Pulse
External
Input
Arm
Start
*Gate To
Internal SystemTimer
and System Mode
Generator
Channel Timers and Channel
ModeGenerators
*Start source is: RUN button inInternal Modes
External inputinExternal triggermodes
** Channelsarearmedbythe RUN button. Insingleshot andburst modes
channellsmay berearmed by pressing the RUNasecondtime.
RUN
Command
**
Start
Gate
Arm
*Start source is: RUN button in Internal Modes
External input in External Trigger modes
**Channels are armed by the RUN button. In single shot and burst modes
channels may be rearmed by pressing the RUN button.
Artisan Technology Group - Quality Instrumentation ... Guaranteed | (888) 88-SOURCE | www.artisantg.com

- 8 -
Burst a pulse is generated for each To pulse, 'n' times, after which
output is inhibited
Divide-by-n a pulse is generated every nth To pulse
Different modes may be selected for each output, allowing a wide variety of output combina-
tions. Each output may also be independently disabled or gated (using the external trigger
input).
The System Timer functions as a non-retriggerable, multivibrator pulse generator. This means
that once started, depending on the mode, the timer will produce pulses continuously. Before
pulses will be generated, the timer must be armed and then receive a start pulse. Arming the
counter is done by pressing the RUN key. With external trigger disabled, the RUN key also
generates the start command for the counter. With external trigger enabled, the external trigger
provides the start pulse. In either case, once started, the counter operation is determined by the
System Mode Generator. Standard modes include:
Continuous once started To pulses are generated continuously
Single Shot one To pulse is generated for each start command
Burst Mode 'n' To pulses are generated for each start command
Duty Cycle once started To pulses cycle on and off continuously
The To pulses are distributed to all of the start inputs of the Channel Timer and Mode Genera-
tors.
QuickStart
The default mode (channel mode = normal, system mode = continuous, and external trigger
disabled) of the Model 555 generates a continuous stream of pulses when started by the RUN
key. The output status is given in the upper-left corner of the display. A blinking light indicates
pulses are being produced.
To generate a specific pulse train in the default mode:
•Enter the output channel menu by pressing the appropriate letter key. Set the
desired pulsewidth and delay. Repeat for each output.
Artisan Technology Group - Quality Instrumentation ... Guaranteed | (888) 88-SOURCE | www.artisantg.com
- 9 -
•Enter the RATE menu, by pressing the FUNCTION key and then the "4" key.
Set the desired pulse period. Note that in general the pulse delay plus
pulsewidth should be less than the period.
•Press the RUN key.
Selecting Menus
Parameters are grouped in menus, selectable using the function keys. To select the output
channel parameters press the letter key corresponding to the desired channel. To select blue
menus press the FUNCTION key and then the key corresponding to the desired blue function.
Menus may include a number of different pages. Each page contains up to four parameters.
The status block in the upper-left corner of the display shows a vertical arrow if the current
menu contains additional pages. To select the next page, select the same menu button again,
pressing the FUNCTION key and blue function again for higher-order menus.
Selecting Menu Items
Within a menu, the blinking cursor indicates the current menu item for editing. The NEXT key
or pressing the adjustment knob will select a different menu item.
Numeric Input Mode
When the current item is numeric, the system enters the Numeric Input Mode. In this mode
data may be edited in one of three ways. Using the arrow keypad, the Left and Right arrow
keys are used to select a digit to edit. The selected digit blinks to identify itself as the active
digit. The Up and Down arrow keys are then used to increment or decrement this digit. Alter-
nately, after using the Left and Right arrow keys to select an active digit, the adjustment knob
may be used to increment and decrement this digit. The adjustment knob features speed
dependent resolution. Slow rotation will increment or decrement the active digit by one. As
you increase the speed of rotation, the parameter will be 10 to 1000 times faster depending on
the speed.
The last entry mode is using the numeric keypad. Enter the number, including decimal point
using the numeric keypad. When complete, enter the number using the ENTER key. Errors
may be corrected using the backspace key or to start over press the clear key (CLR). Pressing
the CLR key a second time will exit the numeric keypad mode and restore the original number.
Artisan Technology Group - Quality Instrumentation ... Guaranteed | (888) 88-SOURCE | www.artisantg.com
- 10 -
Item Edit Mode
When the current item is non-numeric, the Up and Down arrow keys are used to select among
different options for the parameter. The adjustment knob may also be used to change the
selection. If the item is an on/off toggle, the Up arrow (CW adjustment knob) enables the item
and the Down arrow (CCW adjustment knob) disables the item.
Alphanumeric Input Mode
When the current item is alphanumeric, the system enters the Alphanumeric Input Mode. In this
mode, data is entered using the alphanumeric keypad. When entering alphanumeric values,
pressing a key will display the first letter shown on the keypad. Repeated key presses will
toggle through all the letters, both upper and lower case, shown on the keycap. To enter two
letters which appear on the same keycap, select the first character, then use the right arrow to
shift to the next position and enter the next letter. The Left and Right arrow keys may be used
to position the cursor to edit any character. When data entry is complete, the ENTER key must
be pressed. The keys contain the following characters.
•1 1 2 3 4 5 6 7 8 9 0
•2A B C a b c 2
•3D E F d e f 3
•4G H I g h i 4
•5J K L J k l 5
•6M N O m n o 6
•7P Q R S p q r s 7
•8T U V t u v 8
•9W X Y Z w x y z 9
•0 0 1 2 3 4 5 6 7 8 9
•.. , # $ % & ?
•-- + * / space
Artisan Technology Group - Quality Instrumentation ... Guaranteed | (888) 88-SOURCE | www.artisantg.com
- 11 -
MENUS
CHANNEL Menu CHANNEL Menus
Enable/Disable
The top of each Channel menu page is a parameter to enable or disable the output of the
channel. This affects only the output of the current channel.
Timing Parameters
•PULSEWIDTH Sets the width of the active portion of the pulse.
•DELAY Sets the delay from the internal To or external trigger to the
start of the pulse.
*NOTE: The pulsewidth + delay + 250 ns (hardware reset constant) must be
less than the To period. Therefore if the sum exceeds To period, the correct
pulses will be generated but at a rate slower than the To rate.
Pulse Configuration
•POLARITY Sets the pulse to active high or active low.
•OUTPUT TYPE Selects between the high speed TTL/CMOS compatible out-
put or the slower adjustable output.
•OUTPUT LEVEL Sets the voltage level when the adjustable output is selected.
*NOTE: The unit does not generate negative output voltages. An active high
TTL/CMOS pulse is: 0v - 5v - 0v. An active low pulse is: 5v - 0v - 5v. The
adjustable output has a slower rise/fall time than the TTL/CMOS output and
should be used only when the adjustable voltage or the extra current is
needed.
Timing Parameters Pulse Configuration Special Functions Gated Operation
Enable Enable Enable Enable
Polarity
Pulsewidth Output Type Mode Gate Enable
Delay Output Level Divide-by-N
# / Burst
Artisan Technology Group - Quality Instrumentation ... Guaranteed | (888) 88-SOURCE | www.artisantg.com
- 12 -
Special Functions
•MODE Selects the channel output mode: continuous, single shot,
burst, or divide-by-n.
•#/BURST Sets the number of pulses to be generated in the burst mode.
•DIVIDE-BY-N Sets the divisor for the divide-by-n mode.
Gated Operation
•GATE Enables/disables the channel gating using the external trigger
input. This function is independent of any other use of the
trigger input. Care should be taken to insure that all uses of
the trigger are compatible.
•POLARITY Sets the gate to active low or active high.
*NOTE: The gate function disables the channel from being triggered by the
To pulse. To prevent partial pulses from being generated, the gate does not
disable the channel timers. Thus, if a pulse has already started when the
gate disables the channel, the pulse will continue normal output but will not
restart on the next To pulse.
MODE Menu MODE Menus
Modes•MODE Selects the To mode: Continuous, Single Shot, Burst or Duty
Cycle mode.
•#/BURST Sets the number of pulses to be generated when in the Burst
mode.
To Mode To Mode To Mode To Mode Oscillator
MODE: Continuous MODE: Single Shot MODE: Burst MODE: Duty Cycle
DC On OSC Out
# / Burst DC Off OSC In
Artisan Technology Group - Quality Instrumentation ... Guaranteed | (888) 88-SOURCE | www.artisantg.com

- 13 -
•DC ON Sets the number of pulses to be generated each on cycle
when in the Duty Cycle mode..
•DC OFF Sets the number of pulses to skip each off cycle when in the
Duty Cycle mode.
*NOTE: Any mode may be started by either the RUN key in the internal
trigger mode or armed by the RUN key and started by an external trigger in
the external trigger mode. In the single shot and burst modes, (internally
triggered) the unit disarms itself at the end of the pulse train. Pressing the
RUN key after the unit has been disarmed will generate a new pulse train.
RATE Menu Rate Menu
To Period
•PERIOD Sets the To period.
GATE/TRIGGER Menu GATE/TRIGGER Menu
To Period
To Period
Gate/Trigger Mode Gate/Trigger Mode Gate/Trigger Mode
MODE: Disabled MODE: Triggered MODE: Gated
THRESHOLD THRESHOLD THRESHOLD
EDGE POLARITY
Artisan Technology Group - Quality Instrumentation ... Guaranteed | (888) 88-SOURCE | www.artisantg.com
- 14 -
Gate/Trigger Mode
•MODE Selects external input usage for controlling To: disabled, edge
triggered or level gated.
•THRESHOLD Sets the voltage threshold for the external input. This level is
applied to all uses of the external input.
•EDGE Selects rising or falling edge for the trigger mode.
•POLARITY Selects active high or active low in the gated mode.
*NOTE: When the gate disables the System Timer, the timer is reset. The gate
edge to enable the timer will restart the System Timer, which synchronizes the
To pulse to the gate and minimizes jitter relative to the gate. The trigger
threshold applies to all uses, channel and system, of the trigger/gate input.
SYSTEM Menu SYSTEM Menus
Computer Communication Parameters
•BAUD RATE Selects the baud rate for the RS232 interface.
•ECHO Selects whether to echo characters back to the host computer
or not.
•GPIB ADDRESS Selects the GPIB address.
*NOTE: The unit will not respond to computer commands unless the appro-
priate BAUD rate or GPIB address is selected.
Comm. Parameters Keypad
Parameters Misc. Parameters
Baud Rate Key Repeat Rate
Echo Enable Key Volume Decimal Mark
GPIB Address Knob Volume LCD Brightness
Artisan Technology Group - Quality Instrumentation ... Guaranteed | (888) 88-SOURCE | www.artisantg.com
Table of contents
Other BNC Pulse Generator manuals