Bodyguard T320X User manual

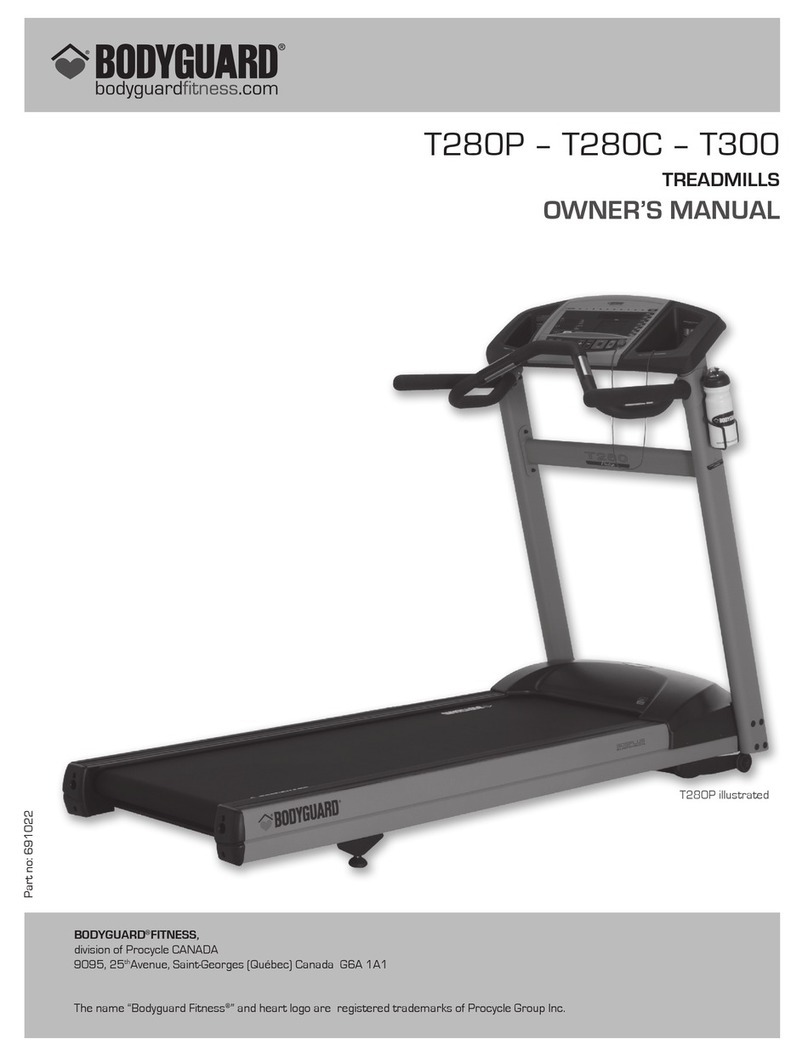
T320X – T460X – T460XC
TREADMILLS
OWNER’S MANUAL
Part no: 691009 R0:10-2007
T460x illustrated
BODYGUARD®FITNESS,
division of Procycle CANADA
9095, 25thAvenue, Saint-Georges (Québec) Canada G6A 1A1
The name “Bodyguard Fitness®” and heart logo are registered trademarks of Procycle Group Inc.

2
Table of Contents
IMPORTANT SAFETY NOTICE......................................................................................................................................................4
1. OPERATING YOUR T460X / T460XC / T320X ....................................................................................................................5
1.1 GETTING TO KNOW THE T460X /T460XC /T320X .................................................................................................................5
AHeart Rate training zone .......................................................................................................................................................5
BClock 6
CDedicated Heart rate window ................................................................................................................................................6
DTri-color profile display ..........................................................................................................................................................6
EProgram Evolution display ....................................................................................................................................................6
FQuick program keys ..............................................................................................................................................................6
GNumeric keypad & Quick speed keys....................................................................................................................................6
HScrolling screen.....................................................................................................................................................................6
ISelect keys............................................................................................................................................................................7
JMain keypad..........................................................................................................................................................................7
KSafety key .............................................................................................................................................................................8
1.2 PAUSE DURING AN EXERCISE.................................................................................................................................................8
1.3 SAVING AN EXERCISE (MEMORY) ...........................................................................................................................................8
1.4 VIEWING EXERCISE PARAMETERS ..........................................................................................................................................9
1.5 AUTO POWER OFF ..............................................................................................................................................................9
2. SETTING UP THE COMPUTER TO YOUR ENVIRONMENT ............................................................................................10
2.1 ACCESS TO SETTINGS MENU ...............................................................................................................................................10
2.2 LANGUAGE SELECTION .......................................................................................................................................................10
2.3 DISTANCE UNIT ..................................................................................................................................................................10
2.4 WEIGHT UNIT.....................................................................................................................................................................10
2.5 WARM UP..........................................................................................................................................................................11
2.6 COOL DOWN......................................................................................................................................................................11
2.7 BEEPER.............................................................................................................................................................................11
2.8 USER IDENTIFICATION .........................................................................................................................................................12
2.9 SPEED LIMITS ....................................................................................................................................................................13
2.10 PAUSE DURATION...............................................................................................................................................................13
2.11 EDIT WELCOME MESSAGE ..................................................................................................................................................14
2.12 SAVING OPTION .................................................................................................................................................................14
2.13 SEGMENT DURATION...........................................................................................................................................................14
2.14 CLOCK OPTION ..................................................................................................................................................................14
2.15 QUICK SPEED MODE ..........................................................................................................................................................15
2.16 AUTO POWER OFF ............................................................................................................................................................15
3. T460X / T460XC / T320X EXERCISE PROGRAMS...........................................................................................................16
3.1 JUSTGO
TM
PROGRAM........................................................................................................................................................16
3.2 MANUAL ...........................................................................................................................................................................17
3.3 CALORIE GOAL (GOAL SELECT -100 –150 -200).................................................................................................................17
3.4 DISTANCE GOAL (GOAL SELECT -5K -10 K –HALF MARATHON –MARATHON) ...........................................................................17
3.5 INTERVALS (1:1 –1:2 –2:1 –MANUAL).................................................................................................................................18
3.6 HEART RATE CONTROL (WEIGHT LOSS –HEALTH –AEROBIC-INTERVAL –HILL –FITNESS TEST) ..............................................19
3.7 TRACK (RACE TRACK –RUNNER’S INTERVAL) .......................................................................................................................21
3.8 GET IN SHAPE ....................................................................................................................................................................22
3.9 LEARN PROGRAM ...............................................................................................................................................................23
3.10 STATISTICS........................................................................................................................................................................23
3.11 MEMORY ...........................................................................................................................................................................24
4. HEART RATE MONITORING.............................................................................................................................................25
4.1 HEART RATE CONTACT .......................................................................................................................................................25
4.2 HEART RATE CHEST STRAP ................................................................................................................................................25
5. COMPUTER DIAGNOSTICS..............................................................................................................................................27
6. MAINTENANCE INFORMATION .......................................................................................................................................32
6.1 GENERAL CARE .................................................................................................................................................................32
6.2 RUNNING BELT AND DECK SURFACE ......................................................................................................................................33
6.3 LUBRICANT APPLICATION.....................................................................................................................................................33
6.4 QUICK TROUBLESHOOTING..................................................................................................................................................33
6.5 ERROR CODES...................................................................................................................................................................34
3
Thank You for Purchasing a Bodyguard®
Bodyguard
®
Fitness is dedicated to designing and manufacturing the finest fitness equipment available today. This manual
outlines information on operation, safety and basic maintenance checks for the Bodyguard
®
T460X / T 460XC / T320X treadmills.
When you require service for your T460X / T460XC / T320X, always present the product model name, serial number and date of
purchase to the Bodyguard
®
dealer. The product name and serial number is located at the bottom front of the machine, near the
ON/OFF switch. We suggest that you write the product model name, serial number and related information in the space provided
below.
Product Name
Model Number
Serial Number
Purchased Date
Dealer Store Name
Dealer Phone Number
Please fill out the warranty registration card and return it to Bodyguard
®
Fitness within 30 days of purchase date for registration
of your T460X / T460XC / T320X treadmill lifetime warranty. It is important that you return your warranty registration to help us
keep you up to date with all the latest T460X / T460XC / T320X product additions. The warranty card is used to establish your
date of purchase.
NOTE: Your date of purchase is the beginning date of your treadmill warranty. If you omit to send your warranty card to
Bodyguard
®
Fitness, we will use the dealer purchase date to honor the warranty time.
You can also register on-line at www.bodyguardfitness.com

4
IMPORTANT SAFETY NOTICE
READ THIS MANUAL THOROUGHLY BEFORE ATTEMPTING
TO ASSEMBLE OR USE THIS EXERCISE EQUIPMENT.
To ensure that you get the maximum benefit from the engineering that has gone into your machine, we recommend that you
read this manual carefully before attempting to use the T460X / T460XC / T320X treadmills. Save these instructions and refer to
this manual if you are unfamiliar with the operation of the T460X / T460XC / T320X.
WARNING – Before attempting to use this equipment you should read this instruction manual carefully. Use of this equipment by
people with heart or other health problems may result in serious injury. You should consult with a physician prior to using this
equipment. It is recommended to periodically consult your physician as you continue to use this equipment. Immediately stop
exercise if you feel dizzy, faint or short of breath. Use of this equipment in a manner other than as prescribed by the instructions
herewith may result in serious injury.
For your personal safety
Do not place towels or clothing on any part of the treadmill.
Do not place liquids near the electrical power plug, ON/OFF switch or any part of the treadmill.
Before attempting to disconnect the power, exit the program screen, then turn the power OFF. To reduce any risks of electrical
shock, do not pull the power cord from the cable. Gently remove the power cable by pulling the plug from the wall outlet.
Do not operate the treadmill if the power cord is damaged or if the treadmill is not working correctly. If the power cord is
damaged, please contact your local distributor or manufacturer to get it replaced. The rating of the new power cord must be
15 amps (125 volts AC).
Keep the power cord away from all moving parts of the treadmill, such as the elevation arm assembly and front transport wheels.
Do not use an extension cord that is not properly grounded. Keep all extension cords clear of all moving parts of the treadmill.
Place the equipment in a way that the power can easily be interrupted by pulling the power cord.
Do not allow children near the treadmill when in operation. Do not allow unsupervised children near the treadmill and keep the
safety key in a safe place away from children.
Wear proper exercise footwear when using the treadmill. Do not use the treadmill in bare feet or in socks. It is normal for the
treadmill belt to discharge soil or rocks that are on the sole of your shoes. It is always good practice to clean the soles of your
shoes before using the treadmill.
Never use the treadmill if there is more than one person on it.
Never try to accelerate or decelerate the speed of the running belt, with the power On or Off, by pushing or pulling on the
machine to stop it.
Always face towards the computer display and do not run backwards on the belt.
The treadmill should not be boxed in with other furniture or obstacles. Keep the rear and side of the treadmill clear of any
obstructions.
Electrical Information
CAUTION – This equipment is intended to be electrically grounded. The three-wire grounding plug (polarized) will fit only a
grounded AC outlet. Do not use an extension cord or outlet if it does not accept three-wire grounding plugs. Contact a licensed
electrician to replace the outlet with a properly grounded outlet.
WARNING – To prevent the risk of fire or electrical shock, do not expose this machine to rain or moisture. Do not place machine
outdoors. Do not place machine near swimming pools, sauna rooms or high humidity environments. Refer servicing to your local
qualified Bodyguard
®
Service personnel only.
If you have any questions about the assembly, proper use or repair of your treadmill, please call your local Bodyguard
®
dealer.
All necessary adjustments or repairs during the warranty period must be made by your local authorized Bodyguard
®
dealer.
IMPORTANT NOTICE: This treadmill should be connected in a dedicated circuit in order to avoid functional problems.
Should you need more information, you can call our Customer Service Department at:
1-418-228-8934 / 1-888-407-3784

5
1. OPERATING YOUR T460X / T460XC / T320X
Each T460X / T460XC / T320X treadmill contains a L.E.D. (light emitting diode) computer display monitor. The control functions,
unique programs and features have been designed with you in mind, to offer the best possible exercise by displaying important
and clear information regarding your exercise progress.
Please familiarize yourself with the functions of the computer display monitor and the programs. These features will help you
have the best workout and exercise experience.
1.1 Getting to know the T460X / T460XC / T320X
A Heart Rate training zone
The heart rate training zone helps you keep track of the zone you are currently exercising in: Fat Burning, Healthy Heart or
Aerobic Zone.
If your are wearing a chest strap and perform in a heart rate program, the Heart Rate training zone will be automatically activated
and it will show your cardio training zone.
To determine your recommended heart rate level, select the type of exercise program
you wish to follow. Your MAXIMUM HEART RATE (MHR) is calculated as follows:
MHR= 220-Age
It is not recommended to exercise above 90% of your MHR.
Exercise in 80-90% MHR area for an aerobic zone.
Exercise in 70-80% MHR area for a moderate, healthy zone.
Exercise in 60-70% MHR area if you wish to train in a fat burning zone.
Difficult to achieve exercise benefit below 60% MHR.
B
Real Time
Clock
C
Dedicated
Heart Rate
Window E
Program
Evolution Display
G
Numeric Keys
& Quick
Speed Keys
I
Select Keys
K
Safety Key
J
Principal
Key pad
D
Profil
Display
L
X-CARDTM
H
Scrolling
Screen
F
Quick
program keys
A
Heart Rate
Training Zone
J
Main
Key Pad
F
Quick
Program Key
D
Profile
Display
L
X-CARD
T M
Slot
B
Clock

6
B Clock
Allow you to see the time of the day during your workout. See SETTINGS section 2.16, to adjust if necessary.
C Dedicated Heart rate window
The dedicated heart rate window allows you to monitor your heart rate at a glance; it will display your actual heart rate in beats
per minutes if the heart rate chest strap is used or if you use the contact heart rate.
D Tri-color profile display
The very easy to read, large 7 inches three colour graphic display, gives a clear indication of your exercising program speed and
elevation. As the speed and elevation increase, the corresponding profile will move towards the top of the viewing screen. Each
green dot represents 1 mph (1,6 km/h). Each red dot represents 1.5% elevation.
The minimum values are:
Speed: 0.1 mph (0.2 km/h) for the T320X and 0.5 mph (0,8 km/h) for the T460X/XC
Elevation: 0% elevation for the T320X and -3% for the T460X/XC
The maximum values are:
Speed: 11 mph (17,7 km/h) for the T320X and 12 mph (19,2 km/h) for the T460X/XC
Elevation: 15%
Each exercise program starts from the left hand side of the screen and ends when it reaches the right hand side of the screen.
Red colour: Elevation profile
Green colour: Speed profile
Orange colour: Line 0% elevation, a flashing orange dot will indicate your progression in the program.
E Program Evolution display
The Program Evolution Display allows you to know Time, Calories or Distance left within your predetermined goal.
F Quick program keys
Allow you to select the program of your choice. For more information on the programs see section 3.
G Numeric keypad & Quick speed keys
Numeric keypad: Use numeric keys to enter exercise time, belt speed, age, weight, and distance.
Quick Speed Keys: These keys also become Quick Speed keys during a program. Simply select the speed with the numeric
keypad keys and press the JustGo
TM
key on the main keypad of the display.
Backspace: This key allow you to go back if you made a mistake when entering settings into you program.
Enter: This Key allow you to validate you settings in a program. You may as well use JustGo
TM
H Scrolling screen
The 22 digits, alphanumeric scrolling screen allow you to easily enter your personal information prior to starting your program.
During your program the speed, distance, elevation, calories, cal/hour, elapsed time, goal remaining and pace can be
displayed.
SPEED indicates the treadmill belt speed in miles per hour or kilometers per hour, ranging from 0.1 to 11 mph (T320X) and 0.5
to 12.00 mph (T460X/XC) or 0.2 to 17, 7 km/h (T320X) and 0.8 to 19, 2 km/h (T460X/XC).
DISTANCE displays the total distance in miles or kilometers from the start of the exercise, ranging from 0.00 to 99.99 miles or
0 to 99.99 km.

7
ELEVATION will display the slope of the running belt in terms of percentage. As an example, one percent (1%) slope is the
equivalent of one foot (or one meter) climbed for every 100 feet (or 100 meters) covered.
CALORIES will indicate the total of your caloric expenditure from the start of the exercise.
CAL/HOUR will indicate the hourly caloric expenditure based on your weight input and actual exercise intensity level.
ELAPSED TIME indicates the amount of time elapsed since the beginning of the program. The time will range from 0 to a
maximum of 99.99 minutes (only for JustGo
TM
program) and 0 to a maximum of 6.00 hours (other program).
TARGET REMAINING indicates the duration (time, distance or calories depending on your settings) left once a program has
started.
PACE indicates how long it will take to complete one mile or one kilometer at that current speed. Pace per mile or kilometer is
shown in minutes and seconds.
NOTE: The CALORIE parameter displays an evaluation of real values of your exercise parameters. The evaluations are based
on formal information, tests and are supported by specialists and physicians.
I Select keys
During an exercise, you can change the value shown on the scrolling screen by pressing the adjacent select key. If you wish to
have both values displayed in an alternating mode, simply hold down the select key for three seconds and release it. You can
also activate any window to scan by repeating the above sequence. To remove the alternate mode, just press the select key
once again.
J Main keypad
The easy access JustGo
TM
, Speed, Elevation, Cool Down, Pause and Stop keys are all made from silicone which feels soft.
The Speed INCREASE and DECREASE keys allow you to modify the running belt speed during an
exercise. During any exercise program, you can modify the belt speed by pressing or holding either the SPEED INCREASE or
DECREASE key. If you continuously hold down a Speed key, the speed display will change by a tenth of a mile (or kilometer)
per hour (0.1 mph or 0,1 km/h). Release the Speed key when you have reached your desired exercise speed.
Note: The treadmill belt will slowly change to your desired speed. The SPEED numbers, at the right of the screen, flash until the
actual belt speed reaches to your targeted speed. Once the speed has been reached the SPEED numbers will stop flashing.
The Elevation INCREASE and DECREASE keys allow you to modify the elevation of the treadmill during an
exercise. These keys also allow you to select the program parameters before each exercise. During any exercise program, you
can modify the elevation by pressing or holding either the Elevation INCREASE or DECREASE key. If you continuously hold
down an Elevation key, the elevation display will change by 0.5%. Release the Elevation key once you have reached your
desired exercise elevation.
Note: The treadmill will slowly change to your desired elevation. The Elevation numbers flash until the treadmill reaches to your
target. Once the elevation has been reached, the Elevation numbers will stop flashing.
COOL DOWN: Press this key to begin an automatically customized workout cool-down.
PAUSE: Press this key to stop the belt and hold the current workout.
STOP: This key allows you to cancel a program selection for any reason. Press this key once to clear data not yet
entered.

8
NOTE: Use the STOP key to stop the running belt should you encounter difficulty or need to stop quickly during an exercise.
JustGo
TM
.: Press this key TWICE to start the JustGo
TM
program, or press this key to accept entries of workout setup
values.
K Safety key
The T460X / T460XC / T320X come with a magnetic security key. The key magnet must be inserted in the appropriate slot in the
console for the treadmill to be functional. For security purposes, make sure to attach the key clip to your clothes prior to starting
an exercise.
L X-Card
TM
User friendly, this new card allows you to access the personal trainer program package of your choice. Thus, you will have
programs adapted to all your fitness needs and levels. For more information please contact our Service Department at 1-888-
407-3784.
1.2 Pause during an Exercise
You can make a pause during any exercise by pressing the PAUSE key . When this key is pressed during an exercise, the
motor will stop and the running belt will slow down to 0 mph (0 km/h) within a few seconds. The stop is gradual, allowing the user
to reach safely a complete stop. The elevation will remain at the level just prior to the pause.
To make a pause during an exercise:
1. Press the PAUSE key whenever you feel the need to make a pause during the exercise. A message will appear on the screen
indicating the amount of pause time remaining. The pause countdown will start as soon as you press the PAUSE key.
2. If you wish to continue the exercise, simply press the JustGo
®
key to start the running belt.
3. If you wish to cancel completely the exercise during the pause, simply press the STOP key as soon as the running belt has
stopped. The exercise will be terminated. A summary of your exercise parameters and options to save will be displayed.
If your pause time runs out by itself before you make any action, the exercise will terminate automatically.
1.3 Saving an Exercise (Memory)
Once a program is finished, the user has the option to save the program with modifications he applied on speed and elevation
during the exercise and recall them later. This feature is very useful when a particular exercise is interesting and satisfying. With
the T460X / T460XC /T320X, you have the possibility to create or modify an existing program, save it and recall it, including the
Heart Rate Control program. Also, the T460X / T460XC / T320X has the unique feature of saving a heart rate control program
and being able to recall this exercise, without the need for a chest strap.
Saving an exercise program allows the computer to store all the parameters of elevation and/or speed changed during your
exercise. The elevation and speed parameters are saved at the end of each Segment on the screen. With the T460X / T460XC /
T320X, you have the possibility to create or modify a personalized existing program, save it and recall from the memory space.
When a program is finished, and the saving option ON, the exercise parameters will first appear on the scrolling screen while two
arrows in the profile display (red and green) will be pointing down to the STOP (red) or JustGo
TM
(green) key.
“TO SAVE THE EXERCISE PRESS JustGo
TM
IF NOT, PRESS STOP”. On the treadmills, you can save up to eight
programs in memory.
If you wish to save the exercise at the end of the program:
1. Press the JustGo
®
key while your parameters are scrolling.
2. The T460X / T460XC / T320X will indicate under which number (ex: Memory 1) it has been saved.
NOTE: If the memory is full, press the INCREASE or DECREASE key to select the program you would like to overwrite. Press
the JustGo
®
key to accept. If you do not wish to save the exercise, press the STOP key to return to the welcome screen. You
will need to turn ON the saving option to activate this memory feature, see Section 2.13 for more instructions.

9
1.4 Viewing Exercise Parameters
At the end of each exercise program, the computer will display the FOUR exercise parameters. These parameters are:
TOTAL DISTANCE, CALORIES BURNED, TOTAL EXERCISE TIME and AVERAGE SPEED.
TOTAL DISTANCE: displays the distance covered for the entire exercise.
CALORIES BURNED: displays the approximate caloric expenditure for the entire exercise.
TOTAL EXERCISE TIME: displays the exercise length in minutes and seconds.
AVERAGE SPEED: displays the average speed for the entire exercise.
The total exercise parameters on the T460X / T460XC /T320X will loop for 2 minutes, showing your exercise parameters or until
you press STOP to exit back to the welcome screen. If you do not wish to view the exercise parameters, press the STOP key to
return to the welcome screen.
1.5 Auto Power OFF
After a period of inactivity (15 minutes by default) your T460XC / T460X T320X treadmill will switch automatically to sleep mode.
This option is ON by default, but you can turn it OFF, see Section 2.16 for more instructions.

10
2. SETTING UP THE COMPUTER TO YOUR ENVIRONMENT
The T460X / T460XC / T320X treadmill offers unique features that allow the user to tailor the treadmill to its current environment.
The treadmill computer can also display a series of diagnostic and calibration features. The treadmills allow you to select and
modify the following settings:
2.1 Access to Settings menu
2.2 Language (English, French)
2.3 Distance Unit (Miles or Kilometers)
2.4 Weight Unit (Pounds or Kilograms)
2.5 Warm up
2.6 Cool Down
2.7 Beeper ( ON or OFF)
2.8 User Identification
2.9 Speed Limits
2.10 Pause Duration
2.11 Edit Welcome Message
2.12 Saving Option (On / Off)
2.13 Segment Duration
2.14 Clock Option
2.15 Quick Speed Mode
2.16 Auto Power Off
2.1 Access to Settings Menu
To view the above settings, you must enter into the “SETTINGS MENU”:
1. At the welcome screen, press and hold Key five (5), on the numeric keypad, for 3 seconds.
2. Press the Speed INCREASE or DECREASE keys to select setting.
2.2 Language Selection
All instructions can be displayed on the screen in two languages.
To select a language, enter the SETTINGS menu (see Section 2.1).
1. Select the LANGUAGE option and press the JustGo
®
key to accept.
2. Select the language (English, French) you wish to display on the screen by pressing the ELEVATION
INCREASE/DECREASE keys or SPEED INCREASE/DECREASE keys.
3. Press the JustGo® key to accept. All messages will now appear in the selected language.
2.3 Distance Unit
The distance unit can be displayed in miles or kilometers.
To select a distance unit: Enter into the SETTINGS menu, see Section 2.1.
1. Select the DISTANCE UNIT option, and press the JustGo
®
key to accept.
2. Select the distance unit you wish to be displayed on the screen. Choose from MILES or KILOMETERS by pressing the
speed INCREASE or DECREASE keys.
3. Press the JustGo
®
key to accept. From now on, distance and speed values entered will be in the selected units.
2.4 Weight Unit
The weight unit can be displayed in pounds or kilograms.
To select a weight unit: Enter into the SETTINGS menu, see Section 2.1.
1. Select the WEIGHT UNIT option, and press the JustGo
®
key to accept.
2. Select the weight unit you wish to be displayed on the screen. Choose from POUNDS or KILOGRAMS by pressing the
speed INCREASE or DECREASE keys.

11
3. Press the JustGo
®
key to accept. From now on, weight values entered will be in the selected units.
2.5 Warm Up
Doing a warm up period before an exercise is strongly recommended for your safety. Your T460X / T460XC / T320X, has a
feature that will allow you to warm up on your treadmill. If the warm up option is activated, a warm up screen will be displayed
prior to each exercise. Be aware that the warm up screen is not available for the JustGo
®
program in which you need to
establish your own warm up periods.
The warm up duration (Maximum: 4 minutes) is divided in 3 Zones.
Warm up:
•Zone 1: Is 40% in intensity of the first segment exercise.
•Zone 2: Is 60% in intensity of the first segment exercise.
•Zone 3: Is 80% in intensity of the first segment exercise.
NOTE: The default value of the warm up is 3 minutes and set to off. In the “WARM UP” mode, the calories, time and distance
parameters are not added to the parameters of the exercise following the warm up.
To activate or deactivate the WARM UP option: Enter into the SETTINGS menu, See Section 2.1.
1. Select the WARM UP option, and press the JustGo
®
key to accept.
2. Select ON or OFF. Press the SPEED INCREASE or DECREASE key to choose. Then press the JustGo
®
key to
accept.
3. To adjust the duration of the warm up, use the speed keys. From now on, the warm up option will be in the selected
mode.
NOTE: If you wish to cancel the warm up while you perform it, simply press the STOP key to interrupt the feature.
2.6 Cool Down
Doing a cool down period after an exercise is strongly recommended for your safety. Your T460X / T460XC / T320X, has a
feature that will allow you to cool down on your treadmill.
If the cool down option is activated, a cool down screen will be displayed after each exercise. Be aware that the cool down
screen is not available for the JustGo
TM
program in which you need to establish your own cool down periods.
The cool down feature has an adjustable duration of one to four minutes and has only one part.
Cool down:
•Part 1: Is half of the intensity of the last segment exercise with a maximum speed of 3.5 mph (5,6 km/h).
NOTE: The cool down default value is 3 minutes and set to off. In the “COOL DOWN” mode, the calories, time and distance
parameters are not added to the parameters of the exercise preceding the cool down. ..
To activate or deactivate the cool down option: Enter into the SETTINGS menu, See Section 2.1.
1. Select the COOL DOWN option, and press the JustGo®key to accept.
2. Select ON or OFF. Press the SPEED INCREASE or DECREASE key to choose and press the JustGo® key to accept.
3. To adjust the duration of the cool down, use the speed keys. From now on, the cool down option will be in the selected
mode.
NOTE : If you wish to cancel the cool down while you perform it, simply press the STOP key to interrupt the feature.
2.7 Beeper
The beeper can be activated or deactivated.
To activate or deactivate the beeper: Enter into the SETTINGS menu, see Section 2.1.

12
1. Select the BEEPER option, and press the JustGo
®
key to accept.
2. Press the SPEED INCREASE or DECREASE key to activate or deactivate it (ON or OFF) and then press the JustGo
®
key to accept.
3.
2.8 User Identification
When activated, The User Identification feature allows the treadmill to recognize individuals and automatically enter their weight
along with additional information. The T460XC / T460X / T320X can recognize up to eight individuals.
Using this feature means not having to enter your weight because the program automatically does it for you. Your age is also
automatically entered into the Heart Rate Monitor programs in order to calculate your Maximum Heart Rate.
The User ID feature gives access to the following options:
Activate User
To activate a User: Enter into the SETTINGS menu (see Section 2.1).
1. Select the USER ID option and press the JustGo
®
key to accept.
2. Select the ACTIVATE USER ID option and press JustGo
®
key to accept.
3. Press the SPEED INCREASE or DECREASE key to activate or not (ON or OFF) and then press the JustGo
®
key to
accept.
Now that the User ID feature has been activated, you will be prompted to select a user at the start of each program.
Create User
To create a User ID’s:
1. Enter into the SETTINGS menu (see Section 2.1).
2. Select the USER ID option and press the JustGo
®
key to accept.
3. Select the CREATE USER option and press the JustGo
®
key to accept.
The cursor will go to the last available space in the memory. If the memory is full, go to the Delete User option.
4. A total of 8 (eight) alphanumeric characters can be used to create a User ID name. Use the INREASE/DECREASE
ELEVATION keys to navigate between spaces 1 to 8. The arrow pointing up moves left and the arrow pointing down
moves right.
Use the SPEED INCREASE/DECREASE keys to select any character from A to Z or any number from 0 to 9 to fill in
spaces 1 to 8. If you wish to leave a space between characters, simply use the blank character between 9 and A. Once
a space is filled, move to the next. Repeat this procedure to create a User ID name.
If you wish to change a character before all eight spaces have been accepted, press the INCREASE/DECREASE
ELEVATION key to backspace. Press the JustGo
®
key to validate the User ID name.
5. You can enter your age by pressing the SPEED INCREASE/DECREASE or INCREASE/DECREASE ELEVATION
keys. Press JustGo
®
to accept.
6. Enter your weight (20 to 182 kg or 50 to 400 pounds) by pressing the SPEED INCREASE/DECREASE keys. Press the
JustGo
®
key to validate the weight.
7. Then press the STOP key to go back to the USER ID main menu.
Edit User ID
To edit a user, select the USER option and press the JustGo
®
key to accept.
1. Select EDIT USER and press JustGo
®.

13
2. Select the user you want to edit using the SPEED INCREASE/DECREASE or INCREASE/DECREASE ELEVATION
keys and press JustGo
®
to accept.
3. Enter the Name using the INCREASE/DECREASE SPEED and INCREASE/DECREASE ELEVATION keys (see
section 2.8.5). Press the JustGo
®
key to validate.
4. You can enter your age by pressing the SPEED INCREASE/DECREASE or INCREASE/DECREASE ELEVATION
keys. Press JustGo
®
to accept.
5. Enter your weight (20 to 182 kg or 50 to 400 pounds) by pressing the SPEED INCREASE/DECREASE keys. Press
the JustGo
®
key to validate the weight.
6. Then press the STOP key to go back to the USER ID main menu.
Delete User
1. To delete a user, select DELETE USER and press the JustGo
®
key to accept.
2. Select the user you wish to delete. Press the JustGo
®
key to delete the user. If you do not wish to delete this user,
press the STOP key.
NOTE – If you delete a user, all parameters saved under that User ID will be lost.
View Statistics
To view the statistics of a User, select STATISTICS and press the JustGo®key to accept.
Select the User ID for which you want to view the statistics. The following parameters are accumulated when the User ID feature
is activated.
•TOTAL DISTANCE displays the distance traveled in miles or kilometers (according to your settings)
•TOTAL CALORIES displays the total number of calories burned
•TOTAL TIME displays total exercise time in hours, minutes, and seconds.
Reset Statistics
To reset the statistics of a User, select the RESET STATISTICS option and press the JustGo®key to accept.
Select the user whose statistics you wish to reset and press the JustGo
®
key to validate.
2.9 Speed Limits
MINIMUM and MAXIMUM speeds can be set into the treadmill.
To select this option: Enter into the SETTINGS menu, see Section 2.1.
1. Select the SPEED LIMIT option, and press the JustGo
®
key to accept.
2. Select the MINIMUM OR MAXIMUM value with the INCREASE and DECREASE Elevation keys. To modify the value,
use the SPEED INCREASE or DECREASE keys. Press the JustGo
®
key to accept (the values will not be considered if
you do not press the JustGo
®
key to accept).
Please refer to the following values to know the possible range of values.
Minimum: 0.1 MPH (0,2 KM/H) for the T320X and 0.5 MPH (0,8 KM/H) for the T460X/XC
Maximum: 11 MPH (17,7 Km/h) for the T320X and 12 MPH (19,2 KM/H) for the T460X/XC
2.10 Pause Duration
To modify the pause duration: Enter into the SETTINGS menu, see Section 2.1.
1. Select the PAUSE DURATION option, and press the JustGo
®
key to accept.

14
2. Select from 1 to 30 minute pause duration (the default value is 5 minutes). Press the INCREASE or DECREASE keys
to select.
3. Press the JustGo
®
key to accept.
2.11 Edit Welcome Message
The Edit Welcome message allows the owner or user of the treadmill to modify the welcome message displayed on the main
computer display screen.
There is a standard welcome message entered in your T460X / T460XC / T320X. This message is displayed in the language of
your choice.
To Edit the Welcome message: Enter into the SETTINGS menu, see section 2.1.
1. Select the EDIT Welcome message option, and press the JustGo® key to accept. To modify the welcome message,
you will need to enter the letters and characters one by one. A total of 100 alphanumeric characters can be saved.
2. Use the SPEED INCREASE or DECREASE keys to select any letter from A to Z or number from 0 to 9 as the first
character. If you wish to leave a space between characters, select SPACE (blank character) between the 9 and the A
character. Press the DECREASE ELEVATION key to accept this character. Repeat this procedure until you have
entered the new welcome message. If you wish to modify a character before all 100 spaces are accepted, press the
INCREASE ELEVATION key to backspace.
3. Once all letters and characters of your message are entered, press the JustGo® key to save your message. From now
on, your welcome message will be displayed on the introduction screen.
2.12 Saving Option
To have the possibility of saving at the end of a program: Enter into the SETTINGS menu, see section 2.1. The default value is
set to off.
1. Select SAVING OPTION and press the JustGo
®
key to accept.
2. Use the SPEED INCREASE/DECREASE key to activate or deactivate.
3. Press the JustGo
®
key to accept.
2.13 Segment duration
To modify the length of a segment: Enter into the SETTINGS menu, see Section 2.1.
1. Select Segment duration, and press the JustGo
®
key to accept.
2. Use the SPEED INCREASE/DECREASE keys to choose the segment type (Time, Distance, Calories).
3. Use the SPEED INCREASE/DECREASE keys to change the duration of the segments as follows:
15 seconds, 30 seconds, 1 minute, 2 minutes or 4 minutes
or
0.01, 0.02, 0.05, 0.1, or 0.5 mile or kilometer
or
1, 2, 5, 10 or 15 calories.
4. Press the JustGo
®
key to accept.
2.14 Clock Option
To enter the CLOCK option: Enter into the SETTINGS menu, see Section 2.1.
1. Select the CLOCK option, and press the JustGo
®
key to accept.
2. Use the SPEED or ELEVATION keys to choose an option (Clock ON/OFF, Time Set, Clock mode), and press the
JustGo
®
key to accept.

15
3. In CLOCK ON/OFF, use the SPEED or ELEVATION keys to set the clock ON or OFF, and press the JustGo
®
key to
accept.
4. In TIME SET, set the HOUR value with the SPEED or ELEVATION keys, and press the JustGo
®
key to accept.
Then, set the MINUTE value with the SPEED or ELEVATION keys, and press the JustGo
®
key to accept.
5. In CLOCK MODE, use the SPEED or ELEVATION keys to choose between 24h or 12h display and press the JustGo
®
key to accept.
When your selection is done, press the STOP key to go back to the SETTINGS menu.
2.15 Quick Speed Mode
To modify the Quick speed mode option: Enter into the SETTINGS menu, see Section 2.1. This option allows you to modify the
way the quick keys operate when you enter a speed value into the machine.
1. Select the QUICK SPEED key option and press the JustGo
®
key to accept.
2. Use the SPEED INCREASE or DECREASE keys to change the option.
Direct = Direct: Allow you to push on the button of the speed you want.
Short = One Digit : Allow you to enter a value with one digit and then press Enter
Full = Two Digits : Allow you to enter a value with two digits and then press Enter
When you have selected the option that you want, press the JustGo
®
key to accept.
2.16 Auto Power OFF
This option allows saving energy by shutting of the display when there is no activity for a preset period of time. To activate and
modify the time of the Auto power OFF feature: Enter into the SETTINGS menu, see Section 2.1.
1. Select the AUTO POWER OFF option and press the JustGo
®
key to accept.
2. Use the Speed INCREASE or DECREASE keys to choose from ON or OFF. Press the JustGo
®
key to accept.
3. Select from 1 to 30 minutes pause time (default value is 15). Press the Speed INCREASE or DECREASE keys to select
the pause time. Press the JustGo
®
key to accept.

16
3. T460X / T460XC / T320X EXERCISE PROGRAMS
3.1 JustGo™
3.2 Manual
3.3 Calorie Goal
3.4 Distance Goal
3.5 Intervals
3.6 Heart Rate Control
3.7 Track
3.8 Get in Shape
3.9 Learn Program
3.10 Statistics
3.11 Memory
A program is a preset pattern. You will get the same profile (hills and valleys) every time you select the same specific exercise
program. By increasing the levels you can change the predetermined hill profiles. These programs allow you to monitor your
progress and add fun and interest to your exercise.
Depending on the type of objective you choose, by default the segment durations are the following:
1 minute - 0.1 mile (or km) - 10 calories
By using the SETTINGS menu, you can change the length of the segments, see section 2.14.
Program Levels
The Calorie Goal and the Distance Goal programs have 10 individual exercise levels. LEVEL 1 is the easiest and LEVEL 10 is
the most difficult. This feature allows you to alter the intensity of your workout.
Level Speed (mph) Speed (km/h)
Elevation (%)
1 1.8 to 2.6 2,9 to 4,2 -1 to 2
2 2.1 to 3.1 3,4 to 5 -1 to 2
3 3.1 to 4.1 5,0 to 6,6 0 to 3
4 4.0 to 4.5 6,4 to 7,2 0 to 5
5 4.0 to 4.5 6,4 to 7,2 0 to 6
6 5.5 to 7.0 8,9 to 11,3 0 to 7
7 5.0 to 8.5 8,0 to 13,7 1 to 8
8 7.0 to 8.2 11,3 to 13,2 2 to 7
9 7.5 to 8.7 12,1 to 14 2 to 7
10 7.5 to 8.7 12,1 to 14 4 to 9
Note: If you have purchased a T320X, remember that the elevation for level one and two range between 0 to 2%.
W A R N I N G
BEFORE YOU SELECT ANY EXERCISE PROGRAM, FIRST STRADDLE YOUR FEET ON THE FOOT RESTS. NEVER
START ANY EXERCISE PROGRAM WITH ONE OR BOTH FEET ON THE RUNNING BELT.
3.1 JustGo TM Program
The JustGo
TM
program allows you to start a manual exercise by pressing one key. Since the JustGo
TM
program is the initial
program, it will always be displayed first for easy selection. You have total control of the speed and elevation of the belt at all
times during this program. Use the JustGo
TM
program if you like to walk or run at fairly constant speeds with little or no changes
during the exercise.
During the exercise, the speed and elevation that you select will remain for the entire exercise until you make the next change.
Your progression in the exercise is shown by one flashing dot.
To start exercising in the JustGo
TM
program:
1. Press the JustGo
®
key when the JustGo
TM
program is displayed on the screen. The running belt will slowly start at 0.5
mph (0,8 km/h) for the T460X/XC or 0.1 mph ( 0,2 km/h) for the T320X and at 0% elevation with the exercise duration
automatically set to the maximum.
The JustGo
TM
program does not allow the user to predetermine the exercise duration or enter his weight. Therefore, the
caloric expenditure and calories per hour values will be based on a user of 150 pounds or 68 kilograms. The calorie values
should therefore be used only as references when in the JustGo
TM
program.
2. Change the speed and elevation at all times by pressing the Speed and Elevation INCREASE and DECREASE keys.

17
3.2 Manual
The Manual program allows you to create your own exercise as you progress in the program. The speed and elevation are
completely controlled by the user at all times. At a glance, the JustGo
TM
and Manual programs seem very similar due to the fact
that the user controls both the speed and elevation at all times. The difference is that in the Manual program, you can select your
goal type and enter your weight for a more accurate display of the caloric expenditure. During the exercise, the speed and
elevation that you select will remain the same until you make the next change. Your progression in the exercise is shown by one
flashing dot.
To select the Manual program:
-Press Manual, Press the JustGo
®
key to accept.
-Enter your weight, press the Speed INCREASE or DECREASE key or use the numeric keypad. Press the JustGo
®
key to accept.
-Enter goal type, press the corresponding select key: Calories, Time or Distance.
-Enter exercise goal (number of calories, time or distance). Press the Speed INCREASE or DECREASE key or use
the numeric keypad. Press the JustGo
®
key to accept.
-Begin workout.
3.3 Calorie Goal (Goal select - 100 – 150 - 200)
The Calorie goal program provides a simulation of an excursion where the speed and elevation vary. At any time during the
exercise, you can modify the speed and/or the elevation if you find the exercise not challenging enough or too difficult. Changing
the elevation and/or speed manually will cause the entire profile to change and will modify the amount of time required to reach
your goal. The program ends once your goal has been reached.
To select the Calorie Goal programs:
-Press repeatedly until you select you goal. You may be choosing between Calorie Goal, Calorie Goal -
100, Calorie Goal -150 and Calorie Goal - 200. Once you have made your choice, press the JustGo
®
key to
accept.
-Enter your weight, press the Speed INCREASE or DECREASE key or use the numeric keypad. Press the JustGo
®
key to accept.
-If you choose CALORIE GOAL, enter your goal with the Speed INCREASE or DECREASE key or use the numeric
keypad. Press the JustGo
®
key to accept.
-Enter level, Press the JustGo
®
key to accept.
-Begin workout.
3.4 Distance Goal (Goal select - 5k - 10 k – half marathon – marathon)
The Distance goal program provides a simulation of an excursion where the speed and elevation vary. At any time during the
exercise, you can modify the speed and/or the elevation if you find the exercise not challenging enough or too difficult. Changing
the elevation and/or speed manually will cause the entire profile to change and will modify the amount of time required to reach
your goal. The program ends once your goal has been reached.
To select the Distance Goal programs:
-Press repeatedly until you select your goal. You may be choosing between Distance Goal, Distance
Goal -5k, Distance Goal -10k, half-marathon, marathon. Press the JustGo
®
key to accept.

18
-Enter your weight by pressing the Speed INCREASE or DECREASE key or use the numeric keypad. Press the
JustGo
®
key to accept.
-If you choose DISTANCE GOAL, enter your value with the Speed INCREASE or DECREASE key or use the
numeric keypad. Press the JustGo
®
key to accept.
-Enter level, Press the Speed INCREASE or DECREASE key or use the numeric keypad. Press the JustGo
®
key
to accept.
-Begin workout.
3.5 Intervals (1:1 – 1:2 –2:1 – Manual)
The Intervals (1:1 – 1:2 –2:1) training program allows you to exercise with constant high intensity workouts and rest periodically
at set recovery periods. The user determines the speed, elevation and the interval type. At any time during the exercise, you can
modify the speed and/or the elevation if you find the exercise not challenging enough or too difficult. If you are at a rest (low
intensity) segment, then changing the speed and/or elevation manually will cause all the other segments to change. Changing
the speed and/or elevation manually during a peak segment will cause all the peak segments to change.
Note: An interval 1:2 means 1 segment of rest : 2 segments of work.
To select an Interval program:
-Press Interval repeatedly until you select your INTERVAL type.
-Enter your weight by pressing the Speed INCREASE or DECREASE key. Press the JustGo
®
key to accept.
-Enter GOAL TYPE by pressing the corresponding select key: Time or Distance.
-Enter goal duration by pressing the Speed INCREASE or DECREASE key or use the numeric keypad. Press the
JustGo
®
key to accept.
-Enter minimum speed (Rest), press the Speed INCREASE or DECREASE key. Press the JustGo
®
key to
accept.
-Enter maximum speed (Work), press the Speed INCREASE or DECREASE key or use numeric key pad, Press
the JustGo
®
key to accept.
-Enter minimum elevation (Rest), press the Elevation INCREASE or DECREASE key. Press the JustGo
®
key to
accept.
-Enter maximum elevation (Work), press the Elevation INCREASE or DECREASE key. Press the JustGo
®
key to
accept.
-Begin workout.
Manual Interval
The Manual Interval Training program allows you to decide the length of your high intensity workouts and recovery periods. At
any time during the program the user can switch to workouts or recovery by pressing the INTERVAL Program button.
To select the Manual Interval program:
-Press Interval repeatedly until you select manual Interval and press the JustGo
®
key to select.
-Enter your weight by pressing the Speed INCREASE or DECREASE key or use the numeric keypad. Press the
JustGo
®
key to accept.
-Enter goal type by pressing the corresponding select key: Time, Distance or Calorie.
-Enter goal duration by pressing the Speed INCREASE or DECREASE key or use the numeric keypad. Press the
JustGo
®
key to accept.

19
-Enter minimum speed (Rest), using the Speed INCREASE or DECREASE key or use the numeric keypad.
Press the JustGo
®
key to accept.
-Enter maximum speed (Work) by using the Speed INCREASE or DECREASE key or use the numeric keypad.
Press the JustGo
®
key to accept.
-Enter minimum elevation (Rest) by using the Elevation INCREASE or DECREASE key. Press the JustGo
®
key
to accept.
-Enter maximum elevation (Work) by using the Elevation INCREASE or DECREASE key. Press the JustGo
®
key
to accept.
-Begin workout.
3.6 Heart Rate Control (Weight loss – Health – Aerobic- Interval – Hill – Fitness Test)
(Requires wireless chest strap)
NOTE: These programs can only be used with the heart rate chest strap. Use of the heart rate chest strap will allow the treadmill
belt to change speed along with a change in elevation. To achieve optimal results, it is recommended to place the chest strap
directly over the skin. The strap should be very snug since any significant amount of shock or impact due to fast running may
temporarily produce wrong heart rate signals. You should not be more than arm’s length from the front handle bar to achieve the
best signal. If at anytime the heart rate receiver does not detect a signal from the chest strap for more than a few seconds, the
following message will appear ‘‘UNSTABLE HR SIGNAL PLEASE CHECK CHEST STRAP’’.
The Heart Rate Control Program allows you to exercise at a determined heart rate level. By selecting the desired heart rate level,
the running belt and/or elevation will automatically adjust to decrease or increase the exercise intensity.
By selecting your age, plus the intensity level that you want to work your heart, a target heart rate level is calculated by the
computer.
HR Weight lost: Exercise in 60-70% MHR area.
HR Healthy: Exercise in 70-80% MHR area.
HR Aerobic: Exercise in 80-90% MHR area.
To determine your recommended heart rate level, select the type of exercise program you
wish to follow. Your MAXIMUM HEART RATE (MHR) is calculated as follows:
MHR= 220-Age
It is not recommended to exercise above 90% of your MHR.
Exercise in 80-90% MHR area for an aerobic zone.
Exercise in 70-80% MHR area for a moderate, healthy zone.
Exercise in 60-70% MHR area if you wish to train in a fat burning zone.
Difficult to achieve exercise benefit below 60% MHR.
To select the Heart Rate Control programs:
-Press Heart Rate control repeatedly until you select your Heart Rate Program Weight lost, Health
or Aerobic.
-Select your weight. Press the Speed INCREASE or DECREASE key or use the numeric keypad. Press the
JustGo
®
key to accept.
-Enter GOAL TYPE. Press the corresponding select key: Calories, Time or Distance.
-Enter GOAL DURATION. Press the Speed INCREASE or DECREASE key or use the numeric keypad. Press the
JustGo
®
key to accept.
-Select your age to allow the computer to indicate your maximum allowable heart rate level. Press the Speed
INCREASE or DECREASE key or use the numeric keypad. Press the JustGo
®
key to accept.

20
-You can modify the heart rate level suggested by the computer. Press the speed INCREASE or DECREASE
keys, and/or press the JustGo
®
key to accept it.
-Select the operating mode by pressing the corresponding select key: (Elevation – Both – Speed).
-Begin workout
HR Interval – HR- Hill:
The running belt and elevation will automatically adjust to decrease or increase the exercise intensity.
The program alternates between different Heart Rate goals (Hr rest and Hr work). Once the Heart Rate goal is reached the
intensity is maintained for the duration of the segment. Then, the program goes to the other Heart Rate goal. The program does
not proceed to a new Heart Rate goal until the user reaches the current goal.
Note: If your Heart Rate goes above the maximum for more then 45 seconds, the treadmill automatically goes into pause mode.
To select the HR Interval – HR - Hill program:
-Press Heart Rate control repeatedly until you select your Heart Rate Program HR Interval or HR Hill.
-Select your weight. Press the Speed INCREASE or DECREASE key or use the numeric keypad. Press the
JustGo
®
key to accept.
-Enter goal type, press the corresponding select key: Calories, Time or Distance.
-Enter goal duration, press the Speed INCREASE or DECREASE key or use the numeric keypad. Press the
JustGo
®
key to accept.
-Select your age to allow the computer to indicate your maximum allowable heart rate level. Press the Speed
INCREASE or DECREASE key or use the numeric keypad. Press the JustGo
®
key to accept.
-Enter your rest Heart Rate Target, press the INCREASE or DECREASE key and press the JustGo® key to
accept it.
-Enter your Work Heart Rate Target, press the INCREASE or DECREASE key and press the JustGo® key to
accept it.
-Enter the segment’s length. Press the Speed INCREASE or DECREASE key or use the numeric keypad. Press
the JustGo
®
key to accept.
-Select the operating mode, press the corresponding select key: Elevation-Both-Speed.
-Begin workout.
Fitness Test
The Fitness Test is a custom-made submaximal test designed to help you achieve your goals by measuring your cardio-
respiratory fitness. Maximal oxygen uptake (VO
2max
) is defined as the maximum volume of oxygen that can be taken up,
distributed and used by the body during physical activity. Testing your VO
2max
before starting an exercise allows you to evaluate
yourself and define the appropriate exercise intensity level.
For the submaximal test, you are challenged to reach 80% of your maximum heart rate. This result is then used to extrapolate
your Maximal oxygen uptake (VO
2max
). This test features target speeds and elevations. It is very important to follow the
instructions on the console to make sure that the test is valid. The test will stop once you reach 80% of your target BPM (beat
per minutes).
Note - For this program, you must wear the heart rate chest strap. Cardio-respiratory fitness is a combination of cardiovascular
fitness and respiratory fitness. Always keep in mind that this test is submaximal, so the results are only approximated.
To select the Fitness Test program:
-Press the repeatedly to select the Fitness Test. Once your selection is made, press JustGo® key to
accept.
This manual suits for next models
2
Table of contents
Other Bodyguard Treadmill manuals

Bodyguard
Bodyguard Treadmills User manual

Bodyguard
Bodyguard T240 User manual

Bodyguard
Bodyguard LT280P User manual

Bodyguard
Bodyguard T700 User manual

Bodyguard
Bodyguard T-30 User manual

Bodyguard
Bodyguard T460XC User manual

Bodyguard
Bodyguard T240S User manual

Bodyguard
Bodyguard T240 User manual

Bodyguard
Bodyguard T360 User manual

Bodyguard
Bodyguard PDG0002 - T560 User manual