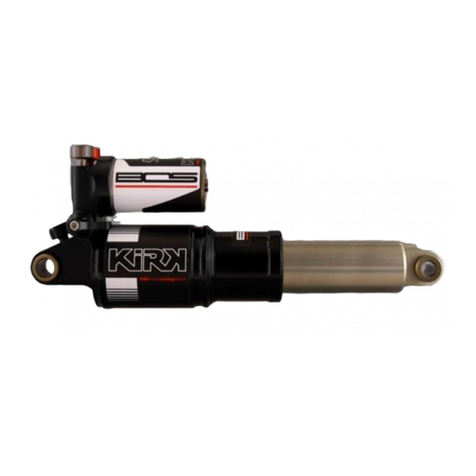
BOS Idylle FCV User manual

User Manual

Terms and conditions
BOS Suspension offers warranty on its products on the following terms:
BOS guarantees to the original purchaser that the BOS product for which
they received this warranty is free from defects in material and
workmanship for one year from the date of original retail purchase. A proof
of purchase will be asked for any warranty claim. This warranty is not
transferable to a subsequent purchaser.
Wear and tear parts such as dust seals, O-rings, bushings, rear shock
mounting hardware, stanchions, threaded parts and bolts are not covered
under this warranty.
Terms
This warranty is subject to legal jurisdictional or warranty rights of the
country where it has been originally purchased, which will prevail if
different from the terms herein listed.
Limits
BOS Suspension cannot be liable for any loss, inconvenience damages,
whether direct, incidental, consequential, resulting from the use of its
products, local legislation prevailing.
Warranty exclusions
This warranty does not cover the following cases:
• Damage to products resulting from improper assembly other than listed
below
• Products that have been modified by the owner or a third party
• Improper use
• Damages resulting from an accident or a crash under any circumstances
• Invalid servicing procedures and servicing time frame not respected
• Replacement of the original parts by parts from others manufacturers
• Products whose serial numbers has been altered, defaced or removed.
Warranty procedure
The owner should always refer to an approved BOS service center for any
warranty claim. A proof a purchase is compulsory for any warranty claim.
Otherwise the warranty claim will not be considered. Always contact BOS
Suspension warranty department before returning any products that may
fall under this warranty. If “the faulty parts” do not fall under warranty, the
customer will be charged for any costs in respect with warranty such as
transport and package back and forth.
WARRANTY

Fitting your Idylle RaRe FCV onto your bike requires care and attention. For your safety, please follow these instructions.
1.1 The steer tube
Before cutting the steer tube, first take some measurements: height of the headset, length of the frame’s head tube, height of
the stem and then add 5 to 10mm.
Calculate the length as below:
Length of the head tube of the frame + height of the headset + height of the stem + 5 to 10mm.
1.2 Adjusting stanchion position in the crowns
Depending on the bicycle, the position of the fork in the crowns can vary slightly. However, you must maintain the following
measurements to ensure the fork’s function and your security.
The lower crown height ensures the full use of fork travel and tire
clearance. Use the following measurements to set your lower crown
height. This height is measured from the top of the fork leg (the bottom of
the visible part of the dust seal) to the bottom of the lower crown.
27.5’’-wheel model forks: 217mm
CAUTION
This measurement match with a maximum of 705mm tire diameter.
The distance between the top of the upper crown and the top of the
stanchion must be between 0mm and 30mm (B).
Once you have assembled the crowns and adjusted the heights to the
measurements above, you may proceed to the tightening the bolts. USE
THE FOLLOWING BOLT TORQUES.
All crown bolts must be torqued to: 4 - 5 n.m (35 to 44 in-lbs.)
1. Assembly
Caution:
Never attempt to remove or replace the steer tube independently from the lower crown. Modification of the integrated
cown-steerer can cause catastrophic assembly failure.
217mm
Caution:
For Idylle RaRe FCV forks, do not clamp the crowns past the
stanchion cutouts. This will result in damage to your fork.

1.3 Installing the front wheel
To assemble the front wheel, follow this procedure:
1. Loosen the four axle pinch bolts on the fork lowers and remove the axle .
2. Install the front wheel into the dropouts.
3. Put a small amount of grease on the thread of the axle .
4. Lightly tighten the axle to the lower leg.
5. Tighten the two left side (caliper side) dropout pinch-bolts to to 4-5 N.m torque.
6. Compress the fork twice without braking to release residual tension and tighten the two right side dropout pinch-bolts
to 4-5 N.m torque.
To disassemble the wheel, follow these instructions in reverse.
1.4 Mounting the brake caliper
The Idylle brake caliper bolt pattern uses a post mount 160 (PS160) standard mount.
Follow the disc brake manufacturer’s
recommendations for installation and the following guidelines.
The disc brake caliper mounting bolts must have 10 mm of thread engagement with the fork.
The disc brake caliper mounting bolt tightening torque level must never exceed 10 n.m.
2.1 Air Pressure
The first adjustment that should be done on the fork before riding is to set the air pressure. This adjusts the stiffness of the air
spring according to your weight. The stiffness of the air spring induces a degree of fork travel when you sit on your bike. This
value, commonly called sag, can vary based on your usage. This value should be between 30mm (smooth terrain/climbs) and
50mm (rough terrain/downhills). The sag measurement should be taken with both feet on the pedals and both hands on the
bars, arms and legs in riding position.
To achieve the best performance from your BOS product, it is important to set your optimal pressure. The chart below will give
you some base values based on your weight. Your specific pressure may vary based on your riding style and personal
preference. However, do not stray too far from the indicated pressures, or you may risk changing the performance of your fork.
Recreational Use:
Weight (Kg/lbs)
60/132
65/143
70/154
75/165
80/176
85/187
95/210
Pressure (psi)
+/-10 PSI
153
163
171
180
187
194
207
Racing Use:
Weight (Kg/lbs)
60/132
65/143
70/154
75/165
80/176
85/187
95/210
Pressure (psi)
+/-10 PSI
160
169
179
187
195
202
216
Caution :
Minimum pressure: 135 PSI
Maximum pressure: 250 PSI
psi
2. Settings
Air valve cap
Air valve
B

FCV System
Your Idylle FCV is equipped with the frequency control valve system. This system has been carefully tuned at the factory to
balance rider comfort and rider support. The system can be made more supple (and less supportive) or more supportive (and
less supple) with an internal adjustment. If you would like to have your system tuned to match your riding style, please contact
your certified BOS service center.
2.2 Hydraulic Adjustments
The Idylle Rare FCV has one rebound setting and two compression settings (high and
low-speeds).
The rebound setting is adjusted via the screw on top of the right stanchion (1)
The high-speed compression setting is adjusted via the screw on the bottom of the right
stanchion. (2-A)
The low-speed compression setting is adjusted via the 14mm bolt on the bottom of the
right stanchion. (2-B)
Setting Ranges:
It is difficult to give a “magical solution” to hydraulic settings as these are linked to a number of different parameters such as
the influence of the rear suspension settings, the air spring pressure, the position of the fork in the crowns, and the geometry of
the bike. This is not to mention personal rider preference. That being said, we can offer the following general advice.
- Fork diving excessively on braking: harden low-speed compression
- Frequent bottom-out: harden high-speed compression
- Feeling of harshness on roots and rocks: soften high-speed compression
- Discomfort, arms getting sore: soften low-speed compression
- Fork stays low over successive impacts and doesn’t spring back: speed up rebound
- Bike sits too high in travel: slow down rebound
Important :
Air Chamber Equalization
You must equalize the positive and negative air chambers each time you adjust your pressures. If the air chambers are
not equalized, the fork will not function properly.
Use the following instructions:
During the pressure adjustment, compress and release the fork over the first inches of travel 5-10 times to equalize air
pressure between chambers. Once this step is done, you’re ready to roll!
1
Faster
Slower
2-A
2-B
Softer
Harder
Important :
To start your adjustment, turn the adjuster all the way clockwise (clicks = 0). Clicks are then counted one at a time while
turning the adjuster in the counter-clockwise direction.

It is worth considering other parameters that may be influencing the performance of the fork, especially if you find yourself very
far from the base settings. Change your settings in steps, only adjust one setting at a time, and only open or close the one setting
by a few clicks at a time. If you find yourself lost in the settings, reset to the base settings and start over again.
Base settings –Idylle RaRe FCV
Rebound:
Recreational use: 20 clicks
Racing use: 19 clicks
Low-speed compression:
Recreational use: 15 clicks
Racing use: 11 clicks
High-speed compression:
Recreational use: 20 clicks
Racing use: 16 clicks
3.1 Air purge
The Idylle RaRe FCV is equipped with an air purge screw on the top of each stanchion. Purging the air regularly reduces the
effect of the air pressure that is invariably created in the fork during use. It is recommended to purge the air every 5 rides in
racing use and every 10 rides in recreational use. To purge residual air, remove the screw entirely and replace the screw –
tighten till snug, do not compress the fork.
3.2 Service
It is essential to clean your fork after each day of riding without waiting. Nothing is worse for the life of your seals than dirt and
dust. The cleaning process is also extremely simple: clean the stanchions and seals with a clean rag. You can occasionally lubricate
the exterior of the seal with fork oil. The following chart shows the minimum service intervals for your fork. If you ride mostly in
wet and muddy conditions, please follow the “racing use” service intervals.
Warning: Do not under any circumstances use degreaser.
On the same note, do not power wash the forks! It will only push the mud inside the forks and get it stuck between the
stanchion and the seals.
Cleaning
Air purge
Oil change
Complete service
Recreational use
Each ride
Every 10 runs
Annually
Every 2 years
Racing use
Each ride
Every 5 runs
Twice per year
Annually
3. Maintenance11
Caution :
Oil changes and service should be performed at an official BOS service center. These are the only locations able to
identify and resolve damaged or worn parts on your product, especially in the case of extreme shocks or premature wear
on structural elements such as the lowers, stanchions, or crowns.

3.3 Oil Levels
During an oil change, make sure to correctly set the oil height on the hydraulic side and the spring side of your fork. The correct oil
heights are indicated in the chart below.
How to set the oil height:
- Push the stanchion all the way down
- Lift the hydraulic shaft all the way up
- Measure the height between the top of the stanchion
and the top of the oil with a clean ruler
Oil Heights
IDYLLE Rare FCV
Hydraulic side (right)
140 mm
Air side (left)
20 ml
140mm
Important :
It is strongly recommended to use BOS Bi’oil. Changing the type of oil risks
changing the fork’s performance and reducing the life of wear parts.
Caution :
To correctly set the oil height on the hydraulic side of your fork, purge the cartridge as you are adding oil. Once the
cartridge is completely purged (hydraulic shaft is difficult to move across its whole travel), set the final oil height.

My fork loses pressure when I remove the pump, what can I do?
Check the valve core tightness using a Schrader valve core tool.
My fork has negative travel, is this normal?
The BOS air spring is designed to lower the engagement threshold as much as possible. Therefore, it is possible on some bikes
that there will be a small negative travel.
Where can I buy replacement stickers or a valve cap?
These items and more are available in our online store.
My new fork has bushing play, what should I do?
The unique bushing alignment and tolerance on BOS forks results in less friction, more sensitivity, and some bushing play from the
factory. If the bushing play feels abnormally excessive, please contact a BOS service center for help.
My fork is lowering as I deflate it, what is happening?
When you deflate the fork by the Schrader valve, you are only emptying the positive air chamber. The negative air chamber stays
under pressure and exerts an opposing force on the air piston and pulls the fork down. To avoid this phenomenon, deflate the
fork in steps of 30-40 PSI and equalize the air chambers between steps (compress and release the fork 5-10 times over the first
20mm –1 inch) of travel.
I just inflated my fork for the first time and it is really hard, what can I do?
Have you equalized your fork’s air chambers? If not, check how it’s done in the setup section of your product’s user manual.
Did you change your fork’s settings? Check that your low-speed and high-speed compression are at our recommended base
settings given in the setup section of your product’s user manual.
If you’ve equalized your fork, you may have some internal pressure from the production process. You can eliminate this
pressure by slipping a thin ziptie between your left dust seal and your stanchion until you hear the sound of air escaping. Then
reset your pressure and equalize your air chambers.
If you’ve tried all that and your fork is still hard, email customer service and they’ll give you a hand.
My fork was upside down or on its side and now it feels like there’s no hydraulic control.
Your cartridge has depurged –air has entered the hydraulic system. Open bath cartridges like the one used in your fork allow
air to mix with oil. The cartridge purges itself as you ride. You can purge the fork even faster by cycling it through its full travel
5-10 times.
If it is becoming increasingly difficult to purge your cartridge, it may be time for an oil change. Contact your closest BOS
authorized service center for a basic or a full service.
I have about 5mm of travel unused when I ride normally.
Our forks are designed to be very progressive at the end of travel to give you a bottomless feeling. This means that those last
couple millimeters of travel might only be used on the biggest hits or when you case a landing. You can think of them as
insurance to get you out of the trickiest situations. If you have more than about 5% of your travel unused, try lowering your air
pressure by 5PSI and check your compression settings. If your compression settings are much harder than our recommended
values, try bringing them closer to the base settings in your product’s user manual.
4. FAQ11

I have grease/oil coming out of my brand new fork seals.
This is not unusual at the beginning of the life of a fork. Clean off the stanchions and the seals and it will stop after a few rides.
My fork has been sitting for a couple of weeks and some oil came out of the seal when I rode it the first time.
BOS seals can let out a little bit of oil when they have been sitting and dried out. Wipe off any oil, and none more will come out
when the seal is lubricated again.
I have grease/oil coming out of my well-ridden fork seals.
It’s time for a service! Contact your nearest BOS authorized service center for a full service.
But I haven’t reached your recommended service interval yet.
Our recommended service intervals cannot cover 100% of customer’s usage cases. Use in wet, muddy conditions; storage out
in the sun; frequent use; or improper care can all cause your seals to wear out more quickly.
Where can I find my serial number?
The serial number is engraved under the steer tube, it’s composed of 7 numbers.
How can I adjust my FCV?
The FCV is a very precise, internal system who is preset in our factory.
I’ve no been completely successful in doing my own adjustments. What can I do?
The internal tuning (settings/FCV/air damper) is tuned at the factory to correspond to most riders, however it’s possible to adapt
all of these parameters to match with your weight, your use and your style. Even so, to optimize your set up please contact your
BOS service center.
For any other questions, please visit our FAQ page on the BOS website or send us a message to
customerservice@bosmtb.com

Date
Location
Air
pressure
(Psi)
HS
Compression
LS
Compression
Rebond
Remarks
4, impasse Léonce Couture - F31200 Toulouse
tel : + 33(0)534 25 33 66 - fax : + 33(0)534 25 33 60
5 .Notes
Other manuals for Idylle FCV
1
Table of contents
Other BOS Bicycle Accessories manuals
