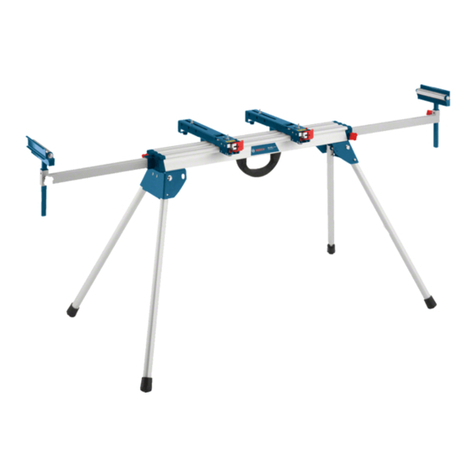
Bosch GTA 3800 Professional User manual

Robert Bosch Power Tools GmbH
70538 Stuttgart
GERMANY
www.bosch-pt.com
1 609 92A 2M9 (2017.01) T / 117
GTA 3800 Professional
de Originalbetriebsanleitung
en Original instructions
fr Notice originale
es Manual original
pt Manual original
it Istruzioni originali
nl Oorspronkelijkegebruiksaanwijzing
da Original brugsanvisning
sv Bruksanvisning i original
no Original driftsinstruks
fi Alkuperäiset ohjeet
el Πρωτότυπο οδηγιών χρήσης
tr Orijinal işletme talimatı
pl Instrukcja oryginalna
cs Původní návod k používání
sk Pôvodný návod na použitie
hu Eredeti használati utasítás
ru Оригинальное руководство по
эксплуатации
uk Оригінальна інструкція з
експлуатації
ro Instrucţiuni originale
bg Оригинална инструкция
sr Originalno uputstvo za rad
sl Izvirna navodila
hr Originalne upute za rad
et Algupärane kasutusjuhend
lv Instrukcijas oriģinālvalodā
lt Originali instrukcija
ar
fa
ςТЎϩХʉ ЌТϾϦφЍʉ ʌμВТЎϺυ
ΖЎϩʉ ˒μВЖЙʉʓ ИͳϞφЁʑ
OBJ_BUCH-1199-002.book Page 1 Tuesday, January 17, 2017 12:24 PM

2|
1 609 92A 2M9 | (17.1.17) Bosch Power Tools
Deutsch . . . . . . . . . . . . . . . . . . . . . . . . . . . . . . . . . . . . . . . . . Seite 11
English . . . . . . . . . . . . . . . . . . . . . . . . . . . . . . . . . . . . . . . . . . Page 14
Français . . . . . . . . . . . . . . . . . . . . . . . . . . . . . . . . . . . . . . . . . Page 18
Español . . . . . . . . . . . . . . . . . . . . . . . . . . . . . . . . . . . . . . . .Página 22
Português. . . . . . . . . . . . . . . . . . . . . . . . . . . . . . . . . . . . . . .Página 26
Italiano . . . . . . . . . . . . . . . . . . . . . . . . . . . . . . . . . . . . . . . . .Pagina 30
Nederlands . . . . . . . . . . . . . . . . . . . . . . . . . . . . . . . . . . . . .Pagina 34
Dansk . . . . . . . . . . . . . . . . . . . . . . . . . . . . . . . . . . . . . . . . . . . Side 37
Svenska . . . . . . . . . . . . . . . . . . . . . . . . . . . . . . . . . . . . . . . . . Sida 40
Norsk . . . . . . . . . . . . . . . . . . . . . . . . . . . . . . . . . . . . . . . . . . . Side 44
Suomi. . . . . . . . . . . . . . . . . . . . . . . . . . . . . . . . . . . . . . . . . . . .Sivu 47
Ελληνικά. . . . . . . . . . . . . . . . . . . . . . . . . . . . . . . . . . . . . . . . Σελίδα 50
Türkçe . . . . . . . . . . . . . . . . . . . . . . . . . . . . . . . . . . . . . . . . . Sayfa 54
Polski . . . . . . . . . . . . . . . . . . . . . . . . . . . . . . . . . . . . . . . . . .Strona 58
Česky . . . . . . . . . . . . . . . . . . . . . . . . . . . . . . . . . . . . . . . . . .Strana 61
Slovensky. . . . . . . . . . . . . . . . . . . . . . . . . . . . . . . . . . . . . . .Strana 65
Magyar . . . . . . . . . . . . . . . . . . . . . . . . . . . . . . . . . . . . . . . . . . Oldal 68
Русский . . . . . . . . . . . . . . . . . . . . . . . . . . . . . . . . . . . . . Страница 72
Українська. . . . . . . . . . . . . . . . . . . . . . . . . . . . . . . . . . . Сторінка 77
Română . . . . . . . . . . . . . . . . . . . . . . . . . . . . . . . . . . . . . . . .Pagina 80
Български . . . . . . . . . . . . . . . . . . . . . . . . . . . . . . . . . . . Страница 84
Srpski. . . . . . . . . . . . . . . . . . . . . . . . . . . . . . . . . . . . . . . . . .Strana 88
Slovensko . . . . . . . . . . . . . . . . . . . . . . . . . . . . . . . . . . . . . . .Stran 91
Hrvatski . . . . . . . . . . . . . . . . . . . . . . . . . . . . . . . . . . . . . . Stranica 94
Eesti . . . . . . . . . . . . . . . . . . . . . . . . . . . . . . . . . . . . . . . . .Lehekülg 98
Latviešu . . . . . . . . . . . . . . . . . . . . . . . . . . . . . . . . . . . . . . Lappuse 101
Lietuviškai . . . . . . . . . . . . . . . . . . . . . . . . . . . . . . . . . . . . Puslapis 104
. . . . . . . . . . . . . . . . . . . . . . . . . . . . . . . . . . . . . . . . . 112
. . . . . . . . . . . . . . . . . . . . . . . . . . . . . . . . . . . . . . . 116
OBJ_BUCH-1199-002.book Page 2 Tuesday, January 17, 2017 12:25 PM

| 3
Bosch Power Tools 1 609 92A 2M9 | (17.1.17)
34
GTA 3800
12
11
13
9
6
2
14
10
21
87
5
OBJ_BUCH-1199-002.book Page 3 Tuesday, January 17, 2017 12:25 PM

1 609 92A 2M9 | (17.1.17) Bosch Power Tools
4|
1 609 B01 854 1 609 B01 855
OBJ_BUCH-1199-002.book Page 4 Tuesday, January 17, 2017 12:25 PM

| 5
Bosch Power Tools 1 609 92A 2M9 | (17.1.17)
A1
A2
15
10
9
OBJ_BUCH-1199-002.book Page 5 Tuesday, January 17, 2017 12:25 PM

1 609 92A 2M9 | (17.1.17) Bosch Power Tools
6|
B1
B2
1
3
12
6
OBJ_BUCH-1199-002.book Page 6 Tuesday, January 17, 2017 12:25 PM

| 7
Bosch Power Tools 1 609 92A 2M9 | (17.1.17)
1
2
C1 C2
C3 C4
164
4
17
x
17
OBJ_BUCH-1199-002.book Page 7 Tuesday, January 17, 2017 12:25 PM

1 609 92A 2M9 | (17.1.17) Bosch Power Tools
8|
D
E F
18
18
19
8
7
a
a
5
OBJ_BUCH-1199-002.book Page 8 Tuesday, January 17, 2017 12:25 PM

| 9
Bosch Power Tools 1 609 92A 2M9 | (17.1.17)
G
H
3
2
3
13
1
2
3
4
OBJ_BUCH-1199-002.book Page 9 Tuesday, January 17, 2017 12:25 PM

1 609 92A 2M9 | (17.1.17) Bosch Power Tools
10 |
I1 I2
J
12
20
11
12
11
OBJ_BUCH-1199-002.book Page 10 Tuesday, January 17, 2017 12:25 PM

Deutsch | 11
Bosch Power Tools 1 609 92A 2M9 | (17.1.17)
Deutsch
Sicherheitshinweise
Allgemeine Sicherheitshinweise
LesenSiealle demArbeitstischoderdemzu
montierenden Elektrowerkzeug beigefüg-
ten Warnhinweise und Anweisungen.
Versäumnisse bei der Einhaltung der Sicher-
heitshinweise und Anweisungen können elek-
trischen Schlag, Brand und/oder schwere
Verletzungen verursachen.
Sicherheitshinweise für Arbeitstische
Ziehen Sie den Stecker aus der Steckdose und/oder
entnehmen Sie den Akku vom Elektrowerkzeug, bevor
SieGeräteeinstellungen vornehmenoderZubehörteile
wechseln.UnbeabsichtigterStartvonElektrowerkzeugen
ist die Ursache einiger Unfälle.
Bauen Sie den Arbeitstisch korrekt auf, bevor Sie das
Elektrowerkzeug montieren. Einwandfreier Aufbau ist
wichtig, um das Risiko eines Zusammenbrechens zu ver-
hindern.
Befestigen Sie das Elektrowerkzeug sicher am Arbeits-
tisch, bevor Sie es benutzen. Ein Verrutschen des Elek-
trowerkzeugs auf dem Arbeitstisch kann zum Verlust der
Kontrolle führen.
Stellen Sie den Arbeitstisch auf eine feste, ebene und
waagerechte Fläche. Wenn der Arbeitstisch verrutschen
oder wackeln kann, können das Elektrowerkzeug oder das
Werkstück nicht gleichmäßig und sicher geführt werden.
Überlasten Sie den Arbeitstisch nicht und verwenden
Sie diesen nicht als Leiter oder Gerüst. Überlastung
oder Stehen auf dem Arbeitstisch kann dazu führen, dass
sich der Schwerpunkt des Arbeitstischs nach oben ver-
lagert und dieser umkippt.
Achten Sie darauf, dass beim Transport und beim
Arbeiten sämtliche Schrauben und Verbindungsele-
mentefestangezogen sind. Die Aufnahme-Sets für das
Elektrowerkzeug müssen immer fest arretiert sein.
Lockere Verbindungen können zu Instabilitäten und
ungenauen Sägevorgängen führen.
Montieren und demontieren Sie das Elektrowerkzeug
nur, wenn es in Transportstellung ist (Hinweise zur
Transportstellung siehe auch Betriebsanleitung des je-
weiligen Elektrowerkzeugs). Das Elektrowerkzeug kann
sonst einen so ungünstigen Schwerpunkt haben, dass Sie
es nicht sicher halten können.
Betreiben Sie das auf dem Aufnahme-Set befestigte
Elektrowerkzeug ausschließlich auf dem Arbeitstisch.
Ohne den Arbeitstisch steht das Aufnahme-Set mit dem
Elektrowerkzeug nicht sicher und kann kippen.
StellenSiesicher,dasslangeundschwereWerkstücke
denArbeitstischnichtaus dem Gleichgewicht bringen.
Lange und schwere Werkstücke müssen am freien Ende
unterlegt oder abgestützt werden.
Bringen Sie beim Zusammenschieben oder Ausein-
anderziehendes Arbeitstisches Ihre Finger nicht in die
Nähe der Gelenkpunkte. Die Finger könnten einge-
quetscht werden.
HaltenSiegültigenationaleundinternationaleNormen
ein.
Symbole
Die nachfolgenden Symbole können für den Gebrauch Ihres
Arbeitstisches von Bedeutung sein. Prägen Sie sich bitte die
Symbole und ihre Bedeutung ein. Die richtige Interpretation
derSymbolehilftIhnen, den Arbeitstisch besser und sicherer
zu gebrauchen.
Produkt- und Leistungsbeschreibung
Bestimmungsgemäßer Gebrauch
Der Arbeitstisch ist bestimmt, folgende Stationärsägen von
Bosch aufzunehmen (Stand 2017.01):
Ausgewählte Kapp- und Gehrungssägen anderer Hersteller
können ebenfalls montiert werden.
Zusammen mit dem Elektrowerkzeug ist der Arbeitstisch
bestimmt zum Ablängen von Brettern und Profilen.
Symbol Bedeutung
Die maximale Tragfähigkeit (Elektrowerk-
zeug + Werkstück) des Arbeitstisches
beträgt 250 kg.
– GCM8S 3601L160..
– GCM 800 S 3 601 L16 1..
– GCM 8 SJ 3 601 L16 2..
–GCM80SJ
GCM 800 SJ
GCM 8000 SJ 3 601 M19 0..
– GCM 8 SJL 3 601 M19 1..
– GCM8SDE 3601M192..
– GCM 10 J 3 601 M20 2..
– GCM 10 S 0 601 B20 5..
–GCM10SD 0601B225..
– GCM 10 GDJ 3 601 M27 0..
–GCM12SE 0601B235..
–GCM12JL
GCM 12 MX 3 601 M21 1..
– GCM 12 SDE 3 601 M23 1..
– GCM 12 GDL 3 601 M23 6..
– GCM 350-254 3 601 M22 6..
–GTM12
GTM12JL 3601M150..
– PCM 8 3 603 M10 0..
–PCM8S
PCM 800 S
PCM8ST 3603M101..
– PCM 8 SD 3 603 M11 0..
250
kg
OBJ_BUCH-1199-002.book Page 11 Tuesday, January 17, 2017 12:25 PM

12 | Deutsch
1 609 92A 2M9 | (17.1.17) Bosch Power Tools
Abgebildete Komponenten
Die Nummerierung der abgebildeten Komponenten bezieht
sich auf die Darstellung des Arbeitstisches auf den Grafik-
seiten.
1Werkstückauflage
2Tischverlängerung
3Feststellknauf der Tischverlängerung 2
4Aufnahme-Set
5Feststellknauf für die Höheneinstellung der
Rollenauflage 7
6Feststellknauf der Werkstückauflage 1
7Rollenauflage
8Längenanschlag
9Höhenverstellbarer Fuß
10 Tragegriff
11 Transportanschlag*
12 Transporträder*
13 Höhenverstellbarer Stützfuß der Tischverlängerung 2*
14 Steckschlüssel (13 mm)/Innensechskantschlüssel
(4 mm)/Kreuzschlitzschraubendreher
15 Sicherungsstift
16 Knopf zum Entriegeln des Hebels 17
17 Hebel zum Arretieren des Aufnahme-Sets
18 Verschiebbare Mutter
19 Befestigungsset Elektrowerkzeug
20 Befestigungsset Transporträder*
*Abgebildetes oder beschriebenes Zubehör gehört nicht zum
Standard-Lieferumfang. Das vollständige Zubehör finden Sie in
unserem Zubehörprogramm.
Technische Daten
Montage
Lieferumfang
Beachten Sie dazu die Darstellung des
Lieferumfangs am Anfang der Betriebs-
anleitung.
Prüfen Sie vor der Montage des Arbeitstisches, ob alle unten
aufgeführten Teile mitgeliefert wurden:
Zusätzlich zum Lieferumfang benötigte Werkzeuge:
– Schraubenschlüssel (10 mm)
Arbeitstisch montieren
Entnehmen Sie alle mitgelieferten Teile vorsichtig aus ihrer
Verpackung.
Entfernen Sie sämtliches Packmaterial.
Arbeitstisch aufstellen (siehe Bilder A1–A2)
Legen Sie den Arbeitstisch mit den Beinen nach oben auf den
Boden.
Drücken Sie den Sicherungsstift 15 nach innen und schwen-
ken Sie das Bein nach oben, bis der Sicherungsstift wieder
hörbar einrastet.
Wiederholen Sie diesen Arbeitsschritt mit den anderen drei
Beinen.
Drehen Sie den Arbeitstisch um in die Arbeitsposition.
VergewissernSiesich,dassderArbeitstisch stabil ist und alle
Sicherungsstifte eingerastet sind.
Ein höhenverstellbarer Fuß 9hilft Ihnen dabei, den Arbeits-
tisch auszurichten.
Schrauben Sie den Fuß so lange ein oder aus, bis der Arbeits-
tisch eben ausgerichtet ist und alle vier Beine auf dem Boden
stehen.
Rollenauflage montieren (siehe Bild B1)
Schrauben Sie die Kreuzschlitzschraube der Rollenauflage 7
mit dem mitgelieferten Kreuzschlitzschraubendreher 14 auf.
Bei Bedarf halten Sie die Kontermutter auf der anderen Seite
der Rollenauflage mit einem Schraubenschlüssel (10 mm)
gegen.
Demontieren Sie die Rollenauflage 7.
Arbeitstisch GTA 3800
Sachnummer 3 601 M24 000
Länge Arbeitstisch ohne
Tischverlängerung mm 1578
Länge Arbeitstisch mit
Tischverlängerung mm 3877
Höhe Arbeitstisch mm 824
max. Tragfähigkeit
(Elektrowerkzeug + Werkstück)
ohne Tischverlängerung
–Aufnahme-Sets kg 250
max. Tragfähigkeit
(Elektrowerkzeug + Werkstück)
mit Tischverlängerung
–Aufnahme-Sets
– je Tischverlängerung kg
kg 150
50
Gewicht entsprechend
EPTA-Procedure 01:2014 kg 22,4
Nr. Bezeichnung Anzahl
Arbeitstisch GTA 3800 1
4Aufnahme-Set 2
1Werkstückauflage 2
7Rollenauflage 2
14 Steckschlüssel/Innensechskantschlüssel/
Kreuzschlitzschraubendreher 14 1
19 Befestigungsset Elektrowerkzeug
bestehend aus:
– Sechskantschraube (M8 x 45)
–Unterlegscheibe 4
4
OBJ_BUCH-1199-002.book Page 12 Tuesday, January 17, 2017 12:25 PM

Deutsch | 13
Bosch Power Tools 1 609 92A 2M9 | (17.1.17)
Es gibt verschiedene Möglichkeiten, wie die einzelnen Rollen
mithilfe der Innengewindestange an der Werkstückauflage
angeordnet werden können (siehe Bild).
OrdnenSiedie Einzelteilewiegewünschtan und schieben Sie
die Innengewindestange durch die Rollen und durch die
Werkstückauflage 1.
Verschrauben Sie alle Teile wieder miteinander.
Werkstückauflage montieren (siehe Bild B2)
Lösen Sie die Feststellknäufe 3und ziehen Sie an beiden
Seiten des Arbeitstisches die Tischverlängerungen 2etwas
nach außen.
Schieben Sie die Werkstückauflagen 1jeweils von links und
rechts in die obere Nut des Arbeitstisches oder der Tisch-
verlängerung.
Die Längenanschläge 8müssen dabei nach außen zeigen.
Ziehen Sie zum Arretieren der Werkstückauflage den Fest-
stellknauf 6an.
Arbeitstisch vorbereiten
Aufnahme-Sets vorbereiten (siehe Bilder C1–C4)
Zum Entriegeln der Aufnahme-Sets 4drücken Sie jeweils auf
die Knöpfe 16 und öffnen die Hebel 17.
MessenSieden Abstand xzwischen denMontage-Bohrungen
an Ihrem Elektrowerkzeug.
Positionieren Sie die Aufnahme-Sets 4mittig auf dem
Arbeitstisch und im passenden Abstand xzueinander.
Schließen Sie jeweils die Hebel 17 wieder. Damit sind die
Aufnahme-Sets auf dem Arbeitstisch fest positioniert.
Elektrowerkzeug auf den Aufnahme-Sets befestigen
(siehe Bild D)
Bringen Sie das Elektrowerkzeug in die Transportstellung.
Hinweise zur Transportstellung finden Sie in der Betriebsan-
leitung des jeweiligen Elektrowerkzeugs.
Positionieren Sie die verschiebbaren Muttern 18 in den Auf-
nahme-Setspassendzuden Montage-Bohrungen des Elektro-
werkzeugs.
Verschrauben Sie mithilfe des mitgelieferten Steckschlüs-
sels 14 Aufnahme-Set und Elektrowerkzeug mit den Sechs-
kantschrauben und Unterlegscheiben aus dem Befesti-
gungsset 19.
Betrieb
Arbeitshinweise
Überlasten Sie den Arbeitstisch nicht. Beachten Sie immer
diemaximale TragfähigkeitdesArbeitstisches undderbeiden
Tischverlängerungen.
Halten Sie das Werkstück immer gut fest, besonders den
längeren, schwereren Abschnitt. Nach dem Durchtrennen
des Werkstücks kann sich der Schwerpunkt so ungünstig
verlagern, dass der Arbeitstisch kippt.
Werkstückauflage vorbereiten
Lange Werkstücke müssen am freien Ende unterlegt oder ab-
gestützt werden.
Höhe der Werkstückauflage einstellen (siehe Bild E)
Legen Sie Ihr Werkstück auf den Sägetisch des Elektrowerk-
zeugs.
Lösen Sie den Feststellknauf 5und passen Sie die Höhe der
Rollenauflage 7so an, dass Ihr Werkstück gerade aufliegt.
Ziehen Sie diesen Feststellknauf wieder an.
Gleich lange Werkstücke sägen (siehe Bild F)
Zum einfachen Sägen von gleich langen Werkstücken können
Sie den Längenanschlag 8verwenden.
Ziehen Sie den Längenanschlag 8nach oben, bis er einrastet.
Positionieren Sie die Werkstückauflage 1im gewünschten
Abstand zum Sägeblatt des Elektrowerkzeugs.
Zum Einschieben des Längenanschlags 8kippen Sie den Län-
genanschlagnachinnenunddrückenSieihn ganz nach unten.
Arbeitstisch verlängern (siehe Bild G)
Der Arbeitstisch kann an beiden Seiten verlängert werden.
Zur Stabilisierung des Arbeitstisches beim Bearbeiten von
langen und schweren Werkstücken können Sie die Tisch-
verlängerung 2durch einen Stützfuß 13 abstützen (siehe
„Stützfuß zur Abstützung der Tischverlängerung“, Seite 13).
LegenSieIhrlanges Werkstück auf denSägetischdesElektro-
werkzeugs.
LösenSie je nach Bedarf den passenden Feststellknauf 3und
ziehen Sie die Tischverlängerung 2bis zum gewünschten
Abstand nach außen.
Ziehen Sie diesen Feststellknauf wieder an.
Montage des Zubehörs
Stützfuß zur Abstützung der Tischverlängerung
(siehe Bild H)
Zur Stabilisierung des Arbeitstisches beim Bearbeiten von
langen und schweren Werkstücken können Sie die Tisch-
verlängerung 2durch einen Stützfuß 13 abstützen.
Sie können den Stützfuß 13 entweder links oder rechts vom
Arbeitstisch befestigen.
Lösen Sie den Feststellknauf 3und ziehen Sie die Tischver-
längerung 2, die abgestützt werden soll, etwas nach außen.
Schieben Sie den Schraubenkopf des Stützfußes 13 in die
untere Nut der Tischverlängerung 2.
Drehen Sie den Stützfuß 13 fest.
Schrauben Sie die Höhenverstellung des Stützfußes 13 so
lange ein oder aus, bis der Arbeitstisch wieder eben ausge-
richtet ist.
Transporträderund-anschlagzumschnellenWechseldes
Einsatzorts (siehe Bilder I1–I2)
Die Transporträder 12 ermöglichen Ihnen einen Transport
des Arbeitstisches zu einem anderen Einsatzort, ohne die
darauf montierte Stationärsäge abnehmen zu müssen.
Sie können die Transporträder 12 entweder links oder rechts
am Arbeitstisch befestigen.
OBJ_BUCH-1199-002.book Page 13 Tuesday, January 17, 2017 12:25 PM

14 | English
1 609 92A 2M9 | (17.1.17) Bosch Power Tools
Verwenden Sie zur Montage das Befestigungsset 20.
Legen Sie den Arbeitstisch mit den eingeklappten Beinen
nach oben auf den Boden.
VerschraubenSiedie Transporträder mithilfe dervierSchrau-
ben und Muttern an der gewünschten Stelle mit dem Arbeits-
tisch.
Dazu dient der mitgelieferte Innensechskantschlüssel 14.
Drehen Sie den Arbeitstisch um in die Arbeitsposition.
Lösen Sie an der Seite des Arbeitstisches, an der die Trans-
porträder befestigt sind, den Feststellknauf 3und ziehen Sie
die Tischverlängerung 2etwas nach außen.
Schieben Sie den Transportanschlag 11 in die obere Nut des
Arbeitstisches und verschieben Sie den Transportanschlag
bis zum Aufnahme-Set 4.
Ziehen Sie die Sechskantschraube im Anschlag mit dem
mitgelieferten Steckschlüssel 14 fest an.
Beim Transport kann das Aufnahme-Set mit montiertem
Elektrowerkzeug jetzt nicht mehr verrutschen.
Transport (siehe Bild J)
Zum Transport müssen Sie den Arbeitstisch zusammenlegen.
Falls ein Stützfuß 13 montiert ist, entfernen Sie diesen.
Schieben Sie die Tischverlängerungen 2ganz nach innen.
Schwenken Sie alle Beine nach innen (Sicherungsstift 15
nach innen drücken; Bein nach innen schwenken, bis der
Sicherungsstift wieder hörbar einrastet).
Greifen Sie in die Handgriff-Aussparung und heben Sie den
Arbeitstisch an.
Wartung und Service
Zubehör
Aufnahme-Set . . . . . . . . . . . . . . . . . . . . . . . . 2 610 948 662
Werkstückauflage . . . . . . . . . . . . . . . . . . . . . 1 609 B01 851
Höhenverstellbarer Stützfuß . . . . . . . . . . . . . 1 609 B01 855
Transporträder-Set
(Räder, Anschlag, Befestigungsset) . . . . . . . 1 609 B01 854
Kundendienst und Anwendungsberatung
Der Kundendienst beantwortet Ihre Fragen zu Reparatur und
Wartung Ihres Produkts sowie zu Ersatzteilen. Explosions-
zeichnungen und Informationen zu Ersatzteilen finden Sie
auch unter:
www.bosch-pt.com
DasBosch-Anwendungsberatungs-TeamhilftIhnengernebei
Fragen zu unseren Produkten und deren Zubehör.
www.powertool-portal.de, das Internetportal für Hand-
werker und Heimwerker.
Geben Sie bei allen Rückfragen und Ersatzteilbestellungen
bitteunbedingtdie10-stelligeSachnummerlaut Typenschild
des Produkts an.
Deutschland
Robert Bosch Power Tools GmbH
Servicezentrum Elektrowerkzeuge
Zur Luhne 2
37589 Kalefeld – Willershausen
Unter www.bosch-pt.com können Sie online Ersatzteile
bestellen oder Reparaturen anmelden.
Kundendienst: Tel.: (0711) 40040460
Fax: (0711) 40040461
E-Mail: Servicezentrum.Ele[email protected]
Anwendungsberatung: Tel.: (0711) 40040460
Fax: (0711) 40040462
E-Mail: [email protected]
Österreich
Unter www.bosch-pt.at können Sie online Ersatzteile
bestellen.
Tel.: (01) 797222010
Fax: (01) 797222011
E-Mail: [email protected]
Schweiz
Unter www.bosch-pt.com/ch/de können Sie online
Ersatzteile bestellen.
Tel.: (044) 8471511
Fax: (044) 8471551
E-Mail: [email protected]
Luxemburg
Tel.: +32 2 588 0589
Fax: +32 2 588 0595
E-Mail: [email protected]
Entsorgung
Arbeitstisch, Zubehör und Verpackungen sollen einer um-
weltgerechten Wiederverwertung zugeführt werden.
Änderungen vorbehalten.
English
Safety Notes
General Safety Rules
Read all warning notes and instructions en-
closed with the saw stand and the power
tool to be mounted. Failure to follow the
warnings and instructions may result in elec-
tric shock, fire and/or serious injury.
Safety Warnings for Saw Stands
Pull the plug from the mains receptacle and/or remove
the battery from the power tool before making adjust-
ments on the tool or changing tool accessories. Unin-
tentional switching on of the power tool is the cause of
many accidents.
OBJ_BUCH-1199-002.book Page 14 Tuesday, January 17, 2017 12:25 PM

English | 15
Bosch Power Tools 1 609 92A 2M9 | (17.1.17)
Assemble the saw stand in the proper manner before
mounting the power tool. Proper assembly is important
to prevent the risk of a collapse of the saw stand.
Attach the power tool securely to the saw stand before
using it. Slipping off of the power tool on the saw stand
can lead to loss of control.
Place the saw stand on a firm, level and horizontal sur-
face. If the saw stand can slip off or wobbles, the power
tool or the workpiece cannot be uniformly and securely
guided.
Do not overload the saw stand and do not use it as a
ladderorscaffolding. Overloading orstandingonthe saw
stand can lead to the upward shifting of the centre of
gravity of the stand and its tipping over.
When working or transporting, take care that all bolts
and connecting elements are firmly tightened. The
attachment sets for the power tool must always be
firmly locked. Loose connections can lead to instability
and inexact sawing.
Mount and dismount the power tool only when it is in
the transport position (for instructions on the trans-
portposition,alsosee the operating instructionsofthe
respective power tool). Otherwise, the power tool can
have such an unfavourable centre of gravity that it cannot
be held securely.
Whenthepowertoolismountedtotheattachmentset,
operateitexclusivelyonthesawstand.Withoutthesaw
stand, the attachment set with the power tool does not
stand securely and can tip over.
Ensure that long and heavy workpieces do not affect
the equilibrium of the saw stand. Long and/or heavy
workpieces must be supported at the free end.
Keep your fingers clear of the hinge points while push-
ing the saw stand together or pulling it apart. Danger of
fingers being crushed or contused.
Observe valid national and international standards.
Symbols
The following symbols can be important for the operation of
your saw stand. Please memorise the symbols and their
meanings. The correct interpretation of the symbols helps
you operate the saw stand better and more secure.
Product Description and
Specifications
Intended Use
The saw stand is intended to accommodate the following sta-
tionary saws from Bosch (as of 2017.01):
Selected chop and mitre saws from other manufacturers can
also be mounted.
Together with the power tool, the saw stand is intended for
the cutting to length of boards and profiles.
Product Features
The numbering of the product features refers to the illustra-
tion of the saw stand on the graphics pages.
1Workpiece support
2Table extension
3Locking knob of the table extension 2
4Attachment set
5Locking knob for height adjustment of the roller stand 7
6Locking knob of the workpiece support 1
7Roller stand
8Material stop
9Height-adjustable leg
10 Carrying handle
11 Transport stop*
12 Transport wheels*
13 Height-adjustable support leg of the table extension 2*
14 Socket spanner (13 mm)/Hex key (4 mm)/Cross-head
screwdriver
Symbol Meaning
Themaximumcarryingcapacity(powertool
+ workpiece) of the saw stand is 250 kg.
250
kg
– GCM8S 3601L160..
– GCM 800 S 3 601 L16 1..
– GCM 8 SJ 3 601 L16 2..
–GCM80SJ
GCM 800 SJ
GCM 8000 SJ 3 601 M19 0..
– GCM 8 SJL 3 601 M19 1..
– GCM8SDE 3601M192..
– GCM 10 J 3 601 M20 2..
– GCM 10 S 0 601 B20 5..
–GCM10SD 0601B225..
– GCM 10 GDJ 3 601 M27 0..
–GCM12SE 0601B235..
–GCM12JL
GCM 12 MX 3 601 M21 1..
– GCM 12 SDE 3 601 M23 1..
– GCM 12 GDL 3 601 M23 6..
– GCM 350-254 3 601 M22 6..
–GTM12
GTM12JL 3601M150..
– PCM 8 3 603 M10 0..
–PCM8S
PCM 800 S
PCM8ST 3603M101..
– PCM 8 SD 3 603 M11 0..
OBJ_BUCH-1199-002.book Page 15 Tuesday, January 17, 2017 12:25 PM

16 | English
1 609 92A 2M9 | (17.1.17) Bosch Power Tools
15 Locking pin
16 Button for releasing lever 17
17 Lever for locking the attachment set
18 Movable nut
19 Fastening kit, power tool
20 Fastening kit for transport wheels*
*Accessories shown or described are not part of the standard de-
livery scope of the product. A complete overview of accessories
can be found in our accessories program.
Technical Data
Assembly
Delivery Scope
Please also observe the representation of
the delivery scope at the beginning of the
operating instructions.
Before assembling the saw stand, check if all parts listed be-
low are provided:
Additionally required tools (not in delivery scope):
– Open-end spanner (10 mm)
Assembling the Saw Stand
Carefully remove all parts included in the delivery from their
packaging.
Remove all packaging material.
Setting Up the Saw Stand (see figures A1 – A2)
Lay the saw stand upside down on the floor (legs facing
upward).
Push the locking pin 15 in and tilt the leg upward until the
locking pin can be heard to engage.
Repeat this workstep with the other three legs.
Turn around the saw stand to the working position.
Ensure that the saw stand is stable and that all locking pins
have engaged.
The saw stand is easily aligned with the height-adjustable
leg 9.
Screw the leg in or out until the saw stand is aligned level and
all four legs face against the floor.
Mounting the Roller Stand (see figure B1)
Unscrew the cross-head screw of the roller stand 7with the
cross-head screwdriver 14 provided.
If required, counter-hold the lock nut on the other side of the
roller stand using a spanner (size 10 mm).
Disassemble the roller stand 7.
There are different possibilities to arrange the individual
rollers to the workpiece support with the internally-threaded
rod (see figure).
Arrange the individual parts as required and slide the inter-
nally-threaded rod through the rollers and the workpiece sup-
port 1.
Screw all parts together again.
Mounting the Workpiece Support (see figure B2)
Loosenthelockingknobs3andpullthetableextensions2via
both sides of the saw stand lightly outward.
Slide the workpiece supports 1from the left and right each
into the upper groove of the saw stand or the table extension.
The length stops 8must face outward.
Tighten the locking knob 6to lock the workpiece support.
Preparing the Saw Stand
Preparing the Attachment Sets (see figures C1 – C4)
To release the attachment sets 4, press buttons 16 each and
open the levers 17.
Measure the distance xbetween the mounting holes and your
power tool.
Position the attachment sets 4centred on the saw stand and
at the matching clearance xto each other.
Lock the levers 17 again. The attachment sets are now firmly
positioned on the saw stand.
Fastening the Power Tool to the Attachment Sets
(see figure D)
Position the power tool in the transport position.
Notes on the transport position are given in the operating
instructions of the respective power tool.
Saw stand GTA 3800
Article number 3 601 M24 000
Length of saw stand without
table extension mm 1578
Length of saw stand with
table extension mm 3877
Height of saw stand mm 824
Max. carrying capacity
(power tool + workpiece)
without table extension
– Attachment set kg 250
Max. carrying capacity
(power tool + workpiece)
with table extension
– Attachment set
– Per table extension kg
kg 150
50
Weight according to
EPTA-Procedure 01:2014 kg 22.4
No. Designation Quantity
Saw stand GTA 3800 1
4Attachment set 2
1Workpiece support 2
7Roller stand 2
14 Socket spanner/hex key/cross-head
screwdriver 14 1
19 Power tool fastening kit consisting of:
– Hexagon bolt (M8 x 45)
–Washer 4
4
OBJ_BUCH-1199-002.book Page 16 Tuesday, January 17, 2017 12:25 PM

English | 17
Bosch Power Tools 1 609 92A 2M9 | (17.1.17)
Position the movable nuts 18 in the attachment sets so that
they match the mounting holes of the power tool.
Screw the attachment set and the power tool with the hexa-
gon bolts and the washers from the fastening kit 19 using the
provided socket spanner 14.
Operation
Working Advice
Do not overload the saw stand. Always observe the maximum
carrying capacity of the saw stand and the two table exten-
sions.
Always hold the workpiece firmly, especially the longer and
more heavy section. After cutting through the workpiece, the
centre of gravity may become dislocated in such an unfavour-
able manner that the saw stand tips over.
Preparing the Workpiece Support
Long workpieces must be underlaid or supported at their free
end.
Adjusting the Height of the Workpiece Support
(see figure E)
Place your workpiece onto the saw table of the power tool.
Loosenlocking knob5and adjusttheheight oftherollerstand
7so that the workpiece rests level.
Retighten the locking knobs again.
Sawing Workpieces of the Same Length (see figure F)
The material stop 8can be used for easily sawing workpieces
to the same length.
Pull the length stop 8upward until it engages.
Position the workpiece support 1at the desired clearance to
the saw blade of the power tool.
To slide in the length stop 8, tilt it inward and push it all the
way down.
Extending the Saw Stand (see figure G)
The saw stand can be extended on both sides.
To stabilise the saw stand when working long and heavy work-
pieces,thetable extension 2can be supportedwithasupport
leg13(see “SupportLegfor Supporting theTableExtension”,
page 17).
Place your long workpiece onto the saw table of the power
tool.
Release the respective locking knob 3as required, and pull
the table extension 2out to the desired position.
Retighten the locking knobs again.
Fitting the Accessories
Support Leg for Supporting the Table Extension
(see figure H)
To stabilise the saw stand when working long and heavy work-
pieces,thetable extension 2can be supportedwithasupport
leg 13.
Thesupportleg 13 canbefastenedeither to the leftorrightof
the saw stand.
Loosen locking knob 3and pull the table extension 2to be
supported somewhat outward.
Slide the screw head of the support leg 13 into the bottom
groove of the table extension 2.
Tighten the support leg 13.
Screw the height adjustment of the support leg 13 in or out
until the saw table is aligned level again.
Transport Wheels and Stop for Swift Changing of the
Location (see figures I1 – I2)
The transport wheels 12 enable the saw stand to be trans-
ported to a different location, without having to remove the
mounted stationary saw.
The transport wheels 12 can be fastened either to the left or
right of the saw stand.
For assembly, use the fastening kit 20.
Laythesawstand upside down onthefloor(thefolded-inlegs
facing upward).
Screw the transport wheels at the desired location to the saw
table with the four screws and nuts.
Use the provided hex key 14 for this.
Turn around the saw stand to the working position.
Loosen the locking knob 3on the side of the saw stand on
which the transport wheels are fastened and pull the table
extension 2lightly outward.
Insert the transport stop 11 into the upper groove of the saw
stand and slide the transport stop to the attachment set 4.
Firmly tighten the hexagon bolt in the stop with the provided
socket spanner 14.
When transporting, the attachment set with the mounted
power tool can no longer slip off.
Transport (see figure J)
The saw stand must be folded together for transport.
In case a support leg 13 is mounted, remove it.
Slide the table extensions 2completely inward.
Tilt all legs inward (press locking pin 15 inward; tilt each leg
inward until the locking pin can be heard to engage again).
Grasp the recessed handle and lift up the saw stand.
Maintenance and Service
Accessories
Attachment set . . . . . . . . . . . . . . . . . . . . . . . . 2 610 948 662
Workpiece support . . . . . . . . . . . . . . . . . . . . . 1 609 B01 851
Height-adjustable support leg . . . . . . . . . . . . 1 609 B01 855
Transport wheel set
(wheels, stop, fastening kit) . . . . . . . . . . . . . 1 609 B01 854
OBJ_BUCH-1199-002.book Page 17 Tuesday, January 17, 2017 12:25 PM

18 | Français
1 609 92A 2M9 | (17.1.17) Bosch Power Tools
After-sales Service and Application Service
Our after-sales service responds to your questions concern-
ing maintenance and repair of your product as well as spare
parts. Exploded views and information on spare parts can al-
so be found under:
www.bosch-pt.com
Bosch’sapplication service team will gladly answer questions
concerning our products and their accessories.
In all correspondence and spare parts orders, please always
include the 10-digit article number given on the nameplate of
the product.
Great Britain
Robert Bosch Ltd. (B.S.C.)
P.O. Box 98
Broadwater Park
North Orbital Road
Denham
Uxbridge
UB 9 5HJ
At www.bosch-pt.co.uk you can order spare parts or arrange
the collection of a product in need of servicing or repair.
Tel. Service: (0344) 7360109
E-Mail: [email protected]
Ireland
Origo Ltd.
Unit 23 Magna Drive
Magna Business Park
City West
Dublin 24
Tel. Service: (01) 4666700
Fax: (01) 4666888
Australia, New Zealand and Pacific Islands
Robert Bosch Australia Pty. Ltd.
Power Tools
Locked Bag 66
Clayton South VIC 3169
Customer Contact Center
Inside Australia:
Phone: (01300) 307044
Fax: (01300) 307045
Inside New Zealand:
Phone: (0800) 543353
Fax: (0800) 428570
Outside AU and NZ:
Phone: +61 3 95415555
www.bosch.com.au
Republic of South Africa
Customer service
Hotline: (011) 6519600
Gauteng – BSC Service Centre
35 Roper Street, New Centre
Johannesburg
Tel.: (011) 4939375
Fax: (011) 4930126
E-Mail: [email protected]
KZN – BSC Service Centre
Unit E, Almar Centre
143 Crompton Street
Pinetown
Tel.: (031) 7012120
Fax: (031) 7012446
E-Mail: [email protected]
Western Cape – BSC Service Centre
Democracy Way, Prosperity Park
Milnerton
Tel.: (021) 5512577
Fax: (021) 5513223
E-Mail: [email protected]
Bosch Headquarters
Midrand, Gauteng
Tel.: (011) 6519600
Fax: (011) 6519880
E-Mail: [email protected]
Disposal
The saw stand, accessories and packaging should be sorted
for environmental-friendly recycling.
Subject to change without notice.
Français
Avertissements de sécurité
Indications générales de sécurité
Lisez tous les avertissements et instruc-
tions joints à la table de travail ou à l’outil
électroportatif à assembler. Ne pas suivre
les avertissements et instructions peut provo-
querunchocélectrique,unincendieet/ouune
blessure sérieuse.
Instructions de sécurité pour tables de travail
Débrancher la fiche de la source d’alimentation en cou-
rant et/ou le bloc de batteries de l’outil avant tout ré-
glage, changement d’accessoires ou avant de ranger
l’outil. Une mise en route involontaire d’outils électropor-
tatifs est une cause courante d’accident.
Montez correctement la table de travail avant de mon-
ter l’outil électroportatif. Un montage exact est impor-
tant pour éviter le risque que la table ne s’écroule.
Fixez l’outil électroportatif fermement sur la table de
découpeavantdel’utiliser.Unoutilélectroportatif qui se
déplace sur la table de travail peut entraîner une perte de
contrôle.
Montez la table de travail sur une surface solide, plane
et horizontale. Si la table de travail peut se déplacer ou
basculer, il n’est pas possible deguider l’outil électroporta-
tif ou la pièce de façon uniforme et en toute sécurité.
OBJ_BUCH-1199-002.book Page 18 Tuesday, January 17, 2017 12:25 PM

Français | 19
Bosch Power Tools 1 609 92A 2M9 | (17.1.17)
Ne surchargez pas la table de travail et ne l’utilisez pas
entant qu’échelle ou échafaudage. Le fait de surcharger
la table de travail ou de se placer dessus peut avoir pour
conséquence que le centre de gravité de la table de travail
se déplace vers le haut et qu’elle se renverse.
Veillez à ce que tous les vis et éléments d’assemblage
soient bien serrés lors du transport et lors du travail.
Les sets de fixation de l’outil électroportatif doivent
toujours être bien bloqués. Des raccords desserrés
peuvent entraîner des instabilités et des opérations impré-
cises de sciage.
Ne montez et démontez l’outil électroportatif que
lorsqu’il se trouve en position de transport (pour les
indications concernant la position de transport, voir
également les instructions d’utilisation de l’outil élec-
troportatifrespectif).Sinon,lecentredegravitédel’outil
électroportatif peut être défavorable de sorte que vous ne
puissiez pas le tenir en toute sécurité.
N’utilisezl’outil électroportatif monté sur le set defixa-
tionquesurla tabledetravail.Sanstable detravail,leset
de fixation avec l’outil électroportatif n’est pas stable et
peut basculer.
Assurez-vous que les pièces longues et lourdes ne dé-
séquilibrent pas la table de travail. Les extrémités libres
des pièces longues et lourdes doivent être soutenues.
Tenez toujours vos doigts à l’écart des points d’articu-
lation lorsque vous pliez ou dépliez la table de travail.
Vos doigts pourraient être coincés.
Respecter les normes nationales et internationales en
vigueur.
Symboles
Les symboles suivants peuvent être importants pour l’utilisa-
tion de votre table de travail. Veuillez mémoriser ces sym-
boles et leurs significations. L’interprétation correcte des
symboles vous permettra de mieux utiliser votre table de tra-
vail et en toute sécurité.
Description et performances du
produit
Utilisation conforme
La table de travail est conçue pour intégrer les scies station-
naires suivantes de Bosch (version 2017.01) :
Certaines scies à onglets d’autres fabricants peuvent égale-
ment être montées.
Avec l’outil électroportatif, la table de travail est conçue pour
le découpage de planches et de profilés.
Eléments de l’appareil
Lanumérotationdesélémentsseréfèreàla représentationde
la table de travail sur les pages graphiques.
1Support de la pièce
2Rallonge de table
3Bouton de blocage de la rallonge de table 2
4Set de fixation
5Bouton de blocage du réglage de la hauteur du support à
rouleaux 7
6Bouton de blocage du support de la pièce 1
7Support à rouleaux
8Butée de longueur
9Pied, réglable en hauteur
10 Poignée
11 Cale de transport*
12 Roues de transport*
13 Pied d’appui ajustable en hauteur de la rallonge de
table 2*
14 Clé à douille (13 mm)/clé mâle pour vis à six pans creux
(4 mm)/tournevis cruciforme
15 Tige de blocage
16 Bouton de déverrouillage du levier 17
17 Levier de blocage du set de fixation
18 Ecrou déplaçable
19 Set de montage de l’outil électroportatif
20 Set de fixation roues de transport*
*Lesaccessoires décritsou illustrés nesont pas tous comprisdans
la fourniture. Vous trouverez les accessoires complets dans notre
programme d’accessoires.
Symbole Signification
La capacité de charge maximale (outil
électroportatif + pièce) de la table de tra-
vail est de 250 kg.
–GCM8S 3601L160..
– GCM 800 S 3 601 L16 1..
– GCM 8 SJ 3 601 L16 2..
250
kg
–GCM80SJ
GCM 800 SJ
GCM 8000 SJ 3 601 M19 0..
– GCM 8 SJL 3 601 M19 1..
– GCM8SDE 3601M192..
– GCM 10 J 3 601 M20 2..
– GCM 10 S 0 601 B20 5..
–GCM10SD 0601B225..
– GCM 10 GDJ 3 601 M27 0..
–GCM12SE 0601B235..
–GCM12JL
GCM 12 MX 3 601 M21 1..
– GCM 12 SDE 3 601 M23 1..
– GCM 12 GDL 3 601 M23 6..
– GCM 350-254 3 601 M22 6..
–GTM12
GTM12JL 3601M150..
– PCM 8 3 603 M10 0..
–PCM8S
PCM 800 S
PCM8ST 3603M101..
– PCM 8 SD 3 603 M11 0..
OBJ_BUCH-1199-002.book Page 19 Tuesday, January 17, 2017 12:25 PM

20 | Français
1 609 92A 2M9 | (17.1.17) Bosch Power Tools
Caractéristiques techniques
Montage
Accessoires fournis
Respectez également l’indication du conte-
nu de l’emballage au début des instructions
d’utilisation.
Avant le montage de la table de travail, vérifiez si toutes les
pièces indiquées ci-dessous ont été fournies :
D’autres outils nécessaires, pas fournis avec l’appareil :
–Clé(10mm)
Montage de la table de travail
Retirez avec précaution de l’emballage toutes les pièces
fournies.
Enlevez tout emballage.
Installer la table de travail (voir figures A1 – A2)
Posez la table de travail sur le sol, les pieds vers le haut.
Poussez la tige de blocage 15 vers l’intérieur et basculez le
pied vers le haut jusqu’à ce que la tige de blocage s’encli-
quette à nouveau de façon perceptible.
Répétez cette opération avec les trois autres pieds.
Retournez la table de travail pour la mettre en position de tra-
vail.
Assurez-vous à ce que la table de travail soit stable et que
toutes les tiges de blocage se soient encliquetées.
Un pied réglable en hauteur 9vous aide à aligner la table de
travail.
Vissez ou dévissez le pied jusqu’à ce que la table de travail soit
alignéehorizontalement et que les quatre pieds touchent le sol.
Monter le support à rouleaux (voir figure B1)
Vissez la vis cruciforme du support à rouleaux 7à l’aide du
tournevis cruciforme livré avec 14.
Sinécessaire,contre-serrez lecontre-écroudel’autrecôté du
support à rouleaux à l’aide d’une clé (10 mm).
Démontez le support à rouleaux 7.
Ily aplusieurspossibilitésdemontage desdifférents rouleaux
sur le support de la pièce à travailler à l’aide de la barre à file-
tage interne (voir figure).
Placez les différentes pièces ainsi que souhaité et faites glis-
ser la barre à filetage interne à travers les rouleaux et le sup-
port de la pièce à travailler 1.
Revissez toutes les pièces ensemble.
Monter le support de la pièce à travailler (voir figure B2)
Desserrezlesboutons de blocage 3etressortezunpeu les ral-
longes de table 2des deux côtés de la table de travail.
Faites glisser les supports des pièces à travailler 1de gauche
etdedroitedanslarainuresupérieuredela table de travail ou
de la rallonge de table.
Les butées de longueur 8doivent être orientées vers l’exté-
rieur.
Pour bloquer le support de la pièce, serrez le bouton de blo-
cage 6.
Préparation de la table de travail
Préparer les sets de fixation (voir figures C1 –C4)
Pour déverrouiller les sets de fixation 4, appuyez à chaque
fois sur le bouton 16 et ouvrez le levier 17.
Mesurez la distance xentrelesalésagesdemontagesurvotre
outil électroportatif.
Positionnez les sets de fixation 4au centre de la table de tra-
vail et à une distance appropriée xl’un par rapport à l’autre.
Refermez le levier 17 à chaque fois. Les sets de fixation sont
alors fermement positionnés sur la table de travail.
Monter l’outil électroportatif sur les sets de fixation
(voir figure D)
Mettez l’outil électroportatif en position de transport.
Vous trouverez des indications pour la position de transport
dans les instructions d’utilisation de l’outil électroportatif res-
pectif.
Table de travail GTA 3800
N° d’article 3 601 M24 000
Longueur de la table de travail
sans rallonge mm 1578
Longueur de la table de travail
avec rallonge mm 3877
Hauteur de la table de travail mm 824
Capacité de charge max.
(outil électroportatif + pièce)
sans rallonge
–Setsdefixation kg 250
Capacité de charge max.
(outil électroportatif + pièce)
avec rallonge
–Setsdefixation
–parrallonge kg
kg 150
50
Poids suivant
EPTA-Procedure 01:2014 kg 22,4
N° Désignation Nombre
Table de travail GTA 3800 1
4Set de fixation 2
1Support de la pièce 2
7Support à rouleaux 2
14 Clé à douille/clé mâle pour vis à six pans
creux/tournevis cruciforme 14 1
19 Set de montage de l’outil électroportatif
comprenant :
– Boulon à tête hexagonale (M8 x 45)
– Rondelle 4
4
OBJ_BUCH-1199-002.book Page 20 Tuesday, January 17, 2017 12:25 PM
Other manuals for GTA 3800 Professional
5
Table of contents
Languages:
Other Bosch Tools Storage manuals
Popular Tools Storage manuals by other brands

Black & Decker
Black & Decker Workmate 79-041 instruction manual

Seaside Casual
Seaside Casual Sonoma 36 Assembly instructions

Sealey
Sealey AP2418.V2 instructions

Seville Classics
Seville Classics HOME UltraGuard Workcenter Island UHD20109 Assembly instructions

Fike
Fike AB-55 Product installation document

CSPS
CSPS COTC4316BC1SAU Use and care guide