Triton SuperJaws SJA200 Quick guide

Version date: 26.05.16
tritontools.com
SuperJaws Portable
Clamping System
Operating and Safety Instructions
SJA 200
569497_Z1MANPRO1.indd 2 26/05/2016 10:18

2
1
3
4
5
6
8
9
10
11
12
13
14
7
15
2
569497_Z1MANPRO1.indd 2 26/05/2016 10:18

G
M
HF
I
D
K
E
N
J L
OP
B
AC
569497_Z1MANPRO1.indd 3 26/05/2016 10:18

4
GB
XW
AE AF
YAB
AC AD
V
U
ZAA
TQ RS
569497_Z1MANPRO1.indd 4 26/05/2016 10:18

5
GB
AK AL
AJ
AH AI
AO
AG
AM AN
AP
569497_Z1MANPRO1.indd 5 26/05/2016 10:18

6
GB
Model no: SJA200
Clamping range: 0-956mm
Clamp travel per stroke: 24mm
Clamping force: Up to 1,000kg
Maximum load: 100kg
Folded dimensions: 755 x 300 x 280mm
Standing dimensions: 865 x 980 x 970mm
Weight: 15,6kg
Wear hearing protection
Wear eye protection
Wear breathing protection
Wear head protection
Caution!
Read instruction manual
DO NOT use as a step or platform!
Description of Symbols
The rating plate on your tool may show symbols. These represent important information about
the product or instructions on its use.
Specification
WARNING: Always wear ear protection where the sound level exceeds 85dB(A) and limit the
time of exposure if necessary. If sound levels are uncomfortable, even with ear protection, stop
using the tool immediately and check the ear protection is correctly fitted and provides the
correct level of sound attenuation for the level of sound produced by your tool.
WARNING: User exposure to tool vibration can result in loss of sense of touch, numbness,
tingling and reduced ability to grip. Long-term exposure can lead to a chronic condition. If
necessary, limit the length of time exposed to vibration and use anti-vibration gloves. Do not
operate the tool with hands below a normal comfortable temperature, as vibration will have a
greater effect. Use the figures provided in the specification relating to vibration to calculate the
duration and frequency of operating the tool.
Sound and vibration levels in the specification are determined according to EN60745 or
similar international standards. The figures represent normal use for the tool in normal
working conditions. A poorly maintained, incorrectly assembled, or misused tool, may produce
increased levels of noise and vibration. www.osha.europa.eu provides information on sound
and vibration levels in the workplace that may be useful to domestic users who use tools for
long periods of time.
General Safety
WARNING Read all safety warnings and all instructions. Failure to follow the warnings and
instructions may result in electric shock, fire and/ or serious injury.
WARNING: This appliance is not intended for use by persons (including children) with
reduced, physical or mental capabilities or lack of experience or knowledge unless they
have been given supervision or instruction concerning use of the appliance by a person
responsible for their safety. Children must be supervised to ensure that they do not play
with the appliance.
Save all warnings and instructions for future reference.
1) Work area safety
a) Keep work area clean and well lit. Cluttered or dark areas invite accidents.
b) Do not operate tools in explosive atmospheres, such as in the presence of flammable
liquids, gases or dust.
c) Keep children and bystanders away while operating a powered tool. Distractions can
cause you to lose control.
2) Personal safety
a) Stay alert, watch what you are doing and use common sense when operating a
powered tool. Do not use a powered tool while you are tired or under the influence
of drugs, alcohol or medication. A moment of inattention while operating a powered tool
may result in serious personal injury.
b) Use personal protective equipment. Always wear eye protection. Protective equipment
such as dust mask, non-skid safety shoes, hard hat, or hearing protection used for
appropriate conditions will reduce personal injuries.
c) Prevent unintentional starting. Ensure the switch is in the off-position when not operating
the tool and make use of other safety features which prevent unintentional starting
d) Remove any adjusting key or wrench before turning the powered tool on. A wrench or
a key left attached to a rotating part of the tool may result in personal injury.
e) Do not overreach. Keep proper footing and balance at all times. This enables better
control of the tool in unexpected situations.
f) Dress properly. Do not wear loose clothing or jewelry. Keep your hair, clothing and
gloves away from moving parts. Loose clothes, jewelry or long hair can be caught in
moving parts.
g) If devices are provided for the connection of dust extraction and collection facilities,
ensure these are connected and properly used. Use of dust collection can reduce
dust-related hazards.
WARNING: User exposure to tool vibration can result in loss of sense of touch, numbness,
tingling and reduced ability to grip. Long term exposure can lead to a chronic condition.
If necessary limit the length of time exposed to vibration. Use the figures provided in the
specification relating to vibration if provided to calculate the duration and frequency of
operating the tool. The 2002/44/EC directive relating to vibration in the workplace may
provide useful information even for domestic use of tools. In the first instance of feeling
uncomfortable due to vibration STOP using the tool immediately.
WARNING: Always wear ear protection where the sound level exceeds 85dB(A) and limit the
time of exposure if necessary. If sound levels are uncomfortable even with ear protection
stop using the tool immediately and check the ear protection is correctly fitted and provides
the right level of sound attenuation for the level of sound produced by your tool.
3) Tool use and care
a) Maintain tools. Check for misalignment or binding of moving parts, breakage of parts
and any other condition that may affect the tool’s operation. If damaged, have the
tool repaired before use. Many accidents are caused by poorly maintained tools.
b) Keep cutting tools sharp and clean. Properly maintained cutting tools with sharp cutting
edges are less likely to bind and are easier to control.
c) Use the tool’s accessories and tool bits etc. in accordance with these instructions,
taking into account the working conditions and the work to be performed. Use of the
tool for operations different from those intended could result in a hazardous situation.
4) Service
a) Have your tool serviced by a qualified repair person using only identical replacement
parts. This will ensure that the safety of the tool is maintained.
Thank you for purchasing this TRITON tool. This manual contains information
necessary for safe and effective operation of this product. This product has unique
features and, even if you are familiar with similar products, it is necessary to read this
manual carefully to ensure you fully understand the instructions. Ensure all users of
the tool read and fully understand this manual.
Original Instructions
Introduction
569497_Z1MANPRO1.indd 6 26/05/2016 10:18

7
GB
Product Familiarisation
1. Fixed Jaw Urethane Face
2. Moving Jaw Urethane Faces (2pce)
3. Moving Jaw Locking Tab
4. Body
5. Rear Leg Locking Knob
6. Rear Leg
7. Foot Plates
8. Foot Pedal
9. Front Legs
10. Foot Pedal Locking Latch
11. Front Leg Locking Knobs
12. Extension Tray Mounting Holes
13. Lock / Release Switch
14. Fixed Jaw
15. Moving Jaw
Intended Use
The SuperJaws Portable Clamping System is a portable work holder which clamps a variety of
workpieces for a multitude of different applications.
• Carefully unpack and inspect your tool. Fully familiarise yourself with all its features and
functions
• Ensure that all parts of the tool are present and in good condition. If any parts are missing
or damaged, have such parts replaced before attempting to use this tool
Unpacking Your Tool
• Carefully unpack and inspect your tool. Fully familiarise yourself with all its features and
functions
• Ensure that all parts of the tool are present and in good condition. If any parts are missing
or damaged, have such parts replaced before attempting to use this tool
Before Use
Setting up
1. With SuperJaws placed upside down on the ground, loosen the Rear Leg Locking Knob (5)
and slide the Rear Leg (6) from its storage position (Image B)
• Pivot the Rear Leg just clear of the front face (Image A)
• Slide it all the way forward then lift and slide it fully into its housing at the rear, then tighten
the knob (Image C)
DO NOT extend the rear leg beyond the marked line (Fig. I)
2. Raise the Foot Pedal (8) until it ‘clicks’ into position (Image D)
3. Pivot the Front Legs (9) out as far as they will go (Image E), then turn the Front Leg Locking
Knobs (11) clockwise; until the rounded section of the knob tightens onto the leg housing, as
shown (Image F & G)
• Several turns may be necessary on initial set-up, until the clamps tighten into place. A half
turn is all that is required to release the legs when folding
4. Turn SuperJaws upright and recheck all legs are locked firmly in position (Image H)
5. Rotate the Moving Jaw Locking Tab (3) to the horizontal position (Image I). SuperJaws is now
ready for use
Folding
Folding is the reverse procedure of the steps described above. Ensure that:
• The Lock / Release Switch (13) is in the ‘unlock’ position (Image J)
• The Foot Pedal Locking Latch (10) is used to release and fold the Foot Pedal (8) (Image K)
• The Moving Jaw Locking Tab (3) is in the ‘vertical’ position to prevent the jaw from sliding
out (Image L)
• The Rear Leg (6) is engaged fully into its housing, and the Rear Leg Locking Knob (5) is
tightened firmly (Image M)
• When in its folded position, the Rear Leg becomes a carrying handle, for easy transportation
(Image N)
Operation
Clamping
1. Check that the Moving Jaw Locking Tab (3) is set to the ‘horizontal’ position (Image O), and
push the Moving Jaw (15) back until your workpiece fits between the jaws (Image P)
2. Place the workpiece against the Fixed Jaw (14) and slide the moving jaw forward until it
touches the workpiece (Image Q)
Note: The jaw can also be advanced forward by pressing the Foot Pedal (8) repeatedly.
3. Slide the Lock / Release Switch (13) down to the ‘lock’ position (Image R)
Note: If preferred the switch can be locked after the work is clamped.
4. Apply downward pressure on the Foot Pedal (8) until sufficient clamping force has been
applied (Image S)
Note: For extra force you may stand on the Foot Pedal (maximum 100kg), but do not jump on
it, as you could damage the unit.
Releasing
1. Slide the Lock / Release Switch (13) up to the ‘release’ position (Image T)
2. Push on the Foot Pedal (8) then allow it to return up and release the workpiece (Image U)
Note: Ensure you are supporting the workpiece to prevent it from falling once the jaw is
released.
Note: If you have clamped the object very tightly, you may need to exert more pressure on the
Foot Pedal before it will release.
3. Slide the Moving Jaw (15) back, and remove your workpiece (Image V)
Clamping on one side of the jaw
• Some large or awkward workpieces can only be clamped on one side of the jaws (Image W)
Note: Always fit a spacer (the same thickness as your workpiece) to the other side of the jaws,
to prevent the Moving Jaw (15) from skewing.
Clamping large objects (460mm to 956mm)
• The Moving Jaw (15) can be reversed to accommodate workpieces measuring between
460mm and 956mm:
1. Set the Lock / Release Switch (13) to the ‘release’ position, and ensure that the Foot Pedal
(8) is released (Image X)
2. Check the Moving Jaw Locking Tab (3) is in the horizontal position (Image Y)
3. Slide the Moving Jaw fully from its tracks (Image Z)
4. Rotate the Moving Jaw by 180°, and re-insert it into the tracks (Images AA & AB)
Notes:
• When clamping objects with the Moving Jaw (15) reversed, ensure the workpiece sits down
onto, and is parallel to, the sliding jaw. Avoid clamping workpieces at the top of the jaws
(with a gap between the workpiece and the base of the Moving Jaw) as excessive pedal
pressure could damage the unit
• When clamping large or heavy materials, provide outboard support (such as a MSA200
Triton Multi-Stand 330090) to prevent SuperJaws from tipping over
Using as an anvil
• The fixed jaw is sufficiently robust to be used as an anvil for strip metal work (Images
AC & AD)
• Do not use the Moving Jaw as an anvil, as this could cause damage
• For thicker materials we recommend the use of the optional SJA470 Engineers’ Jaws
(product code 330120)
Using as a press
• When the Lock / Release Switch (13) is in the ‘release’ position (Image X), SuperJaws can
be used as a press (Image AE)
• With each full stroke of the Foot Pedal (8), the Moving Jaw (15) will advance approximately
25mm (1”)
Ripping a plank
1. When ripping a plank, stop cutting before reaching the jaws (Image AF)
2. Remove the workpiece and re-clamp with sufficient amount of the cut beyond the jaws,
so that you can drop in your saw to recommence your cut
3. Before clamping, insert a spacer slightly thicker than your saw cut, at the jaw area, to
keep the cut open (Image AG)
Clamping square tubing
• Square tubing or similar can be clamped diagonally into the jaws using the V-grooves for
easier, more precise sawing (Image AH)
Note: Use the V-grooves in the urethane jaws to securely hold your material.
Sharpening chainsaws
• SuperJaws is ideal for clamping a chainsaw or chain blade while sharpening the teeth
(Image AI)
Note: If sharpening a chainsaw, use two wooden blocks, either side of the bar, to ensure the
clamping jaws are clear of the chain, which can then be rotated as each tooth is filed.
Outdoor use
• SuperJaws is ideal for outdoor use. However, if SuperJaws gets wet, it is important to dry
the tool to prevent corrosion. Also re-apply any oil or grease that may have been affected
by rain
569497_Z1MANPRO1.indd 7 26/05/2016 10:18
8
GB
Bicycles
• SuperJaws is ideal for clamping bicycles during repair and maintenance, and will hold
the bicycle securely at the required height. However, modern bicycle frames need careful
consideration before clamping. Carbon fibre frames are very easy to damage and should
not be clamped. Steel bicycle frames are possible to clamp, so long as the clamping is
applied carefully and slowly. Ideally, for any frame, the best solution is to fit an old seat post
to the frame and clamp the seat post instead, to prevent the frame being damaged
Note: Clamp so the weight of the bicycle is dispersed evenly across SuperJaws. Bicycles are
considerably heavier at the back than at the front.
Additional Uses
There are many additional uses for SuperJaws which are not featured in this manual. Whatever
the use, it is important to heed the following:
• Always check SuperJaws is correctly assembled before use
• Do not overload SuperJaws beyond its load capacity (see ‘Specification’)
• Make sure the workpiece is correctly balanced
• Do not exert too much force on the workpiece while clamping
• Do not use clamping force beyond 1,000kg; only clamp to the required force
• Do not use this product as a step or for building work platforms for people
Accessories
Engineers Jaws SJA470 (product code 330120)
• The bolt-on jaws are manufactured from extremely strong ductile cast iron, and are
specially shaped to increase grip when clamping pipe or round sections up to 50mm
in diameter. They also have an integral anvil for hammering or bending of heavy metal
sections (Image AJ)
Log Jaws SJA460 (product code 330115)
• Suitable for gripping logs or poles, these jaws also bolt onto the standard steel jaws and are
formed from steel plate, and zinc-plated for corrosion resistance (Image AK)
Note: Logs or poles up to 175mm in diameter are gripped firmly for chain sawing, drilling,
rebating etc.
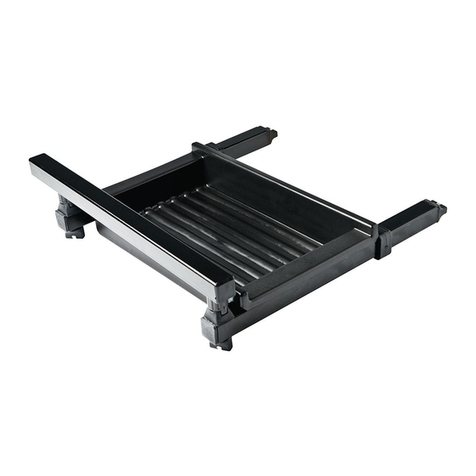
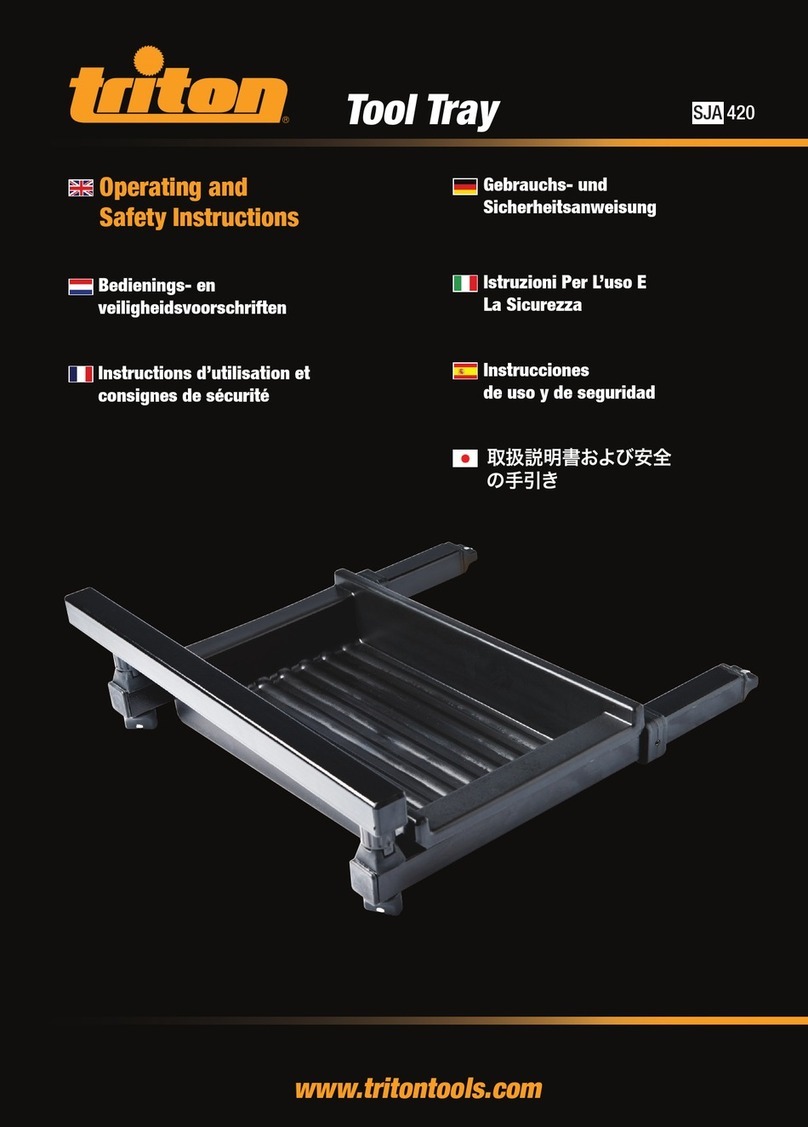
Extension Tray SJA420 (product code 330110)
• The Extension Tray fits through the Extension Tray Mounting Holes (12) in either side of
the main Body (4). It provides outboard support for the workpiece, keeping it level while
clamping into position. A tough, high density polyethylene tray locates onto the support
tubes as a convenient place to hold tools, parts and other accessories (Image AL)
Note: For additional support and capacity a second extension tray can be fitted onto the
opposite side of SuperJaws
Note: Check with your Triton stockist for additional accessories for your SuperJaws. Spare
parts for your SuperJaws can be obtained from toolsparesonline.com.
Maintenance
• Basic maintenance of this product should ensure a long working life
• Any damage to SuperJaws should be repaired and carefully inspected before use by
qualified repair personnel
• Servicing should be carried out using only original Triton replacement parts
• Triton Tools will not be responsible for any damage or injury caused by unauthorised repair
or mishandling of the machine
Please note:
• Depending on the type of use, it is quite likely this product will receive scratches and marks
that will remove paint and result in corrosion over time. Check for corrosion and treat if
necessary. Some disassembly may be required to check thoroughly, such as the underside
of the moving jaw. Always dry SuperJaws if it gets wet, particularly on any exposed metal
surfaces
• Lubricant or grease may be required from time to time, but always apply it in moderation
and never apply lubricant if it will affect the way the product operates. Any mechanism
should only be lubricated with a light spray lubricant which cannot affect the way it
operates
• If SuperJaws becomes damaged or corroded, and requires major repair, such as welding,
you can no longer rely on the given figures for clamping force or load capacity. Under these
circumstances, SuperJaws should be replaced immediately, as this level of repair will void
the guarantee
Removing the urethane jaw faces
• The jaw facings can be removed to achieve a greater clamping range, or for replacement if
worn or damaged, or when fitting the optional jaws
Note: Replacement urethane jaw pads are available from your Triton stockist or from www.
toolsparesonline.com.
1. The Fixed Jaw Urethane Face (1) is removed by carefully prying it off the Fixed Jaw (14)
using a broad screwdriver or similar (Image AM)
2. To remove the Moving Jaw Urethane Faces (2), push the backing face to the right (when
viewed from the front of SuperJaws), in order to disengage the connection pins. The
backing face can then be removed, allowing the front to be pulled off the Moving Jaw (15)
(Image AN)
• The pawl carrier pivot pin may occasionally require a small amount of spray lubricant, as
shown, if it doesn’t pivot smoothly (Image AP)
Storage
• Store this tool carefully in a secure, dry place out of the reach of children
Disposal
Always adhere to national regulations when disposing of power tools that are no longer
functional and are not viable for repair.
• Do not dispose of power tools with household waste
• Contact your local waste disposal authority for information on the correct way to dispose of
tools
569497_Z1MANPRO1.indd 8 26/05/2016 10:18
9
GB
Warranty
Our goods come with guarantees that cannot be excluded under the Australian Consumer Law.
You are entitled to a replacement or refund for a major failure and for compensation for any
other reasonably foreseeable loss or damage. You are also entitled to have the goods repaired
or replaced if the goods fail to be of acceptable quality and the failure does not amount to a
major failure.
This product is covered by a 36 month warranty.
This warranty will not apply:
(i) where this product has been subjected to misuse, abuse, accident or want
of care;
(ii) where this product has been used for a purpose for which it was not
designed or is not suited;
(iii) where the service of this product has been undertaken by a non-
authorised person or company or if non-approved parts have been used;
(iv) where this product has been used for industrial purposes.
Should service become necessary during the warranty period, the purchaser should contact
an Authorised Service Centre or White International. In order to obtain warranty service, the
purchaser must present the store receipt showing the name of the retailer and the date of
purchase.
The period of the warranty begins from the original date of purchase, notwithstanding any
subsequent repair or parts replacement.
Purchaser shall be responsible for all transport charges to and from the Authorised Service
Centre.
Damage in transit is not covered by this warranty. The purchaser should remove from the
product any liquids (if applicable) before sending the tool for service or repair. The tool should
be packed securely to prevent damage.
Warranty exclusions
Wear parts or service related parts required when performing normal and regular maintenance
of this product are not covered by warranty unless it is found to be defective by an Authorised
Service Centre. These include, but are not limited to: Blades
Distributed in Australia by White International.
PO Box 304 Milperra LPO, NSW Australia, 2214
Ph:1800 251 338
The White International Policy is one of continuous improvement and the company reserves the
right to alter designs, colours and specifications without notice
Guarantee
To register your guarantee visit our web site at
www.tritontools.com* and enter your details.
Your details will be included on our mailing list (unless indicated otherwise) for
information on future releases. Details provided will not be made available to any third
party.
Purchase Record
Date of Purchase: ___ / ___ / ____
Model: SJA200 Retain your receipt as proof of purchase art pr
Triton Precision Power Tools guarantees to the purchaser of this product that if any
part proves to be defective due to faulty materials or workmanship within 3 YEARS
from the date of original purchase,
Triton will repair, or at its discretion replace, the faulty part free of charge.
This guarantee does not apply to commercial use nor does it extend to normal wear
and tear or damage as a result of accident, abuse or misuse.
* Register online within 30 days.
Terms & conditions apply.
This does not affect your statutory rights oves to be defecti
569497_Z1MANPRO1.indd 9 26/05/2016 10:18
Notes:
569497_Z1MANPRO1.indd 10 26/05/2016 10:18
Notes:
569497_Z1MANPRO1.indd 11 26/05/2016 10:18
569497_Z1MANPRO1.indd 12 26/05/2016 10:18
Other manuals for SuperJaws SJA200
2
Table of contents
Other Triton Tools Storage manuals

Triton
Triton LocBoard LBC-4 User manual

Triton
Triton 2000 Series Assembly instructions

Triton
Triton LocBoard LB18-S Guide

Triton
Triton LocBoard LB18-T Guide

Triton
Triton SuperJaws SJA200 Quick guide

Triton
Triton TSTSS Assembly instructions

Triton
Triton TWX7 Quick guide

Triton
Triton SJA420 Quick guide

Triton
Triton WC18-WH-Kit Guide

Triton
Triton SJA420 Quick guide
Popular Tools Storage manuals by other brands

Beta
Beta C24S/6-O Instructions for use

Husky
Husky HOTC8010BB1S Use and care guide

Harbor Freight Tools
Harbor Freight Tools 60723 Owner's manual & safety instructions

Tool Shed
Tool Shed TSTH08 Operator's manual

Sealey
Sealey SC01.V2 instructions

Wolfcraft
Wolfcraft MASTER 200 Original operating instructions