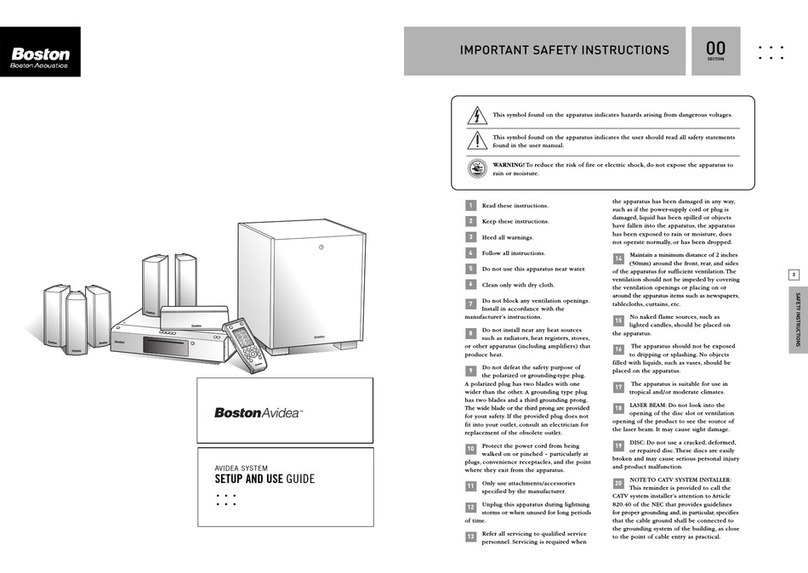
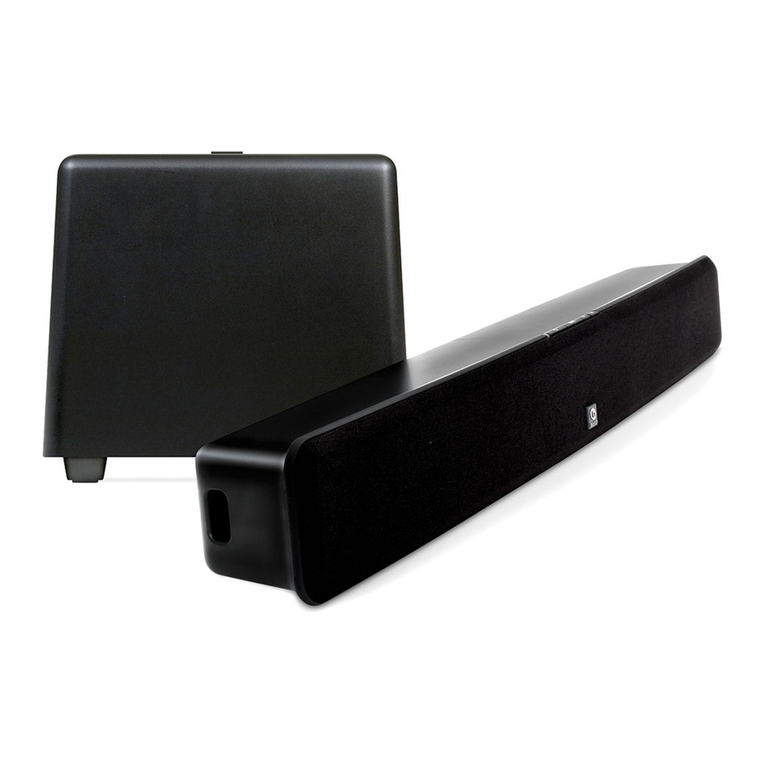
Boston Acoustics Avidea 610 User manual

SETUP AND U
SETUP AND USE GUIDE
DVD/VCD/CD SURROUND SYSTEM
DVD RECEIVER 2.0
INSTRUCTION MANUAL
Volume
Phones
Volume
English-US

2
ENGLISH
Introduction
Before Applying Power
This symbol found on the apparatus indicates
hazards arising from dangerous voltages.
This symbol found on the apparatus indicates
the user should read all safety statements
found in the user manual.
WARNING! To reduce the risk of fire or
electric shock, do not expose the apparatus to
rain or moisture.apparatus to rain or moisture.
1. Read these instructions.
2. Keep these instructions.
3. Heed all warnings.
4. Follow all instructions.
5. Do not use this apparatus near water.
6. Clean only with dry cloth.
7. Do not block any ventilation openings. Install in
accordance with the manufacturer’s instructions.
8. Do not install near any heat sources such as
radiators, heat registers, stoves, or other apparatus
(including amplifiers) that produce heat.
9. Do not defeat the safety purpose of the polarized or
grounding-type plug. A polarized plug has two blades
with one wider than the other. A grounding type plug has
two blades and a third grounding prong. The wide blade
or the third prong are provided for your safety. If the pro-
vided plug does not fit into your outlet, consult an elec-
trician for replacement of the obsolete outlet.
10. Protect the power cord from being walked on or
pinched – particularly at plugs, convenience receptacles,
and the point where they exit from the apparatus.
11. Only use attachments/accessories specified by the
manufacturer.
12. Unplug this apparatus during lightning storms or
when unused for long periods of time.
13. Refer all servicing to qualified service personnel.
Servicing is required when the apparatus has been dam-
aged in any way, such as if the power-supply cord or plug
is damaged, liquid has been spilled or objects have fallen
into the apparatus, the apparatus has been exposed to rain
or moisture, does not operate normally, or has been
dropped.
14. Maintain a minimum distance of 2 inches (50mm)
around the front, rear, and sides of the apparatus for
sufficient ventilation. The ventilation should not be
impeded by covering the ventilation openings or placing
on or around the apparatus items such as newspapers,
tablecloths, curtains, etc.
15. No naked flame sources, such as lighted candles,
should be placed on the apparatus.
16. The apparatus should not be exposed to dripping or
splashing. No objects filled with liquids, such as vases,
should be placed on the apparatus.
17. The apparatus is suitable for use in tropical and/or
moderate climates.
18. LASER BEAM: Do not look into the opening of
the disc slot or ventilation opening of the product to see
the source of the laser beam. It may cause sight damage.
19. DISC: Do not use a cracked, deformed, or repaired
disc. These discs are easily broken and may cause serious
personal injury and product malfunction.
20. NOTE TO CATV SYSTEM INSTALLER: This
reminder is provided to call the CATV system installer’s
attention to Article 820.40 of the NEC that provides
guidelines for proper grounding and, in particular, specifies
that the cable ground shall be connected to the ground-
ing system of the building, as close to the point of cable
entry as practical.

Knowledge
In Case of Difficulty 50
Specifications 53
Universal Set-Up 54
Universal Code List 55
Introduction
Before Applying Power 2
Safety Precautions 2
Contents 3
Accessories 4
IMPORTANT SAFEGUARDS 5
Maintenance 6
Discs Information 7
Types of Playable Discs 7
Unplayable Discs 7
Icons on the DVD Video Discs 7
Region Codes 8
World Region Codes 8
Video Formats 9
System Connections 10
Loudspeakers 10
AM Loop Antenna 11
FM Antenna 11
Connecting to a TV 12
Connecting to a Satellite Tuner 12
Connecting to Audio Video Equipment 13
Controls and Indicators 14
Operation of Remote Control Unit 15
Set Up Functions 16
Preparation for Set Up 16
Setup Menu 16
Select TV Display 18
Select Picture Mode 18
Select Angle Mark On or Off 19
Select OSD Language 19
Select Captions On or Off (NTSC only) 20
Select Screen Saver On or Off 20
Select Dynamic Range 21
Select Audio Language 22
Select Subtitle Language 22
Select Disc Menu Language 23
Select Parental Level 23
Change Password 24
Reset to Default Setting 24
DVD Menu Language Code List 25
Setting Up SURROUND Mode 26
What are SURROUND Modes? 26
3
ENGLISH
Introduction
Contents
Preparation
Operations
Let's Play Some Sound 31
Basic Use Method 31
Assigning the Digital(Optical In) 31
Selecting Surround Sound Mode 32
Receiving Broadcast Stations 33
Storing the Broadcast Stations (one-by-one
presetting) 34
Playback of Disc 35
Basic Play 35
Disc Playback Features 36
On Screen Display 37
Various Playback Functions 38
Select Audio Language 38
Select the Audio Channel 38
Select Subtitle Language 38
Select Subtitle On or Off 38
Select Camera Angle 39
Random Play 39
Repeat Play 40
A-B Repeat Play 40
Using Bookmarks 41
Using IntroScan Function 41
Program Play 42
Menu Playback 44
Hierarchical Structure of VCD Menus 44
MP3/WMA/JPEG Media Playback 45
Guidance of MP3/WMA/JPEG 45
Playing Back MP3/WMA/JPEG Files 46
Select Files to be Played Back Directly 47
Rotating a Picture (JPEG files only) 47
MP3/WMA/JPEG Repeat Play 48
MP3/WMA/JPEG Random Play 48
MP3/WMA/JPEG Program Playback 49
Setting SURROUND Mode Manually 27
Speaker Setting 28
Speaker Level Setting 28
Delay Time Setting 29
Level Setting Using a Music Source 30
Caution: Read the pages marked carefully to ensure safe operation.
g
in
r
es

4
ENGLISH
Introduction
Accessories
Please confirm that the following accessories are present.
Unpacking
Unpack the unit carefully and make sure that all accessories are put aside so they will not be lost. Examine the unit for any possibility
of shipping damage. If your unit is damaged or fails to operate, notify your dealer immediately. If your unit was shipped to you
directly, notify the shipping company without delay. Only the consignee (the person or company receiving the unit) can file a claim
against the carrier for shipping damage. We recommend that you retain the original carton and packing materials for use should
you transport or ship the unit in the future.
Keep this manual handy for future reference.
Accessories packed with the DVD RECEIVER 2.0 unit
FM Indoor Antenna (1) AM Loop Antenna (1) Video Cable (1)
Remote Control (1) Batteries (R03"/AAA") (2) S-Video Cable (1)
SystemManuals (1)

5
IMPORTANT SAFETY INSTRUCTIONS
ENGLISH
CAUTION: THIS DIGITAL VIDEO PLAYER EMPLOYS A
LASER SYSTEM.
TO ENSURE PROPER USE OF THIS PRODUCT,
PLEASE READ THIS USER’S GUIDE CAREFULLY
AND RETAIN FOR FUTURE REFERENCE.
SHOULD THE UNIT REQUIRE MAINTENANCE,
CONTACT A BOSTON ACOUSTICS AUTHO-
RIZED SERVICE CENTER.
USE OF CONTROLS, ADJUSTMENTS OR THE
PERFORMANCE OF PROCEDURES OTHER
THAN THOSE SPECIFIED HEREIN MAY RESULT
IN HAZARDOUS RADIATION EXPOSURE.
TO PREVENT DIRECT EXPOSURE TO LASER
BEAM, DO NOT TRY TO OPEN THE ENCLOSURE.
VISIBLE LASER RADIATION MAY BE PRESENT
WHEN THE ENCLOSURE IS OPENED.
DO NOT STARE INTO BEAM.
Regulatory Compliance Statements
American Users:
This equipment has been tested and found to comply
with the limits for a Class B digital device, pursuant to
part 15 of the FCC Rules. These limits are designed to
provide reasonable protection against harmful interference
in a residential installation. This equipment generates,
uses, and can radiate radio frequency energy and, if not
installed and used in accordance with the instructions,
may cause harmful interference to radio communications.
However, there is no guarantee that interference will not
occur in a particular installation. If this equipment does
cause harmful interference to radio or television reception,
which can be determined by turning the equipment off
and on, the user is encouraged to try to correct the
interference by one or more of the following measures:
1. Reorient or relocate the receiving antenna.
2. Increase the separation between the equipment
and receiver.
3. Connect the equipment into an outlet on a circuit
different from that to which the
receiver is connected.
4. Consult the dealer or an experienced radio/TV
technician for help.
CAUTION: Unauthorized changes or modifications to
the receiver could void the user’s authority to operate
the equipment.
Canadian Users:
This class B digital apparatus complies with Canadian
ICES-003.
Cet appareil numérique de classe B est conforme á la
norme NMB-003 du Canada.
Location of the Required Label
Complies with FDA radiation performance
standard, 21 CFR subchapter J.
Manufactured by: BOSTON ACOUSTICS INC.
300 Jubilee Drive
Peabody, MA 01960 USA
Location of the Required Label

6
ENGLISH
Transportation and Movement
Before transporting or moving this unit, carry out the
following operations.
1. Set the POWER ON/OFF switch to ON without
loading a disc.
2. Wait a few seconds and verify that the display shown
appears.
3. Set the POWER ON/OFF switch to OFF.
Maintenance
Maintenance
Reference
Maintenance of the Unit
When the front panel or case becomes dirty, wipe
with a soft, dry cloth. Do not use thinner, benzene,
alcohol, etc. for these agents may cause discoloration.
Disc Handling Precautions Discs Which Can be Played With this Unit
Use discs that comply with the IEC standard, for example a disc
carrying the marking on the label surface.
Disc Accessories
The disc accessories (stabilizer, protection sheet, protection ring,
etc.) which are marketed for improving the sound quality or
protection of discs as well as the disc cleaner should not be used
with this system because they may cause a malfunction.
Never Play a Cracked or Warped Disc
During playback, the disc rotates at a high speed in the player.
Therefore, to avoid danger, never use a cracked or deformed
disc or a disc repaired with tape or an adhesive agent. Please
do not use discs which are not round because they may cause
malfunctions.
In Regard to Contact Cleaner
Do not use contact cleaners because it could cause a
malfunction. Be specially careful not to use contact
cleaners containing oil, for they may deform the plastic
component.
Caution on Condensation
Condensation (of dew) may occur inside the unit when there is
a great difference in temperature between this unit and the out-
side. This unit may not function properly if condensation
occurs. In this case, leave the unit for a few hours and restart the
operation after the condensation has dried up.
Be specially cautious against condensation in the following
circumstances:
When this unit is carried from one place to another across a
large difference in temperature, when the humidity in the room
where this unit is installed increases, etc.
Handling
Hold the disc so that you do not touch the
playing surface.
Label side
Playing side
Sticker
Do not attach paper or tape to either the
playing side or the label side of the disc.
Cleaning
If there are fingerprint marks or foreign
matter found on the disc, lightly wipe the
disc with a soft cotton cloth (or similar)
from the center of the disc outwards in a
radial manner.
Storage
When a disc is not to be played for a long
period of time, remove it from the player
and store it in its case.
Sticky paste

DVD AUDIO (Can play Dolby Digital tracks of DVD
Audio Disc.)
DVD ROM discs
DVD RAM discs
SACD discs (Can play CD layer of hybrid discs.)
7
ENGLISH
Discs Information
Types of Playable Discs
Unplayable Discs
Icons on the DVD Video Discs
This unit does not only play music from CDs but can also play the discs listed below to offer you high-quality
entertainment of videos, movies and live concerts.
MP3 and WMA media and JPEG picture CDs can be played back with this equipment (CD-R, CD-RW)
* This unit can play SVCDs, but some functions will not work.
* This unit can play DVD-R, DVD+R, DVD-RW, and DVD+RW discs, but depending on the recording unit, the disc
manufacturer, etc., playback sometimes may not be possible.
* This unit may also be incapable of playing certain CD-R/RW discs depending on their properties, recording conditions, etc.
This unit may not play some WMA, JPEG and MP3 formats. This player cannot playback any of the following discs.
CD-ROM discs (Except MP3, WMA, and JPEG discs [ISO 9660 level 1])
VSD discs
CDV discs (Only the audio part can be reproduced.)
CD-G/CD-EG/CD-EXTRA discs (Only the audio can be reproduced.)
Aspect ratios that can be selected. “NORMAL/LB” stands for Letter Box and “NORMAL/PS” for Pan/Scan.
In the example on the left, the 16:9 video can be converted into letter box video.
Number of angles provided by the angle function. The number in the icon indicates the number of angles. (Max. 9 angles)
Number of voice languages recorded with the audio function. The number in the icon indicates the number of voice
languages. (Max. 8 languages)
Number of subtitle languages recorded with the subtitle function. The number in the icon indicates the number of
subtitle languages. (Max. 32 languages)
Indicates the region code where the disc can be played.
Description
Icon
Playable Disc
Logo mark on disc
Disc size
Played sides One or both One or both
Approx. 133 min,
(1 side, 1 layer)
Approx. 242 min.
(1 side, 2 layers)
Approx. 266 min.
(2 sides, 1 layer)
Approx. 484 min.
(2 sides, 2 layers)
Approx. 41 min,
(1 side, 1 layer)
Approx. 75 min.
(1 side, 2 layers)
Approx. 82 min.
(2 sides, 1 layer)
Approx. 150 min.
(2 sides, 2 layers)
Video + Audio
Audio
One side only
Max. 20 min., digital Max. 80 min., digital
One side only One side only One side only
Max. 20 min. Max. 74 min.
(In case of an SVCD, the possible
playback time becomes shorter.)
DVD VIDEO CD (CD-R, CD-RW) VCD (SVCD*)
Contents
47
16
8
9
•A DVD VIDEO disc with a region code which does not match this unit or without a region code. For details, see
“Region Codes”.
•When the video format of a disc differs from that of the TV in use, the disc cannot be played normally. For details, see
“Video Formats”.

8
ENGLISH
Region Codes
Every player of this model has a certain region code assigned to it based on the country where the player is used.
When the player is used to play back DVD VIDEO discs, it can only play DVD VIDEO discs carrying the
region codes matching the region code of the player.
The region code for this player is described on the rear panel of the player.
The DVD players are given a region code according to the country or area it is marketed, as shown in the
following map.
Professional use discs
(Air Line cabin service)
Region Codes of the DVD Video Discs That Can be Played With This Player
This player can play back a DVD VIDEO disc which carries the corresponding code to the region code of the player
shown in the table above, a marking containing the region code of the player or the “ALL” marking shown below. Even
when a DVD VIDEO disc does not carry any indication of the region code, it may sometimes unable to be played on
this player due to certain restrictions.
Restrictions Due to Difference Between Discs
Some DVD and VCD discs can be played only in certain playback modes according to the
intentions of the software producers. As this player plays discs according to their intentions,
some functions may not work as intended by you. Please be sure to read the instructions
provided with each disc. When an inhibition icon is displayed on the TV screen connected to
the player, it indicates that the disc being played is under the restriction as described above.
halt icon
World Region Codes

16
16
9
ENGLISH
Video Formats
The TV picture display and disc signal systems can be
divided roughly into two TV formats (NTSC and PAL).
They are variable depending on countries and areas.
TV formats of major countries
TV Format Major Countries & Areas
Japan, Taiwan, Korea, USA, Canada, Mexico,
Philippines, Chile, etc.
China, U.K., Germany, Australia, New
Zealand, Kuwait, Singapore, etc.
NTSC
PAL
When the video formats are different:
Try playing the disc. If the video formats of the disc and TV
do not match, the played video may be black and white or become as
shown below.
Top and bottom edges are not displayed.
Top and bottom areas are dark.
Picture turbulence due to sync unmatching.
Checking the Video Format (“Preparation for Set Up” )
Check the video format of the TV to be used
16
(For Europe and Australia)
This unit has a function for changing the video format according to the TV type. ( ) The initial setting of this unit for “TV
Type” is NTSC. Please confirm the type of your TV.
(For other countries)
This unit has a function for changing the video format according to the TV type. ( ) The initial setting of this unit for “TV
Type” is PAL. Please confirm the type of your TV.

10
ENGLISH
System Connections
Loudspeakers
Caution: Do not plug in the power lead until all
connections are completed.
Make connections as shown below.
When connecting the related system components, refer
also to the instruction manuals of the related components.
Caution
Be sure to adhere to the following or proper ventilation will be blocked causing damage
or fire hazard.
•Do not place any objects impairing heat radiation onto the top of the unit.
• Leave a space around the unit (from the largest outside dimension including
projection) equal or greater than, shown below.
Top panel: 19.7"(50 cm) Side panel: 3.95"
(10 cm) Back panel: 3.95"(10 cm)
Malfunction of Microcomputer
If operation is not possible or erroneous
display appears even though all connections
have been made properly, reset the micro-
computer referring to “In case of difficulty”.
Right
surround
speaker
Left
surround
speaker
When making all connections,
use the markings on the wire to
connect + to + and - to -.
Left front speakerCenter speaker
Subwoofer
Right front
speaker
50
Note

11
ENGLISH
System Connections
AM Loop Antenna
FM Antenna
Caution: Read this page carefully to ensure safe operation.
The supplied antenna is for
indoor use. Place it as far as
possible from the main system,
TV set, speaker wires and
power cord, and set it in a
position which provides the
best reception.
The accessory indoor antenna
is for temporary indoor use only.
For stable signal reception we
recommend using an outdoor
antenna.
Lead the 75Ωcoaxial cable
connected to the FM outdoor
antenna into the room and
connect it to the FM 75Ω
terminal.
Connect to the antenna terminal.
Locate the position providing good
reception.
Fix the antenna.
FM Indoor Antenna Connection
AM Loop Antenna Connection
FM Outdoor Antenna
(commercially available)
1
2
3

12
ENGLISH
The TV Button on the remote selects the video input. In this way you can use the TV button on the
remote to control the TV, and connect the TV’s audio to the video audio input. Please see the Universal
Code list on page 54.
Note
The S-Video and the Composite Video are deactivated when progressive scan in turned on.
Note
System Connections
Connecting to a TV(S-Video, Monitor Out)
Connecting to a TV(Component Out)
For remote control programming see page 54.
Progressive displays, such as high performance CRT/LCD/DLP/LCOS projectors and the HDTV-ready TVs can take advantage
of the high definition source this unit can provide. These devices may require Progressive Scan.
Activate Progressive Scan
While the unit is in standby, press and hold the OPEN/CLOSE button and PLAY/PAUSE button at the same time
to toggle progressive scan on and off.
Note
Composite Video Cable
OR
S-Video Cable
Switching NTSC/PAL video signal
Depending on what type of TV you own, you may have to switch the video signal.
Press the OPEN/CLOSE button on the unit to open the tray. When the tray is
open, press the STOP button on the top panel of the unit and press the
SUBTITLE button on the remote.
Audio Cable
Component
Video
Cable
(accessory)

13
ENGLISH
ENGLISH
System Connections
Connecting to Audio Video Equipment
Use the Optical Out to connect to a CD recorder or MD recorder to record audio.
Note
COMPOSITE Video cables
Audio Cable
Audio Cable Play
Play
Record
Record
Connecting to a Satellite Tuner, Cable Box or other Digital Device
Satellite tuner
COMPOSITE
Video Cable
Audio
Cable Optical Digital
Cable
(accessory)
Component
Video
Cable
(accessory)
When connecting video devices, separate cables are required for the picture (video) and the sound (audio). However the
component video input has to be assigned in order to enable the system.
If you would like to use the component video or optical digital inputs, you will need to assign them to the CBL/SAT,
VCR/PVR, or VIDEO sources. When selected, these connections override the standard audio/video connections.
Assign the Component Input
Important note for assigning the Component Input: Select the DVD input on the Remote Control and press the AUDIO
SETUP button. The display will show the current setting. Toggle through the list using the right or left cursor buttons:
VIN-OFF, VIN-VIDEO, VIN-VCR, or VIN-CABLE.
Assign the Digital Input
Important note for assigning the Digital Input: Select the
DVD input on the Remote Control and press the AUDIO
SETUP button TWICE. The display will show the current
setting. Toggle through the list using the right or left cursor
buttons: DIN-OFF, DIN-VIDEO, DIN-VCR, or DIN-CABLE.
Recording from the VCR OUT terminal
of this unit is only possible when the
SURROUND MODE is set to STEREO.
Note

14
ENGLISH
Switching as shown below is done each time the DIMMER
button on the remote control is pressed.
Bright
Dim 1
Dim 2
Controls and Indicators
CAUTION
The power will not be completely cut off from the AC wall outlet when the main switch is turned OFF.
Standby Mode
While the standby indicator is lit, a small amount of power is supplied to the system to back up the memory. This is called standby
mode. Under this condition, the system can be turned ON by the remote control unit.
DIMMER Function
The display brightness of the main
unit can be changed.
DOLBY DIGITAL indicator
DOLBY Pro Logic II indicator
DTS indicator
RANDOM indicator
PCM indicator
ST (STEREO) indicator
DSP indicator
TITLE indicator
TRACK indicator
CHP (CHAPTER)
indicator
SLEEP indicator
ST (STEREO) indicator
TUNED indicator
AUTO indicator
REPEAT indicator
A-B indicator
FOLDER indicator
IN/OUT status indicator
L : Left speaker
C : Center speaker
R : Right speaker
LS : Left surround speaker
LFE : Low frequency effect
RS : Right surround speaker
Memory indicator
Display
Character
information
display section
PLAY / PAUSE indicator
CD indicator
DVD indicator
VCD indicator
MP3 indicator
This lights when an MP3, WMA,
or a JPEG disc is set.
STANDBY button
STANDBY indicator
Disc tray
OPEN/CLOSE ( )
STOP (Q)
SKIP ( )
W
3
2
1
W
W
W
W
1
2
3
4
5
6
31
37
37
38
37
There is an AC power switch on the rear panel.
Note
12345 6 78910
PLAY/PAUSE ( )
737
W
SOURCE
831
VOLUME CONTROL
931
PHONES jack 31
10

DEVICE POWER OFF
INPUT SELECTOR buttons
DVD button
CBL/SAT button
VCR/PVR button
VIDEO button
AM/FM button
TV button
DIMMER button
Numeric buttons
MEM. button
Speaker select buttons
FRONT button
CENTER button
REAR button
SUB-W (Subwoofer)
CHANNEL buttons, A-B,B. Mark
Up (+), Down (-)
TOP MENU button
RETURN button
REC/ANGLE button
TUNING (Search) buttons
SLOW button
STEP button
SUBTITLE button
AUDIO button
15
ENGLISH
Operation of Remote Control Unit
The remote control provided with the DVD Receiver 2.0 is a universal
remote. The universal remote is pre-programmed for hundreds of
different devices. Please see page 54 for instructions.
Infrared ray system
Loading Batteries
Insert batteries.
Remove the cover. Close the cover.
• Insert two AAA (R03-size) batteries
following the polarity indications.
Operation
Insert the power plug into a power outlet, press the
POWER switch on the main unit to ON, then press the
POWER button on the remote control.
•When pressing more than one remote control buttons succes-
sively, press the buttons securely by leaving an interval of 1 sec-
ond or more between pressing of buttons.
1. The provided batteries are intended for use in operation checking, and their service life may be short.
2. When the remote controllable distance becomes short, replace both of the batteries with new ones.
3. If direct sunlight or the light of a high-frequency fluorescent lamp (inverter type, etc.) is incident to the remote sensor,
malfunction may occur. In such a case, change the installation position to avoid malfunction.
Operating range (approx.)
Remote sensor
POWER button
SURROUND button
RANDOM button
REPEAT button
A-B REPEAT button
TV INPUT button
CLEAR button
LEVEL buttons, Up (+), Down (-)
MUTE button
VOLUME
Up, ( ), Down ( ) buttons
AUDIO SETUP button
MENU/PBC button
CURSOR Up ( ), Down ( ),
Left ( ), and Right ( )
ENTER button
ON SCREEN button
Q(Stop)/FM MODE
Pause button
Play button
PRESET (Skip) buttons
W
W
W
W
W
W
W
W
W
W
W
W
W
1
2
15
3
4
5
6
8
7
9
10
12
11
13
14
15
16
17
18
19
21
20
1 2 3
Notes
31
14
34
34
30
28
42
39
33
36
38
38
31
43
31
31
28
18
35
33
4
16
22
26
6
17
18
14
2
113
5
11
821
24
719
3
9
W
22
23
24
25
12
20
26
23
25
37
27
39
40
40
28
18
36
35
33
10

9
16
ENGLISH
Set Up Functions
Preparation for Set Up
Set Up Menu
Press the OPEN/CLOSE button on the unit
to open the tray. When the tray is open, press
the STOP button on the top panel of the unit
and press the SUBTITLE button on the
remote.
MULTI ( NTSC/PAL switchable)
NTSC
PAL
The SETUP functions are the following diverse functions. Please change them according to your use environment.
Turn on the POWER.
1 2
3
2
1
+
This model has a rear panel power switch.
If unit appears not to function make sure
AC cord is plugged in and rear panel power
switch is turned on.
Note
Set the TV Format according to the connected TV type.
(Initial Settings)
MAIN UNIT REMOTE
MAIN UNIT REMOTE
GENERAL SETUP
Picture Mode This adjusts the screen quality
according to the material being played back.
Auto The picture quality is adjusted automatically.
Film Choose this setting to reproduce the picture
quality of FILM material.
Video Choose this setting to reproduce the picture
quality of VIDEO material.
Smart Choose this setting to reproduce progressive
and interlaced materials with limited motion.
Super Smart Choose this setting to reproduce
progressive and interlaced materials with motion
(motion adaptive interlacing.)
Angle Mark When this is set to ON, the ANGLE
mark will be displayed when a multi angle scene
is reached during playback of a DVD.
On
Off
OSD Language This switches the language for the
on-screen display.
English, French, German, Italian, Spanish
Captions (NTSC ONLY) This switches the CLOSED
CAPTION ON or OFF. “Closed caption” is a subtitle
display system developed for the hearing-impaired,
but it is also a very effective system for learning
foreign languages. When your TV is compatible with
“closed caption” and you select ON, you can use the
CLOSED CAPTION function.
On
Off
Screen Saver This switches the screen saver ON or
OFF. When SCR SAVER is ON, the screen saver
function will operate after approx. 3 minutes have
passed with a still picture (display of BOSTON).
On, Off
SPEAKER
Downmix The digital output will automatically provide
a stereo downmix in case a multichannel signal is detected.
On
Off Allows Surround Sound to operate.
Center Allows you to turn off the Center channel.
On
Off
Rear Allows you to turn off the Rear channel.
On
Off
Subwoofer Allows you to turn off the Subwoofer.
On
Off
AUDIO
Audio Out
Off
Bit Stream A signal(DTS, DD or PCM) that is
compressed and changed into digital format.
PCM PCM (Pulse Code Modulation) is the most
common system of encoding digital audio.
Sound can be turned into digital audio data at
different sampling rates; the higher the rate, the
better the quality. PCM soundtracks are mono
or stereo only.
Compression (ONLY FOR Dolby Digital Sources only)
Setting the dynamic range to levels below full will
provide a limited soft to loud range that maybe desirable
for late night listening
Full (Most Compression)
3/4
1/2
1/8 (Least Compression)
Off
LPCM Output LPCM is a signal that is changed to a digital
format without compression. A CD is recorded with 16-
bit sound at 44.1kHz, while DVD recording is anywhere
between 16 bits at 48kHz to 24 bits at 192kHz.
LPCM 48k
LPCM 96k
DOLBY Pro Logic II Mode This mode applies conventional
2-channel signals such as digital pcm or analog as well as
Dolby Surround signals to surround processing.
Music This mode allows you to further enhance

17
ENGLISH
Set Up Functions
your listening experience by adding processing that
emphasizes the musical effects.
Movie This mode allows you to further enhance
your movie experience by adding processing that
emphasizes the sounds of the audio special effects.
Dolby Pro Logic II Control
Panorama (On or Off) Expands the image of front-
channel stereo to the surround speakers to create
a sound environment that fills your surroundings.
(To change the Panorama mode, press SETUP
at the time of Dolby Pro Logic II Music mode.
Display the PANORA OFF or ON, then press
the LEVEL buttons to select on or off.)
Dimension (-3 to 3) Dimension: This controls
the balance between the Front and Rear in 2 steps
on the front and 2 steps on the rear. Set this
parameter to one of the Front steps if the surround
effect is too strong, or to one of the Back
steps if it is too weak. (To change the Dimension,
press SETUP button twice at the time of Pro Logic II
Music mode. Display the DIMEN 0
(or other value), then press the LEVEL buttons
to select F-2, F-3, R-2 or R-3.)
Center Width (0 to 7) The center channel signal can
be divided and distributed to the Front L/R
channels.The adjustment for distributing the
center channel signal to the front channels can
be applied in eight steps from 0 to 7. Use this
adjustment when the center image seems to be
too strong. (To change the Center Width, press
SETUP button 3 times at the time of Dolby Pro
Logic II Music mode. Display the C-WIDTH 0
(or other value), then press the LEVEL buttons to
select 0-7.)
PREFERENCES
TV Display This sets the screen size (4:3 or 16:9
aspect ratio) according to the connected TV.
NORMAL/PS (Pan Scan) Choose this setting if you
want the movie to fill the entire screen of your 4:3
TV. You won’t see part of the picture (particularly
the right and left edge). Some discs produced in a
wide screen format can not be cropped in this
fashion, which means the black bars would appear
at the top and the bottom of the screen.
NORMAL/LB (Letter Box) Choose this setting if
you would prefer to see movies in their original
aspect ratio of your 4:3 TV. You will see the entire
frame of the movie, but it will occupy a smaller
portion of the screen. This setting may result in
the movie appearing with black bars at the top
and bottom of the screen.
Wide Choose this setting if your DVD Receiver is
connected to a wide screen 16:9 aspect ratio TV.
Audio Choose the language for Audio
English, French, Spanish, Chinese, Italian or
German
Subtitle Choose the language for Subtitle
English, French, Spanish, Chinese, Italian or
German
Disc Menu Choose the language for Disc Menu
English, French, Spanish, Chinese, Italian or
German
Parental This can restrict playback of adult-oriented
DVD discs that you do not want to be seen by
children. However, even when a DVD disc is
marked “Adult-oriented” or so on the label, its
viewing cannot be restricted unless the restriction
level is recorded in the disc itself.
Parental lock level:
Level 8: All DVDs can be played back.
(Factory preset)
Level 7 to 2: DVDs for general
audiences/children can be played back.
(DVDs for adults are prohibited.)
Level 1: DVDs for children can be played
back (DVDs for adults/general audiences are
prohibited.)
1, 2, 3 PG, 4 PG 13, 5, 6 PG-R, 7, 8,
Defaults This resets all settings, except for PARENTAL
and PASSWORD, to the factory defaults.
Defaults
Password The password for PARENTAL setting,
change, cancellation, etc. is set. The password set at
the time of shipping from the factory is 0000.
Old Password
New Password
Confirm

18
ENGLISH
W
W
Press cursor up/down ( / ) buttons on the remote
to select PIC MODE, then press the cursor right
( ) button to access the sub features.
2
3
4
5
6
Press cursor up/down ( / ) buttons on the remote to
select the specific mode, then press the ENTER button.
W
W
Set Up Functions
Select TV Display Select Picture Mode
During stop mode, press the MENU button on
the remote.
Press cursor up/down ( / ) buttons on the remote
to select PREFERENCES, then press the ENTER
button to access the sub features.
Press cursor up/down ( / ) buttons on the remote
to select TV DISPLAY, then press the cursor right
( ) button to access the sub features.
Press cursor up/down ( / ) buttons on the remote to
select TV DISPLAY type, then press the ENTER button.
Press cursor left ( ) button on the remote to return to
previous menu.
Press cursor up/down ( / ) buttons on the remote to
select EXIT SETUP, then press the ENTER button.
Please refer to pages 16 and 17 for setup.
W
W
W
W
W
W
W
W
W
W
During stop mode, press the MENU button on the
remote.
Press cursor up/down ( / ) buttons on the remote
to select GENERAL SETUP, then press the ENTER
button to access the sub features.
Press cursor left ( ) button on the remote to return
to previous MENU.
Press cursor up/down ( / ) buttons on the remote to
select EXIT SETUP, then press the ENTER button.
W
W
W
W
W
W
1
2
3
4
5
6
1
VCD
DVD
VCD
DVD

19
ENGLISH
During stop mode, press the MENU button on
the remote.
CD
VCD
1
2
3
4
5
6
5
6
4
3
Set Up Functions
Please refer to pages 16 and 17 for setup.
Press cursor up/down ( / ) buttons on the remote
to select GENERAL SETUP, then press the ENTER
button to access the sub features.
Press cursor up/down ( / ) buttons on the remote
to select ANGLE MARK, then press the cursor
right ( ) button to access the sub features.
Press cursor up/down ( / ) buttons on the remote
to select ON or OFF, then press the ENTER button.
Press cursor left ( ) button on the remote to return
to the previous menu.
Press cursor up/down ( / ) buttons on the remote
to select EXIT SETUP, then press the ENTER button.
W
W
W
W
W
W
W
W
During stop mode, press the MENU button on the
remote.
Press cursor up/down ( / ) buttons on the remote
to select GENERAL SETUP, then press the ENTER
button to access the sub features.
Press cursor up/down ( / ) buttons on the remote
to select OSD LANG, then press the cursor right
( ) button to access the sub features.
Press cursor up/down ( / ) buttons on the remote to
select the specific language, then press the ENTER
button.
Press cursor left ( ) button on the remote to return to
the previous menu.
Press cursor up/down ( / ) buttons on the remote to
select EXIT SETUP, then press the ENTER button.
W
W
W
W
W
W
W
W
W
W
W
W
2
1
DVD
DVD
Select OSD Language
Select Angle Mark On or Off
o

20
ENGLISH
ENGLISH
Set Up Functions
5
6
4
3
2
1During stop mode, press the MENU button on
the remote.
Press cursor up/down ( ) buttons on the
remote to select GENERAL SETUP, then press
the ENTER button to access the sub features.
Press cursor up/down ( ) buttons on the remote
to select SCR SAVER, then press the cursor right
( ) button to access the sub features.
Press cursor up/down ( ) buttons on the remote to
select ON or OFF, then press the ENTER button.
Press cursor left ( ) button on the remote to return to
the previous menu.
Press cursor up/down ( ) buttons on the remote to
select EXIT SETUP, then press the ENTER button.
W
W
W
W
CD
VCD
DVD
W
W
W
W
W
W
Select Screen Saver On or Off
3
2
1
Select Captions On
or Off (NTSC only)
Please refer to pages 16 and 17 for setup.
During stop mode, press the MENU button on
the remote.
Press cursor up/down ( ) buttons on the remote
to select GENERAL SETUP, then press the ENTER
button to access the sub features.
Press cursor up/down ( ) buttons on the remote
to select CAPTIONS, then press the cursor right
( ) button to access the sub features.
W
W
W
CD
VCD
DVD
W
W
5
6
4Press cursor up/down ( ) buttons on the remote
to select ON or OFF, then press the ENTER button.
Press cursor left ( ) button on the remote to return to
the previous menu.
Press cursor up/down ( ) buttons on the remote to
select EXIT SETUP, then press the ENTER button.
W
W
W
W
W
Other manuals for Avidea 610
3
This manual suits for next models
1
Table of contents
Other Boston Acoustics Home Theater System manuals

Boston Acoustics
Boston Acoustics DVD Receiver 2.0 User manual

Boston Acoustics
Boston Acoustics Avidea 770 Safety guide

Boston Acoustics
Boston Acoustics Avidea 610 Technical manual

Boston Acoustics
Boston Acoustics TVee Model Two User manual

Boston Acoustics
Boston Acoustics MCS 160 User manual

Boston Acoustics
Boston Acoustics TVee 300 User manual

Boston Acoustics
Boston Acoustics TVeeTM User manual

Boston Acoustics
Boston Acoustics DT6000 User manual

Boston Acoustics
Boston Acoustics DT7000 User manual

Boston Acoustics
Boston Acoustics TVee Model Two User manual