Bovie Aaron 950 User manual


iUser’s Guide • Aaron 950™
USER’S GUIDE

ii Bovie Medical Corporation

This manual and the equipment it describes are for use only by qualified medical professionals trained in the
particular technique and surgical procedure to be performed. It is intended as a guide for using the Aaron 950™
Electrosurgical Generator only.
Additional technical information is available in the Aaron 950™ Service Guide.
Equipment Covered in this Manual
Aaron 950™ Electrosurgical Generator:
110 VAC Model No.: A950
220 VAC Model No.: A950-220
For Information Call
Bovie Medical Corporation • 5115 Ulmerton Road, Clearwater, FL 33760-4004
U.S. Phone 1-800-537-2790 • Fax 1-800-323-1640 • International Phone +1-727-384-2323 • Fax +1-727-347-9144
www.boviemed.com • sales@boviemed.com
©2013 Bovie Medical Corporation. All rights reserved. Contents of this publication may not be reproduced without
the written permission of Bovie Medical Corporation.
Aaron Part Number: MC-55-055-001 Rev. 8
CONVENTIONS USED IN THIS GUIDE
WARNING:
Indicates a potentially hazardous situation which, if not avoided, could result in death or serious injury.
CAUTION:
Indicates a hazardous situation which, if not avoided, may result in minor or moderate injury.
NOTICE:
Indicates an operating tip, a maintenance suggestion, or a hazard that may result in product
damage.
iiiUser’s Guide • Aaron 950™

TABLE OF CONTENTS
Equipment Covered in this Manual ....................................................................................................iii
For Information Call ...........................................................................................................................iii
Conventions Used in this Guide...................................................................................................................iii
Introducing the Aaron 950™ Electrosurgical Generator .......................................................................1-1
Key Features .............................................................................................................................................1-2
Components and Accessories....................................................................................................................1-2
Safety .......................................................................................................................................................1-2
Controls, Indicators, and Receptacles .................................................................................................2-1
Front Panel ...............................................................................................................................................2-2
Symbols on the Front Panel.............................................................................................................2-3
Cut, Blend, and Coag Controls...................................................................................................................2-4
Fulguration, Bipolar, and Preset Controls..................................................................................................2-5
Indicators and Receptacles .......................................................................................................................2-6
Rear and Side Panels ................................................................................................................................2-7
Symbols on the Rear Panel..............................................................................................................2-7
Symbols on the Side Panel ..............................................................................................................2-7
Getting Started .................................................................................................................................3-1
Initial Inspection.......................................................................................................................................3-2
Installing the Unit.....................................................................................................................................3-2
Using the Aaron 950™........................................................................................................................4-1
Inspecting the Generator and Accessories ................................................................................................4-2
Setup Safety .............................................................................................................................................4-2
Setting Up ................................................................................................................................................4-3
Using and Understanding The Aaron 950™ Memory Features ..................................................................4-4
Storing and Recalling Preset Settings..............................................................................................4-4
Preparing for Monopolar Surgery .............................................................................................................4-4
Applying the Patient Return Electrode ............................................................................................4-4
Preparing for Bipolar Surgery ...................................................................................................................4-5
Activation Safety ......................................................................................................................................4-6
Activating the Unit ...................................................................................................................................4-7
Monopolar Activation......................................................................................................................4-7
Bipolar Activation............................................................................................................................4-7
Maintaining the Aaron 950™ .............................................................................................................5-1
Cleaning ...................................................................................................................................................5-2
Periodic Inspection ...................................................................................................................................5-2
Troubleshooting ................................................................................................................................6-1
Repair Policy and Procedures.............................................................................................................7-1
Responsibility of the Manufacturer ..........................................................................................................7-2
Returning the Generator for Service .........................................................................................................7-2
Step 1 – Obtain a Returned Goods Authorization Number..............................................................7-2
Step 2 – Clean the Generator ..........................................................................................................7-2
Step 3 – Ship the Generator............................................................................................................7-2
iv Bovie Medical Corporation

Technical Specifications.....................................................................................................................A-1
Performance Characteristics .....................................................................................................................A-2
Input Power ....................................................................................................................................A-2
Duty Cycle .......................................................................................................................................A-2
Dimensions and Weight ..................................................................................................................A-2
Operating Parameters .....................................................................................................................A-2
Transport and Storage.....................................................................................................................A-2
Audio Volume..................................................................................................................................A-3
Low Frequency (50–60 Hz) Leakage Current...................................................................................A-3
High Frequency (RF) Leakage Current .............................................................................................A-3
Standards and IEC Classifications..............................................................................................................A-4
Class I Equipment (IEC 60601-1) .....................................................................................................A-4
Type BF Equipment (IEC 60601-1) / Defibrillator Proof ...................................................................A-4
Drip Proof (IEC 60601-2-2)..............................................................................................................A-4
Electromagnetic Interference..........................................................................................................A-4
Electromagnetic Compatibility (IEC 60601-1-2 and IEC 60601-2-2)................................................A-4
Voltage Transients (Emergency Generator Mains Transfer)..............................................................A-4
EMC Compliance.......................................................................................................................................A-4
Output Characteristics ..............................................................................................................................A-8
Maximum Output for Bipolar and Monopolar Modes......................................................................A-8
Output Power Curves................................................................................................................................A-9
Monopolar Cut Curves.....................................................................................................................A-9
Monopolar Coag Curves ................................................................................................................A-11
Bipolar Curves ...............................................................................................................................A-13
Warranty ..........................................................................................................................................B-1
vUser’s Guide • Aaron 950™

LIST OF FIGURES
Figure 2 – 1 Layout of controls, indicators, and receptacles on the front panel ................................................2-2
Figure 2 – 2 Controls for the cut, blend, and coag modes.................................................................................2-4
Figure 2 – 3 Controls for the fulguration and bipolar modes and presets .........................................................2-5
Figure 2 – 4 Indicators and receptacles.............................................................................................................2-6
Figure 2 – 5 Layout of controls and indicators on the rear and side panels.......................................................2-7
Figure 3 – 1 Mounting kit .................................................................................................................................3-2
Figure 4 – 1 Setup procedures ..........................................................................................................................4-8
Figure A – 1 Output power versus impedance for cut mode.............................................................................A-9
Figure A – 2 Peak voltage versus power setting for cut mode ..........................................................................A-9
Figure A – 3 Output power versus impedance for blend mode.......................................................................A-10
Figure A – 4 Peak voltage versus power setting for blend mode....................................................................A-10
Figure A – 5 Output power versus impedance for coagulation mode.............................................................A-11
Figure A – 6 Peak voltage versus power setting for coagulation mode ..........................................................A-11
Figure A – 7 Output power versus impedance for fulguration mode..............................................................A-12
Figure A – 8 Peak voltage versus power setting for fulguration mode ..........................................................A-12
Figure A – 9 Output power versus impedance for bipolar mode.....................................................................A-13
Figure A – 10 Peak voltage versus power setting for bipolar mode................................................................A-13
vi Bovie Medical Corporation

INTRODUCING THE AARON 950™
ELECTROSURGICAL GENERATOR
This section includes the following information:
llKey Features
llComponents and Accessories
llSafety
CAUTIONS
Read all warnings, cautions, and instructions provided with this generator before using.
Read the instructions, warnings, and cautions provided with electrosurgical accessories before using. Specific instruc-
tions are not included in this manual.
User’s Guide • Aaron 950™ 1-1

Bovie Medical Corporation1-2
KEY FEATURES
The Aaron 950™ Electrosurgical Generator includes the latest technology. This unit offers unsurpassed performance,
flexibility, reliability, and convenience.
It includes the following features:
• Two levels of coagulation: Pinpoint Coagulation and Fulguration
Pinpoint Coagulation provides precise control of bleeding in localized areas.
Fulguration provides greater control of bleeding in highly vascular tissue over broad surface areas.
• Presets
The unit incorporates six user-defined presets for easy recall of frequently used settings.
• Isolated RF output for Cut, Blend, and Coag modes
This minimizes the potential of alternate site burns.
• Ground Referenced RF output for Fulguration mode
• Self diagnostics
These diagnostics continually monitor the unit to ensure proper performance.
COMPONENTS AND ACCESSORIES
To avoid incompatibility and unsafe operation, we recommend using the following Bovie® or Aaron®brand
accessories supplied with your generator:
• Aaron 950™ Electrosurgical Generator • A901 Handpiece
• 50 sharp and 50 blunt non-sterile dermal tips • Ten A910 handpiece drapes
• Five disposable electrodes (3 blades, 1 ball, 1 needle) • Hospital-grade power cord
• One reusable grounding cord • Wall mount bracket
• Five disposable grounding pads • User’s Guide
SAFETY
The safe and effective use of electrosurgery depends to a large degree on factors solely under the control of the
operator. There is no substitute for a properly trained and vigilant medical staff. It is important that they read,
understand, and follow the operating instructions supplied with this electrosurgical equipment.
Physicians have used electrosurgical equipment safely in numerous procedures. Before starting any surgical procedure,
the surgeon should be familiar with the medical literature, complications, and hazards of using electrosurgery in that
procedure.
To promote the safe use of the Aaron 950™ Electrosurgical Generator, this section presents the warnings and
cautions that appear throughout this user’s guide. So that you can operate this equipment with maximum safety,
it is important that you read, understand, and follow the instructions in these warnings and cautions. It is also
important that you read, understand, and follow the instructions for use in this user’s guide.
WARNINGS:
Hazardous Electrical Output - This equipment is for use only by trained, licensed physicians.
Danger: Fire / Explosion Hazard - Do not use the Aaron 950™ electrosurgical generator in the presence of
flammable anesthetics.

User’s Guide • Aaron 950™ 1-3
WARNINGS:
Fire / Explosion Hazard - The following substances will contribute to increased fire and
explosion hazards in the operating room:
• Flammable substances (such as alcohol based skin prepping agents and tinctures)
• Naturally occurring flammable gases which may accumulate in body cavities such as
the bowel
• Oxygen enriched atmospheres
• Oxidizing agents (such as nitrous oxide [N20] atmospheres)
The sparking and heating associated with electrosurgery can provide an ignition source.
Observe fire precautions at all times. When using electrosurgery in the same room with any
of these substances or gases, prevent their accumulation or pooling under surgical drapes,
or within the area where electrosurgery is performed.
Connect the power cord to a properly polarized and grounded power source with the frequency and voltage charac-
teristics that match those listed on the back of the unit.
Electric Shock Hazard - Connect the generator power cord to a properly grounded receptacle. Do not use power plug
adapters.
Electric Shock Hazard - Always turn off and unplug the generator before cleaning.
Fire Hazard - Do not use extension cords.
Patient Safety - Use the generator only if the self-test has been completed as described. Otherwise, inaccurate
power outputs may result.
Failure of the high frequency electrosurgical equipment could result in an unintended increase of output power.
The instrument receptacles on this generator are designed to accept only one instrument at a time. Do not attempt to
connect more than one instrument at a time into a given receptacle. Doing so will cause simultaneous activation of
the instruments.
Use the lowest output setting necessary to achieve the desired surgical effect. Use the active electrode only for the
minimum time necessary in order to lessen the possibility of unintended burn injury. Pediatric applications and/or
procedures performed on small anatomic structures may require reduced power settings. The higher the current flow,
and the longer the current is applied, the greater the possibility of unintended thermal damage to tissue, especially
during use on small structures.
Use electrosurgery with caution in the presence of internal or external devices such as pacemakers or pulse genera-
tors. Interference produced by the use of electrosurgical devices can cause devices such as pacemakers to enter an
asynchronous mode or can block the pacemaker effect entirely. Consult the device manufacturer or hospital
Cardiology Department for further information when use of electrosurgical appliances is planned for patients with
cardiac pacemakers or other implantable devices.
If the patient has an Implantable Cardioverter Defibrillator (ICD), contact the ICD manufacturer for instructions before
performing an electrosurgical procedure. Electrosurgery may cause multiple activation of ICDs.
Do not use electrosurgical equipment unless properly trained to use it in the specific procedure being undertaken.
Use by physicians without such training has resulted in serious, unintended patient injury, including bowel perfora-
tion and unintended, irreversible tissue necrosis.
For surgical procedures where the high frequency current could flow through parts of the body having a relatively
small cross-sectional area, the use of bipolar techniques may be desirable to avoid unwanted coagulation.
In some circumstances, potential exists for alternate site burns at points of skin contact
(e.g., between the arm and the side of the body). This occurs when electrosurgical current
seeks a path to the patient return electrode that includes the skin-to-skin contact point.
Current passing through small skin-to-skin contact points is concentrated and may cause
a burn. This is true for grounded, ground referenced, and isolated output generators.To reduce the potential for alter-
nate site burns, do one or more of the following:
• Avoid skin-to-skin contact points, such as fingers touching leg, when positioning the patient.
• Place 5 to 8 cm (2 to 3 in.) of dry gauze between contact points to ensure that contact does not occur.

Bovie Medical Corporation1-4
WARNINGS:
• Position the patient return electrode to provide a direct current route between the surgical
site and the return electrode which avoids skin-to-skin contact areas.
• In addition, place patient return electrodes according to the manufacturer’s instructions.
Potential for alternate site burns increases if the return electrode is compromised.
Do not wrap the accessory cords or patient return electrode cords around metal objects. This
may induce currents that could lead to shocks, fires, or injury to the patient or surgical team.
CAUTIONS:
At no time should you touch the active electrode or bipolar forceps. A burn could result.
Do not stack equipment on top of the generator or place the generator on top of electrical equipment. These
configurations are unstable and/or do not allow adequate cooling.
Provide as much distance as possible between the electrosurgical generator and other electronic equipment (such as
monitors). An activated electrosurgical generator may cause interference with them.
Nonfunction of the generator may cause interruption of surgery. A backup generator should be available for use.
Do not turn the activation tone down to an inaudible level. The activation tone alerts the surgical team when an
accessory is active.
When using a smoke evacuator in conjunction with the electrosurgical generator, place the smoke evacuator a
distance from the generator and set the generator volume control at a level that ensures that the activation tones
can be heard.
The use of high frequency current can interfere with the function of other electromagnetic equipment.
When high frequency surgical equipment and physiological monitoring equipment are used simultaneously on the
same patient, place any monitoring electrodes as far as possible from the surgical electrodes. Monitoring systems
incorporating high frequency current limiting devices are recommended.
Do not use needles as monitoring electrodes during electrosurgical procedures. Inadvertent electrosurgical burns may
result.
To avoid the possibility of an electrosurgical burn to either the patient or the physicians, do not allow the patient to
come in contact with a grounded metal object during activation. When activating the unit, do not allow direct skin
contact between the patient and the physician.
Remove any loose fitting jewelry from the patient before activation.
Examine all accessories and connections to the electrosurgical generator before use. Ensure that the accessories
function as intended. Improper connection may result in arcs, sparks, accessory malfunction, or unintended surgical
effects.
When not using active accessories, place them in a holster or in a clean, dry, nonconductive,
and highly visible area not in contact with the patient. Inadvertent contact with the patient may result in burns.
Studies have shown that smoke generated during electrosurgical procedures can be potentially harmful to patients
and the surgical team. These studies recommend adequately ventilating the smoke by using a surgical smoke
evacuator or other means.
1
1. U.S. Department of Health and Human Services. National Institute for Occupational Safety
and Health (NIOSH). Control of Smoke from Laser / Electric Surgical Procedures. HAZARD
CONTROLS, Publication No. 96-128, September, 1996.
NOTICE:
Do not clean the generator with abrasive cleaning or disinfectant compounds, solvents, or other
materials that could scratch the panels or damage the generator.

2-1User’s Guide • Aaron 950™
CONTROLS, INDICATORS, AND RECEPTACLES
This section describes:
●The Front, Rear, and Side Panels
●Controls, Indicators, and Receptacles

FRONT PANEL
Figure 2 – 1 Layout of controls, indicators, and receptacles on the front panel
2-2 Bovie Medical Corporation

Symbols on the Front Panel
The following table lists descriptions for symbols found on the front panel of the Aaron 950™.
2-3User’s Guide • Aaron 950™
SYMBOLS DESCRIPTION
Generator Controls
Cut mode
Blend mode
Coagulation mode
High Frequency Desiccator Controls
Bipolar mode
Fulguration mode
Presets
Select next preset
Set new preset
Indicators
RF ground referenced
Defibrillator proof type BF equipment
RF Isolated – patient connections are isolated from earth at high frequency.
Read instructions before use.
Caution - high voltage
Handpiece Connectors
Monopolar handpiece
Patient return electrode
Footswitch
Bipolar forceps

CUT, BLEND, AND COAG CONTROLS
Figure 2 – 2 Controls for the cut, blend, and coag modes
2-4 Bovie Medical Corporation
Power Display (watts)
Indicates the power set for the
selected mode.
Cut, Blend Active Indicator
Indicates that the power
has been activated in the selected
mode.
Cut Indicator
Indicates when pure
cut mode is selected.
Cut Mode Selector
When pressed, selects
the pure cut mode.
Blend Mode Selector
When pressed, selects
the blended cut mode.
Blend Indicator
Indicates when blended
cut mode is
selected.
Coag Mode Selector
When pressed, selects the
coagulation mode.
RF Isolated Indicator
Indicates when the
RF output is isolated from
the ground.
Coag Indicator
Indicates when
coagulation mode is
selected.
Coag, Fulguration, Bipolar Active
Indicator
Indicates that the power has been
activated in the selected mode.
Power Output
Control Knob
Turn clockwise to increase
power output, counterclock-
wise to decrease power
output.

FULGURATION, BIPOLAR, AND PRESET CONTROLS
Figure 2 – 3 Controls for the fulguration and bipolar modes and presets
2-5User’s Guide • Aaron 950™
Power Display (watts)
Indicates the power set for the
selected mode.
Cut, Blend Active Indicator
Indicates that the power
has been activated in the selected
mode.
Fulguration Indicator
Indicates when
fulguration mode
is selected.
Fulguration Mode
Selector
When pressed, selects
the fulguration mode.
Bipolar Mode Selector
When pressed, selects the
bipolar mode.
Bipolar Indicator
Indicates when bipolar
mode is selected.
Presets Display
Indicates which preset is selected (A-
F). “b” and “d” are displayed in lower-
case letters.
RF Ground Referenced
Indicator
Indicates when the RF
output is ground refer-
enced. Only applies to
the fulguration mode.
Presets Recall Selector
When pressed, selects the
next preset setting.
No Presets Indicator
Dot blinks to indicate when
no user defined preset is
being used.
Presets Set Button
When depressed for 2 seconds,
makes the current settings the
preset letter shown in the indi-
cator window.
Coag, Fulguration Bipolar
Active Indicator
Indicates that the power
has been activated in the
selected mode.
Power Output
Control Knob
Turn clockwise to increase
power output, counterclock-
wise to decrease power
output.

INDICATORS AND RECEPTACLES
Figure 2 – 4 Indicators and receptacles
2-6 Bovie Medical Corporation
Monopolar Handpiece
Receptacle
Accepts the Aaron A901
3-button handpiece cord.
Patient Plate Grounding
Receptacle
Accepts the Aaron A1202C
reusable grounding cord.
Patient Plate Alarm Indicator
Indicates an alarm condition regard-
ing the patient return cord or pad.
Footswitch Receptacle
Accepts the Aaron A1203W
footswitch cord.
Bipolar Cord Receptacle
Accepts the Aaron A827EU bipolar
forceps cord.

REAR AND SIDE PANELS
Figure 2 – 5 Layout of controls and indicators on the rear and side panels
Symbols on the Rear Panel
NOTICE:
Please note that infected medical devices must be disposed of as medical/biohazard waste and cannot be includ-
ed in used electronic equipment disposal/recycling programs. In addition, certain electronic products must be
returned directly to Bovie Medical Corporation. Contact your Bovie® sales representative for return instructions.
Symbols on the Side Panel
2-7User’s Guide • Aaron 950™
SYMBOLS DESCRIPTION
Volume control
Fuse enclosed
Read Instructions Before Use
SYMBOLS DESCRIPTION
Non-ionizing Radiation
Danger - Explosion Risk If Used With Flammable Anesthetics.
Do not dispose of this device in the unsorted municipal waste stream.
Manufacturer

2-8 Bovie Medical Corporation

3-1
User’s Guide • Aaron 950
™
GETTING STARTED
This section includes the following information:
●Initial Inspection
●Installing the Unit
This manual suits for next models
1
Table of contents
Other Bovie Medical Equipment manuals
Bovie
Bovie UV59 User manual
Bovie
Bovie Smoke Shark II User manual

Bovie
Bovie DERM 941 User manual

Bovie
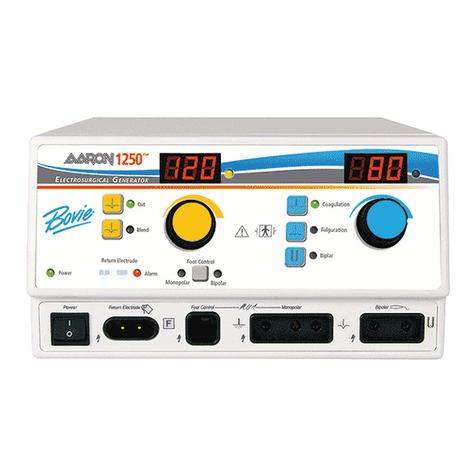
Bovie Aaron 1250 User manual

Bovie
Bovie SPECIALIST PRO User manual
Bovie
Bovie Icon Gi User manual
Bovie
Bovie Aaron 940 User manual

Bovie
Bovie System Two MH Manual

Bovie
Bovie ES06 User manual
Bovie
Bovie Smoke Shark SE01 User manual
Popular Medical Equipment manuals by other brands

Clement Clarke
Clement Clarke AirMed Travel-Air CN03A instructions

BMC
BMC G2S BPAP Series Quick operation manual
ResMed
ResMed S9 Series quick start guide

Baylis Medical
Baylis Medical Nykanen RFK-265 Instructions for use
OPTIKON
OPTIKON PULSAR MS Installation and operating manual

Studex
Studex System 75 Operator's manual
