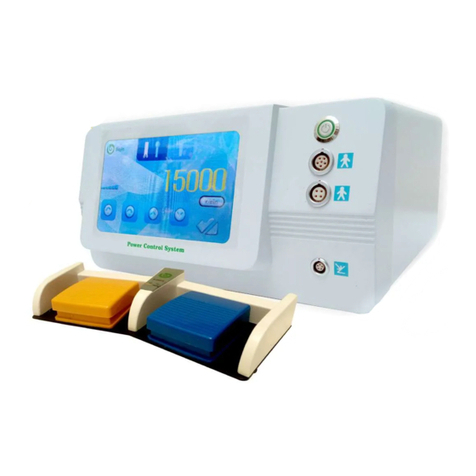
Bovie Icon Gi User manual


iUser’s Guide • Bovie Icon Gi™
USER’S GUIDE

ii Bovie Medical Corporation

This manual and the equipment it describes are for use only by qualified medical professionals trained in the particular technique
and surgical procedure to be performed. It is intended as a guide for using the Bovie Icon Gi™ only.
Additional technical information is available in the Bovie Icon Gi™ Service Guide.
Equipment Covered in this Manual
Bovie Icon Gi™:
Reference No.: Icon Gi
For Information Contact
Bovie Medical Corporation • 5115 Ulmerton Road, Clearwater, FL 33760-4004
U.S. Phone 1-800-537-2790 • Fax 1-800-323-1640 • International Phone +1-727-384-2323 • Fax +1-727-347-9144
www.boviemed.com • sales@boviemed.com
©2013 Bovie Medical Corporation.All rights reserved. Contents of this publication may not be reproduced without the written
permission of Bovie Medical Corporation.
Bovie® Part Number MC-55-114-001 Rev. 3
CONVENTIONS USED IN THIS GUIDE
WARNING:
Indicates a potentially hazardous situation which, if not avoided, could result in death or serious
injury.
CAUTION:
Indicates a hazardous situation which, if not avoided, may result in minor or moderate injury.
NOTICE:
Indicates an operating tip, a maintenance suggestion, or a hazard that may result in product
damage.
iiiUser’s Guide • Bovie Icon Gi™

TERMINOLOGY
The following terminology is used throughout this guide to describe specialized features and functionality of the Bovie Icon Gi™.
Touch Screen – Touch screen located on the unit’s front panel.This area is used to enter and view user selections such as modes,
power setting, and presets. From each screen, the user can navigate to and from additional screens.
Pop-Up Screen – Additional input and information screens that appear on the unit’s front panel. These windows display and allow
input for instructions, warnings and cautions and other information about the unit and its functionality. Pop-up screens can also
navigate the user to and from additional screens.
Bovie NEM™ – The contact quality monitoring system (NEM) detects the return electrode and contact quality between the return
pads and the patient. This feature is designed to minimize patient burns at the return electrode site.
Graphical User Interface (GUI) – This type of interface uses symbols,images or icons along with or rather than text to make
using the Icon Gi more user-friendly.
High Frequency Generator (HF Generator) – This type of equipment is used in medical procedures requiring electro surgery.
Electrosurgical Unit (ESU) – The ESU, combined with the appropriate electrosurgical accessory is used for a avriety of surgical
procedures.
Split Pad – With the exception of Warnings and Cautions, the term “split pad”will be used throughout this manual when
discussing patient pads,return electrodes, or patient return electrodes.This accessory is used during monopolar surgery to
maximize patient safety and site burns.
Cut/Blend Modes
Continued on following page.
iv Bovie Medical Corporation
Pure Cut – The Pure Cut mode is used when little coagulation is needed during endoscopic dissection or polypectomy.
This mode can be used for either dissection or removal of non-vascular polyps and clean dissection of non-vascular areas
or areas that can be spot coagulated after dissection. It may be useful for some minimally vascular polypectomy
procedures.
Safe Cut – During Safe Cut mode, the unit pulses between pure cut and gentle coag with a predetermined repetition rate.
This mode can be used when a controlled dissection is required. It is useful for ERCP examinations when Papillotomy is
performed and is also useful when piecemeal polypectomy is performed and preservation of the microscopic margins is
desired.
Blend 1 – This is a monopolar Cut mode that is modified to allow for minimal coagulation along the wound edges.
Intended uses are for minimally vascularized polyps and areas that can be spot coagulated, post dissection.
75% duty cycle.
Blend 2 – This is a monopolar Cut mode that is modified to allow for moderate coagulation along the wound edges.
Intended uses are for moderately vascular polyps and areas that can be spot coagulated, post dissection.62.5% duty cycle.
Blend 3– This is a monopolar Cut mode that is modified to allow for maximum coagulation along the wound edges.
Intended uses are for vascularized polyps and areas that can be spot coagulated, post dissection. 50% duty cycle.
Smart Cut– This mode is reserved for future Gi functionality.

Coag/Bipolar Modes
vUser’s Guide • Bovie Icon Gi™
Pinpoint – The Pinpoint mode is most effective with the electrode tip in direct contact with the tissue at the point of
bleeding. This mode will provide maximum hemostasis but may also result in some char or sticking depending on the
electrode utilized. This mode may also be used to dissect tissue with hemostasis.
Gentle Monopolar – Using the Gentle Coagulation mode will result in minimal charring or sticking of the electrode. The
electrode must be in direct contact with the tissue for positive results. It has no dissection ability.
Bipolar – Using the Bipolar mode does not require a patient return pad and is the most aggressive bipolar mode for
providing hemostasis. It can also be used for bipolar cutting instruments with direct contact to tissue.
Gentle Bipolar – The Gentle Bipolar mode does not require a patient return pad. This coagulation mode significantly
reduces charring and sticking of the electrode.

TABLE OF CONTENTS
Equipment Covered in this Manual............................................................................iii
For Information Contact .............................................................................................iii
Conventions Used in this Guide ........................................................................................iii
Terminology........................................................................................................................iv
Introducing the Icon Gi.........................................................................................................1-1
Key Features...................................................................................................................1-2
Components and Accessories.........................................................................................1-3
Additional Accessories ....................................................................................................1-3
Safety ..............................................................................................................................1-4
Touch Screen and Receptacles ...........................................................................................2-1
Front Panel......................................................................................................................2-2
Rear Panel ......................................................................................................................2-2
Symbols...................................................................................................................2-3
Main Screen ...................................................................................................................2-5
Cut/Blend and Coag/Bipolar Keypad Screens ................................................................2-6
Unit Properties Screen....................................................................................................2-7
Additional Screens ..........................................................................................................2-8
Select or Edit Preset Screens.........................................................................................2-9
Getting Started ......................................................................................................................3-1
Initial Inspection ..............................................................................................................3-2
Installation .......................................................................................................................3-2
Function Checks..............................................................................................................3-2
Setting Up the Unit..................................................................................................3-2
Checking the Split Pad Alarm..................................................................................3-2
Proper Pad Placement ............................................................................................3-2
Improper Pad Placement.........................................................................................3-3
Split Pad Disconnection ..........................................................................................3-3
Solid Pad Detected..................................................................................................3-3
Visual and Audible Indicators ..................................................................................3-3
Checking Monopolar Mode (with BV-1253BGI footswitch) .....................................3-3
Checking Monopolar Mode (with handswitch) ........................................................3-4
Checking Bipolar Mode (with BV-1253BGI footswitch) ...........................................3-4
In-Service ........................................................................................................................3-4
Performance Checks.......................................................................................................3-4
Using the Icon Gi ..................................................................................................................4-1
Inspecting the Unit and Accessories...............................................................................4-2
Setup Safety....................................................................................................................4-2
Initial Set Up....................................................................................................................4-3
Selecting Unit Properties.................................................................................................4-4
Select Presets .........................................................................................................4-6
Add Presets.............................................................................................................4-6
Edit Presets.............................................................................................................4-7
Delete Presets.........................................................................................................4-8
Preparing for Surgery......................................................................................................4-9
Applying the Split Pad.............................................................................................4-9
Connecting Monopolar Accessories ........................................................................4-9
Connecting Bipolar Accessories..............................................................................4-9
Mode and Power Settings .......................................................................................4-9
Selecting the CUT/BLEND Settings ........................................................................4-9
vi Bovie Medical Corporation

Selecting the COAG/BIPOLAR Settings ...............................................................4-10
Activating the Unit .........................................................................................................4-10
Activation Safety............................................................................................................4-11
Maintaining the Icon Gi ........................................................................................................5-1
Cleaning ..........................................................................................................................5-2
Periodic Inspection..........................................................................................................5-2
Fuse Replacement ..........................................................................................................5-2
Troubleshooting ....................................................................................................................6-1
System Fault Code Messages ........................................................................................6-2
System Fatal Error Messages.........................................................................................6-3
ReCalibration of the Touch Screen .................................................................................6-4
Repair Policy and Procedures .............................................................................................7-1
Responsibility of the Manufacturer..................................................................................7-2
Returning the Unit for Service.........................................................................................7-2
Step 1 – Obtain a Returned Goods Authorization Number.....................................7-2
Step 2 – Clean the Unit...........................................................................................7-2
Step 3 – Ship the Unit.............................................................................................7-2
Technical Specifications......................................................................................................A-1
Performance Characteristics...........................................................................................A-2
Input Power.............................................................................................................A-2
Duty Cycle...............................................................................................................A-2
Dimensions and Weight..........................................................................................A-2
Operating Parameters.............................................................................................A-2
Transport and Storage ............................................................................................A-2
Audio Volume..........................................................................................................A-3
Split Pad Sensing....................................................................................................A-3
Low Frequency (50-60 Hz) Leakage Current .........................................................A-3
High Frequency (RF) Leakage Current ..................................................................A-4
Standards and IEC Classifications .................................................................................A-4
Class I Equipment (IEC 60601-1)...........................................................................A-4
Type CF Equipment (IEC 60601-1) / Defibrillator Proof .........................................A-4
Drip Proof (IEC 60601-2-2).....................................................................................A-4
Electromagnetic Compatibility (IEC 60601-1-2 and IEC 60601-2-2)......................A-4
Voltage Transients (Emergency Generator Mains Transfer) ..................................A-4
EMC Compliance............................................................................................................A-4
Output Characteristics ....................................................................................................A-8
Maximum Output for Monopolar and Bipolar Modes..............................................A-8
Output Power Curves .....................................................................................................A-9
Warranty ................................................................................................................................B-1
viiUser’s Guide • Bovie Icon Gi™

LIST OF FIGURES
Figure 2 – 1 Layout of touch screen and receptacles on the front panel............................2-2
Figure 2 – 2 Layout of receptacles on the rear panel..........................................................2-2
Figure 2 – 3 Controls for selecting and adjusting the Cut/Blend and Coag/Bipolar power .2-5
Figure 2 – 4 Controls for the Cut, Blend, Coag and Bipolar modes ...................................2-6
Figure 2 – 5 Controls for the Coag and Bipolar modes ......................................................2-7
Figure 2 – 6 Unit properties and user preferences..............................................................2-8
Figure 2 – 7 Data exchange pop-up screen ........................................................................2-9
Figure 2 – 8 RF mode example ...........................................................................................2-9
Figure 2 – 9 Unit information pop-up screen .......................................................................2-9
Figure 2 – 10 Physician Preferences screen.........................................................................2-9
Figure 2 – 11 Select physician screen.................................................................................2-10
Figure 2 – 12 Physician keypad screen...............................................................................2-10
Figure 4 – 1 Main screen.....................................................................................................4-4
Figure 4 – 2 Unit Properties screen.....................................................................................4-4
Figure 4 – 3 Data Exchange screen ....................................................................................4-5
Figure 4 – 4 Main Screen ....................................................................................................4-5
Figure 4 – 5 Select Physician screen ..................................................................................4-5
Figure 4 – 6 Physician Preferences screen.........................................................................4-5
Figure 4 – 7 Physician keypad screen.................................................................................4-6
Figure 4 – 8 Delete Procedure pop-up screen ....................................................................4-6
Figure 4 – 9 Max wattage available example ......................................................................4-7
Figure 5 – 1 Fuse holder......................................................................................................5-2
Figure 6 – 1 Fault Error Pop-up screen...............................................................................6-2
Figure 6 – 2 Fatal Error Pop-up screen...............................................................................6-3
Figure A – 1 Output power vs impedance for Cut (Pure) mode..........................................A-9
Figure A – 2 Output power vs impedance for Blend modes ...............................................A-9
Figure A – 3 Output power versus impedance for Safe Cut mode....................................A-10
Figure A – 4 Output power versus impedance for Pinpoint mode....................................A-10
Figure A – 5 Output power vs impedance for Gentle Coag mode.....................................A-11
Figure A – 6 Output power vs impedance for Bipolar mode..............................................A-11
Figure A – 7 Output power vs impedance for Gentle Bipolar mode..................................A-12
LIST OF TABLES
Table 2 – 1 Table of symbols found on the front panel ......................................................2-3
Table 2 – 2 Table of symbols found on the back panel......................................................2-4
viii Bovie Medical Corporation

1-1User’s Guide • Bovie Icon Gi™
INTRODUCING THE ICON GI™
This section includes the following information:
●●Key Features
●●Components and Accessories
●●Safety
CAUTIONS:
Read all warnings, cautions, and instructions provided with this unit before using.
Read the instructions, warnings, and cautions provided with electrosurgical accessories before
using. Specific instructions are not included in this manual.

KEY FEATURES
The Icon Gi™ includes the latest technology. The unit utilizes a touch screen hardware interface in combination with a
software graphical user interface (GUI). This allows for simple touch control features and functionality selection with unsurpassed
performance, flexibility, reliability, and convenience for the user during endoscopic and laparoscopic procedures.
It includes the following features:
•NineModesofOperation
Pure Cut, Safe Cut, three levels of Blend, two levels of Coag (Pinpoint and Gentle), and two levels of Bipolar
These settings give the surgeon flexibility to cut all types of tissue without losing performance. Monopolar Pure Cut generates
constant output power over a wide range of impedances. Safe Cut generates a pulsed cut followed by a controlled period of gentle
coagulation. The three Blend modes generate minimal, moderate, and maximum coagulation along wound edges. The Bipolar
modes require no patient return pad.
•TouchScreen
The Icon Gi™ features touch screen functionality that allows the user to interact with the generator by touching the screen. All
user selections are entered on the touch screen.
• Physician and Procedure Presets
The Presets feature allows multiple physicians to be programmed into the generator. Each physician can program their preferred
Procedure Presets, including mode and power settings for quick changeover between cases.
• Split Pad Sensing and Contact Quality Monitoring
The Icon Gi™ incorporates a split pad contact quality monitoring system (Bovie NEM™). This system detects the split pad.
The system also continually monitors the contact quality between the patient and the split pad. This feature is designed to
minimize patient burns at the pad site.A split pad must be used with the Icon Gi™.An alarm will sound if a solid pad is detected.
Refer to Section 3, Getting Started to learn more.
NOTICE:
The Icon Gi™ requires a split pad. Connecting a solid pad and activating a mode will cause a unit
fault and trigger an alarm.
•IsolatedRFoutput
This minimizes the potential of alternate site burns.
• Lighted Connector Panel
Illuminated panel makes connection of accessories easier to use in any surgical setting.
• Standard Accessory Connectors
These connectors accept the latest monopolar and bipolar instruments. Refer to Section 2,Touch Screen and Receptacles to
learn more.
• Multiple Communication Ports
There are three USB connections, two on the rear and one on the front. Also, the rear panel has an ethernet and
RS232 connection.
•DataExchange
Used to exchange data from unit to unit.
1-2 Bovie Medical Corporation

COMPONENTS AND ACCESSORIES
You should receive the following components with your unit:
• Icon Gi™ Electrosurgical Generator
• 110 VAC Hospital-grade power cord
• 220 VAC Hospital-grade power cord
• Icon Gi™ USB Memory Stick
• User’s Guide
ADDITIONAL ACCESSORIES
To avoid incompatibility and unsafe operation, we recommend using the following Bovie accessories with the Icon Gi™:
•ESREC - split pad with 2.8 M cable
•BV-1253BGI - footswitch
•RHSW - Bovie Button - remote hand control (active)
•RHSWL - Bovie Button Laparoscopic - remote hand control (active)
•GIACM - Gi active cord (male)
•GIACF - Gi active cord (female)
•BV-ICON-CS - Icon Gi™ Mobile Cart
1-3User’s Guide • Bovie Icon Gi™

SAFETY
The safe and effective use of electrosurgery depends to a large degree on factors solely under the control of the operator. There is no
substitute for a properly trained and vigilant medical staff. It is important that they read, understand, and follow the operating
instructions supplied with this electrosurgical equipment.
Physicians have used electrosurgical equipment safely in numerous procedures. Before starting any surgical procedure, the surgeon
should be familiar with the medical literature, complications, and hazards of using electrosurgery in that procedure.
To promote the safe use of the Icon Gi™, this section presents the warnings and cautions that appear throughout this user’s guide.
It is important that you read, understand, and follow the instructions in these warnings and cautions so that you can operate this
equipment with maximum safety. It is also important that you read, understand, and follow the instructions for use in this
user’s guide.
WARNINGS:
Hazardous Electrical Output - This equipment is for use only by trained, licensed physicians.
Danger: Fire / Explosion Hazard - Do not use the Icon Gi™ in the presence of flammable
materials.
Fire / Explosion Hazard - The following substances will contribute to increased fire and explosion
hazards in the operating room:
• Flammable substances (such as alcohol based skin prepping agents and tinctures)
• Naturally occurring flammable gases which may accumulate in body cavities such as
the bowel
• Oxygen enriched atmospheres
• Oxidizing agents (such as nitrous oxide [N20] atmospheres).
The sparking and heating associated with electrosurgery can provide an ignition source.
Observe fire precautions at all times. When using electrosurgery in the same room with any
of these substances or gases, prevent their accumulation or pooling under surgical drapes, or
within the area where electrosurgery is performed.
Connect the power cord to a properly polarized and grounded power source with the frequency
and voltage characteristics that match those listed on the back of the unit.
Electric Shock Hazard - Connect the unit power cord to a properly grounded receptacle. Do not
use power plug adapters.
Electric Shock Hazard - Always turn off and unplug the unit before cleaning.
Fire Hazard - Do not use extension cords.
Patient Safety - Use the unit only if the self-test has been completed as described. Otherwise,
inaccurate power outputs may result.
Failure of the high frequency electrosurgical equipment could result in an unintended increase of
output power.
The instrument receptacles on this unit are designed to accept only one instrument at a time. Do
not attempt to connect more than one instrument at a time into a given receptacle. Doing so will
cause simultaneous activation of the instruments.
Use the lowest output setting necessary to achieve the desired surgical effect. Use the active
electrode only for the minimum time necessary in order to lessen the possibility of unintended
burn injury. Pediatric applications and/or procedures performed on small anatomic structures may
require reduced power settings. The higher the current flow, and the longer the current is applied,
the greater the possibility of unintended thermal damage to tissue, especially during use on small
structures.
1-4 Bovie Medical Corporation

WARNINGS:
Use electrosurgery with caution in the presence of internal or external devices such as
pacemakers or pulse generators. Interference produced by the use of electrosurgical devices can
cause devices such as pacemakers to enter an asynchronous mode or can block the pacemaker
effect entirely. Consult the device manufacturer or hospital Cardiology Department for further
information when use of electrosurgical appliances is planned for patients with cardiac
pacemakers or other implantable devices.
If the patient has an Implantable Cardioverter Defibrillator (ICD), contact the ICD manufacturer for
instructions before performing an electrosurgical procedure. Electrosurgery may cause multiple
activation of ICDs.
Do not use electrosurgical equipment unless properly trained to use it in the specific procedure
being undertaken. Use by physicians without such training has resulted in serious, unintended
patient injury, including bowel perforation and unintended, irreversible tissue necrosis.
For surgical procedures where the high frequency current could flow through parts of the body
having a relatively small cross-sectional area, the use of bipolar techniques may be desirable to
avoid unwanted coagulation.
In some circumstances, potential exists for alternate site burns at points of skin contact (e.g.,
between the arm and the side of the body). This occurs when electrosurgical current seeks a path
to the return electrode that includes the skin-to-skin contact point. Current passing through small
skin-to-skin contact points is concentrated and may cause a burn. This is true for grounded,
ground referenced, and isolated output units.
To reduce the potential for alternate site burns, do one or more of the following:
• Avoid skin-to-skin contact points, such as fingers touching leg, when positioning the patient.
• Place 5 to 8 cm (2 to 3 in.) of dry gauze between contact points to ensure that contact does
not occur.
• Position the return electrode to provide a direct current route between the surgical site and
the return electrode which avoids skin-to-skin contact areas.
• In addition, place patient return electrodes according to the manufacturer’s instructions.
Potential for alternate site burns increases if the return electrode is compromised. Bovie Medical
recommends the use of split return electrodes and Bovie units with a contact quality
monitoring system.
Do not wrap the accessory cords or return electrode cords around metal objects. This may induce
currents that could lead to shocks, fires, or injury to the patient or surgical team.
To avoid incompatibility and unsafe operation, use suitable cables, accessories, active and neutral
electrodes, including values for the highest allowed H.F. peak voltage.
Connected accessories need be rated for at least the maximum peak output voltage of the H.F.
generator set at the intended output control setting in the intended operating mode.
1-5User’s Guide • Bovie Icon Gi™

CAUTIONS:
At no time should you touch the active electrode or bipolar forceps. A burn could result.
Do not stack equipment on top of the unit or place the unit on top of electrical
equipment. These configurations are unstable and/or do not allow adequate cooling.
Provide as much distance as possible between the electrosurgical unit and other electronic
equipment (such as monitors). An activated electrosurgical unit may cause interference
with them.
Non-function of the unit may cause interruption of surgery. A backup unit should be available for
use.
Do not turn the activation tone down to an inaudible level. The activation tone alerts the surgical
team when an accessory is active.
When using a smoke evacuator in conjunction with the electrosurgical unit, place the smoke
evacuator a distance from the unit and set the unit volume control at a level that ensures that the
activation tones can be heard.
The use of high frequency current can interfere with the function of other electromagnetic
equipment.
When high frequency surgical equipment and physiological monitoring equipment are used
simultaneously on the same patient, place any monitoring electrodes as far as possible from
the surgical electrodes. Monitoring systems incorporating high frequency current-limiting devices
are recommended.
Do not use needles as monitoring electrodes during electrosurgical procedures. Inadvertent
electrosurgical burns may result.
To avoid the possibility of an electrosurgical burn to either the patient or the physicians, do
not allow the patient to come in contact with a grounded metal object during activation. When
activating the unit, do not allow direct skin contact between the patient and the physician.
Remove any loose fitting jewelry from the patient before activation.
Examine all accessories and connections to the electrosurgical unit before use. Ensure that the
accessories function as intended. Improper connection may result in arcs, sparks, accessory
malfunction, or unintended surgical effects.
When not using active accessories, place them in a holster or in a clean, dry, non-conductive, and
highly visible area not in contact with the patient. Inadvertent contact with the patient may result
in burns.
Studies have shown that smoke generated during electrosurgical procedures can be potentially
harmful to patients and the surgical team. These studies recommend adequately ventilating the
smoke by using a surgical smoke evacuator or other means.1
1. U.S. Department of Health and Human Services. National Institute for Occupational Safety
and Health (NIOSH). Control of Smoke from Laser / Electric Surgical Procedures. HAZARD
CONTROLS, Publication No. 96-128, September, 1996).
NOTICES:
If required by local codes, connect the unit to the hospital equalization connector with an
equipotential cable.
Do not clean the unit with abrasive cleaning or disinfectant compounds, solvents, or other
materials that could scratch the panels or damage the unit.
1-6 Bovie Medical Corporation

2-1User’s Guide • Bovie Icon Gi™
TOUCH SCREEN AND RECEPTACLES
This section describes:
●The Front and Rear Panels
●Touch Screen Controls, Indicators, Receptacles, and Symbology Descriptions
NOTICE:
Refer to Section 4 of this guide for instructions on using the Icon Gi™ ESU.

FRONT PANEL
Figure 2 – 1 Layout of touch screen and receptacles on the front panel
REAR PANEL
Figure 2 – 2 Layout of receptacles on the rear panel
2-2 Bovie Medical Corporation
USB Port
Type A USB Port
Bipolar Combination Receptacle
Receptacle
Accepts standard bipolar and BiStat™
Gold probe.
Power On/Off Switch
Turns the unit on or off. Green
illuminated “power on”
indicator built into switch.
Split Pad Receptacle
Accepts a standard split pad plug.
Monopolar Combination Receptacle
Accepts standard 3-pin handpieces and
Olympus style active cords.
Touch Screen
The touch screen is used to enter and view user
selections such as modes, power setting, and
presets. From each screen, the user can
navigate to and from additional screens
(pop-up screens).
Illuminated Activation
Indicator
The Bovie logo illuminates
yellow when Cut , Blend or
Safe mode is activated, blue
when Coag or Bipolar is
activated, red when errors
are detected, and white at
all other times that the unit
is powered on.
Ethernet
Used to transfer data to and
from the Icon Gi. . USB Types B and A
Used to transfer data to and
from the Icon Gi .
Power Cord
Receptacle
Accepts hospital grade
power cord.
Footswitch
Receptacle
Accepts Bovie
BV1253B-Gi
2-pedal
footswitch.
RS232
Accepts
standard
connector .
POAG
Ground
stud.
Fuse Holder
Refer to Section 5 for
fuse replacement
information.
OSD
Receptacle
Used for on-
screen displays.
Available in
future models.

Symbols
Table 2 – 1 Refer to the following table for descriptions of symbols found on the front of the Icon Gi™.
Rear panel symbols on following page.
2-3User’s Guide • Bovie Icon Gi™
SYMBOLS DESCRIPTION
Cut/Blend Controls
Pure Cut Mode
Blend Mode 1
Blend Mode 2
Blend Mode 3
Safe Cut Mode
Coag Controls
Pinpoint (Coag) Mode
Gentle Coag Mode
Bipolar Controls
Bipolar Mode
Gentle Bipolar Mode
Indicators
Split Pad (green indicates proper placement; red indicates incorrect placement)
Activator/Error Indicator
Symbols
Mandatory: Refer to instruction manual/guide
Defibrillator Proof Type CF Equipment
RF Isolated – patient connections are isolated from earth at high frequency.
USB Communications
Split Pad
Bipolar Combination Receptacle (Standard or BiStat Gold probe)
Monopolar Combination Receptacle (Standard 3-pin or probe)
Warning: Dangerous Voltage

2-4 Bovie Medical Corporation
Symbols
Table 2 – 2 Refer to the following table for descriptions of symbols found on the back of the Icon Gi™.
SYMBOLS DESCRIPTION
Equipotential Ground Stud
Non-ionizing Radiation
Fuse Enclosed
Danger - Explosion Risk If Used With Flammable Anesthetics.
Footswitch Input Jack
Do not dispose of this device in the unsorted municipal waste stream.
Read Instructions Before Use
RS 232 Serial Communications
USB Communications
Ethernet Port

MAIN SCREEN
Figure 2 – 3 Controls for selecting and adjusting the Cut/Blend and Coagulation/Bipolar power; pre-programmed physician and
procedure selections
2-5User’s Guide • Bovie Icon Gi™
Select Procedure
Displays Procedure
Select Physician
Displays Physician
Cut/Blend Power
Displays Cut Mode settings.
NOTICES:
Activation is only available from the Main Screen and shows the requested powers and modes.
The Physician and Procedure Presets are also displayed in this screen.
Cut /Blend Power Adjustment
Used to increase and decrease
to desired power setting.
Coag/Bipolar Power
Displays Coag Mode settings.
Coag/Bipolar Power Adjsutment
Used to increase and decrease to
desired power setting.
Split Pad
The symbol illuminates green when a split
pad is properly connected and placed on
the patient. The symbol illuminates red if
pad is not connected to the unit or is
improperly placed on the patient.
Select Unit Properties
Selects the unit’s setup controls (i.e,
brightness, volume, language).
POLYPEC
Table of contents
Other Bovie Medical Equipment manuals
Bovie
Bovie Smoke Shark II User manual
Bovie
Bovie Aaron 1250 User manual

Bovie
Bovie Aaron 950 User manual

Bovie
Bovie DERM 941 User manual
Bovie
Bovie Aaron 940 User manual

Bovie
Bovie UV59 User manual

Bovie
Bovie SPECIALIST PRO User manual

Bovie
Bovie Aaron 1250 User manual
Bovie
Bovie Smoke Shark SE01 User manual

Bovie
Bovie System Two MH Manual
Popular Medical Equipment manuals by other brands

Ferno
Ferno Mondial MB64 user manual

Olympus
Olympus ENDOCAPSULE 10 SYSTEM Quick reference guide

COOK Medical
COOK Medical Hemospray Series manual

VitalConnect
VitalConnect VistaPoint 2.1 QuickStart and Instructions for Use

Organ recovery systems
Organ recovery systems LifePort Kidney Transporter LKT101P Operator's manual

Inogen
Inogen at home user manual
