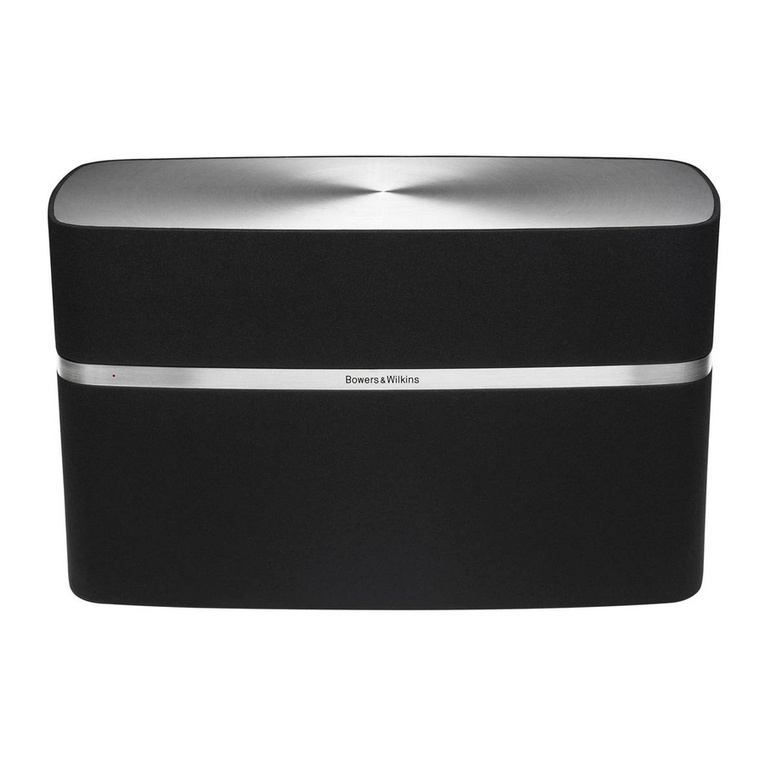
Bowers & Wilkins Panorama User manual

Panorama
Integrated A/V Sound System
Owner’s Manual
Dolby, Pro Logic, and the double-D symbol are registered trademarks
of Dolby Laboratories.
The “AAC” logo is a trademark of Dolby Laboratories
Manufactured under license under U.S. Patent #’s : 5,451,942; 5,956,
674; 5,974,380; 5,978,762; 6,487,535 & other U.S. and worldwide
patents issues & pending. DTS and DTS Digital Surround are registered
trademarks and the DTS logos and Symbol are trademarks of DTS,
Inc. © 1996-2007 DTS, inc. All Rights Reserved.
iPod and Airport Express are trademarks of Apple Inc. registered in the
US and other countries.
Copyright © B&W Group Ltd. E&OE
B&W Group (UK Sales)
T +44 1903 221 500
B&W Group North America
T +1 978 664 2870
B&W Group Asia Ltd
T +852 2 869 9916
B&W Group Ltd
Dale Road
Worthing West Sussex
BN11 2BH England
T +44 (0) 1903 221800
F +44 (0) 1903 221801
www.bowers-wilkins.com
II11922 Issue 4
Owner details
Title, first name, surname
Address
Town, postcode, country
e-mail address
Product details
Model
Serial number
Date of purchase
Dealer details
Dealer name
Address
Town, postcode, country
e-mail address
Dealer stamp

/&&3%4
$)34!.#%
46
!IR0ORT
%XPRESS
$6$
#OAXIAL
46 I0OD
4UNER
$IGITAL
!NALOGUE
!5$)/
/54
$)')4!,
$)')4!,
Figure 1 Figure 4
Figure 2
Figure 3a
Figure 3b
Figure 5

/&&3%4
$)34!.#%
46
!IR0ORT
%XPRESS
$6$
#OAXIAL
46 I0OD
4UNER
$IGITAL
!NALOGUE
!5$)/
/54
$)')4!,
$)')4!,
Figure 1 Figure 4
Figure 2
Figure 3a
Figure 3b
Figure 5

1
Figure 6 Figure 7a
Figure 7b Figure 7c

2
Figure 7d Figure 7e
Figure 8
Figure 9
Figure 10
zzz
12345
12345
zzz

3
Figure 9
Figure 10
zzz
12345
12345
zzz

4
Contents
English
Safety Instructions 5
Owner’s Manual 6
Limited Warranty 11
Français
Informations importantes
concernant la sécurité 13
Manuel de l’utilisateur 14
Garantie limitée 20
Deutsch
Wichtige Sicherheitshinweise 23
Bedienungsanleitung 24
Garantie 30
Español
Instrucciones importantes
relacionadas con la seguridad 32
Manual de instrucciones 33
Garantía limitada 39
Português
Instruções de Segurança
Importantes 42
Manual do Utilizador 43
Garantia Limitada 48
Italiano
Importanti istruzioni
sulla sicurezza 51
Manuale istruzioni 52
Garanzia limitata 57
Nederlands
Belangrijk voor uw Veiligheid 60
Handleiding 61
Beperkte Garantie 66
Ελληνικά
δηγίες για την ασαλή
ρήση της συσκευής 68
δηγίες ρήσης 69
Περιρισµένη εγγύηση 76
Русский
Важные инструкции
по безопасности 78
Инструкция пользователя 79
Ограниченная гарантия 85
"esky
DÅleãitá bezpe#nostní
upozorn>ní 88
Uãivatelsk≥ manuál 89
Záruka 94
Sloven#ina
Dôleãité bezpe#nostné pokyny 96
Návod na obsluhu 97
Limitovaná záruka 102
Magyar
Fontos biztonsági tudnivalók 104
Használati útmutató 105
Korlátozott jótállás 110
Polski
WaÃne instrukcje dotyczƒce
bezpiecze◊stwa 113
Instrukcja obs¡ugi 113
Gwarancja 119
日本語
安全上のご注意 122
取扱説明書 123
保証期間 128
简体中文
重要安全说明 130
用户手册 130
有限保修 134
繁體中文
重要安全說明 137
用戶手冊 137
有限保修 141
한국어
중요한 안전설명 144
사용설명서 144
보증에 대하여 149
Standards Conformity 151
Specifications 152

5
17. CAUTION: Danger of explosion if battery is
incorrectly replaced. Replace only with the same or
equivalent type (CR2032). Dispose of dead batteries
in accordance with local regulations.
18. To prevent overheating, do not cover the apparatus.
Install in accordance with the manufacturer’s
instructions.
19. UK, Ireland and Hong Kong only – The power cord
is supplied with a 13A plug having an earthing pin.
The apparatus is double insulated and this earthing
pin is not required for safety, merely to operate the
safety shutter of mains outlets.
20. The ventilation should not be impeded by covering
the ventilation openings with items such as
newspapers, tablecloths curtains etc.
21. No naked flame sources, such as lighted candles,
should be placed on the unit.
22. Observe and follow the local regulations regarding
battery disposal.
23. Do not expose the unit to dripping or splashing
fluids.
24. Do not place objects filled with liquids, such as
vases, on the unit.
25. Do not expose the batteries (batteries installed) to
excessive heat such as sunshine, fire or the like.
26. For the apparatus mounted to wall, the apparatus
shall be installed on solid wood, bricks, concrete or
solid wood columns and battens.
Environmental Information
All B&W products are designed to comply
with international directives on the
Restriction of Hazardous Substances
(RoHS) in electrical and electronic equipment and the
disposal of Waste Electrical and Electronic Equipment
(WEEE). These symbols indicate compliance and that
the products must be appropriately recycled or
processed in accordance with these directives. Consult
your local waste disposal authority for guidance.
7. Do not block any ventilation openings. Install in
accordance with the manufacturer’s instructions.
8. Do not install near any heat sources such as
radiators, heat registers, stoves, or other apparatus
(including amplifiers) that produce heat.
9. Do not defeat the safety purpose of the polarized or
grounding-type plug. A polarized plug has two
blades with one wider than the other. A grounding
type plug has two blades and a third grounding
prong. The wide blade or the third prong are
provided for your safety. If the provided plug does
not fit into your outlet, consult an electrician for
replacement of the obsolete outlet.
10. Protect the power cord from being walked on or
pinched, particularly at plugs, convenience
receptacles and the point where they exit from the
apparatus.
11. Only use attachments/accessories specified by the
manufacturer.
12. Use only with the cart, stand, tripod.
bracket, or table specified by the
manufacturer, or sold with the
apparatus. When a cart is used, use
caution when moving the cart/
apparatus combination to avoid injury
from tip-over.
13. Unplug this apparatus during lightning storms or
when unused for long periods of time.
14. Refer all servicing to qualified personnel. Servicing
is required when the apparatus has been damaged
in any way, such as power supply cord or plug is
damaged, liquid has been spilled or objects have
fallen into the apparatus, the apparatus has been
exposed to rain or moisture, does not operate
normally, or has been dropped.
15. To completely disconnect this apparatus from the
AC mains, disconnect the power cord plug from the
AC receptacle.
16. The mains plug of the power cord shall remain
readily operable.
English
Important Safety
Instructions
Explanation of graphical symbols
The lightning flash within an equilateral
triangle is intended to alert you to the
presence of uninsulated “dangerous
voltage” within the product’s enclosure
that may be of sufficient magnitude to
constitute an electric shock to persons.
The exclamation point within an
equilateral triangle is intended to alert you
to the presence of important operating
and maintenance (servicing) instructions
in the literature accompanying the
appliance.
To avoid risk of electric shock, do not open the case of
the apparatus. There are no user serviceable parts inside.
WARNING: To reduce risk of fire or electric shock,
do not expose this apparatus to rain or moisture.
Warnings
1. Read these instructions.
2. Keep these instructions.
3. Heed all warnings.
4. Follow all instructions.
5. Do not use this apparatus near water.
6. Clean only with a dry cloth.
CAUTION
RISK OF ELECTRIC SHOCK
DO NOT OPEN
AVIS: RISQUE DE CHOC ELECTRIQUE – NE PAS OUVRIR

6
• The analogue audio output from the TV is
connected to Panorama’s Input 5.
With this connection scheme the majority of audio
programme formats can be reproduced through selection
of the appropriate Panorama input. For example:
Input 1: Digital, 5.1 channel, DVD soundtracks.
Input 2: Digital audio from, or routed through, the TV.
Input 5: Analogue stereo audio (analogue TV audio or
Dolby Pro Logic surround encoded audio for example).
Note: Some televisions pass 5.1 channel digital audio
from their HDMI inputs to their digital audio outputs (the
remainder down-mix 5.1 signals to stereo). In these
cases, the direct connection between the DVD player
and Panorama’s Input 1 will not be necessary. Confirm
with the manufacturer of your TV that it is capable of
5.1 channel digital audio output from external inputs
before dispensing with the direct DVD to Panorama
connection.
Note: When using Panorama it may be necessary to
mute the television’s internal speakers. Some television
screens will display a permanent on-screen symbol
when mute is selected. If this is the case the television
volume can alternatively be reduced to zero using its
remote handset volume controls.
Note: For further information on connecting Panorama
to a wide variety of audio sources a Panorama
Connection Guide is available for download from the
B&W web site. www.bowers-wilkins.com
Use the digital optical cables supplied with Panorama to
connect the DVD player digital audio output and the TV
digital audio output to Input 1 and Input 2 respectively.
The caps must be removed from the ends of the digital
optical cables before it is used. Inputs 3 to 5 may be
used to connect a variety of audio sources such as
analogue TV, a CD player, an Apple Airport Express or a
personal audio device.
Note: If your DVD player does not have an optical digital
audio output, use the phono coaxial digital cable
supplied and connect to Panorama Input 3.
Panorama’s connection sockets are located on the
underside beneath a removable cover. To remove the
1. UNPACKING PANORAMA
Check that all parts are present in the carton. In
addition to the Panorama itself, you will find an
accessory box containing:
• Wall bracket
• Quick Start Guide
• This manual
• Warranty and registration documents
• Remote handset
• Power cord
• Stereo analogue phono signal cable
• 2 x optical digital signal cable
• Co-axial (phono) digital signal cable
• 4 x 25mm feet
• 4 x 35mm feet
• Micro-fibre polishing cloth.
In some markets, Panorama may be supplied with two
power cords. The one with a 3-pin plug on the end is
for use in the UK, Republic of Ireland and Hong Kong.
Follow the guidelines in the Quick Start Guide when
unpacking.
2. INSTALLING PANORAMA
2.1 Panorama Connections
Panorama requires connection to mains power and to
one or more digital or analogue audio sources.
Panorama offers a total of five audio inputs – three
digital and two analogue. The inputs are numbered as
follows:
Input 1: Digital optical
Input 2: Digital optical
Input 3: Digital RCA-phono
Input 4: Analogue RCA-phono
Input 5: Analogue RCA-phono
Figure 1 illustrates Panorama connected in a typical home
entertainment system including a television and a DVD
player. In this system the connection scheme is as follows:
• The digital audio output from the DVD player is
connected to Panorama’s Input 1.
• The digital audio output from the TV is connected
to Panorama’s Input 2.
Owner’s manual
Welcome
Thank you for purchasing Panorama and welcome to
Bowers & Wilkins.
Watching a movie in the home on a generous screen and
with great sound can be a breathtaking experience – often
better than in the theatre. But installing and wiring a home
theatre system is sometimes not quite so enjoyable. And
that’s where Panorama comes in. Panorama is an
integrated solution to home theatre sound that is as
simple to install as it is remarkable to experience. Rather
than require multiple speakers positioned around the
room, Panorama uses sophisticated digital signal
processing to steer the sound from one source and create
a genuine home theatre audio experience without the
complication of multiple speakers. But Panorama is not
only simple to install and use. Thanks to advanced
acoustic technology borrowed directly from our highest
performance hi-fi designs, it offers sound quality more
often associated with the best h-fi separates.
The Bowers & Wilkins Panorama Home Theatre
experience starts here. However, before you immerse
yourself in a great movie, please take a moment to read
through this manual, especially the safety instructions.
B&W maintains a network of dedicated distributors in
over 60 countries who will be able to help you should
you have any problems your dealer cannot resolve.
Overview
Panorama is a complete home theatre audio system
contained in one easily installed unit that can be wall or
table mounted. It incorporates a 5.1 channel home
theatre audio decoder along with front, centre, surround,
and subwoofer speakers and their drive amplifiers. An
additional active subwoofer can be connected and
Panorama will automatically detect its use and adjust its
own settings appropriately. Panorama incorporates three
digital and two analogue audio inputs for the connection
of audio sources such as DVD players and satellite
receivers. Panorama is controlled by an intuitive user
interface combined with a simple remote control handset.

7
they can be found in the Support section of the B&W
web site at www.bowers-wilkins.co.uk.
3.1 Front Panel Controls
Panorama front panel controls functions consist of the
following:
G input: Press to switch on Panorama and then press
to select each input in turn. Press and hold for three
seconds to switch off Panorama.
mode: Selects Panorama programme decode modes.
See Figure 10
– v+: Adjusts Panorama volume.
3.2 Remote Handset
Before the remote handset is first used the clear plastic
insulating tab that prevents its battery from draining
must be removed. Follow the procedure illustrated in
Figure 8 and described below and to remove the
insulating tab.
• Rotate the battery cover anticlockwise 1/8 full turn
and remove it.
• Release the battery by pressing down on the edge
opposite the metal spring.
• Remove and discard the insulator.
• Replace the battery, first locating one side under
the small lugs opposite the metal spring.
• Replace the cover.
Figure 9 illustrates the remote handset and the following
paragraph describes its functions.
GSwitches Panorama on and off.
+Raises Panorama volume.
Mutes and un-mutes Panorama.
voice Switches Panorama to Voice mode. Voice
mode emphasizes the vocal content of movie
sound tracks and can be useful for late night
use when movie sound effects and music
might otherwise disturb others.
Pressing and holding the voice button for five
seconds or more switches Panorama into
2.3 Panorama Location and Mounting
The home theatre surround performance achieved by
Panorama will be optimized if it is located in the room
approximately symmetrically between two sound-
reflective walls. Figure 5 illustrates two possible room
layouts. Panorama can be either mounted on table
centrally in front of the home theater TV or be wall
mounted using the supplied bracket centrally above or
below the TV.
Note: A Panorama setup function enables selection of
bass equalisation characteristics appriopriate to either
wall or table locations. See Section 4.1.
If Panorama is to be table mounted the bracket is not
required. Panorama may be either placed directly on the
table or raised using one of the sets of feet supplied. To
fit the feet carefully turn Panorama upside-down on the
surface and screw them into the tapped holes. Figure 6
illustrates fitting the feet.
If Panorama is to be wall mounted, the bracket screw
hole positions on the wall must first be established. Use
a spirit level to ensure the bracket is level before marking
the hole positions. Drill and plug the wall for appropriate
screws. A second person to assist with marking holes
and lifting Panorama is recommended. Panorama’s rear
cover must be removed when it is wall mounted.
Use wall plugs that are appropriate for the type of wall
construction and ensure that wall, plugs and screws are
capable of reliably supporting Panorama’s weight
(10.6kg). If you have any doubt over your ability to mount
the bracket securely to the wall you should engage
specialist help. Once the bracket has been secured to the
wall, Panorama can be lifted into the bracket where it is
secured by lugs on its rear face engaging with key-hole
slots. Figures 7a to 7e illustrates use of the wall bracket.
3. USING PANORAMA
Panorama is simple to operate with all commonly used
functions on both its front panel and remote control
handset.
Note: Universal or “learning” remote handsets may also
be used to control Panorama. If Panorama remote
control codes are required for handset programming
cover, stand Panorama upright and gently push the
cover downward and away. Figure 2 illustrates removal
of the cover. Once the cover is removed, Panorama
must be turned upside-down to gain access to the
connection sockets. Ensure that the surface on which
Panorama is then placed will not damage its top
surface finish.
In addition to the mains and signal input sockets, a
subwoofer output socket and a service socket are also
present. Use of the subwoofer socket is covered below.
The service socket is not intended for consumer use.
Figures 3a and 3b illustrates and identifies Panorama
connection sockets.
Panorama incorporates a cable-dressing channel that
enables the input and subwoofer output cables to be
collected together and to exit the unit from the same
location adjacent to the mains power cable. To use the
cable-dressing channel, collect the cables together and
insert them in the open channel. Rotate the lever to
close the channel and retain the cables. Figure 4
illustrates use of the cable-dressing channel.
2.2 Connecting a Subwoofer
An active subwoofer can be connected to Panorama. A
subwoofer can enhance the Panorama experience by
providing extra impact on movie soundtracks and
extending bass response on stereo music programme.
The subwoofer is connected via Panorama’s subwoofer
output socket. Remove the connection cover as
described above and identify the subwoofer output
socket. Connect one end of an RCA phono cable to the
socket and the other end of the cable to the
subwoofer’s input socket.
Ensure that the subwoofer is switched on. As Panorama
handles the appropriate low-pass filtering on its
subwoofer output, the subwoofer’s internal low pass
filter should be set to its maximum or switched off.
Initially set the subwoofer’s volume level control to
between half and three-quarters maximum then fine
control its volume via the Panorama subwoofer level
setup menu (See Paragraph 4.1).

8
mode, surround mode selected, stereo mode selected
and wide stereo mode selected.
3.3 Switching On and Using Panorama
Ensure that the DVD player is connected to Panorama
Input 1, switched on and correctly set up with a disc
playing. In its default setup Panorama will switch on
automatically when an input signal is present on Input
1. It will also automatically select Input 1 together with a
default group of setup parameters that have been
specifically chosen to provide good initial performance
in a typical domestic environment. If a signal is present
on Input 1 Panorama will immediately reproduce it.
Note: If no sound is reproduced either the input cable is
plugged-in to the wrong input socket or there is no
output signal from the DVD. Select Input 2 using the
remote handset to check the former. To check the latter,
disconnect the input cable from Panorama and examine
its end. A faint red light shining from the end of an
optical cable confirms that a signal is present.
Once reproducing audio satisfactorily, use the Panorama
handset or front panel controls to raise or lower the
volume, select inputs or select audio decode modes. The
following paragraph describes audio decode modes.
3.4 Audio Decode Modes
Audio from DVD, videotape and, on occasions,
broadcast sources can be encoded with a variety of
surround sound formats. Panorama is capable of
decoding Dolby Digital, DTS, Dolby PLII surround sound
formats as well as providing conventional and “wide’
stereo reproduction. Not all decode modes however
can be used with each Panorama input or with each
programme material format. Figure 11 illustrates the
decode modes available with each programme material
format and Panorama input.
Panorama will detect Dolby Digital and DTS encoded
programme material and automatically select the
appropriate decode mode. With other programme
material, digital or analogue, the most likely appropriate
decode modes are highlighted in the table. The
Panorama display will show SURR when surround
modes are engaged, STEREO when conventional stereo
is engaged and WIDE when wide stereo is engaged.
digital or analogue material is reproduced, voice mode
implements a custom B&W designed filter algorithm.
The Panorama control panel, illustrated in Figure 10,
incorporates a display, a standby/input button, a
decode mode button and volume adjustment buttons.
The display illustrates the currently selected Panorama
input until a function button is pressed. It will then
display the selected function for a short time. The
display also incorporates six indicators which illuminate
to indicate the currently selected programme decode
Setup Mode. See the Panorama Setup
sections for more information.
mode Selects Panorama home theatre programme
decode modes.
–Lowers Panorama volume.
Selects Panorama inputs.
Note: When reproducing Dolby Digital encoded
material, voice mode implements the compression and
filter algorithm inherent in the encoding. When other

9
or press and hold voice for five seconds to exit from
Setup Mode.
Note: Subwoofer distance should be set to reflect its
approximate distance from the listening position.
4.2 The Room Menu
The ROOM menu enables the selection of one of three
preset room setups (Preset 1 is the default selection
when Panorama is first switched on) or configuration of
a user defined room setup. The user defined room
setup parameters are distance (DIST), centre offset
(OFFSET) and side wall reflection compensation
(WALLS).
To select one of the room menu presets, press and hold
voice to enter Setup Mode. Press –to select ROOM and
press mode to enter the selection menu (the current
setting will be displayed). Press +or –to select
alternative presets followed by voice to save the
selection and return to the ROOM menu, or press and
hold voice for five seconds to exit from Setup Mode.
Note: The centre offset, distance and wall type settings
for each of the room menu presets is shown in
Figure 13.
To configure and select the user defined room setup,
press mode from the ROOM menu followed by –to
select CUSTOM and mode again to select the DIST
parameter. DIST refers to the distance from Panorama
to the listening position. Press mode to enter the
adjustment menu (the current setting will be displayed)
followed by +or –to adjust the distance. Press voice
to save the adjustment and return to the DIST menu.
menu (the current setting will be displayed). Press +or
–to adjust the bass level as required followed by voice
to save the adjustment and return to the TONE menu.
Alternatively, press and hold voice for five seconds to
exit from Setup Mode.
To adjust the treble, press mode from the TONE menu
followed by +to select TREBLE, then mode again to
enter the adjustment menu (the current setting will be
displayed). Press +or –to adjust the treble level as
required followed by voice to save the adjustment and
return to the TONE menu. Press voice to return to the
SOUND menu or press and hold voice for five seconds
to exit from Setup Mode.
To adjust the bass equalisation press mode from the
SOUND menu followed by –to select BASS.EQ then
mode again to enter the adjustment menu (the current
setting will be displayed). Press +or –to select WALL or
TABLE as appropriate followed by voice to save the
selection and return to the BASS.EQ menu. Press voice
to return to the SOUND menu or press and hold voice
for five seconds to exit from Setup Mode.
Note: Bass equalization adjusts Panorama bass
response to suit wall and table mounting.
To adjust the subwoofer setup, press mode from the
SOUND menu followed by +to select SUB then mode to
enter the LEVEL menu and mode again to enter the
adjustment menu (the current setting will be displayed).
Press +or –to adjust the subwoofer volume level as
required followed by voice to save the selection and
return to the SUB menu. Press voice to return to the
SUB menu or press and hold voice for five seconds to
exit from Setup Mode.
Note: Subwoofer level adjusts the volume of a
subwoofer connected to Panorama relative to the
volume of the other channels.
To adjust the subwoofer distance, press mode from the
SUB menu followed by +to select DIST, then mode
again to enter the adjustment menu (the current setting
will be displayed). Press +or –to adjust the distance as
appropriate followed by voice to save the adjustment
and return to the SUB menu. Press voice to return to
the SOUND menu then –to select the next setup menu,
4. PANORAMA SETUP
Using Panorama’s default setup is likely to provide good
results in many situations, however its functionality and
performance can be customized in numerous ways
through its Setup Mode better to suit specific
installations or personal preferences. You may chose to
adjust any or all of the setup parameters. To switch
Panorama into Setup Mode press and hold the remote
handset voice button for five seconds. Exit from Setup
Mode in the same manner.
Note: If no button is pressed for thirty seconds in Setup
Mode Panorama will return automatically to normal
mode.
In Setup Mode some Panorama handset buttons
change function as described below:
+Selects the next setup menu top-level parameter
and adjusts parameter values once selected.
voice Saves parameter settings and jumps back to a
previous menu level.
mode Selects the next setup menu parameter.
–Selects the previous setup menu top-level
parameter and adjusts parameter values once
selected.
The remaining handset buttons are not operational in
Setup Mode. Figure 12 illustrates the Setup Mode
menus and the handset operations required to navigate
around them.
To begin Panorama setup press and hold the handset
voice button to enter Setup Mode. The first adjustment
menu is SOUND.
4.1 The Sound Menu
The SOUND menu enables adjustment of Panorama bass
and treble (TONE), bass equalization (BASS.EQ) and
subwoofer setup (SUB).
Note: The subwoofer menu will only be available if a
subwoofer is connected to Panorama.
To adjust the bass press mode from the SOUND menu
to select the TONE menu followed by mode again to
select BASS, and mode again to enter the adjustment
Figure 13 Panorama Room Presets
Preset
Preset 1Preset 2Preset 3
Setup Parameters
Distance 3.0m (9.8ft) 3.0m (9.8ft) 3.0m (9.8ft)
Offset CentreCentreCentre
Walls (Left) Medium Hard Soft
Walls (Right) Medium Hard Soft

10
To engage the bilingual function, press and hold voice
to enter Setup Mode and press –to select BILANG
followed by mode to select the selection menu (the
current setting will be displayed). Press +or –to select
FIRST language SECOND language or MIX (both
languages) as required followed by voice to save the
adjustment and return to the BILANG menu. Press –to
select the next menu or press and hold voice for five
seconds to exit from Setup Mode.
Note: The BILANG menu will only be available if a
bilingual encoded material is detected.
4.7 The Units Menu
The UNITS menu enables selection of measurement units
where they are used in menus that specify distance.
To select units, press and hold voice to enter Setup
Mode and press –to select UNITS followed by mode to
select the option menu (the current option will be
displayed). Press +or –to select METERS or FEET as
required followed by voice to save the selection and
return to the UNITS menu. Press –to select the next
menu or press and hold voice for five seconds to exit
from Setup Mode.
4.8 The DISP Menu
The DISP menu enables Panorama’s front panel display
to be brightened or switched off.
To adjust the display, press and hold voice to enter
Setup Mode and press –to select DISP followed by
mode to select the selection menu (the current setting
will be displayed). Press +or –to select OFF, NORMAL or
BRIGHT as required followed by voice to save the
adjustment and return to the DISP menu. Press –to
select the next menu or press and hold voice for five
seconds to exit from Setup Mode.
Note: When the display is switched off it will temporarily
illuminate to display control commands.
5. AFTERCARE
The cabinet surfaces usually only require dusting, or if
grease marks are apparent, polishing with the microfibre
cloth supplied. If you wish to use an aerosol or other
cleaner apply the aerosol or cleaner first onto a
select the next menu or press and hold voice for five
seconds to exit from Setup Mode.
Note: The gain menu will only be available if an
analogue input is selected.
4.4 The Delay Menu
The DELAY menu enables adjustment of Panorama’s
overall audio output delay so that any video lip-sync
errors can be corrected. Delay adjustment only applies
to the currently selected input. If Input 1, for example,
requires adjustment it must be selected before
Panorama is switched into Setup Mode.
To adjust the delay, press and hold voice to enter
Setup Mode and press –to select DELAY followed by
mode to select the adjustment menu (the current
setting will be displayed). Press +or –to adjust the
delay as required followed by voice to save the
adjustment and return to the DELAY menu. Press –to
select the next menu or press and hold voice for five
seconds to exit from Setup Mode.
4.5 The On/Off Menu
The ON/OFF menu enables selection of Panorama’s
auto on/off function. When auto on/off is engaged
Panorama will switch on automatically when a signal is
detected and switch off automatically when no signal is
detected for ten minutes.
To select auto on/off, press and hold voice to enter
Setup Mode and press –to select ON/OFF followed by
mode to select the option menu (the current option will
be displayed). Press +or –to select AUTO or MANUAL as
required followed by voice to save the adjustment and
return to the ON/OFF menu. Press –to select the next
menu or press and hold voice for five seconds to exit
from Setup Mode.
4.6 The BILANG Menu
The bilingual function enables Panorama to reproduce
appropriately encoded dual language programme
material. Languages can be selected individually or
reproduced simultaneously. Panorama’s ability to create
distinct left and right sound fields makes simultaneous
language reproduction viable. The bilingual function is
only available on Panorama's digital inputs.
To adjust the centre offset, press –from the DIST menu
followed by mode to enter the adjustment menu (the
current setting will be displayed). Press +or –to adjust
the centre offset as required followed by voice to save
the adjustment and return to the OFFSET menu.
Note: The centre offset parameter describes the
distance, left or right, that the central listening position
is offset from the middle of Panorama. See Figure 5.
To adjust the side wall reflection quality, press –from
the OFFSET menu followed by mode to enter the WALLS
menu and mode again followed by +or –to select the
left or right hand wall. Press mode to enter the
selection menu (the current setting will be displayed)
and then +or –to select soft, medium or hard. Press
voice to save the selection and return to the WALLS
menu. Repeat the selection for the other wall then
either press –to select the next menu or press and hold
voice for five seconds to exit from Setup Mode.
Note: Panorama generates a surround sound field by
reflecting sound from the side walls of the room.
Specifying the reflective quality of the walls helps
optimize performance. A typical “hard” wall would be a
large window or solid brick structure; a “medium” wall
would be a stud construction or brick wall screened
with furniture items, and a “soft” wall would be a
curtained window or wall with a fabric hanging.
4.3 The Gain Menu
The GAIN menu enables adjustment of Panorama’s
analogue input (4 and 5) sensitivity. Input sensitivity
adjustment is sometimes useful to compensate for the
low output level of some analogue source items. Input
sensitivity adjustment only applies to the currently
selected input. If Input 5, for example, requires
adjustment it must be selected before Panorama is
switched into Setup Mode.
To adjust the input sensitivity, press and hold voice to
enter Setup Mode and press –to select GAIN followed
by mode to select the adjustment menu (the current
setting will be displayed). Press +or –to adjust the
sensitivity as required followed by voice to save the
adjustment and return to the GAIN menu. Press –to

11
d. for damages caused by accidents, lightning, water,
fire heat, war, public disturbances or any other
cause beyond the reasonable control of B&W and
its appointed distributors,
e. for products whose serial number has been altered,
deleted, removed or made illegible,
f. if repairs or modifications have been executed by
an unauthorised person.
4 This guarantee complements any national/regional
law obligations of dealers or national distributors
and does not affect your statutory rights as a
customer.
How to claim repairs under warranty
Should service be required, please follow the following
procedure:
1 If the equipment is being used in the country of
purchase, you should contact the B&W authorised
dealer from whom the equipment was purchased.
2 If the equipment is being used outside the country
of purchase, you should contact the B&W national
distributor in the country of residence, who will
advise where the equipment can be serviced. You
can call B&W in the UK or visit our web site to get
the contact details of your local distributor.
To validate your warranty, you will need to produce the
warranty booklet completed and stamped by your
dealer on the date of purchase. Alternatively, you will
need the original sales invoice or other proof of
ownership and date of purchase.
alternative cleaning cloth, not directly onto the product.
Test a small area first, as some cleaning products may
damage some of the surfaces. Avoid products that are
abrasive, or contain acid, alkali or anti-bacterial agents.
Do not use cleaning agents on the drive units. Do not
attempt to remove the grille.
Limited Warranty
This product has been designed and manufactured to
the highest quality standards. However, if something
does go wrong with this product, B&W Group Ltd. and
its national distributors warrant free of charge labour
(exclusion may apply) and replacement parts in any
country served by an official B&W distributor.
This limited warranty is valid for a period of two years
from the date of purchase, except that exclusions apply
in certain countries in line with national law. Please
consult the B&W distributor in your country for detailed
information.
Terms and Conditions
1 The warranty is limited to the repair of the
equipment. Neither transportation, nor any other
costs, nor any risk for removal, transportation and
installation of products is covered by this warranty.
2 This warranty is only valid for the original owner. It is
not transferable.
3 This warranty will not be applicable in cases other
than defects in materials and/or workmanship at the
time of purchase and will not be applicable:
a. for damages caused by incorrect installation,
connection or packing,
b. for damages caused by any use other than correct
use described in the user manual, negligence,
modifications, or use of parts that are not made or
authorised by B&W,
c. for damages caused by faulty or unsuitable ancillary
equipment,

12
SOUND TONE BASS +6dB
BASS.EQ
-6dB
TREBLE
WALL
TABLE
SUB* LEVEL
DIST
ROOM TYPE 1
CUSTOM DIST
TYPE 2
TYPE 3
OFFSET L 3.0m
CENTRE
R 3.0m
WALLS
+6dB
-6dB
5.4m
1.2m
5.4m
1.2m
SOFT
MEDIUM
HARD
LEFT
SOFT
MEDIUM
HARD
RIGHT
GAIN* +6dB
0dB
DELAY 170ms
0ms
ON/OFF AUTO
MANUAL
BILANG* FIRST
SECOND
MIX
UNITS METRES
FEET
DISP OFF
NORMAL
BRIGHT
Figure 12 Panorama Menu Structure
Menu 1 Menu 2 Menu 3 Menu 4 Menu 5
5s
+6dB
-6dB

13
14 Adressez-vous uniquement à un revendeur agréé
pour toute intervention sur l’appareil. Une telle
intervention sera nécessaire si l’appareil a été
endommagé de quelque manière que ce soit, par
exemple câble secteur endommagé, liquide ayant
coulé à l’intérieur, objet tombé dans l’appareil, ou
bien si l’appareil a été exposé à la pluie ou à
l’humidité, s’il ne fonctionne pas normalement, ou
est tombé.
15 Pour débrancher complètement cet appareil de son
alimentation secteur, débranchez impérativement sa
prise d’alimentation de la prise murale.
16 La prise d’alimentation secteur doit rester
accessible en permanence.
17 ATTENTION : Danger d’explosion si la pile interne
n’est pas correctement remplacée. Ne la remplacer
que par un modèle similaire ou équivalent
(CR2032). Respectez les lois sur l’environnement
quand vous jetez les piles usagées.
18 Pour éviter tout échauffement excessif, ne jamais
recouvrir l’appareil d’objets externes. Respectez
scrupuleusement les conseils du constructeur.
19 Royaume-Uni, Irlande et Hong-Kong uniquement –
Le câble secteur est équipé d’une prise 13 A avec
prise de terre. Cet appareil possède une double
isolation, et l’utilisation de cette prise de terre n’est
pas obligatoire : elle n’est utile que pour permettre
l’ouverture de sécurité des prises murales.
20. La ventilation correcte ne doit pas être réduite par
l’obturation des ouïes naturelles de ventilation avec
des magazines, napperons, etc.
21. Aucun objet générant une flamme nue, comme celle
d’une bougie, ne doit être placé sur l’appareil.
22. Respectez les normes en vigueur dans votre pays
concernant la destruction des piles.
23. Ne jamais exposer l’appareil directement à des
substances liquides, éclaboussures ou coulées.
24. Ne pas poser sur l’appareil des objets remplis de
liquide, comme un vase, etc.
3 Respectez tous les conseils de sécurité indiqués.
4 Suivez toutes les instructions indiquées.
5 Ne pas utiliser cet appareil près d’une source
humide.
6 Nettoyez-le uniquement avec un chiffon sec.
7 Ne jamais bloquer les ouïes de ventilation de
l’appareil. Effectuez l’installation selon les
préconisations du constructeur.
8 Ne l’installez pas près d’une source de chaleur
comme un radiateur, une bouche de chauffage, ou
d’autres appareils électroniques (y compris des
amplificateurs)
9 Ne jamais démonter une prise secteur polarisée, ou
avec prise de terre. Une prise polarisée possède
deux lames-contacts, l’une plus large que l’autre.
Une prise avec mise à la terre possède deux
contacts, plus un troisième central. Ces contacts
supplémentaires ou de forme différente sont conçus
pour votre sécurité. Si la prise fournie ne convient
pas à votre prise d’alimentation murale, consultez
un électricien qualifié pour le remplacement de la
prise murale inutilisable.
10 Assurez-vous que le câble d’alimentation secteur ne
peut être écrasé, ou pincé, notamment au niveau
des prises ou à l’endroit où il sort du châssis de
l’appareil.
11 N’utilisez que des supports/accessoires
spécifiquement recommandés par le constructeur.
12 N’utilisez que des chariots de
transport, supports, tripodes ou
accessoires de fixation conseillés par
le constructeur, ou vendus
spécialement pour l’appareil. Lorsque
qu’un chariot ou un support mobile est utilisé,
déplacez-le avec précaution pour éviter toute chute
de l’appareil, pouvant entraîner des dégâts et des
blessures.
13 Débranchez l’appareil du secteur pendant les
orages ou lorsqu’il ne doit pas être utilisé pendant
une longue période.
Français
Informations importantes
concernant la sécurité
Explication des symboles graphiques
L’éclair dans un triangle équilatéral est
utilisé pour vous avertir de la présence
éventuelle d’une tension électrique non
isolée potentiellement dangereuse, en
tout cas suffisamment élevée pour
présenter des risques d’électrisation, si le
boîtier externe de l’appareil est ouvert.
Le point d’exclamation dans un triangle
équilatéral est utilisé pour vous avertir de
la nécessité de respecter ou d’effectuer
certaines opérations importantes afin de
ne pas nuire à votre sécurité ou d’utiliser
l’appareil dans les meilleures conditions
possibles.
Pour éviter tout risque d’électrisation, ne jamais ouvrir le
capot de l’appareil. Il n’y a à l’intérieur aucune pièce
susceptible d’être modifiée par l’utilisateur.
ATTENTION : Pour réduire les risques d’incendie
et d’électrisation, ne jamais exposer cet appareil à
la pluie ou l’humidité.
Avertissements importants
1 Lisez soigneusement ces instructions.
2 Conservez ce manuel d’utilisation dans un endroit
sûr.
CAUTION
RISK OF ELECTRIC SHOCK
DO NOT OPEN
AVIS: RISQUE DE CHOC ELECTRIQUE – NE PAS OUVRIR

14
• Support de fixation mural
• Guide de mise en service rapide
• Ce manuel d’utilisation
• Les documents concernant l’enregistrement et la
garantie
• Télécommande
• Câble secteur
• Câble de modulation analogique stéréo Phono
• 2 x câble numérique optique
• Câble coaxial pour signal numérique
• 4 x pieds 25 mm
• 4 x pieds 35 mm
• Un tissu de nettoyage microfibre
Pour certains marchés uniquement, Panorama peut être
livré avec deux câbles d’alimentation secteur. L’un est
alors équipé d’une prise 3 broches à une de ses
extrémités, pour utilisation dans le Royaume-Uni, en
Irlande ou à Hong-Kong. Suivez les conseils donnés
dans le guide de mise en service rapide lors du
déballage.
2. INSTALLATION DE PANORAMA
2.1 Branchements de Panorama
Panorama nécessite son branchement sur l’alimentation
secteur, et avec au moins une source audio, analogique
ou numérique. Panorama propose un total de cinq
entrées audio stéréo – trois numériques et deux
analogiques. Ces entrées sont repérées comme suit :
Entrée 1 : Numérique optique
Entrée 2 : Numérique optique
Entrée 3 : Numérique coaxiale/prises RCA
Entrée 4 : Analogique prises RCA
Entrée 5 : Analogique prises RCA
La Figure 1 illustre un branchement typique de Panorama
dans une installation Home Cinema, intégrant un
téléviseur et un lecteur de DVD. Dans ce système, les
différents branchements sont les suivants :
• La sortie audionumérique du lecteur de DVD est
branchée sur l’entrée 1 (Input 1) de Panorama.
• La sortie audionumérique du téléviseur est branchée
sur l’entrée 2 (Input 2) de Panorama.
signal très sophistiqué, capable de diriger le son à partir
d’une unique source, recréant ainsi toute la magie
d’une véritable installation Home Cinema multicanal
sans les complications apportées par de multiples
enceintes. Mais Panorama n’est pas seulement une
solution simple à installer et utiliser. Grâce à des
technologies très avancées, directement issues de
celles que nous utilisons sur nos modèles Hi-Fi les plus
performants, il offre la même qualité sonore que celle
habituellement uniquement disponible via des maillons
Haute Fidélité séparés.
Votre nouvelle expérience avec le système Bowers &
Wilkins Panorama Home Theatre débute donc ici. Mais
avant de vous immerger totalement dans les meilleurs
grands films, veuillez s’il vous plaît prendre quelques
instants pour lire ce manuel d’utilisation, et notamment
les instructions concernant la sécurité. B&W possède
un réseau de revendeurs agréés dans plus de 60 pays
différents, mais saura aussi vous aider si vous
rencontrez un problème que votre revendeur ne parvient
pas à résoudre.
Introduction
Panorama est un système Home Cinema complet,
contenu dans un unique appareil qui peut être fixé au
mur ou posé sur une simple table. Il intègre un
décodeur audio Home Cinema 5.1 canaux, avec ses
canaux et haut-parleurs avant, centre, Surround et
enceintes de sous-grave, chacun étant alimenté par son
propre amplificateur. Une enceinte de sous-grave active
supplémentaire peut aussi être branchée, et Panorama
la détectera et la réglera alors automatiquement.
Panorama propose aussi trois entrées numériques et
deux entrées analogiques, pour y brancher des sources
telles qu’un lecteur de DVD ou un récepteur satellite.
Panorama se pilote à partir d’une interface très intuitive,
et une télécommande très simple.
1. DÉBALLAGE DE PANORAMA
Vérifiez que tous les éléments suivants sont bien dans
l’emballage. En plus de Panorama lui-même, vous
devez trouvez dans le carton :
25. Ne pas exposer les piles (installées dans l’appareil)
à une chaleur excessive, par exposition directe au
soleil, feu à proximité, etc.
26. Lorsque l’appareil est fixé au mur, assurez-vous de
la solidité de ce dernier, constitué obligatoirement
d’un matériau solide : pierre, briques, béton, bois
épais, etc.
Information sur la protection de
l’environnement
Tous les produits B&W sont conçus en
conformité totale avec les nouvelles
normes internationales concernant
l’interdiction d’utilisation de certaines substances
dangereuses (RoHs, pour Restriction of Hazardous
Substances) dans les équipements électriques et
électroniques, ainsi que la possibilité de recyclage des
matériaux utilisés (WEEE, pour Waste Electrical and
Electronic Equipment). Le symbole du conteneur à
ordures barré par une croix indique la compatibilité avec
ces directives, et le fait que les appareils peuvent être
correctement recyclés ou traités dans le respect total
de ces normes.
Manuel de l’utilisateur
Bienvenue !
Nous vous remercions pour l’achat de ce Panorama, et
vous souhaitons la bienvenue dans l’univers Bowers &
Wilkins.
Regarder un film, chez soi, sur un écran de grandes
dimensions et avec un son superbe peut être une
expérience inoubliable – même supérieure à celles
ressenties dans des salles de cinéma professionnelles.
Mais installer et câbler un tel système n’est souvent pas
chose facile. Et c’est là que Panorama intervient.
Panorama est une solution Home Cinema intégrée qui
est aussi simple à installer que ses résultats sont
exceptionnels ! Plutôt que d’utiliser de multiples
enceintes acoustiques disposées tout autour de la
pièce, Panorama utilise un traitement numérique du

15
protection des prises comme déjà décrit plus haut, puis
identifiez la prise pour l’enceinte de sous-grave
« subwoofer ». Branchez la prise RCA d’une des
extrémités du câble sur cette prise, et l’autre prise RCA à
l’autre extrémité dans la prise d’entrée de l’enceinte de
sous-grave active.
Vérifiez que celle-ci est bien allumée. Panorama intègre le
filtre passe-bas approprié via sa sortie pour enceinte de
sous-grave, ce qui sous-entend que le filtre intégré dans
l’enceinte de sous-grave doit être soit désactivé, soit, si
ce n’est pas possible, placé sur sa position de réglage
maximum. Positionnez le réglage de volume de l’enceinte
de sous-grave active sur sa position comprise entre la
moitié et les trois-quarts de la course du réglage
correspondant. Vous effectuerez ensuite le réglage fin du
niveau de l’enceinte de sous-grave via le menu de
réglage de Panorama (Voir paragraphe 4.1).
2.3 Positionnement et installation de Panorama
Les performances Home Cinema de Panorama seront
optimisées si celui-ci se trouve approximativement à
égale distance de deux murs latéraux réfléchissants. La
Figure 5 illustre deux positions optimales possibles.
Panorama peut être simplement posé sur une table, de
manière centrale, face à l’écran de l’installation Home
Cinema, soit directement fixé au mur, en utilisant le
support fourni, et installé alors juste au-dessus ou
au-dessous du téléviseur.
Note : une fonction de réglage de l’égalisation dans le
grave, intégrée à Panorama, permet d’en régler les
caractéristiques de réponse dans les basses fréquences
suivant qu’il est posé sur une table ou fixé sur le mur.
Voir le paragraphe 4.1.
Si Panorama est posé sur une table, le support fourni
n’est pas nécessaire. Panorama peut être directement
posé sur une table, ou surélevé en utilisant un des deux
jeux de pieds fournis d’origine. Pour fixer ces pieds,
retournez avec précaution Panorama, puis vissez
chaque pied dans les filetages visibles sous l’appareil.
La Figure 6 illustre cette opération.
Si l’on veut fixer Panorama sur un mur, on doit tout
d’abord repérer sur le mur la position des trous de
fixation du support. Utilisez un niveau à bulle pour vérifier
comme un téléviseur analogique, un lecteur de CD, une
borne Apple Airport Express ou un baladeur audio.
Note : Si votre lecteur de DVD ne possède pas de sortie
audionumérique optique, utilisez le câble audionumérique
coaxial fourni et branchez-le sur l’entrée 3 (Input 3) de
Panorama.
Les prises de branchement de Panorama se trouvent à
l’arrière de l’appareil, sous un couvercle amovible. Pour
retirer ce couvercle, maintenez Panorama en position
verticale, puis tirez doucement le couvercle vers le bas et
vers l’extérieur. La Figure 2 illustre le retrait du couvercle.
Une fois le couvercle retiré, retournez Panorama tête en
bas pour accéder facilement aux prises de branchement.
Assurez-vous que la surface sur laquelle est posée
Panorama ne détériore pas la finition de sa partie
supérieure.
En plus de la prise d’alimentation secteur et de ces
prises d’entrées, une sortie pour enceinte de sous-grave
(caisson de grave) et une prise supplémentaire (service)
sont présentes. L’utilisation d’une enceinte de sous-
grave supplémentaire est décrite dans le paragraphe
suivant. La prise supplémentaire (service) n’a pas à être
branchée par l’utilisateur final. Les Figure 3a et 3b
illustrent et identifient ces prises complémentaires.
Panorama possède un tube pour les câbles, qui permet
de réunir les câbles des entrées et celui de l’enceinte de
sous-grave afin de regrouper leur sortie de l’appareil
avec celle du câble de l’alimentation secteur. Pour utiliser
ce tube-collecteur, réunissez les câbles tous ensemble,
et insérez-les dans l’ouverture du tube. Faites pivoter le
levier de blocage du tube pour les maintenir en place. La
Figure 4 illustre l’utilisation de ce tube.
2.2 Branchement d’une enceinte de sous-grave
Une enceinte de sous-grave active peut être branchée
sur Panorama. Une telle enceinte améliorera la qualité
musicale de Panorama, en procurant encore plus
d’impact sur les bandes sonores des films, et une bande
passante plus étendue dans l’extrême-grave pour la
reproduction de la musique.
L’enceinte de sous-grave est branchée sur la prise de
sortie « subwoofer » de Panorama. Retirez le capot de
• La sortie audio analogique du téléviseur est branchée
sur l’entrée 5 (Input 5) de Panorama.
Dans cette configuration de branchements, la majorité
des formats audio des différents programmes peut être
reproduite sur l’entrée appropriée de Panorama. Par
exemple :
Entrée 1 : pistes sonores numériques 5.1 canaux et des
DVD
Entrée 2 : Audio numérique issu ou transmis via le
téléviseur
Entrée 5 : audio analogique stéréo (TV analogique
classique, ou audio codé Dolby Pro Logic Surround, par
exemple).
Note : Certains téléviseurs transmettent le son audio
numérique 5.1 canaux via leurs entrées HDMI (et
l’équivalent en audio mixé stéréo analogique). Dans ce
cas, la connexion directe entre le lecteur de DVD et
l’entrée 1 de Panorama ne sera pas nécessaire. Vérifiez
bien ce point auprès du fabricant de votre téléviseur
(manuel d’utilisation) : sa sortie doit bien être capable de
transmettre des signaux audionumériques 5.1 canaux.
Note : Lorsque vous utilisez Panorama, il peut être
nécessaire de couper le son des haut-parleurs intégrés
au téléviseur. Certains téléviseurs affichent alors en
permanence sur leur écran un symbole indiquant que le
son est coupé. Dans ce cas, préférez simplement placer
la commande de volume interne du téléviseur sur zéro,
via le réglage de volume de sa télécommande.
Note : Pour de plus amples informations sur les
différentes manières de relier Panorama à une grande
variété de sources audio, vous pouvez vous procurer le
Guide de Connexion Panorama, en le téléchargeant
directement depuis le site Internet e B&W, sur
www.bowers-wilkins.com.
Utilisez les câbles numériques optiques fournis avec
Panorama pour brancher la sortie numérique optique du
lecteur de DVD et la sortie numérique optique du
téléviseur sur les entrées 1 et 2, respectivement. Les
bouchons éventuellement présents sur les prises et le
câble doivent être ôtés avant ce branchement. Les
entrées 3 à 5 de Panorama seront utilisées pour
brancher une grande variété d’autres sources audio,

16
–Diminue le volume sonore de Panorama.
(entrée) Sélectionne l’entrée audio utilisée par
Panorama, par pressions successives.
Note : Lors de la reproduction d’une piste audio codée
Dolby Digital, le mode Voice utilise la compression et
l’algorithme de filtrage propres à ce mode d’encodage.
Lorsque d’autres sources analogiques ou numériques
sont lues, le mode Voice utilise un algorithme
spécialement conçu par B&W.
Le panneau de contrôle de Panorama, illustré Figure
10, intègre un afficheur, une touche standby/input (mise
en veille/entrée), une touche de sélection du mode de
décodage et des touches pour le réglage du volume
sonore. L’afficheur indique l’entrée couramment
sélectionnée, tant qu’une autre touche de fonction n’est
pas pressée. Dans ce cas, il affiche pendant un court
instant la fonction dont on vient de presser la touche.
Cet afficheur intègre également six voyants indiquant le
mode de décodage de la source sélectionnée, la
présence d’une enceinte de sous-grave par liaison sans
fil, la sélection du mode Surround, ou du mode stéréo
ou stéréo élargie (wide stereo).
3.3 Allumage et utilisation de Panorama
Vérifiez que le lecteur de DVD est bien branché sur
l’entrée 1 (Input 1) de Panorama, allumé et
correctement réglé pour la lecture d’un disque DVD.
Dans son réglage par défaut, Panorama doit s’allumer
automatiquement en présence d’un signal à l’entrée,
sur l’entrée 1. Il doit également sélectionner
automatiquement cette entrée 1 (Input 1) si la sélection
du groupe de paramètres par défaut a été conservée,
celle correspondant à son utilisation correcte dans un
environnement domestique typique. Si un signal est
effectivement présent sur l’entrée 1, Panorama doit
alors le reproduire immédiatement et automatiquement.
Note : Si aucun son ne sort, c’est que le câble d’entrée
n’est pas branché dans la bonne prise, ou qu’il n’y a
aucun signal de sortie en provenance du lecteur de
DVD. Sélectionnez l’entrée 2 à partir de la
télécommande pour vérifier le premier point. Pour le
second, vérifiez tout d’abord la qualité des contacts du
câble utilisé en le débranchant côté Panorama. Une
3.2 Télécommande
Avant la première utilisation de la télécommande, vous
devez tirer sur la languette en plastique qui évite l’usure
de la pile avant utilisation. Pour ce faire, suivez la
procédure ci-dessous, illustrée sur la Figure 8.
• Faites pivoter le couvercle de la pile d’un huitième
de tour dans le sens inverse des aiguilles d’une
montre, puis retirez-le.
• Retirez la pile, en appuyant dessus, dans l’angle
opposé du ressort métallique visible.
• Ôtez puis jeter l’isolant en plastique.
• Replacez la pile, en la glissant tout d’abord sous le
contact placé dans l’angle opposé du ressort
métallique.
• Replacez le couvercle de la pile.
La Figure 9 montre les fonctions de la télécommande,
qui sont décrites dans le paragraphe suivant :
GAllume Panorama, ou le replace dans son
mode de veille Standby.
+Monte le volume sonore de Panorama
(silence) Coupe le son de Panorama. Une seconde
pression rétablir le niveau sonore
précédent.
voice (voix) Permet de placer Panorama dans son
mode de reproduction « Voice ». Celui-ci
augmente le niveau du contenu sonore
des dialogues des bandes-son des films,
ce qui peut être utile notamment en
soirée, quand les effets sonores et la
musique des films peuvent déranger le
voisinage.
Une pression maintenue pendant au
moins cinq secondes sur la touche Voice
pemet également d’accéder dans le menu
des réglages Setup Menu de Panorama.
Voir les paragraphes correspondants pour
de plus amples informations sur ce menu.
mode Sélectionne le mode de décodage Home
Cinema utilisé par Panorama
la bonne horizontalité du support avant de marquer la
position des trous. Percez ceux-ci et utilisez des chevilles
appropriées aux vis du support. La présence d’une
seconde personne pour vous assister dans le marquage
des trous puis l’installation effective de Panorama sur
son support mural est conseillée. Le capot arrière de
Panorama doit être retiré lorsqu’il est fixé au mur.
Utilisez des chevilles de fixation appropriées à la nature
du matériau constitutif de la paroi, puis assurez-vous
que l’ensemble mur, chevilles et vis est bien en mesure
de supporter le poids de Panorama (10,6 kg). Si vous
avez le moindre doute, n’hésitez pas à demander l’aide
d’un spécialiste. Une fois que le support est fermement
fixé sur le mur, Panorama peut être glissée sur son
support puis sécurisé en place, grâce aux pattes et à la
forme des trous pratiqués sur sa face arrière. Les
figures 7a à 7e illustrent l’utilisation correcte du support
mural.
3. UTILISATION DE PANORAMA
Panorama est d’une utilisation très simple, toutes ses
fonctions se trouvant soit sur sa face avant, soit sur la
télécommande.
Note : Des télécommandes universelles ou « à
apprentissage » peuvent également être utilisées avec
Panorama. Les codes de commande de Panorama,
nécessaires pour la programmation de ce type de
télécommandes, se trouvent dans la section Support de
notre site Internet (www.bowers-wilkins.co.uk).
3.1 Commandes de la face avant
Les commandes présentes en face avant de Panorama
sont les suivantes :
G input : Une pression allume Panorama, les pressions
suivantes permettent de sélectionner chaque entrée,
l’une après l’autre. Une pression continue pendant au
moins trois secondes replace Panorama dans son
mode de veille Standby.
mode : Permet de choisir le mode de décodage utilisé
par Panorama. Voir Figure 10
– v+: Permet de régler le volume sonore de Panorama
Other manuals for Panorama
2
Table of contents
Languages:
Other Bowers & Wilkins Stereo System manuals

Bowers & Wilkins
Bowers & Wilkins Panorama 2 User manual

Bowers & Wilkins
Bowers & Wilkins ASW608 User manual

Bowers & Wilkins
Bowers & Wilkins DM 601 S2 User manual

Bowers & Wilkins
Bowers & Wilkins TM4S User manual

Bowers & Wilkins
Bowers & Wilkins WM4 User manual

Bowers & Wilkins
Bowers & Wilkins A7 User manual

Bowers & Wilkins
Bowers & Wilkins HTM61 User manual

Bowers & Wilkins
Bowers & Wilkins 800D User manual

Bowers & Wilkins
Bowers & Wilkins Zeppelin Air User manual

Bowers & Wilkins
Bowers & Wilkins Zeppelin Air User manual