Step 5: Install the Right and Left Squat Frame Rails
Locate the following items:
• Item #8 - Right Squat Frame Rail
• Item #9 - Left Squat Frame Rail
• Item #10 - Right Squat Frame Foot Assembly
• Item #11 - Left Squat Frame Foot Assembly
• Item #34 - R6 Squat Pulley (Squat/Arm Right Cable)
• Item #35 - L6 Squat Pulley (Squat/Arm Left Cable)
• From Step 4 - Main Assembly
• Item #F - (4) 3/8" X 3/4" Hex Head Bolts
• Item #G - (2) 3/8" X 1" Hex Head Bolts
• Item #I - (1) 3/8" X 5" Hex Head Bolt
• Item #O - (8) 3/8" Washers
• Item #R - (1) 3/8" Nylock Nut
Do not unwrap cables.
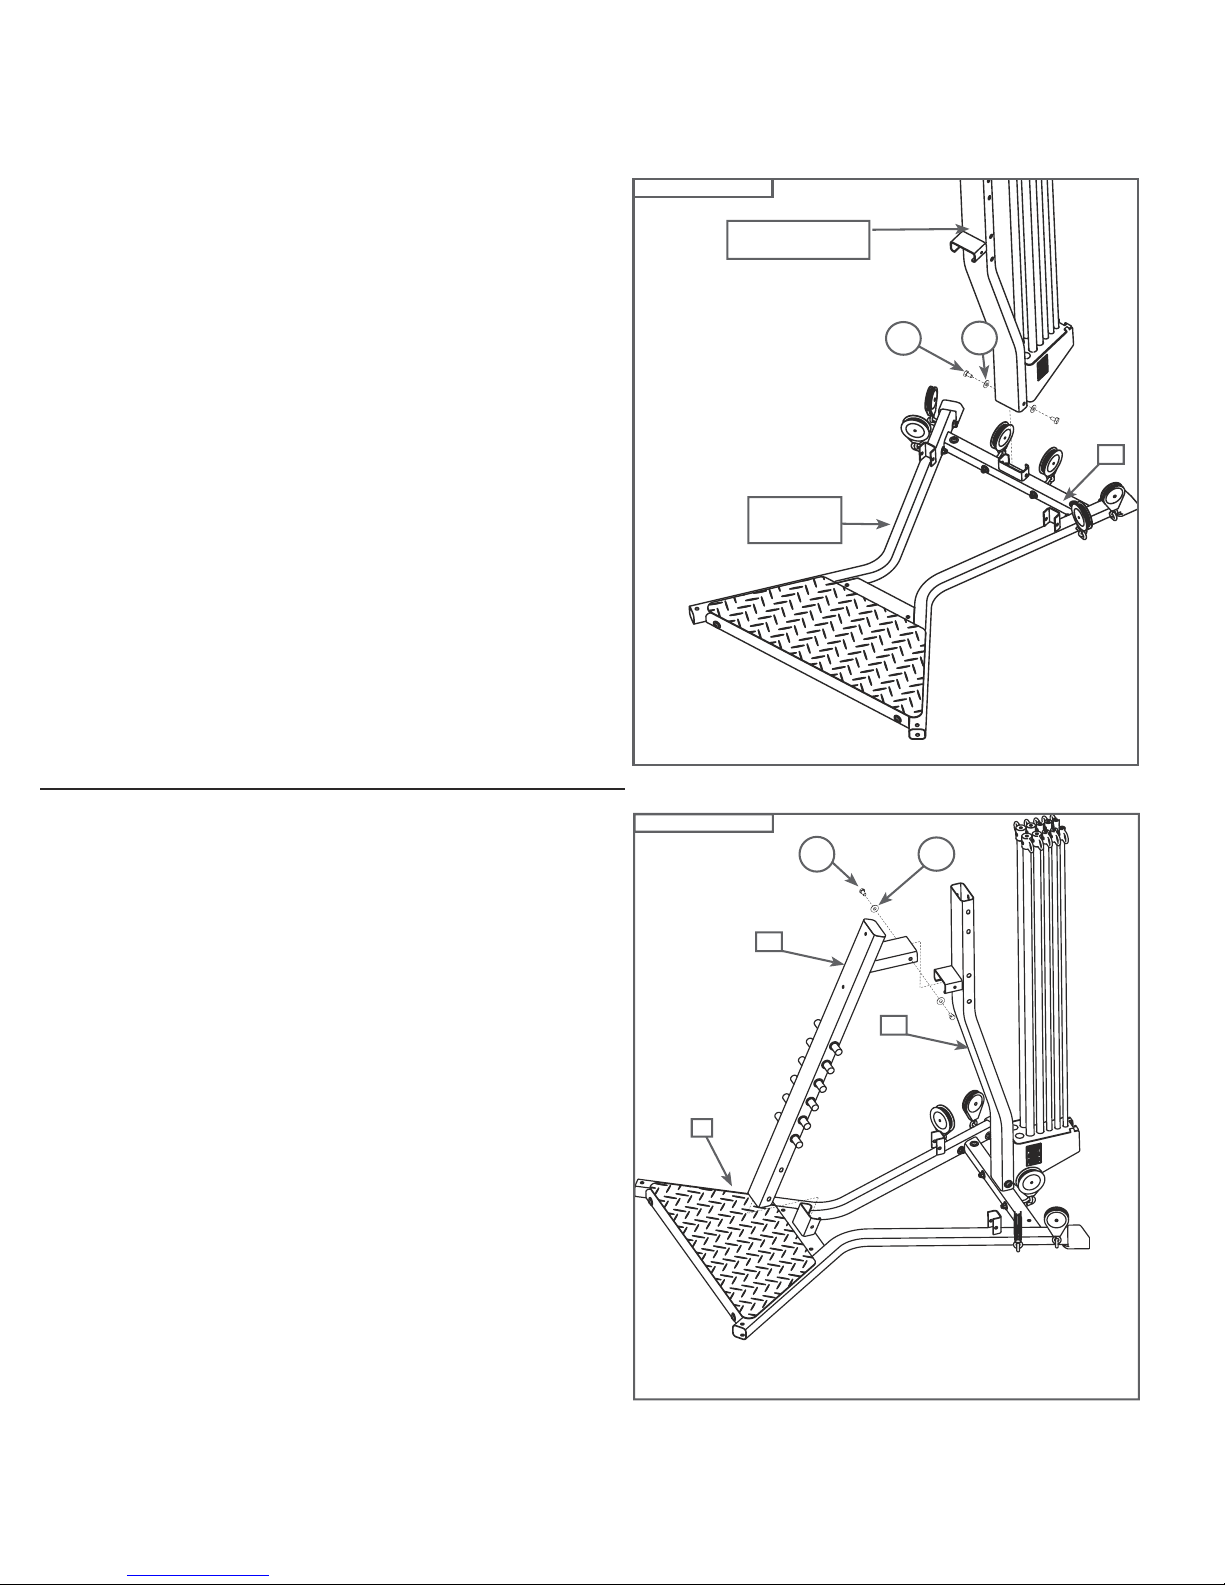
Before you install the Squat Frame Rails, slide the R6
Squat Pulley (Item #34) over the end of the Right Squat
Frame Rail (Item #8), and the L6 Squat Pulley (Item #35)
over the end of the Left Squat Frame Rail (Item #9), as
shown in Figure 5a.
Line up the holes in the brackets on the Right Squat
Frame Rail (Item #8) and Left Squat Frame Rail (Item #9)
with the holes in the Seat Support Rail (Item #7) as shown
in Figure 5.
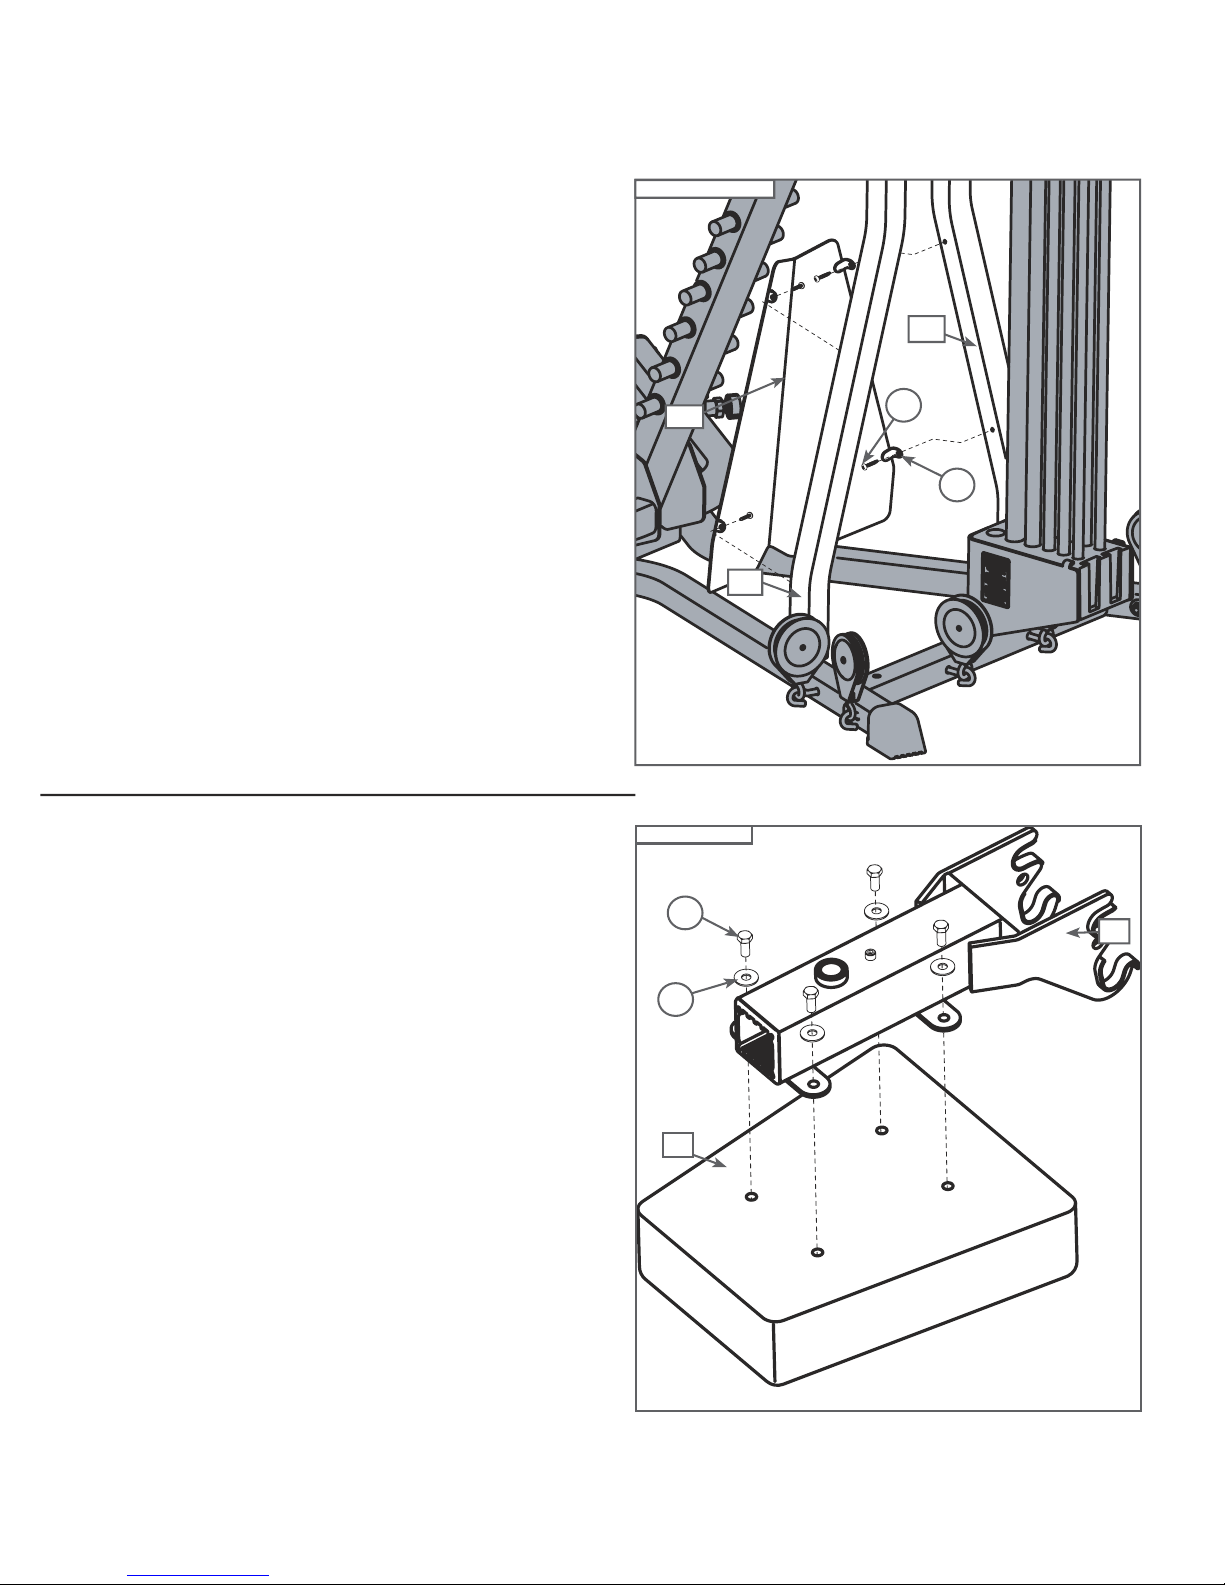
Place (1) 3/8" Washer (Item #O) over the end of (1) 3/8" X
5" Hex Head Bolt (Item #I), and slide the bolt through the
upper bolt hole in the Left Squat Frame Rail, Seat Rail and
Right Squat Frame Rail, as shown in Figure 5. Place (1)
3/8" Washer (Item #O) and (1) 3/8" Nylock Nut (Item #R)
over the end of the bolt to secure it.
Then, place (2) 3/8" Washers (Item #O) over the ends of (2)
3/8" X 3/4" Hex Head Bolts (Item #G) and attach the Squat
Frame Rails more securely by screwing these through the
lower holes in the Squat Frame Rails and Seat Rail.
Next, slide the Right Squat Frame Foot Assembly (Item
#10) into the connectors on the Right Frame Rail (Item #2)
and the Right Squat Frame Rail. Secure the Foot Assembly
using (2) 3/8" X 3/4" Hex Head Bolts (Item #F) and (2) 3/
8" Washers (Item #O) (see Figure 5a).
Repeat this process for the Left Squat Frame Foot Assembly
(Item #11).
Note: You will need to lift the machine to install
the Squat Frame Foot Assemblies.
Tighten all hardware from Step 5 only at this time.
Figure 5
I
R
8
9
7
G
O
Figure 5a
8
9
11
10
35
6
34