This machine can be set various parameters, and the setting method is as below.
In the state of startup, press the “MENU” key on the remote control or on the front panel
to set image setting, function, setting and volume. Press the “MENU” key on the remote
control or on the front panel to select the desired setting, and then press the direction
key on the remote control or on the front panel to set the detailed parameters.
Press “MENU” key and “UP” “DOWN” key to enter into brightness option, press “←”
“→” on the remote control or “CH1” “CH2” on the front panel to adjust the screen
brightness. 0-100 optional. And 50 as default. Press “MENU” key to exit and save
the parameter.
1) Brightness
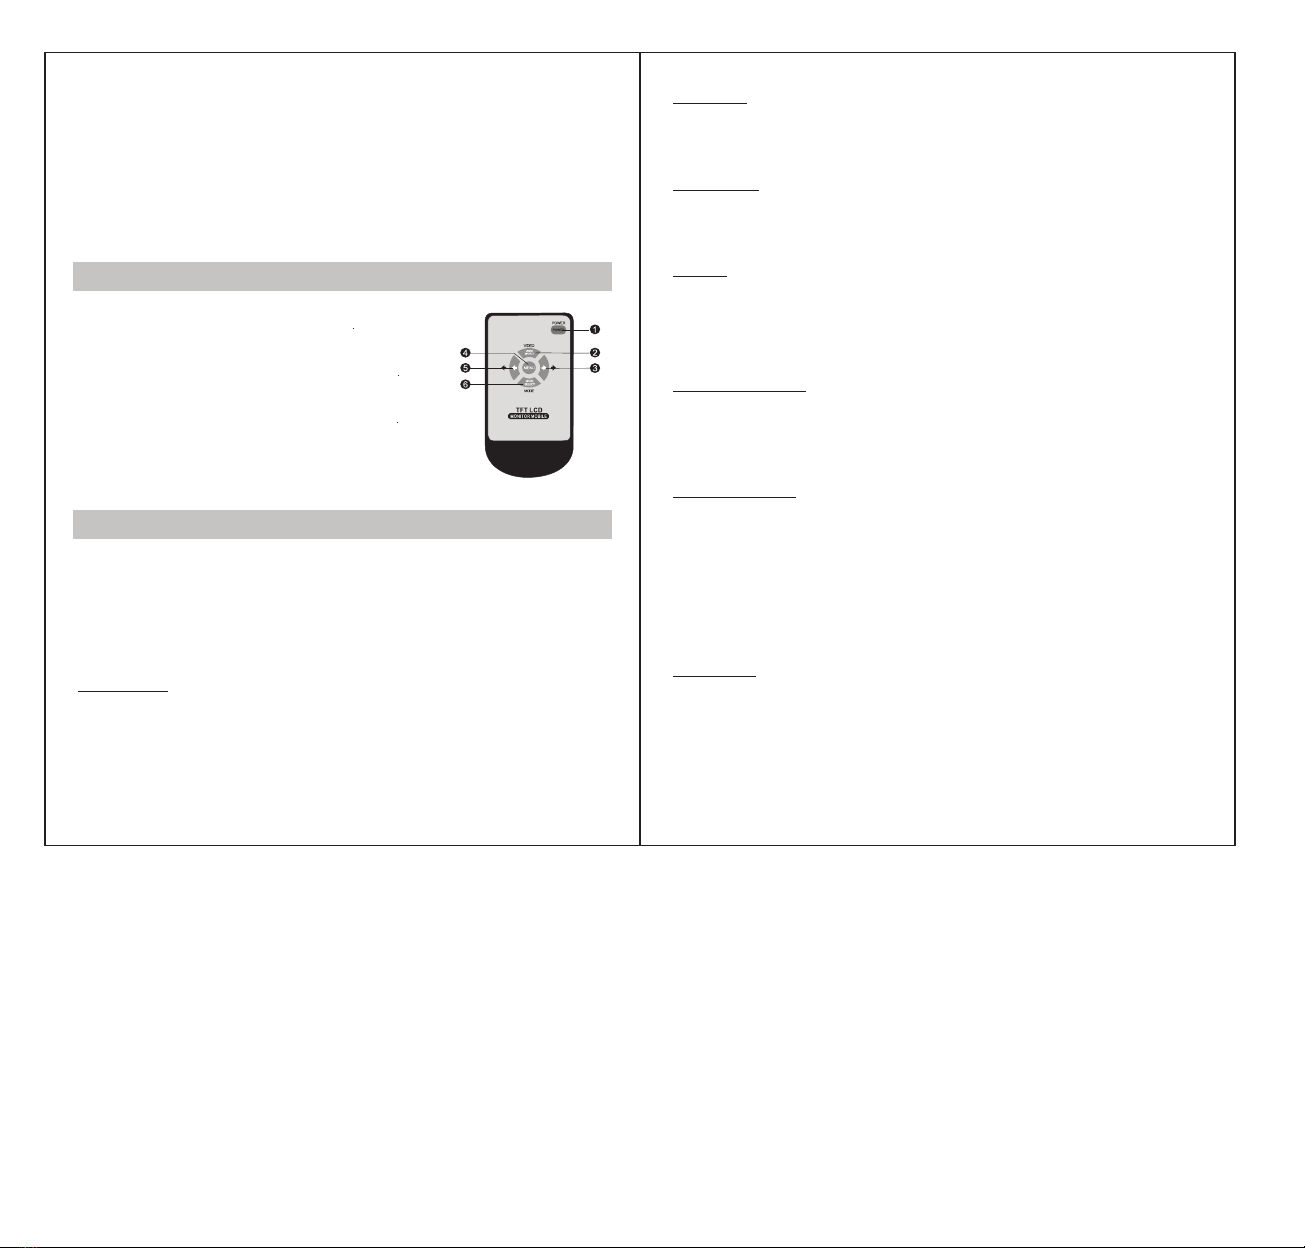
4.Remote Control
5.The Menu Setup Instructions
2) Contrast
Press “MENU” key and “UP” “DOWN” key to enter into contrast option, press “←” “→”
on the remote control or “CH1” “CH2” on the front panel to adjust the screen contrast.
0-100 optional. And 50 as default. Press “MENU” key to exit and save the parameter.
3) Saturation
Press “MENU” key and “UP” “DOWN” key to enter into saturation option, press “←” “→”
on the remote control or “CH1” “CH2” on the front panel to adjust the screen saturation.
0-100 optional. And 50 as default. Press “MENU” key to exit and save the parameter.
4) Reset
Press “MENU” key and “UP” “DOWN” key to enter into reset option, press “←” “→” on
the remote control or “CH1” “CH2” on the front panel to reset the brightness, contrast,
and saturation parameters. Press “MENU” key to exit and save the settings.
3 4
1. Black 14PIN power cable connector
2. Black 4PIN male connector: CH1 video signal input(AHD 1)
3. Black 4PIN male connector: CH2 video signal input(AHD 2)
4. Black 4PIN male connector: CH3 video signal input(AHD 3)
5. Black electronic wire: GND
6. Red or yellow electronic wire: connect to DC 12-24V positive pole
7. Brown electronic wire: trigger to CH1
8. Green electronic wire: trigger to CH2
9. Blue electronic wire: trigger to CH3
1. Power key: short press to turn on or off
2. VIDEO key: CH1, CH2, CH3 video channel
switching, to move up in menu setting
3. Right key: increase volume, increase analog
value in the menu setting
4. MENU key: menu
5. Left key: decrease volume, decrease analog
value in the menu setting
6. MODE key: image mode switching, to move
down in menu setting
Image Setting
Press “MENU” key and “UP” “DOWN” key to enter into parking guideline option (which
can be separately set for each channel), press “←” “→” on the remote control or “CH1”
“CH2” on the front panel to turn on or off the parking guideline. Press “MENU” key to
exit and save the settings. Off as default.
General Setting
1) Parking guideline
2) Reversing delay
Press “MENU” key and “UP” “DOWN” key to enter into reversing delay option (which
can be separately set for each channel), press “←” “→” on the remote control or
“CH1” “CH2” on the front panel to adjust the reversing delay time. Off and 1-10s
optional. If the system is set off, then the monitor will return to the previous state
immediately once finished reversing, and if it is set 2s, then the monitor will return to
the previous state 2s later after finished reversing. Press “MENU” key to exit and save
the settings. Off as default.
System Setting
1) Language
Press “MENU” key and “UP” “DOWN” key to enter into language option, press “←”
“→” on the remote control or “CH1” “CH2” on the front panel to select the desired
language. Press “MENU” key to exit and save the parameter. Simplified Chinese,
Traditional Chinese, English, Japanese, Korean, Russian optional. English as default.