B+B Sensors LogBox RHT User manual

INSTRUCTION MANUAL
LogBox RHT
Temperature and Humidity Data Logger
Technical changes reserved
B+B Thermo-Technik GmbH | Heinrich-Hertz-Str. 4 | D-78166 Donaueschingen
0141 0315-14 07.06.2016 Fon +49 771 83160 | Fax +49 771 831650 | [email protected]om | bb-sensors.com 1 / 18

INSTRUCTION MANUAL
LogBox RHT
Temperature and Humidity Data Logger
Technical changes reserved
B+B Thermo-Technik GmbH | Heinrich-Hertz-Str. 4 | D-78166 Donaueschingen
0141 0315-14 07.06.2016 Fon +49 771 83160 | Fax +49 771 831650 | [email protected]om | bb-sensors.com 2 / 18
Table of contents
1. FOREWORD ................................................................................................................................................................... 3
2. GENERAL INFORMATION............................................................................................................................................... 3
2.1 Labels............................................................................................................................................................................................3
3. SECURITY ADVICE......................................................................................................................................................... 4
4. WASTE AND DISPOSAL ADVICE .................................................................................................................................... 4
5. USAGE ACCORDING TO PURPOSE................................................................................................................................ 4
6. PRODUCT DESCRIPTION ............................................................................................................................................... 4
6.1. Supply voltage...............................................................................................................................................................................4
6.2. Unpacking ......................................................................................................................................................................................4
6.3. Identification..................................................................................................................................................................................5
7. OPERATION ................................................................................................................................................................... 5
7.1. Drivers and software installation.................................................................................................................................................6
7.2. Running LogChart_II.....................................................................................................................................................................7
7.3. Configuring the logger..................................................................................................................................................................7
8. DATATRANSFER AND VISUALISATION........................................................................................................................ 10
8.1. Offloading data............................................................................................................................................................................10
8.2. Visualizing data ...........................................................................................................................................................................10
8.3. Chart view ....................................................................................................................................................................................10
8.4. Sheet view....................................................................................................................................................................................10
8.5. General information sheet..........................................................................................................................................................11
8.6. Exporting data .............................................................................................................................................................................11
9. PDA USER.................................................................................................................................................................... 12
9.1. Accessing the Logger.................................................................................................................................................................12
9.2. Configuring the Logger- Settings ..............................................................................................................................................13
9.3. Downloading data from the Logger...........................................................................................................................................15
9.4. File Visualisation .........................................................................................................................................................................15
9.5. Transferring the data to the desktop.........................................................................................................................................16
10. MOST FREQUENTLY FOUND PROBLEMS .................................................................................................................... 17
11. MAINTENANCE ............................................................................................................................................................ 16
12. QUESTIONS? ............................................................................................................................................................... 17
13. TECHNICAL DATA........................................................................................................................................................ 18

INSTRUCTION MANUAL
LogBox RHT
Temperature and Humidity Data Logger
Technical changes reserved
B+B Thermo-Technik GmbH | Heinrich-Hertz-Str. 4 | D-78166 Donaueschingen
0141 0315-14 07.06.2016 Fon +49 771 83160 | Fax +49 771 831650 | [email protected]om | bb-sensors.com 3 / 18
1. FOREWORD
Dear customer,
We thank you for having purchased the LogBox RHT and are very glad that you decided in favour of a product of B+B Thermo-
Technik GmbH. We hope this product will fully satisfy you and will assist you effectively in your work.
This Device has been developed to be technically highly up-to date. This product has been designed in accordance with the regnant
European and German national directives and rules. For a proper and effective usage of the product the customer shall observe the
following Operating Instructions. In the case that against one’s expectations any troubles occur which you can not resolve yourself,
please contact our service centres or your salesperson. We go after giving you rapid and competent help to minimize the risk of long
time outfalls.
The following operating Instruction is an indispensable part of this Product. It contains important advices for the starting up and
further use of the device.
2. GENERAL INFORMATION
This documentation contains information which must be paid in attention to assure a highly effective and secure use of the supplied
product
Please read through the following instructions and make yourself familiar with the handling of the product before you insert it in your
processes. Keep this document always readily to hand so you can consult it by need.
2.1 Labels
Darstellung
Bedeutung
Hinweis
Advice
It is necessary to read the following advices before beginning the operations.
The used symbols in the manual acts first of all as eye catcher for security
risks. The symbols do not replace the security advices. The text must be read
to the end.
Necessary to observe
This symbol designates important advices and tips that are necessary for the
success a work step. They have to be followed in order to get good results.
Warning sign
Meaning
Warning sign
Meaning
This symbol advises the user of danger for
persons, material or environment. The text
gives information that must be necessarily
followed to avoid any risks
Caution against electromagnetic fields
(BGV A8, GUV-V A8/W12)
Caution against hot surfaces (BGV A8,
GUV-V A8/W26) and hot liquids or
substances
Caution against severe cold
(BGV A8, GUV-V A8/W17)
Caution against liquids and hot substances
Caution against dangerous high electrical
voltage (BGV A8, GUV-V A8/W08)
Caution against dangerous explosive
substances (BGV A8, GUV-V A8/W02)
Caution against dangerous explosive
atmosphere
(BGV A8, GUV-V A8/W21)
Caution against mobile engines (W29)
Caution against moving parts
Electronic waste

INSTRUCTION MANUAL
LogBox RHT
Temperature and Humidity Data Logger
Technical changes reserved
B+B Thermo-Technik GmbH | Heinrich-Hertz-Str. 4 | D-78166 Donaueschingen
0141 0315-14 07.06.2016 Fon +49 771 83160 | Fax +49 771 831650 | [email protected]om | bb-sensors.com 4 / 18
3. SECURITY ADVICE
The B+B Thermo-Technik GmbH assumes no liability for damages occurred through failure to observe these security advices. A
usage non conform to the instructions given in this manual can damage the device
Body and property damages
The use of the measurement system must be restricted to qualified personal.
The system is not adequate for use in atmosphere with explosion danger.
Do not use the system in a high electric or magnetic field area.
Ensuring of product security
The system must be operated only within the limits given in the technical Data
Exposing the system to hot temperatures (higher than the operating temperature) will cause damages in the electronic circuits
and also damage the housing.
4. WASTE AND DISPOSAL ADVICE
Please return the device to B+B Thermo-Technik GmbH after expiration of its lifetime
5. USAGE ACCORDING TO PURPOSE
Please use the product only for the purposes for which it is conceived. In case of doubt, please first contact B+B Thermo-Technik
GmbH
6. PRODUCT DESCRIPTION
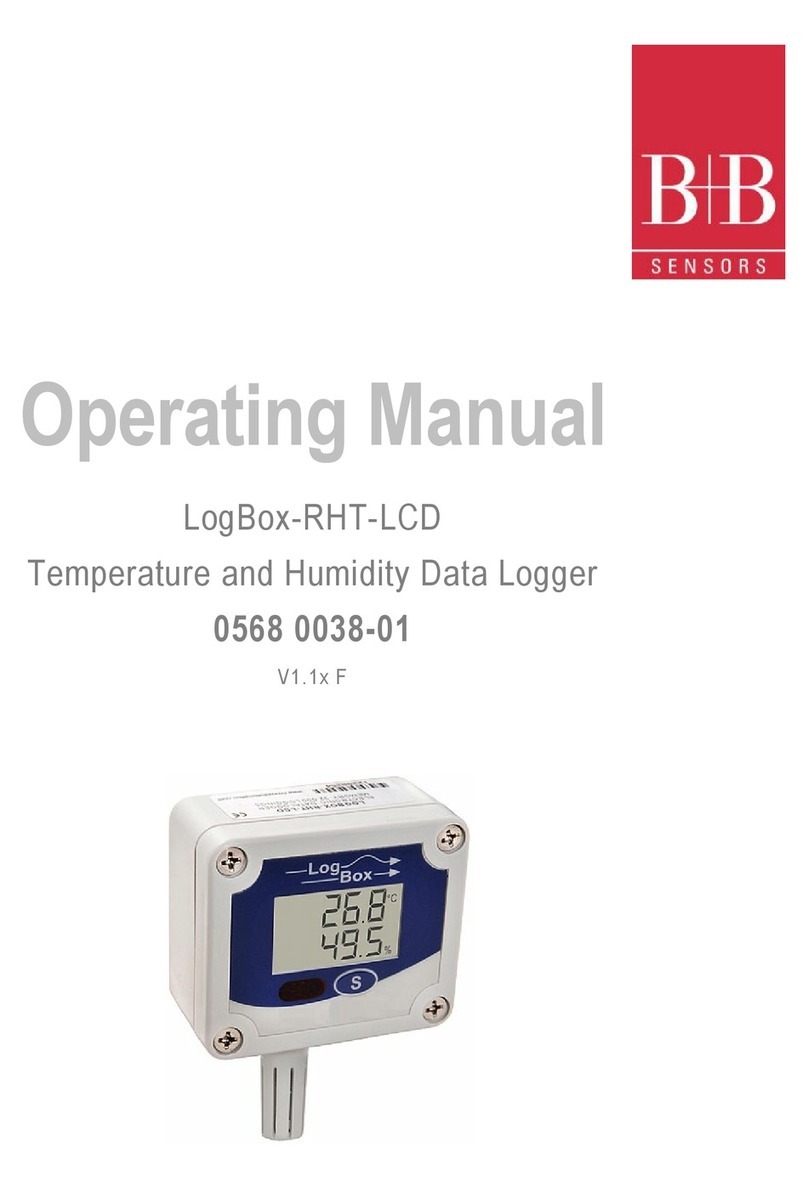
LogBox RHT is a small portable electronic temperature and humidity logger. Its internal sensor measures local environment
temperature humidity and logs the values in an electronic memory. Logged data, or ACQUISITIONS, can be later viewed and
analyzed on a PC where they can be opened in tabular and graph forms.
The logger is supplied with Logchart-II software, which enables to set up the logger operation mode. It is also used for viewing
acquisitions. Other parameters such as end of measurements, logging interval, etc., are easily defined through the LogChart-II software.
Acquisitions can also be exported to be analyzed in other applications, such as spreadsheet programs.
6.1. Supply voltage
The Temperature and humidity Data logger LogBox RHT is a highly autonomic measurement device. It is supplied with a built-in 3.6
V lithium battery (CR2032).
6.2. Unpacking
The following items must be included in the package:
The electronic logger LogBox RHT;
A CD-ROM with the Logchart-II software and a USB driver;
Quick logger operation guide.
The present operating instructions
Optional : a communication interface (upon request)

INSTRUCTION MANUAL
LogBox RHT
Temperature and Humidity Data Logger
Technical changes reserved
B+B Thermo-Technik GmbH | Heinrich-Hertz-Str. 4 | D-78166 Donaueschingen
0141 0315-14 07.06.2016 Fon +49 771 83160 | Fax +49 771 831650 | [email protected]om | bb-sensors.com 5 / 18
6.3. Identification
The identification label is on the logger body. Check if the features described are in accordance with your order.
The following elements are shown in the logger front.
Start/stop button (S)
This button can be configured to start or stop the temperature measurement
process.
IR communication Window
PC - Logger communication area. During download, the communication interface
must be directed towards this window.
Status indicator (LOG)
While in stand-by (not logging) or after a series of measurements, it flashes once
at every four seconds. During logging it flashes twice at every four seconds.
Alarm Indicator (AL)
Warns the user as to alarm conditions. Whenever an alarm situation takes place
it will flash once at every four seconds, until a new configuration is applied to the
logger.
7. OPERATION
It is only possible to operate the logger after the Logchart-II software is installed to a PC, according to the steps described in
Logchart-II Software section of this manual. The communication between logger and PC is performed with the aid of the IR-Link
wand.
Requirements:
A PC system or a Laptop with Windows®2000- or XP
CD-ROM device
A free USB interface
The logger must be “woken up” before communication is attempted. To do so, press the Start/Stop button.
The logger starts flashing the Status Indicator according to its current status:
One flash every four seconds (stand-by) indicates the logger is waiting to start measuring or that a series of measures was
concluded and the logger is waiting for a new command.
Two flashes every four seconds indicate measures ongoing.
The logger operation mode set up is defined in advance by using the LogChart-II software.Each setting must be defined and the
consequences observed. The logger starts and stops logging as defined in settings.
Communication
interface
Alarm
Status
indicator
Start/Stop Button

INSTRUCTION MANUAL
LogBox RHT
Temperature and Humidity Data Logger
Technical changes reserved
B+B Thermo-Technik GmbH | Heinrich-Hertz-Str. 4 | D-78166 Donaueschingen
0141 0315-14 07.06.2016 Fon +49 771 83160 | Fax +49 771 831650 | [email protected]om | bb-sensors.com 6 / 18
7.1. Drivers and software installation
In the Ir-Link3/RS232 model there is a RSR232/Ir communication interface. It must
be connected to the serial port at the PC.
In the Ir-Link3/USB model there is a USB/Ir communication interface, which must
be connected to the available USB port. Windows will request the proper driver
installation, which is found in the CD-ROM that is provided with the logger.
The driver installation steps may vary according to the machine, even for the same
version of an operating system. The following screenshots and steps are only to
provide guidance.
1. Insert the CD shipped with the logger in the CD-ROM drive.
2. Connect the communication interface IrLink-3 to the PC USB port.
Windows® will acknowledge the presence of new hardware and a few
seconds later it will start the driver installation process.
3. The “found new hardware wizard” will be displayed, and you will be asked
if you want to install the driver from the Windows Update website. Select
“No, not this time”, and then click Next.
4. Select “Install from a list or specific location (Advanced)” and click “Next”.
5. Select “Search for the best driver in these locations” and check “Search
removable media”. Click “Next”. If installation files are not in a CD, check
“Include this location in the search” and show the file path.
6. If a prompt warns you that it does not support Windows® XP or that
signature verification failed, click “Continue anyway”.
7. The interface driver files will be copied to the computer and after a few
seconds a screen is displayed informing you that the software installation
has been concluded. Click “Finish”.
8. In some situations, the steps described above may be repeated again.
Follow the same procedures.
In later uses of the interface, Windows® may require the driver installation again. In
this case, the same installation wizard will be displayed, and you will have to select
the option “Install software automatically (recommended), as the driver may already
be in the computer.
Logchart-II Software installation:
Insert the supplied CD-ROM in the CD-drive of the PCs/Laptop.
The software installation wizard will start automatically. If it does not, please run the LC_II_Setup.exe program provided from
your CD drive. To do so please follow the steps below:
From the start menu of Windows run Windows Explorer. Choose the CD drive
Double click on the icon LC_II_Setup.exe to run the setup program.
Follow the steps described in the Setup wizard

INSTRUCTION MANUAL
LogBox RHT
Temperature and Humidity Data Logger
Technical changes reserved
B+B Thermo-Technik GmbH | Heinrich-Hertz-Str. 4 | D-78166 Donaueschingen
0141 0315-14 07.06.2016 Fon +49 771 83160 | Fax +49 771 831650 | [email protected]om | bb-sensors.com 7 / 18
7.2. Running LogChart_II
When you open Logchart-II the following main window is displayed
Next, select the serial port that the communication interface will use in the “Port” menu.
If using the serial port check which serial is available. Usually COM2 is free, once the mouse uses COM1. In the case of Ir-
Link3/USB choose USB port. The chosen port will be chosen by default next times the LogChart II is initiated. When a valid port is
selected, the icons below are highlighted.
7.3. Configuring the logger
Make sure the communication interface is connected to the PC port selected. The interface must be constantly directed towards the
communication window on front part of the logger at a maximum distance of 0.5 m.
The logger must be first “woken up” by pressing once the Start/Stop (S) button on its front side.
After the serial port is selected, click the
Displays the configuration
setup dialog box
Stops any running
measurements
Press this button to download the
actual contents of the logger’s
memory
Press to view online the 10 last
logged values
Logger
Interface

INSTRUCTION MANUAL
LogBox RHT
Temperature and Humidity Data Logger
Technical changes reserved
B+B Thermo-Technik GmbH | Heinrich-Hertz-Str. 4 | D-78166 Donaueschingen
0141 0315-14 07.06.2016 Fon +49 771 83160 | Fax +49 771 831650 | [email protected]om | bb-sensors.com 8 / 18
“GO” button: The following Parameters Configuration dialog box is then displayed
In this dialog box the user can define the logger operation mode
and also obtains general information about the device.
The different Fields and their meaning are listed in the following:
Title
In this field, the user identifies the logger by assigning it a name.
General information
Area with information about the logger, such as Model, Serial Number, Logger
Date/Time, PC Date/Time, firmware version, memory capacity and number of
acquisitions stored in memory, etc. In this field, time is constantly updated while the
communication between logger and computer is taking place
Acquisition
Register card where a series of parameters that define the acquisition process are
determined.
Period
Defines the interval between readings: The minimum interval is (1) one second and
the maximum is (18) eighteen hours.
Note: When the type of value logged is Average, Maximum or Minimum values
(see Value), the minimum interval is 10 seconds.
Daily Operations
Here the user defines the time at which daily logs will take place
Estimated time
In this field, the logger informs the user how long it will take to occupy the full
memory, in the conditions set up during configuration.
Start of readings
Readings can be started in one of five different modes
Immediately
Start as soon as set up is ready and sent (OK) to the logger.
Start via Palm
Start with a command sent via PDA, which runs the software Log Chart Palm-OS.
For further information, see PDA User section in this guide.
Date
Readings start at predefined date and time.
Via Start/ Stop
To start the measurement press the Start/Stop button, in the frontal part of the
logger, for three seconds. To stop the measurement press again the Start/Stop
button for three seconds.
Set point
Acquisitions start when a temperature set point is reached. In this option, the set
point value is defined in the Channels register card, where the Alarm parameter is
replaced by set point.
Stop loggings
Defines the event that initiates the end of measurement. The following options are
possible

INSTRUCTION MANUAL
LogBox RHT
Temperature and Humidity Data Logger
Technical changes reserved
B+B Thermo-Technik GmbH | Heinrich-Hertz-Str. 4 | D-78166 Donaueschingen
0141 0315-14 07.06.2016 Fon +49 771 83160 | Fax +49 771 831650 | [email protected]om | bb-sensors.com 9 / 18
Full Memory
Measurement is stopped when the memory is full (32 000 values)
Wrap around
Readings never stop, The oldest records are replaced with newest ones as the
number of readings exceeds the memory capacity.
After
The logger stops readings after a number of readings defined in the corresponding
edit field
Date
Readings stop at user-predefined date and time. In case the logger memory
capacity is reached before the date defined, readings are also stopped
Channels
Register Card with parameters related to temperature measurement. There are two
separate Channels: Channel 1 for Temperature and Channel 2 for Humidity
Unit
Defines the unit of the Temperature (channel 1) value measured: ºC or ºF and %
RH only for the humidity (channel 2)
Value
Defines how the value measured will be registered. 3 Options are available:
Instantaneous
The logger measures the temperature once at the end of the predefined
measurement interval (Period) and save the measured value in the internal
memory. The minimum interval between measurements is 1 seconds.
Average
The Logger takes 10 equidistant measurements within the predefined
measurement interval (Period), build the average of these ten values and store the
result in the internal memory. The minimum interval between measurements is 10
seconds.
Maximum
The Logger takes 10 equidistant measurements within the predefined
measurement interval (Period) and stores the highest value of them in the internal
memory. The minimum interval between measurements is 10 seconds.
Minimum
The Logger takes 10 equidistant measurements within the predefined
measurement interval (Period), and stores the lowest value of them in the internal
memory. The minimum interval between measurements is 10 seconds.
Offset
Gives the user the possibility to automatically correct the value logged.
Alarm
Defines limit values that, when exceeded (high) or undershot (low), characterize an
alarm condition. Alarm events are informed to the user through a flashing mode of
the Alarm Indicator.
Input
Parameter only available in Channel 2 (humidity). It allows disabling of humidity
measurements, hence, saving all memory capacity for temperature measurements.
After filling all the fields select OK and settings will be sent to the logger
Note: After clicking the OK button all previous settings and previous data logged are lost.

INSTRUCTION MANUAL
LogBox RHT
Temperature and Humidity Data Logger
Technical changes reserved
B+B Thermo-Technik GmbH | Heinrich-Hertz-Str. 4 | D-78166 Donaueschingen
0141 0315-14 07.06.2016 Fon +49 771 83160 | Fax +49 771 831650 | [email protected]om | bb-sensors.com 10 / 18
8. DATATRANSFER AND VISUALISATION
Data collected are sent from logger to PC. Data can be collected any time, at the end of the acquisition process or while they are
being acquired. If data collection takes place during the acquisition process, the process will not be interrupted.
8.1. Offloading data
Data offload is accomplished by clicking the button Offload Data:
During data transfer, a status bar indicates remaining data to be transferred. Data offloading time is proportional to the number of
readings logged (40 Seconds for 16 000 values).
8.2. Visualizing data
At the end of values transfer, data are automatically displayed in a graphical form.
8.3. Chart view
It is possible to select a region of the chart to zoom in. Zoom commands can be accessed through the View menu or through zoom
icons from the task bar.
It is also possible to select an area from the chart to zoom in by clicking and dragging the mouse, thus creating a zoom region
starting from the upper left corner on the chart area.
The graphic curves can be vertically dragged with a right-click and dragging the mouse up and down
8.4. Sheet view
To display measurements in a tabular form, press the icon Table View:
Values are presented in a tabular form, listing the measurement time and value.

INSTRUCTION MANUAL
LogBox RHT
Temperature and Humidity Data Logger
Technical changes reserved
B+B Thermo-Technik GmbH | Heinrich-Hertz-Str. 4 | D-78166 Donaueschingen
0141 0315-14 07.06.2016 Fon +49 771 83160 | Fax +49 771 831650 | [email protected]om | bb-sensors.com 11 / 18
8.5. General information sheet
This window shows some information about the logger whose data were just read and its configuration. The screen can be displayed
by pressing the Parameter Viewing icon:
8.6. Exporting data
Logged data can be exported to different file formats, for further analysis. To export, access File/Export or click the icon:
and store/open the data in the desired format.
.

INSTRUCTION MANUAL
LogBox RHT
Temperature and Humidity Data Logger
Technical changes reserved
B+B Thermo-Technik GmbH | Heinrich-Hertz-Str. 4 | D-78166 Donaueschingen
0141 0315-14 07.06.2016 Fon +49 771 83160 | Fax +49 771 831650 | [email protected]om | bb-sensors.com 12 / 18
9. PDA USER
It is possible to set up the logger and collect acquired data with a PDA that supports the Palm-OS system. The application LogChart
Palm-OS is shipped with the logger. The stalled in the PDA through a HotSync process (data synchronization between PDA and
PC). The user needs the Palm Desktop and the LogChart II software installed in his machine. It is recommended to execute the
Palm HotSync before installing the LogChart PalmOS.
To install the software, insert the disk in the driver, click on Start and Execute in the windows task bar. Type d:\LCP_Setup, where d:
is the disk drive unit. Press “OK”. The installation wizard will guide you through the installation process.
Executing a new HotSync will install the LogChart PalmOs software in the PDA. The LogChart icon will be added to the PDA home
screen.
Starting the LogChart PalmOS application will display the Recorded Data on the PDA screen, where it is possible to access the
logger to change settings and offload data, as well as to access recorded data.
9.1. Accessing the Logger
To have communication between the logger and the PDA established, the user must align the PDA infrared wand to the logger
communication window, run the LogChart Palm-OS software, and press Search Device in the Recorded Data screen. When the
PDA finds the logger, the Monitoring screen will be displayed. The screen displays values of variables measured, configuration
information and current logger status.
Buttons are assigned the following functions:
Search
It allows "searching" for another logger or reconnect communication lost for any
reason. After finding a logger, the PDA displays a new Monitoring screen.
Download
Offload logged data. Download can be partial and it does not interfere in the
ongoing measurement process
More Info
Displays further information on the connected logger, such as model, serial number,
version and memory capacity
Settings
Accesses the Settings screen, which allows to modify the logger configuration.
Data
Displays the Recorded Data screen listing all the processes stored and processed

INSTRUCTION MANUAL
LogBox RHT
Temperature and Humidity Data Logger
Technical changes reserved
B+B Thermo-Technik GmbH | Heinrich-Hertz-Str. 4 | D-78166 Donaueschingen
0141 0315-14 07.06.2016 Fon +49 771 83160 | Fax +49 771 831650 | [email protected]om | bb-sensors.com 13 / 18
Base
in the PDA data base.
9.2. Configuring the Logger- Settings
During configuration, the logger and the PDA ports must be aligned. Press Settings in the Monitoring screen. The screen Settings
is opened and provides the required parameters for configuring the logger.
The parameters to be defined are:
Title: Name of the process.
Input: Enables the user to select the temperature unit.
Start (start of acquisitions): Defines the measurement start mode. Options are:
Immediately: The logger starts logging as soon as configuration is sent to the logger.
date/time: Start in defined data and time, always after current time. It is possible to perform daily repetitions. If this option
is selected, a new box to define the stop logging time is displayed.
<Start> Button: Press the Start_Now button from the Monitoring screen to start logging. The PDA must be turned towards the
logger.
Set point value: Measurements start when a temperature set point is reached. With this option it is also possible to start
measurements above (log Above) or below (log Below) a temperature set point (channel 1). This option is not
valid for alarms that have already been set up.
TagTemp button: Starts when the Start/Stop button at the frontal side of the logger is pressed.
Stop: Defines the measurements stop mode: Options are:
Full memory: Loggings can be stored up to the logger full memory capacity is reached.
Wrap around: Logging never stops. When the logger maximum memory capacity is reached, oldest records are overwritten
by newest data.

INSTRUCTION MANUAL
LogBox RHT
Temperature and Humidity Data Logger
Technical changes reserved
B+B Thermo-Technik GmbH | Heinrich-Hertz-Str. 4 | D-78166 Donaueschingen
0141 0315-14 07.06.2016 Fon +49 771 83160 | Fax +49 771 831650 | [email protected]om | bb-sensors.com 14 / 18
After loggings: The logging will stop after the pre-defined number of readings has been reached.
By date/time: Logging is stopped on user-defined date and time
Interval: Defines the interval between readings: hour, minutes and seconds. When the logging mode is set to the
Instantaneous the minimum interval is 1 second. For maximum and minimum values, the minimum interval is 10 seconds in
both models.
Misc: Shows the Logging Mode parameter that defines how measured value will be logged. Options are:
Instantaneous: The value logged will be exactly the value measured at each interval. Measurement is taken at the end of the
defined interval. The minimum interval between measurements is 1 second.
Average The Logger takes 10 equidistant measurements within the predefined measurement interval (Period), build the
average of these ten values and store the result in the internal memory. The minimum interval between
measurements is 10 seconds
Minimum: The value logged will be the minimum value found within ten consecutives measurements taken within an
interval. The minimum interval between measurements is 10 second.
Maximum: The value logged will be the maximum value found within ten consecutives measurements taken within an
interval. The minimum interval between measurements is 10 second.
Alarms: Enables an alarm that is triggered according to user defined parameters. Values shown in the temperature unit
selected.
Clocks: Provides access to Logger and PDA clocks. When a new configuration is sent to the logger, clocks are
updated.
Offset: allows fine offset adjustment on the measured value. The Reset button clears changes made and the logged
values are the measured values again.
Click Apply to send this configuration to the Logger, returning to the Monitoring screen. Sending a new configuration implies the
exclusion of all data collected present in the logger memory

INSTRUCTION MANUAL
LogBox RHT
Temperature and Humidity Data Logger
Technical changes reserved
B+B Thermo-Technik GmbH | Heinrich-Hertz-Str. 4 | D-78166 Donaueschingen
0141 0315-14 07.06.2016 Fon +49 771 83160 | Fax +49 771 831650 | [email protected]om | bb-sensors.com 15 / 18
9.3. Downloading data from the Logger
In the Monitoring screen, the Download button performs the transfer of the data from de LogBox to the PDA. Download can be partial
and it does not interfere in the ongoing acquisition process. The data base of loggings is displayed in the Recorded Data screen,
identified with the name assigned to the process (Data Title) and the date it was downloaded. Should the PDA batteries be
discharged, all readings will be lost.
9.4. File Visualisation
The Recorded Data screen lists the data base logged and stored in the PDA. To access data, select the desired data base and press
Details. The Recorded Data Details screen shows several information about the data base. View Data shows in table format the
logged values and the date and time they were performed. Press Delete to erase the selected data base.

INSTRUCTION MANUAL
LogBox RHT
Temperature and Humidity Data Logger
Technical changes reserved
B+B Thermo-Technik GmbH | Heinrich-Hertz-Str. 4 | D-78166 Donaueschingen
0141 0315-14 07.06.2016 Fon +49 771 83160 | Fax +49 771 831650 | [email protected]om | bb-sensors.com 16 / 18
9.5. Transferring the data to the desktop
HotSync of data stored in a PDA with the Desktop is performed through a conduit installed together with the LogChart Palm-OS. The
conduit converts the data collected by the LogChart Palm-OS to a file compatible with the LogChart-II software.
To access the conduit options, the HotSync Manager software must be active. Click on the HotSync Manager in the Windows
taskbar. Select in the drop-down menu the option Custom. Select Novus LogChart Conduit and click Change. The following window
will be exhibited:
Handheld overwrites Desktop: LogChart Palm-OS files are transferred to the Desktop.
Save in: Choose a directory to record files generated during data synchronization.
Leave Data on Palm: Option to keep or delete the data in the PDA after HotSync.
Do nothing: Data synchronization will not be performed;
Set as default: The same settings will be used in the next HotSync
10. MOST FREQUENTLY FOUND PROBLEMS
The LED is not flashing: The LED flashing light is intentionally weak, and it can be difficult to see in clear environments. Be sure it
is really not flashing
Communication with the logger fails:
Make sure the COM port is correctly selected and there is no other programs using the same port during the
communication attempts.
Make sure there is no physical obstacle blocking the IR signal.
Make sure the cable is well connected to the PC.
Make sure the port selected does not present any problem.
11. MAINTENANCE
The housing can be cleaned with a wet cloth. Do not use chemical solvents. With the exception of exchanging empty batteries the
logger is widely maintenance free

INSTRUCTION MANUAL
LogBox RHT
Temperature and Humidity Data Logger
Technical changes reserved
B+B Thermo-Technik GmbH | Heinrich-Hertz-Str. 4 | D-78166 Donaueschingen
0141 0315-14 07.06.2016 Fon +49 771 83160 | Fax +49 771 831650 | [email protected]om | bb-sensors.com 17 / 18
12. QUESTIONS?
If you still have other questions concerning this or other product of B+B Thermo-Technik GmbH, contact us at:
B+B Thermo-Technik GmbH
Heinrich-Hertz-Straße 4
78166 Donaueschingen
Phone: +49 771 83160
Fax: +49 771 831650
www.bb-sensors.com
Your partner for temperature
B+B Thermo-Technik GmbH

INSTRUCTION MANUAL
LogBox RHT
Temperature and Humidity Data Logger
Technical changes reserved
B+B Thermo-Technik GmbH | Heinrich-Hertz-Str. 4 | D-78166 Donaueschingen
0141 0315-14 07.06.2016 Fon +49 771 83160 | Fax +49 771 831650 | [email protected]om | bb-sensors.com 18 / 18
13. TECHNICAL DATA
Features
Values
Measurement Range
Temperature: –40.0 °C to 80.0 °C.
Humidity 0 to 100 % RH
Accuracy
See figure below.
Measurement resolution
°C
0,1 % RH
Memory capacity
32 000 (32 K) logs
Measurement Interval
1 second min. 18 hours max.
Supply
3.6 V lithium battery (1/ 2 AA), built-in
Estimated autonomy
Higher than 1 year, with weekly data reading. More frequent logged
data readings may shorten battery life.
Operating temperature
From -20°C to 80°C
Case / Body
Polycarbonate
Protection
Suitable for products with protection level IP65. (excepting the
Sensor Head)
Dimensions
60 x 70 x 35 mm
Logger-PC data transfer time
According to the number of logs. 40 seconds for 16,000 logs.
PC Interface
Ir/USB or Ir/Serial
LogChart-ll Software Umgebung
Windows 95, 98, NT, 2000 and XP.
Menus in Portugiesisch, English oder Spanisch.
Einstellungen, Datentransfer und Anzeige auf dem Bildschirm
0568 0038
Data Logger LogBox RHT with internal temperature (Pt100) and
humidity sensors. Up to 32 000 values memory capacity. Operating
Temperature -40°C …80 °C,
0568 0036
IrLink 3infra red communication interface with USB Connector and
LogChart II software. To use with TagTemp and LogBox serie Data
loggers
CE-conformance
2014/30/EU
Electromagnetic compatibility
EN 61326-1
Temperature accuracy
Humidity accuracy
The technical information given in this documentation has been controlled very carefully. Their aim is to inform the customer about the product and its
possible applications and should not be taken as an insurance of any properties. The user shall examine this information relatively to the intended
application. Trademark rights of third persons has to be respected
Edited 23.01.2009. This datasheet replaces all previous editions.
Table of contents
Other B+B Sensors Data Logger manuals
