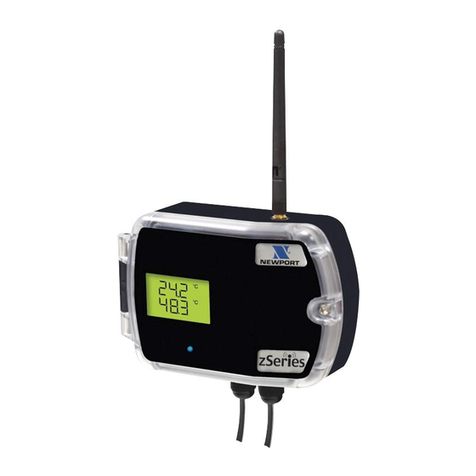
B+B SmartWorx Wzzard WSD2C31010 User manual

Wzzard™ Mesh Wireless Sensors
Intelligent Edge Nodes | Wireless Sensing Platform
USER MANUAL

Wzzard™ Sensor Edge Nodes
2
Advantech B+B SmartWorx - Americas
707 Dayton Road
Ottawa, IL 61350 USA
Phone (815) 433-5100
Fax (815) 433-5105
Advantech B+B SmartWorx - European Headquarters
Westlink Commercial Park
Oranmore, Co. Galway, Ireland
Phone +353 91-792444
Fax +353 91-792445
www.advantech-bb.com
support@advantech-bb.com
Documentation Number: Wzzard-Ind&Comm_r5_0518m

Wzzard™ Sensor Edge Nodes
3
CONTENTS
WARRANTY .................................................................................................................................................. 5
ABOUT THE WZZARD SENSING PLATFORM ........................................................................................... 6
Wireless Connectivity Where You Need It ............................................................................................. 6
Secure, Reliable, Highly Scalable Wireless Networking........................................................................ 6
Easy Configuration and Installation ....................................................................................................... 6
Contents of Packages ............................................................................................................................... 7
Wzzard™ Industrial Node - model package includes: ........................................................................... 7
Wzzard Commercial Node - model package includes: .......................................................................... 7
HARDWARE INSTALLATION....................................................................................................................... 8
Connecting Your Sensor to Wzzard Industrial Node Models .................................................................... 8
Conduit Node Models: ........................................................................................................................... 8
Industrial Node With M12 Connector & M12 Accessory Cable ............................................................. 9
Mounting The Node ................................................................................................................................. 10
Putting Node in Deep Sleep .................................................................................................................... 11
Restoring Node to Factory Default ............................................................................................................ 11
Battery Replacement ............................................................................................................................... 11
Connecting Your Sensor to Wzzard™ Commercial Node Model............................................................ 13
MOunting Options – Commercial Node ................................................................................................... 13
Adhesive Strip Mounting ...................................................................................................................... 13
Mounting Bracket/Plate ........................................................................................................................ 14
Zip Tie Mounting .................................................................................................................................. 14
Putting Node in Deep Sleep .................................................................................................................... 14
Restoring Node to Factory Default .......................................................................................................... 14
CONFIGURING AND MANAGING WZZARD MESH WIRELESS SENSORS ........................................... 15
CREATE AND LOCK THE NETWORK ................................................................................................... 16
CONFIGURE THE GATEWAY’s MESH INTERFACE ............................................................................ 18
NODE Configuration ................................................................................................................................ 20
EVENT DETECTION AND TRIGGER CONFIGURATION ..................................................................... 21
ANALOG INPUT CONFIGURATION ...................................................................................................... 24
DIGITAL INPUT CONFIGURATION ....................................................................................................... 25
DIGITAL OUTPUT CONFIGURATION ................................................................................................... 26
TEMPERATURE INPUT CONFIGURATION .......................................................................................... 27
HUMIDITY INPUT CONFIGURATION .................................................................................................... 27
COPYING NODE CONFIGURATIONS ................................................................................................... 27
NETWORK DESIGN AND TROUBLESHOOTING ..................................................................................... 29
NETWORK PHYSICAL LAYOUT ............................................................................................................ 29

Wzzard™ Sensor Edge Nodes
4
GATEWAY/NETWORK LEVEL TROUBLESHOOTING ......................................................................... 30
NODE LEVEL TROUBLESHOOTING ..................................................................................................... 30
I/O TROUBLESHOOTING ....................................................................................................................... 32
SPECIFICATIONS FOR WZZARD MESH WIRELESS SENSORS ........................................................... 33
Industrial Node Models ............................................................................................................................ 33
Commercial Node Model ......................................................................................................................... 35
GENERAL SPECIFICATIONS – ALL MODELS – INDUSTRIAL & COMMERCIAL ................................... 36
RADIO SPECIFICATIONS – ALL MODELS – INDUSTRIAL & COMMERCIAL ........................................ 37
MECHANICAL DRAWINGS ........................................................................................................................ 38
Wzzard Industrial Node Models .............................................................................................................. 38
Wzzard Commercial Node Models .......................................................................................................... 38
MODEL NUMBERS .................................................................................................................................... 39
Wzzard Mesh Wireless Sensors – Industrial Nodes ............................................................................ 39
Wzzard Mesh Wireless Sensors – Commercial Nodes ....................................................................... 39
DECLARATION OF COMPLIANCE ............................................................................................................ 40
DECLARATION OF CONFORMITY - CE ................................................................................................... 42
ADVANTECH B+B SMARTWORX - TECHNICAL SUPPORT ................................................................... 44

Wzzard™ Sensor Edge Nodes
5
WARRANTY
Advantech B+B SmartWorx warrants to the original end-user purchaser that this product, EXCLUSIVE OF
SOFTWARE, shall be free from defects in materials and workmanship under normal and proper use in
accordance with Advantech B+B SmartWorx' instructions and directions for a period of six (6) years after
the original date of purchase. This warranty is subject to the limitations set forth below.
At its option, Advantech B+B SmartWorx will repair or replace, at no charge, the product which proves to
be defective within such warranty period. This limited warranty shall not apply if the Advantech B+B
SmartWorx product has been damaged by unreasonable use, accident, negligence, service or
modification by anyone other than an authorized Advantech B+B SmartWorx Service Technician or by
any other causes unrelated to defective materials or workmanship. Any replaced or repaired products or
parts carry a ninety (90) day warranty or the remainder of the initial warranty period, whichever is longer.
To receive in-warranty service, the defective product must be received at Advantech B+B SmartWorx no
later than the end of the warranty period. The product must be accompanied by proof of purchase,
satisfactory to Advantech B+B SmartWorx, denoting product serial number and purchase date, a written
description of the defect and a Return Merchandise Authorization (RMA) number issued by Advantech
B+B SmartWorx. No products will be accepted by Advantech B+B SmartWorx that do not have an RMA
number. For an RMA number, contact Advantech B+B SmartWorx at PHONE: (800) 624-1070 (in the
U.S.A. and Canada) or (949) 465-3000 or FAX: (949) 465-3020. The end-user shall return the defective
product to Advantech B+B SmartWorx, freight, customs and handling charges prepaid. End-user agrees
to accept all liability for loss of or damages to the returned product during shipment. Advantech B+B
SmartWorx shall repair or replace the returned product, at its option, and return the repaired or new
product to the end-user, freight prepaid, via method to be determined by Advantech B+B SmartWorx.
Advantech B+B SmartWorx shall not be liable for any costs of procurement of substitute goods, loss of
profits, or any incidental, consequential, and/or special damages of any kind resulting from a breach of
any applicable express or implied warranty, breach of any obligation arising from breach of warranty, or
otherwise with respect to the manufacture and sale of any Advantech B+B SmartWorx product, whether
or not Advantech B+B SmartWorx has been advised of the possibility of such loss or damage.
EXCEPT FOR THE EXPRESS WARRANTY SET FORTH ABOVE, ADVANTECH B+B SMARTWORX
MAKES NO OTHER WARRANTIES, WHETHER EXPRESS OR IMPLIED, WITH RESPECT TO THIS
ADVANTECH B+B SMARTWORX PRODUCT, INCLUDING WITHOUT LIMITATION ANY SOFTWARE
ASSOCIATED OR INCLUDED. ADVANTECH B+B SMARTWORX SHALL DISREGARD AND NOT BE
BOUND BY ANY REPRESENTATIONS OR WARRANTIES MADE BY ANY OTHER PERSON,
INCLUDING EMPLOYEES, DISTRIBUTORS, RESELLERS OR DEALERS OF ADVANTECH B+B
SMARTWORX, WHICH ARE INCONSISTENT WITH THE WARRANTY SET FORTH ABOVE. ALL
IMPLIED WARRANTIES INCLUDING THOSE OF MERCHANTABILITY AND FITNESS FOR A
PARTICULAR PURPOSE ARE HEREBY LIMITED TO THE DURATION OF THE EXPRESS
WARRANTY STATED ABOVE.
Every reasonable effort has been made to ensure that Advantech B+B SmartWorx product manuals and
promotional materials accurately describe Advantech B+B SmartWorx product specifications and
capabilities at the time of publication. However, because of ongoing improvements and updating of
Advantech B+B SmartWorx products, Advantech B+B SmartWorx cannot guarantee the accuracy of
printed materials after the date of publication and disclaims liability for changes, errors or omissions.

Wzzard™ Sensor Edge Nodes
6
ABOUT THE WZZARD SENSING PLATFORM
WIRELESS CONNECTIVITY WHERE YOU NEED IT
The Wzzard™ Mesh intelligent wireless sensor platform makes it quick and easy to connect sensors and
communicate their data to your application, on your network or on the Internet, for visualization, analytics
or integration into business applications.
The Wzzard Mesh platform connects to a vast range of industry-standard sensors. It uses Wzzard Mesh
Wireless Sensor nodes and a wireless SmartMesh IP network to transmit intelligent sensor data to the
SmartSwarm 342 Ethernet Gateway. The gateway can connect to the Internet via wired connections or
the cellular data network.
Wzzard Mesh Wireless Sensors accommodate external sensors with a wide variety of sensor interface
options, including general purpose analog inputs, digital input/output, thermocouples and 10K thermistors.
They can also contain internal sensors like temperature and relative humidity.
SECURE, RELIABLE, HIGHLY SCALABLE WIRELESS NETWORKING
The Wzzard platform uses 802.15.4e wireless SmartMesh IP networking technology to deliver reliable,
resilient and scalable communication with advanced network management and comprehensive security
features. The platform uses full SmartMesh IP networking and time-synchronized channel hopping to
provide up to 99.999% connectivity, even in the most demanding RF environments.
The Wzzard Mesh wireless sensor platform enables rapid network deployment and expansion. New
nodes may be added at any time and the SmartMesh network dynamically self-configures as new nodes
are added or removed. This process is a function of the mesh network itself and does not need to be
controlled by the network gateway.
EASY CONFIGURATION AND INSTALLATION
Configuration of the Wzzard sensor platform is easy. The nodes can be configured with calibration and
scaling information, engineering units, friendly names, and other descriptive information. The MQTT-
JSON protocol is used to transport sensor data from the network gateway to any MQTT broker. MQTT-
JSON is a highly efficient publish/subscribe protocol optimized for sending sensor data over wireless
networks.
The platform simplifies physical installation as well. Wzzard Mesh Wireless Sensors can be attached to
any surface using screws and flange mounting ears. The IP67 rated, fiber reinforced polyester PBT
housing and the ability to connect to external sensors via conduit fitting or M12 connector make the units
deployable in virtually any industrial or commercial environment.

Wzzard™ Sensor Edge Nodes
7
CONTENTS OF PACKAGES
WZZARD™ INDUSTRIAL NODE - MODEL PACKAGE INCLUDES:
• Wzzard Mesh Wireless Sensor node – for industrial applications
• Sensor wire harness cable - conduit connection model only
• (2) AA 3.6V Thionyl Chloride Lithium batteries
• External antenna
• Quick Start Guide
• Anti-Skid disk
WZZARD COMMERCIAL NODE - MODEL PACKAGE INCLUDES:
• Wzzard Mesh Wireless Sensor Node – for commercial applications
• (1) 2/3 AA 3.6V Thionyl Chloride Lithium battery
• Quick Start Guide
• Mounting Bracket/Plate (included, factory installed)
• Dual adhesive strip (included, factory installed)

Wzzard™ Sensor Edge Nodes
8
HARDWARE INSTALLATION
CONNECTING YOUR SENSOR TO WZZARD INDUSTRIAL NODE MODELS
TIP: It is best practice that wiring is done prior to waking up the device.
Note: UL C1/D2 rating is voided when using non UL-specified batteries.
Remove the four (4) black screws that hold the top of the Wzzard node in place.
Connect your sensor.
CONDUIT NODE MODELS:
Thread the included wire harness through the conduit and into the node.
Plug the wire harness into the circuit board inside the node.
1 Brown
2 Red
3 Pink
4 Yellow
5 Green
6 Blue
7 White
8 Gray

Wzzard™ Sensor Edge Nodes
9
Connect your sensor to the wires running from the node’s conduit.
Consult the following chart for wire instructions:
WIRING FOR INDUSTRIAL NODE WITH CONDUIT CONNECTOR & ATTACHED
WIRING HARNESS
1
Brown
2
Red
3
Pink
4
Yellow
5
Green
6
Blue
7
White
8
Gray
WSD2C31010
10-30
VDC
AIN1
AIN2
AIN3
DIN1
GND
GND
GND
WSD2C21150
10-30
VDC
AIN1
AIN2
DO1
DIN1
GND
GND
GND
* Wiring Chart Abbreviations:
10-30VDC = 10-30V DC Power Input
AIN1 = Analog Input #1
AIN2 = Analog Input #2
AIN3 = Analog Input #3
DIN1 = Digital Input #1
D01 = Digital Output #1
GND = Ground Input
INDUSTRIAL NODE WITH M12 CONNECTOR & M12 ACCESSORY CABLE
Note: UL Class1/Division2 rating is voided when using M12 model
M12 WIRING
TIP: You can use your own M12 cable or order B+B SmartWorx M12 cable Model# BB-WSCAM12-6.
Consult the following chart for M12 wiring instructions.
1 White
2 Brown
3 Green
4 Yellow
5 Gray
6 Pink
7 Blue
8 Red

Wzzard™ Sensor Edge Nodes
10
1
White
2
Brown
3
Green
4
Yellow
5
Gray
6
Pink
7
Blue
8
Red
WSD2M31010
10-30
VDC
AIN1
AIN2
AIN3
DIN1
GND
GND
GND
* Wiring Chart Abbreviations:
10-30VDC = 10-30V DC Power Input
AIN1 = Analog Input #1
AIN2 = Analog Input #2
AIN3 = Analog Input #3
DIN1 = Digital Input #1
GND = Ground Input
TERMINAL BLOCK CONNECTIONS – THERMOCOUPLE & THERMISTOR
Thread the thermocouple and thermistor wires through the conduit and attach them to the terminal block.
MOUNTING THE NODE
Wzzard industrial nodes may be mounted either with screws or temporarily with built-in magnets. The
included anti-skid disk may be attached to bottom of unit to prevent slipping on metal surfaces.
Flange Mounting - Wzzard nodes may be mounted via their mounting ears. (M5, #10)

Wzzard™ Sensor Edge Nodes
11
Temporary Magnetic Mounting* - Wzzard nodes include an internal mounting magnet embedded in the
node’s base – pull force 2.13 kg (4.7 lb) – convenient for temporary positioning and configuration.
*Notes:
-UL C1/D2 rating is voided if magnetic mounting is used for permanent application installation.
-Flange mounting only is recommended. Magnetic mounting is not an appropriate means of mounting.
PUTTING NODE IN DEEP SLEEP
When not using the node for some time, the node should be put into deep sleep.
Press the Status/Sleep/Reset configuration button for 5 seconds until the Status LED turns off.
The node will retain all settings, including the associated network if the node has been claimed. It will not
reset the device back to factory settings.
RESTORING NODE TO FACTORY DEFAULT
To reset the node to factory defaults, press and hold the Status/Sleep/Reset configuration button for 10
seconds until the Status LED flashes quickly. This will:
1) Clear the sensor type information.
2) Clear the associated network information if the node has been claimed.
3) Allow the node to search for a new network.
BATTERY REPLACEMENT
Note: UL C1/D2 rating is voided when using non UL-specified batteries. Do not mix old and new batteries.
Remove the 4 black screws that hold the top of the node in place.

Wzzard™ Sensor Edge Nodes
12
Install (2) 3.6 V AA Lithium Thionyl Chloride Batteries.
In most installations you will only need to place the batteries in the battery holder. But, in high vibration
environments, you should also use the included black battery retaining clip.
Do not use excessive force while placing or removing the clip, as you can break it. The best way to
remove the clip is to insert a small flathead screwdriver between the batteries and the clip (parallel to the
batteries) and give the screwdriver a gentle twist. This will remove the clip without damage.
Note: As with all batteries, these are a fire, explosion, and severe burn hazard. Do not burn or expose
them to high temperatures. Do not recharge, crush, disassemble, or expose the contents to water.
Properly dispose of used batteries according to local regulations by taking it to a hazardous waste
collection site, an e-waste disposal center, or other facility qualified to accept lithium batteries.

Wzzard™ Sensor Edge Nodes
13
CONNECTING YOUR SENSOR TO WZZARD™ COMMERCIAL NODE MODEL
MOLEX CONNECTOR PORT
Connect your sensor’s cable to the Wzzard Mesh Wireless Sensor node via the Molex connector port.
Mating Connector:
_ Housing = Molex 51382-0600
_ Terminal socket for housing = Molex 56134-9100
Consult the following chart for Molex pin-outs:
Molex Connector Pin-Out
Pin 1
Pin 2
Pin 3
Pin 4
Pin 5
Pin 6
(Do Not Use)
DIN1
Thermistor Input
AIN1
AIN2
Common GND
* Pin Abbreviations:
DIN1 = Digital Input
AIN1 = Analog Input
AIN2 = Analog Input
GND = Ground
THERMISTOR / BREAKOUT CABLE PIN-OUT
PIN#
AIN1
AIN2
Door Switch
Red
Black
Yellow
Black
Blue
Black
AIN1
GND
AIN2
GND
DIN1
GND
* Pin Abbreviations:
AIN1 = Analog Input
AIN2 = Analog Input
DIN1 = Digital Input
GND = Ground
MOUNTING OPTIONS – COMMERCIAL NODE
ADHESIVE STRIP MOUNTING
The Wzzard Mesh Wireless Sensor node can be mounted almost anywhere using the convenient 3M™
VHB (“Very High Bond”) adhesive mounting strip pre-attached to the back of the unit at the factory.

Wzzard™ Sensor Edge Nodes
14
MOUNTING BRACKET/PLATE
The node enclosure includes an installed mounting bracket on the back. Simply remove the bracket to
access the two screw holes in the plate.
ZIP TIE MOUNTING
The node enclosure also features two grip channel areas for securing the node with standard Zip ties.
PUTTING NODE IN DEEP SLEEP
When not using the node for some time, the node should be put into deep sleep.
Press the Status/Sleep/Reset configuration button for 5 seconds until the Status LED turns off.
The node will retain all settings, including the associated network if the node has been claimed. It will not
reset the device back to factory settings.
RESTORING NODE TO FACTORY DEFAULT
To reset the node to factory defaults, press and hold the Status/Sleep/Reset button for 10 seconds until
the Status LED flashes quickly. This will:
1) Clear the sensor type information.
2) Clear the associated network information if the node has been claimed.
3) Allow the node to search for a new network.

Wzzard™ Sensor Edge Nodes
15
CONFIGURING AND MANAGING WZZARD MESH WIRELESS SENSORS
Management and configuration of the network, gateway, nodes, and sensor inputs is all done remotely
through SmartWorx Hub. https://hub.bb-smartworx.com/
Refer to the SmartSwarm manual for information on how to log in and claim your gateway.
The configuration of the Wzzard Mesh sensor network is done at 3 levels:
1) Gateway/Network Level
When the gateway is selected in the tree, you can turn node discovery on and off, claim and release
nodes, and review the health status of the network.
2) Node Level
When a single node is selected in the tree, you can configure the measurement interval, set up any
triggers, retrieve live data from the node, and review network health information about the node.

Wzzard™ Sensor Edge Nodes
16
3) Sensor Level
Expand the tree to see individual sensor I/O by clicking on the triangle next to the node.
When an individual sensor is selected, you can configure all parameters for that endpoint.
Enable/Disable, change between a voltage input and 4-20mA current, change scaling reported to real
Engineering units, change temperature reported between Centigrade and Fahrenheit, etc.
CREATE AND LOCK THE NETWORK
1) Wake Up The Node
Press and hold Status/Sleep/Reset configuration button for 5 seconds until the Status LED comes on and
starts blinking.
2) Check LEDs
After you wake the node, the Status LED will begin to blink. This indicates that the node is attempting to
establish a network connection. The Status LED will come on solid when a network connection is made.
Note: The Status LED goes off after 10 seconds to conserve battery life. To check status, use a short press of the
Status/Sleep/Reset configuration button.

Wzzard™ Sensor Edge Nodes
17
Status LED
Data
Slow Blink
(1 per second)
Attempting to establish connection with SmartMesh IP
network.
Fast Blink
(10 per second)
Firmware Update in progress.
ON
(solid, steady)
Unit is connected to wireless network.
3) Review Network And Claim Nodes
Follow the SmartSwarm quick start guide to claim and configure the gateway. With the gateway connected
to the Internet, click on the “Wzzard Mesh” button.
As nodes join the network, they will be added to the device tree under the gateway MAC address.
When all nodes’ MAC addresses show in the tree, click the checkbox next to each node.
Click the “Claim Nodes” button to prevent the nodes from joining another open network.
All nodes will be set to a unique Network ID and Join Key for this network. They will no longer search for
another open network
The gateway will automatically turn off node discovery for the network 24 hours after powering on. In
some cases, it may be necessary to control this function manually.
• If it takes longer than 24 hours to get all nodes awake and the network to complete, you will need
to turn node discovery back on until all nodes show in the tree.
• If it takes shorter than 24 hours to claim all of the desired nodes, you may want to manually turn
off Node Discovery so that no other unclaimed nodes in the vicinity can join the network.

Wzzard™ Sensor Edge Nodes
18
To manually control Node Discovery, select the gateway from the tree and click the Node Discovery
switch to move it in the opposite position.
CONFIGURE THE GATEWAY’S MESH INTERFACE
Select your SmartSwarm Gateway by clicking on the Device ID.
Now, select the Wzzard Mesh App.

Wzzard™ Sensor Edge Nodes
19
To publish the Wzzard Mesh MQTT data to an MQTT you must configure the MQTT client in the
SmartSwarm 342 for the broker you wish to publish. Enter the Broker’s IP address in the Host field and
enter the Broker’s Port. If a User Name and Password are required for the broker, enter them here.
Client ID is a unique name made up by you and is required for any MQTT connection.
Timeout, Retry Interval, and Keep Alive need to be filled in to work with any broker. Defaults are shown
below and should work in most instances.
The SmartSwarm 342 includes an internal broker for use with the embedded Node Red app. The internal
broker is at the main IP address of the gateway. The default is 192.168.1.1. The port for the internal
broker is 1883.
If you wish to have a secure TLS connection to the MQTT server, enable TLS and upload the required
certificates and private key.

Wzzard™ Sensor Edge Nodes
20
Apply your changes.
NODE CONFIGURATION
Each node can be set to read and publish its sensor data at a fixed Measurement Interval. The
Measurement Interval should be set as large as possible to save battery life and still get the
measurement resolution required by the application. The nodes are capable of a Measurement Interval of
10s to 84,600s (24 hours).The default is set to one minute.
To set the Measurement Interval for a node:
• Select the node from the tree.
• Expand the Node Configuration section by clicking on the “+” sign.
• Enter the desired Measurement Interval in seconds
This manual suits for next models
1
Table of contents
Other B+B SmartWorx Accessories manuals
Popular Accessories manuals by other brands

National Instruments
National Instruments NI-IMAQ user manual
Makita
Makita DFJ210 instruction manual

turck
turck PK01VR N Series quick start guide

PCB Piezotronics
PCB Piezotronics 4115K-11A Installation and operating manual

Philips
Philips DLA67044D brochure
Simplicity
Simplicity TV CO-AXIAL SOCKET user manual

