Brannan 13/460/0 User manual
User's Manual
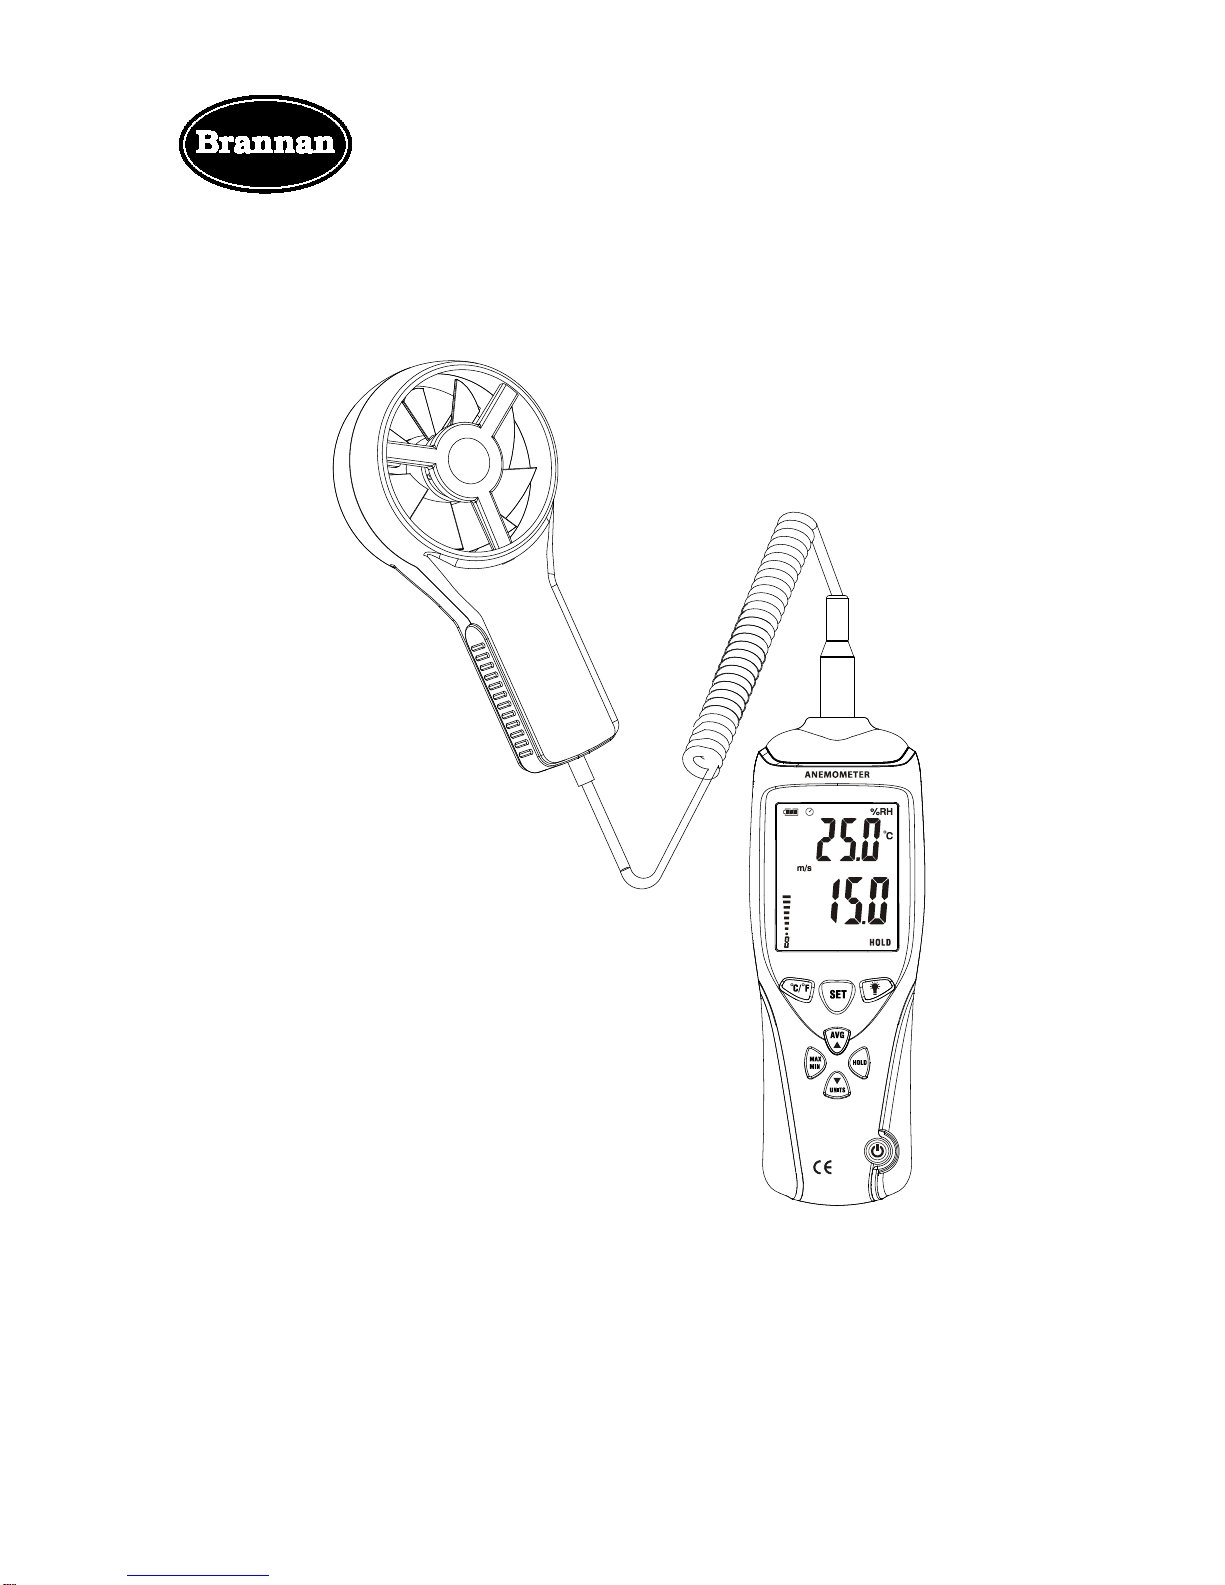
Professional Anemometer – 13/460/0
Please read this user manual before using this device and keep
it safe for future reference.

Contents
1. Introduction ........................................................................ 1
2. Application.......................................................................... 1
3. Safety .................................................................................. 1
4. Maintenance........................................................................ 1
5. Specifications..................................................................... 2
6. Meter Description ............................................................... 3
7. LCD Display Description.................................................... 5
8. Changing the Battery ......................................................... 5
9. Operating Instructions....................................................... 6
10. Supplementary Items.......................................................... 7

1. Introduction
This anemometer is can provide fast, easy and accurate
measurements of air velocity, air flow and temperature. It’s
extra-large and easy to read backlit LCD displays air flow and
temperature readings simultaneously.
2. Application
These units are widely used in manufacturing, construction,
environmental, meteorological and marine applications, as well as
the education and leisure sectors.
3. Safety
Read the following safety information carefully before attempting
to operate the meter.
Use the meter only as specified in this manual. Improper use could
affect the accuracy of the measurements taken.
EMC compliant
4. Maintenance
This meter has already been calibrated before delivery, but may
need to be re-calibrated to ensure the accuracy of readings taken.
The unit contains no user serviceable parts, repairs and calibration
should be carried out by qualified personnel. The recommended
calibration period is one year.
Do not use volatile liquids to clean the unit, wipe with dry soft cloth.

5. Specifications
Circuit
Fast and high accuracy MCU design
Display
Extra-large LCD
Sampling rate
1 reading per second
Temperature measuring
High accuracy NTC resistance
Temperature range
-30°C to 60°C / -22°F to 140°F
Temperature accuracy
±1.5℃/ ±2.7℉
Air velocity range
0.3m/s to 45.0m/s
Operation Temperature
-10℃to 60℃/ 14℉to 140℉
Operating Humidity
≤90
%
RH
(
Non-condensing
)
Storage Temperature
-10℃to 60℃/ 14℉to 140℉
Air velocity level indication
Level 1-12 shown on an analog bar-
graph,
levels above 12 are shown numerically.
Measurement average
Dynamic 30 point average of air flow
Maximum / Minimum Displays maximum and
minimum readings
during current period of operation.
Hold
Holds current readings.
Area set
0.001 to 9999
㎡(
0.001to 9999ft²)
Power Supply 9V battery (Type of 006P, NEDA1604 or
IEC6F22)
Auto power off
After approx 15 minutes of inactivity
Resolution m/s:0.01、km/h:0.1、ft/min:1、knots:0.1
mph:0.1
、
cmm:0.001
、
cfm:0.001
Dimensions (L*W*H)
185* 66*33mm
Weight
311g
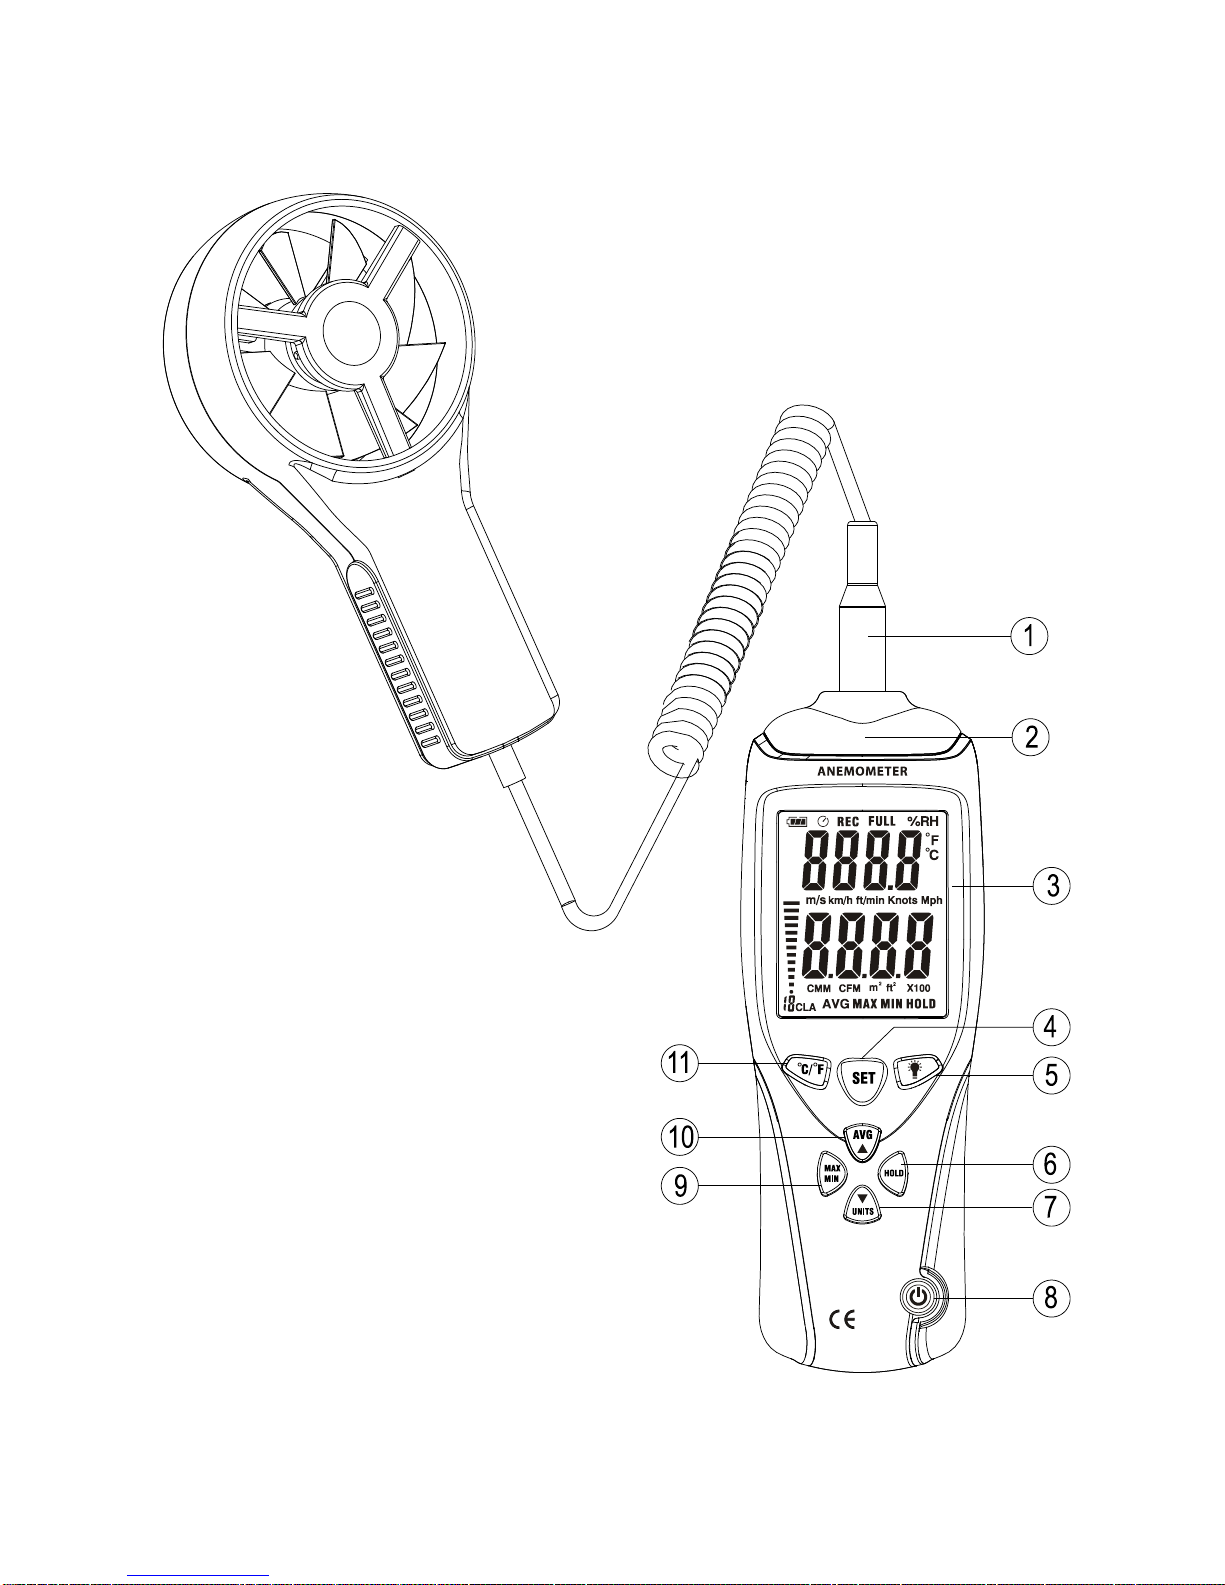
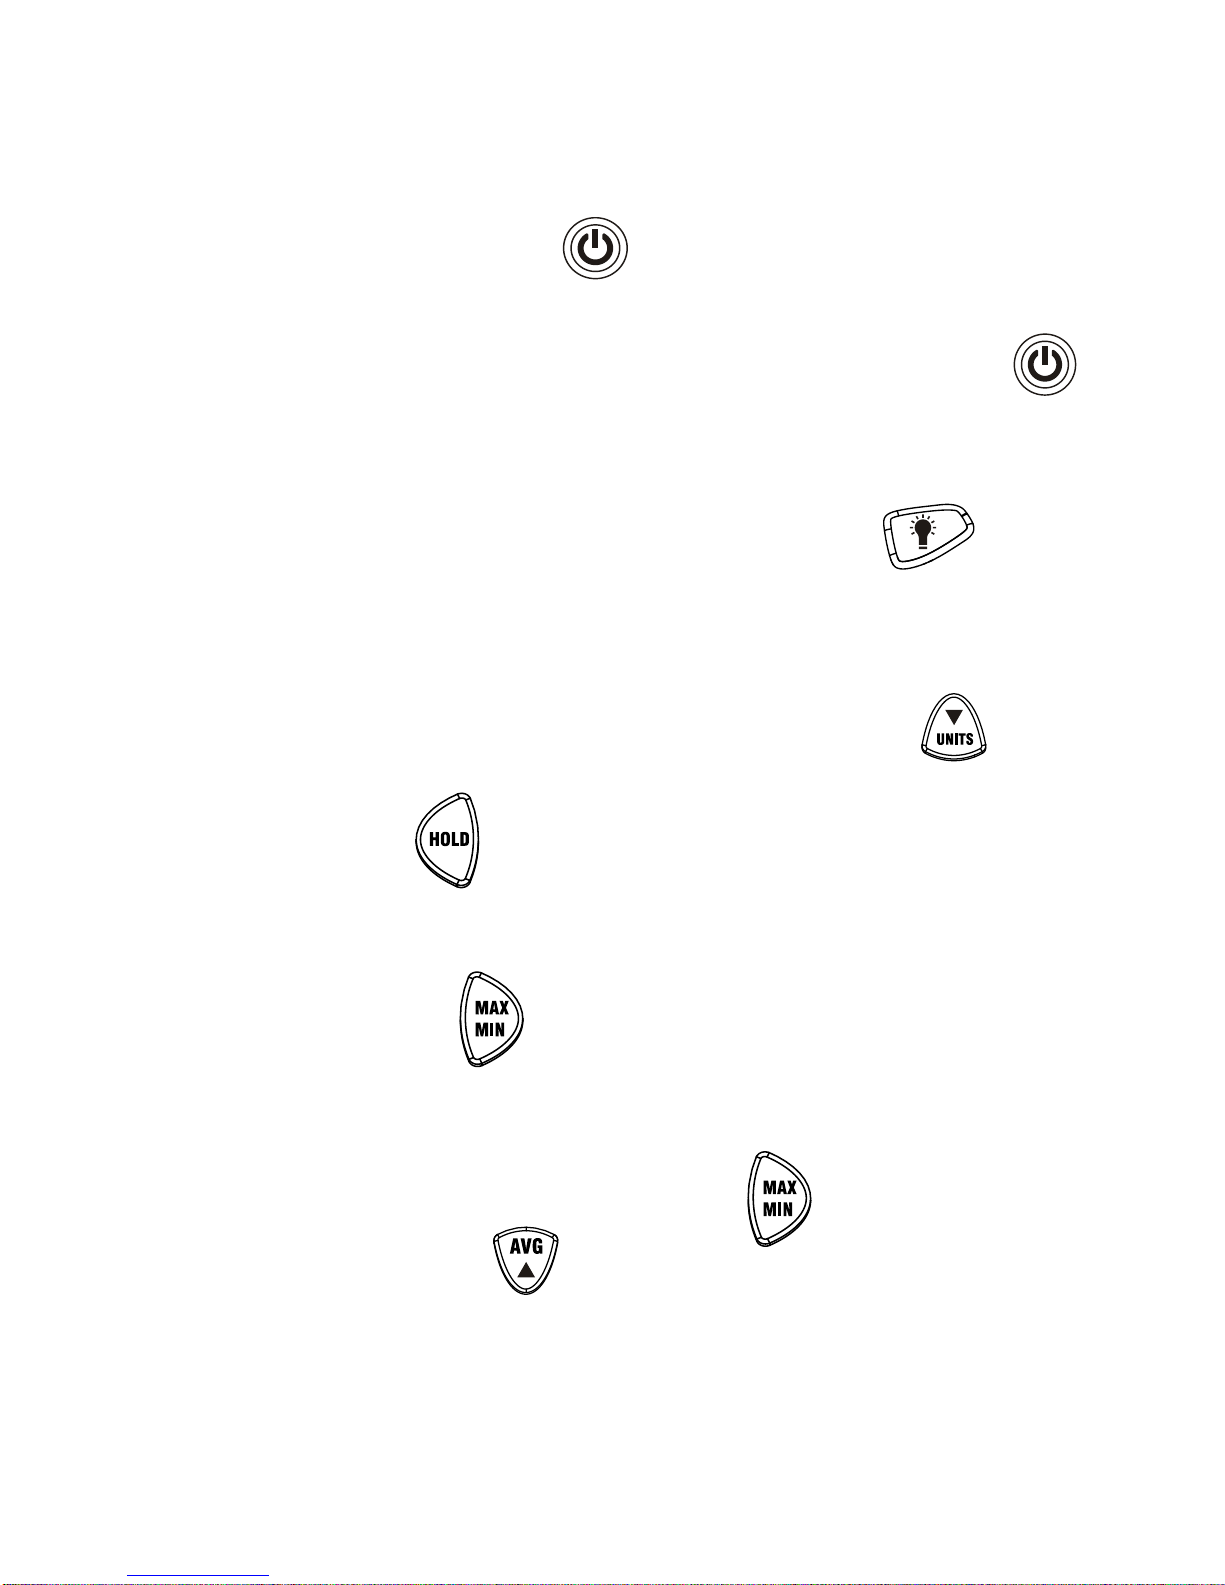
6. Meter Description
①Air Velocity Sensor
②Sensor Interface
③LCD display
④SET Button
⑤Backlight Button
⑥HOLD Button
⑦Velocity Units / DOWN
⑧Power ON/OFF
⑨MAX/MIN
⑩AVG / UP
⑪Temperature °C / °F
⑫Battery cover
⑬Tripod nut
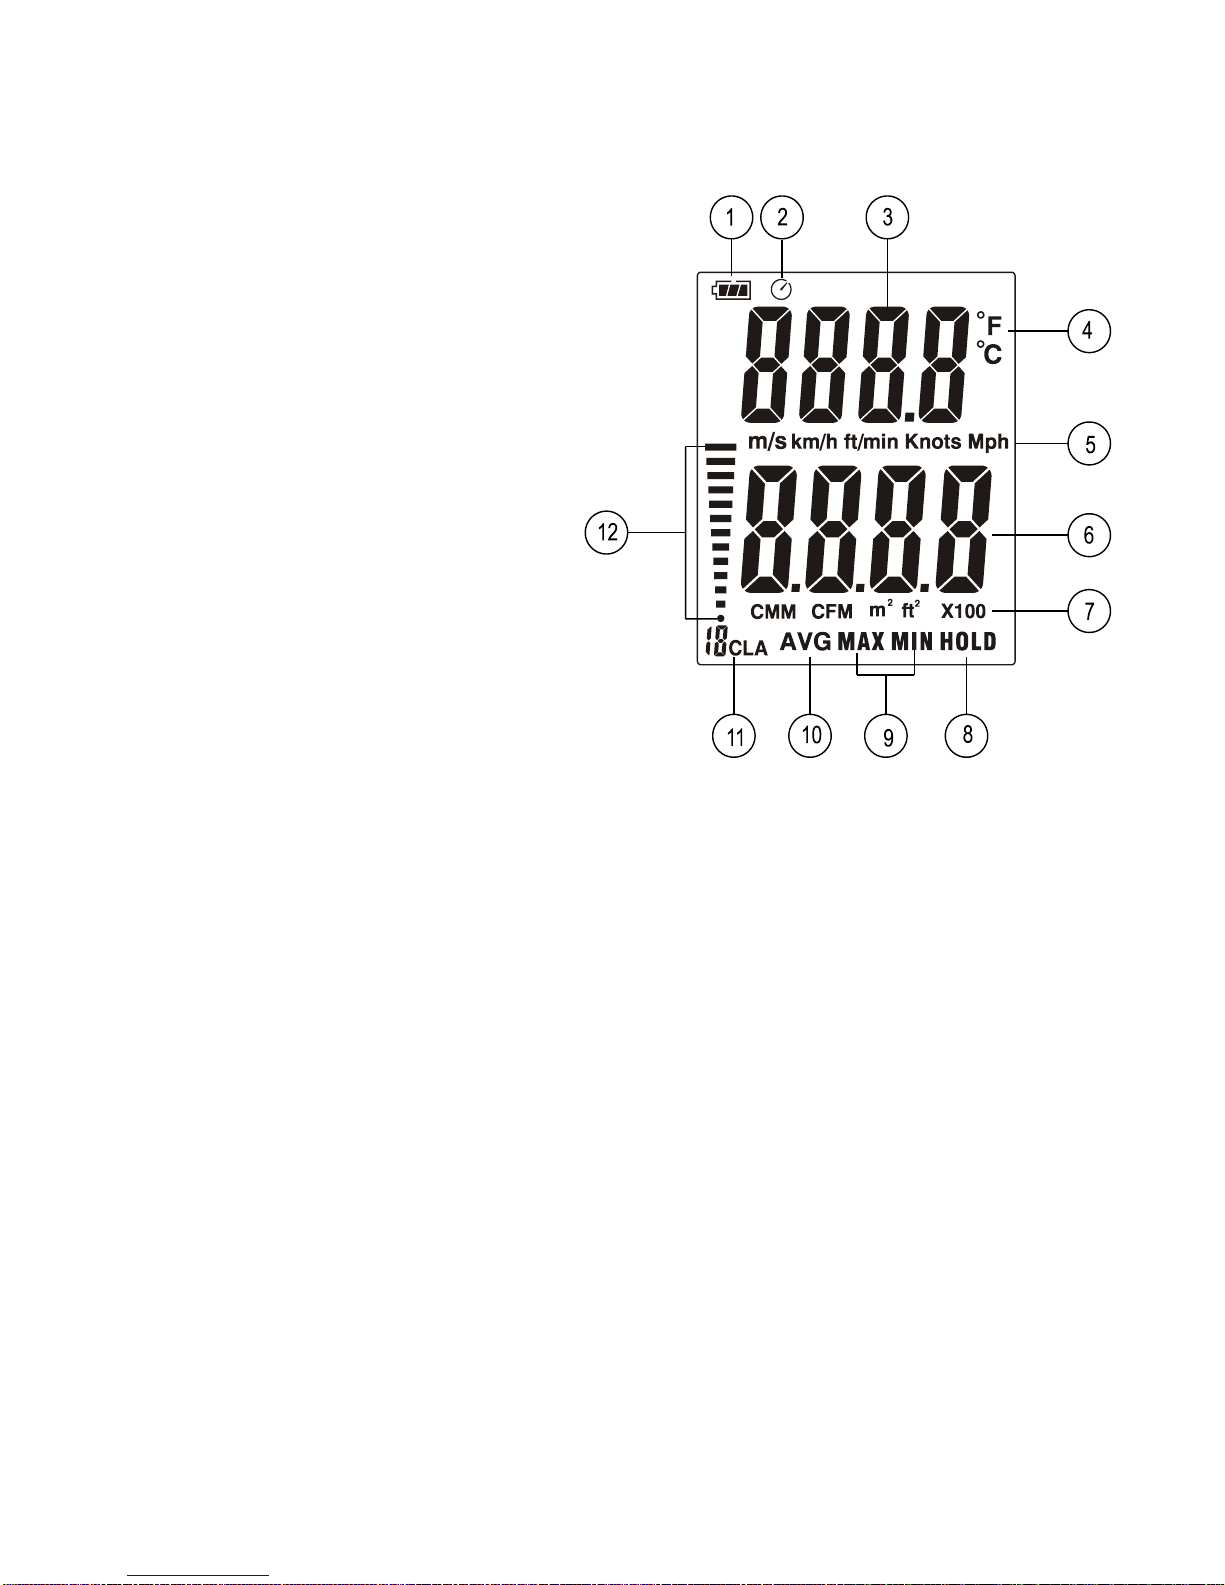
7. LCD Display Description
①Battery Power Indicator
②Auto Power OFF icon
③Temperature readings
④Temperature units
⑤Air Velocity Units:
⑥Air Velocity readings
⑦Air flow & Area units
⑧HOLD Icon
⑨MAX/MIN Icon
⑩AVG Icon
⑪Air Velocity level indication
⑫Analog bar-graph indication for air velocity level
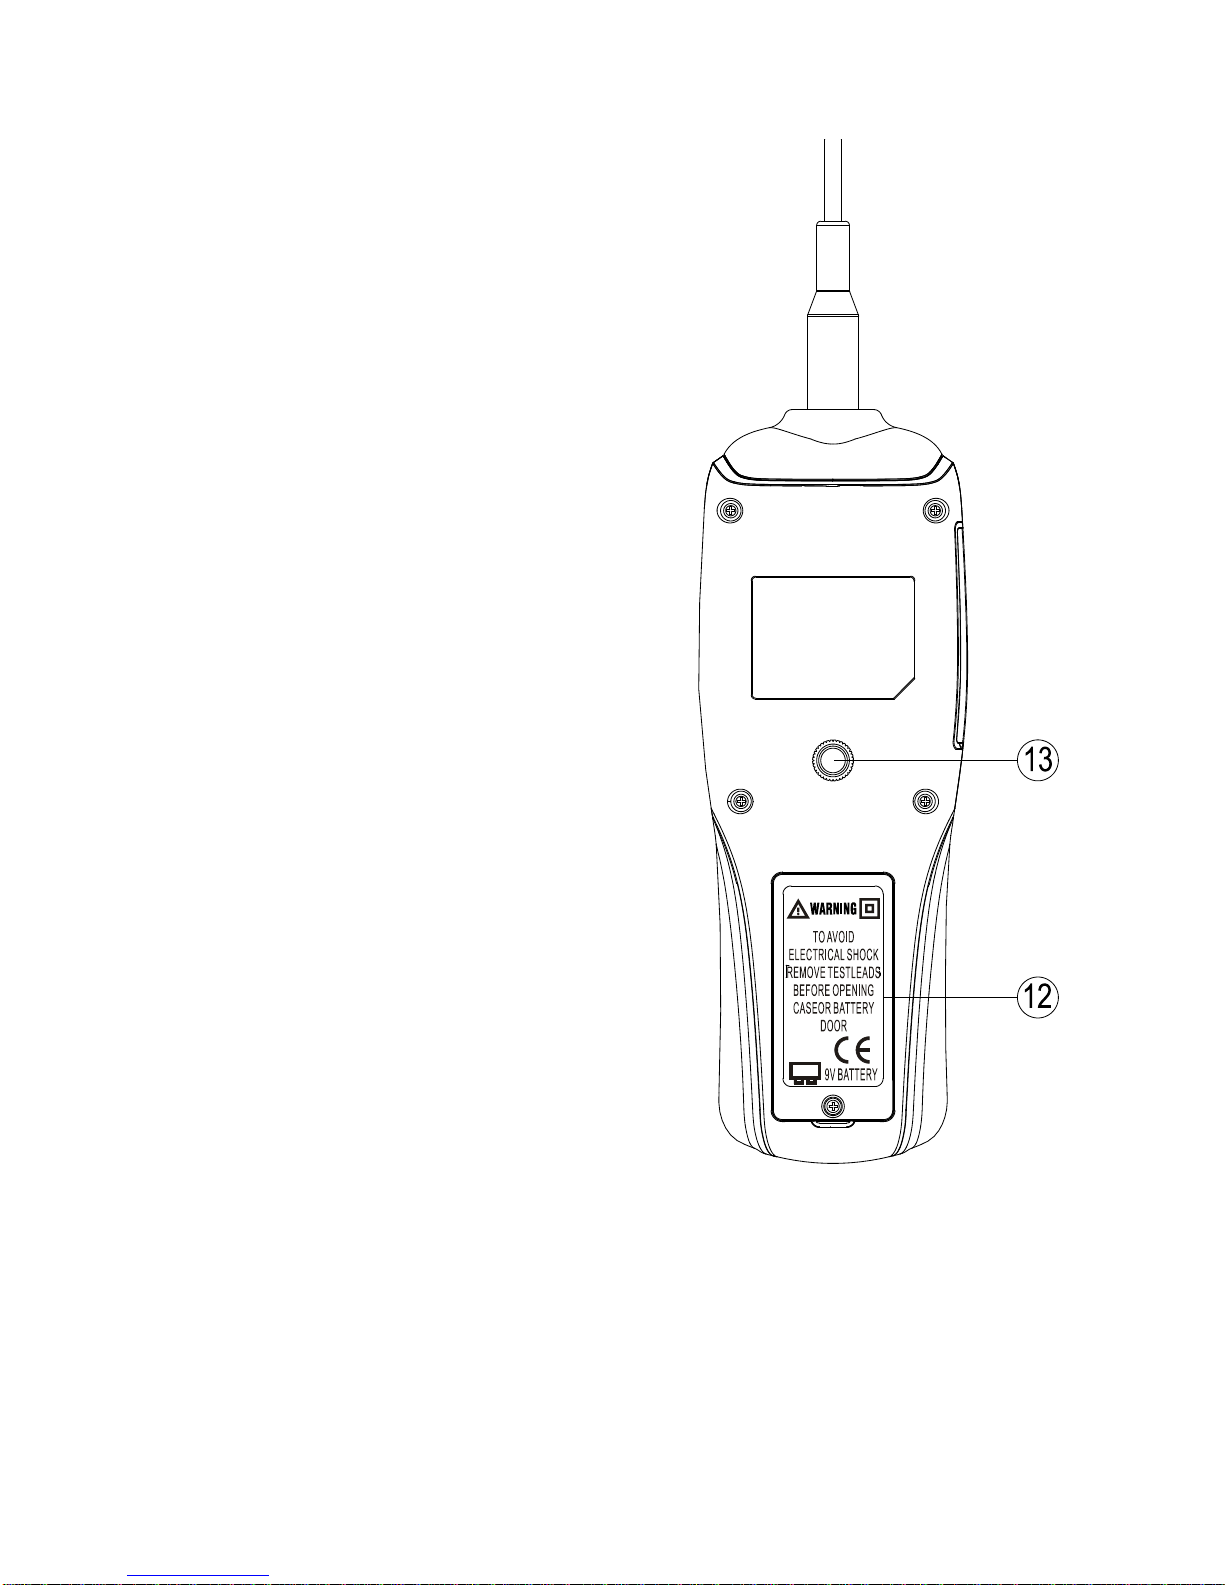
8. Changing the Battery
Use a small screwdriver to remove the securing screw on the
battery compartment and remove the battery cover. Attach the
battery connector to the terminals of a suitable 9V battery and
replace the cover and screw. Remove the battery when the meter
is to be stored for long periods of time to avoid battery leakage and
possible damage to the meter.
9. Operating Instructions
Power ON:Assuming there is a suitable battery inserted, turn the
meter on by pressing the "" button until the LCD screen is
activated, then release the button.
Power OFF:Turn the meter off by pressing and holding the ""
button for approx. 3 seconds until the LCD is switched off, then release
the button.
Backlight:After turning the meter on, press the " " button.
Repeat to manually switch the backlight off again. If the backlight is left
on, it will automatically turn off after approx. 30 seconds of inactivity.
Units selection: After enter measuring mode, press the “” button
to select desired units.
HOLD: Press the “ ” button once, the “HOLD” icon will appear on
the LCD, which indicates the reading is frozen. Press the button again
to exit HOLD mode.
MAX/MIN: Press the "" button once until the "MAX" icon appears
on the LCD to view the current maximum reading; press the button
again and the "MIN" icon will appear to view the current minimum
reading. To exit MAX/MIN mode, press the " " button again.
AVG Button: Press the “ ” button once, ‘AVG’ will appear on LCD,
the meter is now in average measuring mode, the average value of the
last 30 readings will be displayed on the LCD.
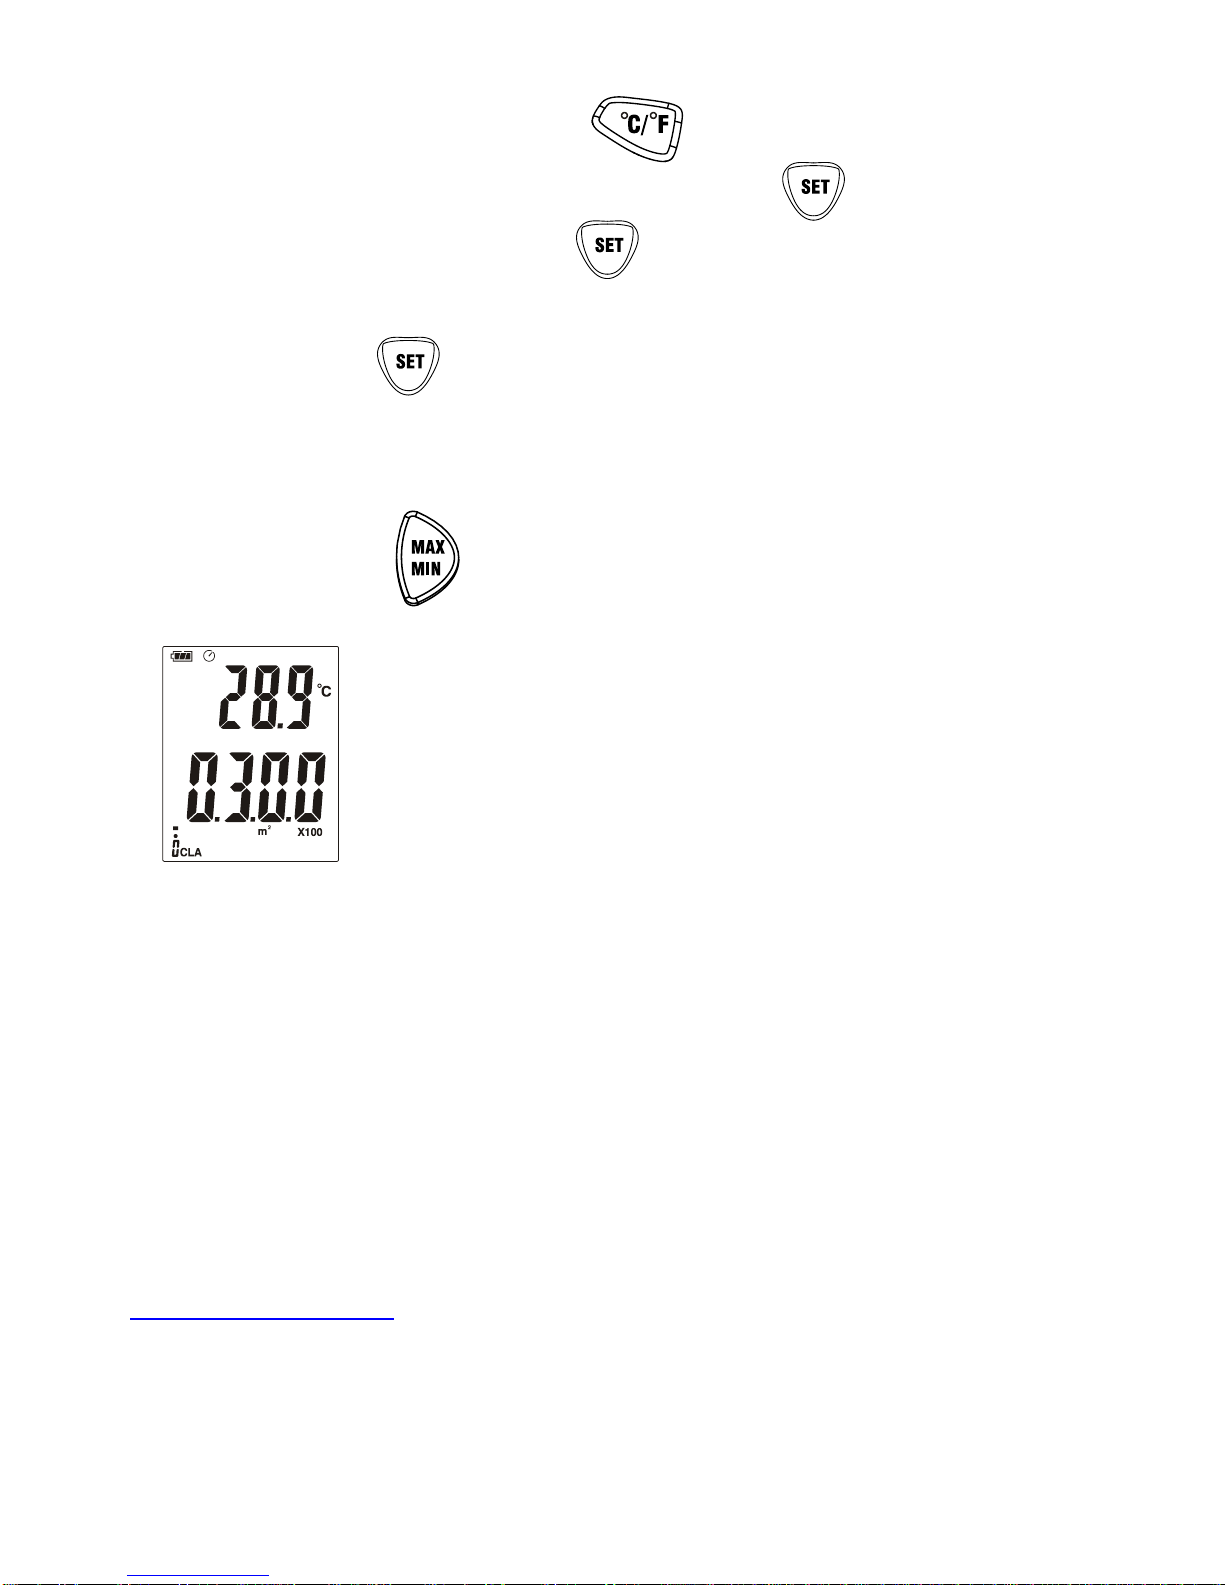
Temperature Units: Press the " " button to select ℃or ℉.
Setting the Area Units:Press and hold the " " button and then
power the meter on, release "" button when LCD displays. The
wind speed section will be flashing and the set area will be displayed.
Pressing the " " button changes the units from m2to ft2
The area units can be altered by pressing the UP and DOWN buttons.
If a large change in area is required the decimal point can be shifted
by pressing the "" button.
If the set area is above 9999 m2, the actual
area=displayed data x100 as shown above.
10. Supplementary Items
◆User's manual
◆9V battery
Brannan Thermometers & Instrumentation
Cleator Moor, Cumbria, UK. CA25 5QE
www.brannan.co.uk BRAN.2015.Rev0

Table of contents
Other Brannan Measuring Instrument manuals


Popular Measuring Instrument manuals by other brands


PCB Piezotronics
PCB Piezotronics IMI Sensors 608A10 Installation and operating manual

Konica Minolta
Konica Minolta REGIUS 190 Operation manual

Keysight
Keysight M9392A Startup guide

KROHNE
KROHNE FLEXMAG 4050 C quick start

DRUCK & TEMPERATUR Leitenberger
DRUCK & TEMPERATUR Leitenberger LR-Cal Pyros Basic 375 operating manual

VOLTCRAFT
VOLTCRAFT AM-60X46 operating instructions

PEWA
PEWA K&S Elektronik TFA HumidCheck Mini II instruction manual

KSR KUEBLER
KSR KUEBLER BNA EX Series Mounting and operating instructions

Aventech
Aventech AIMMS-20 operating manual

METER
METER AQUALAB TDL Operator's manual

Tektronix
Tektronix RSA5103B Quick start user manual

Rhewa
Rhewa 82comfort operating manual