EN2EN1 EN3
6" (15 cm)
3"
(7.5 cm) 6" (15 cm)
1" (2.5 cm)
6" (15 cm)6" (15 cm)
S
Y
S
T
È
M
E
Q
U
A
L
I
T
É
C
E
R
T
I
F
I
É
-
R
E
G
I
S
T
E
R
E
D
Q
U
A
L
I
T
Y
S
Y
S
T
E
M
UGB0502W
UGB1002W
UGB1502W
UGB2002W
ABB
1. Attach the baseboard to the wall using at least four (4)
mounting holes [F]. If no studs are available, anchors may
be required. Do not over tighten.
F
D
G
E
C
EE
G
C
H
A
B
J
I
NET VOLUME (cm3)
RIGHT
JB
LEFT
JB
RIGHT
JB
LEFT
JB
WITHOUT OPTION 506.00 535.49
B1T1ER 401.12 N. A. BRE153/156 N. A. 465.85
SIBT1E 453.89 483.38 BRE153T N. A. 449.30
MECHANICAL THERMOSTAT 479.91 509.41 BDIS277 483.66 513.16
C
E
1. Once a year, or as required, use a damp cloth and non-abra-
sive dish soap to remove any dust build-up. All other servic-
ing is to be done by qualied service personnel.
2. Before cleaning, make sure the power has been turned off
at the circuit breaker panel, and wait until the elements have
cooled before cleaning the unit or removing the front cover.
3. If the unit is installed in a dusty area, use a vacuum cleaner to
remove the dust.
4. Replace front cover [H] if it was removed.
5. Restore the power at the circuit breaker.
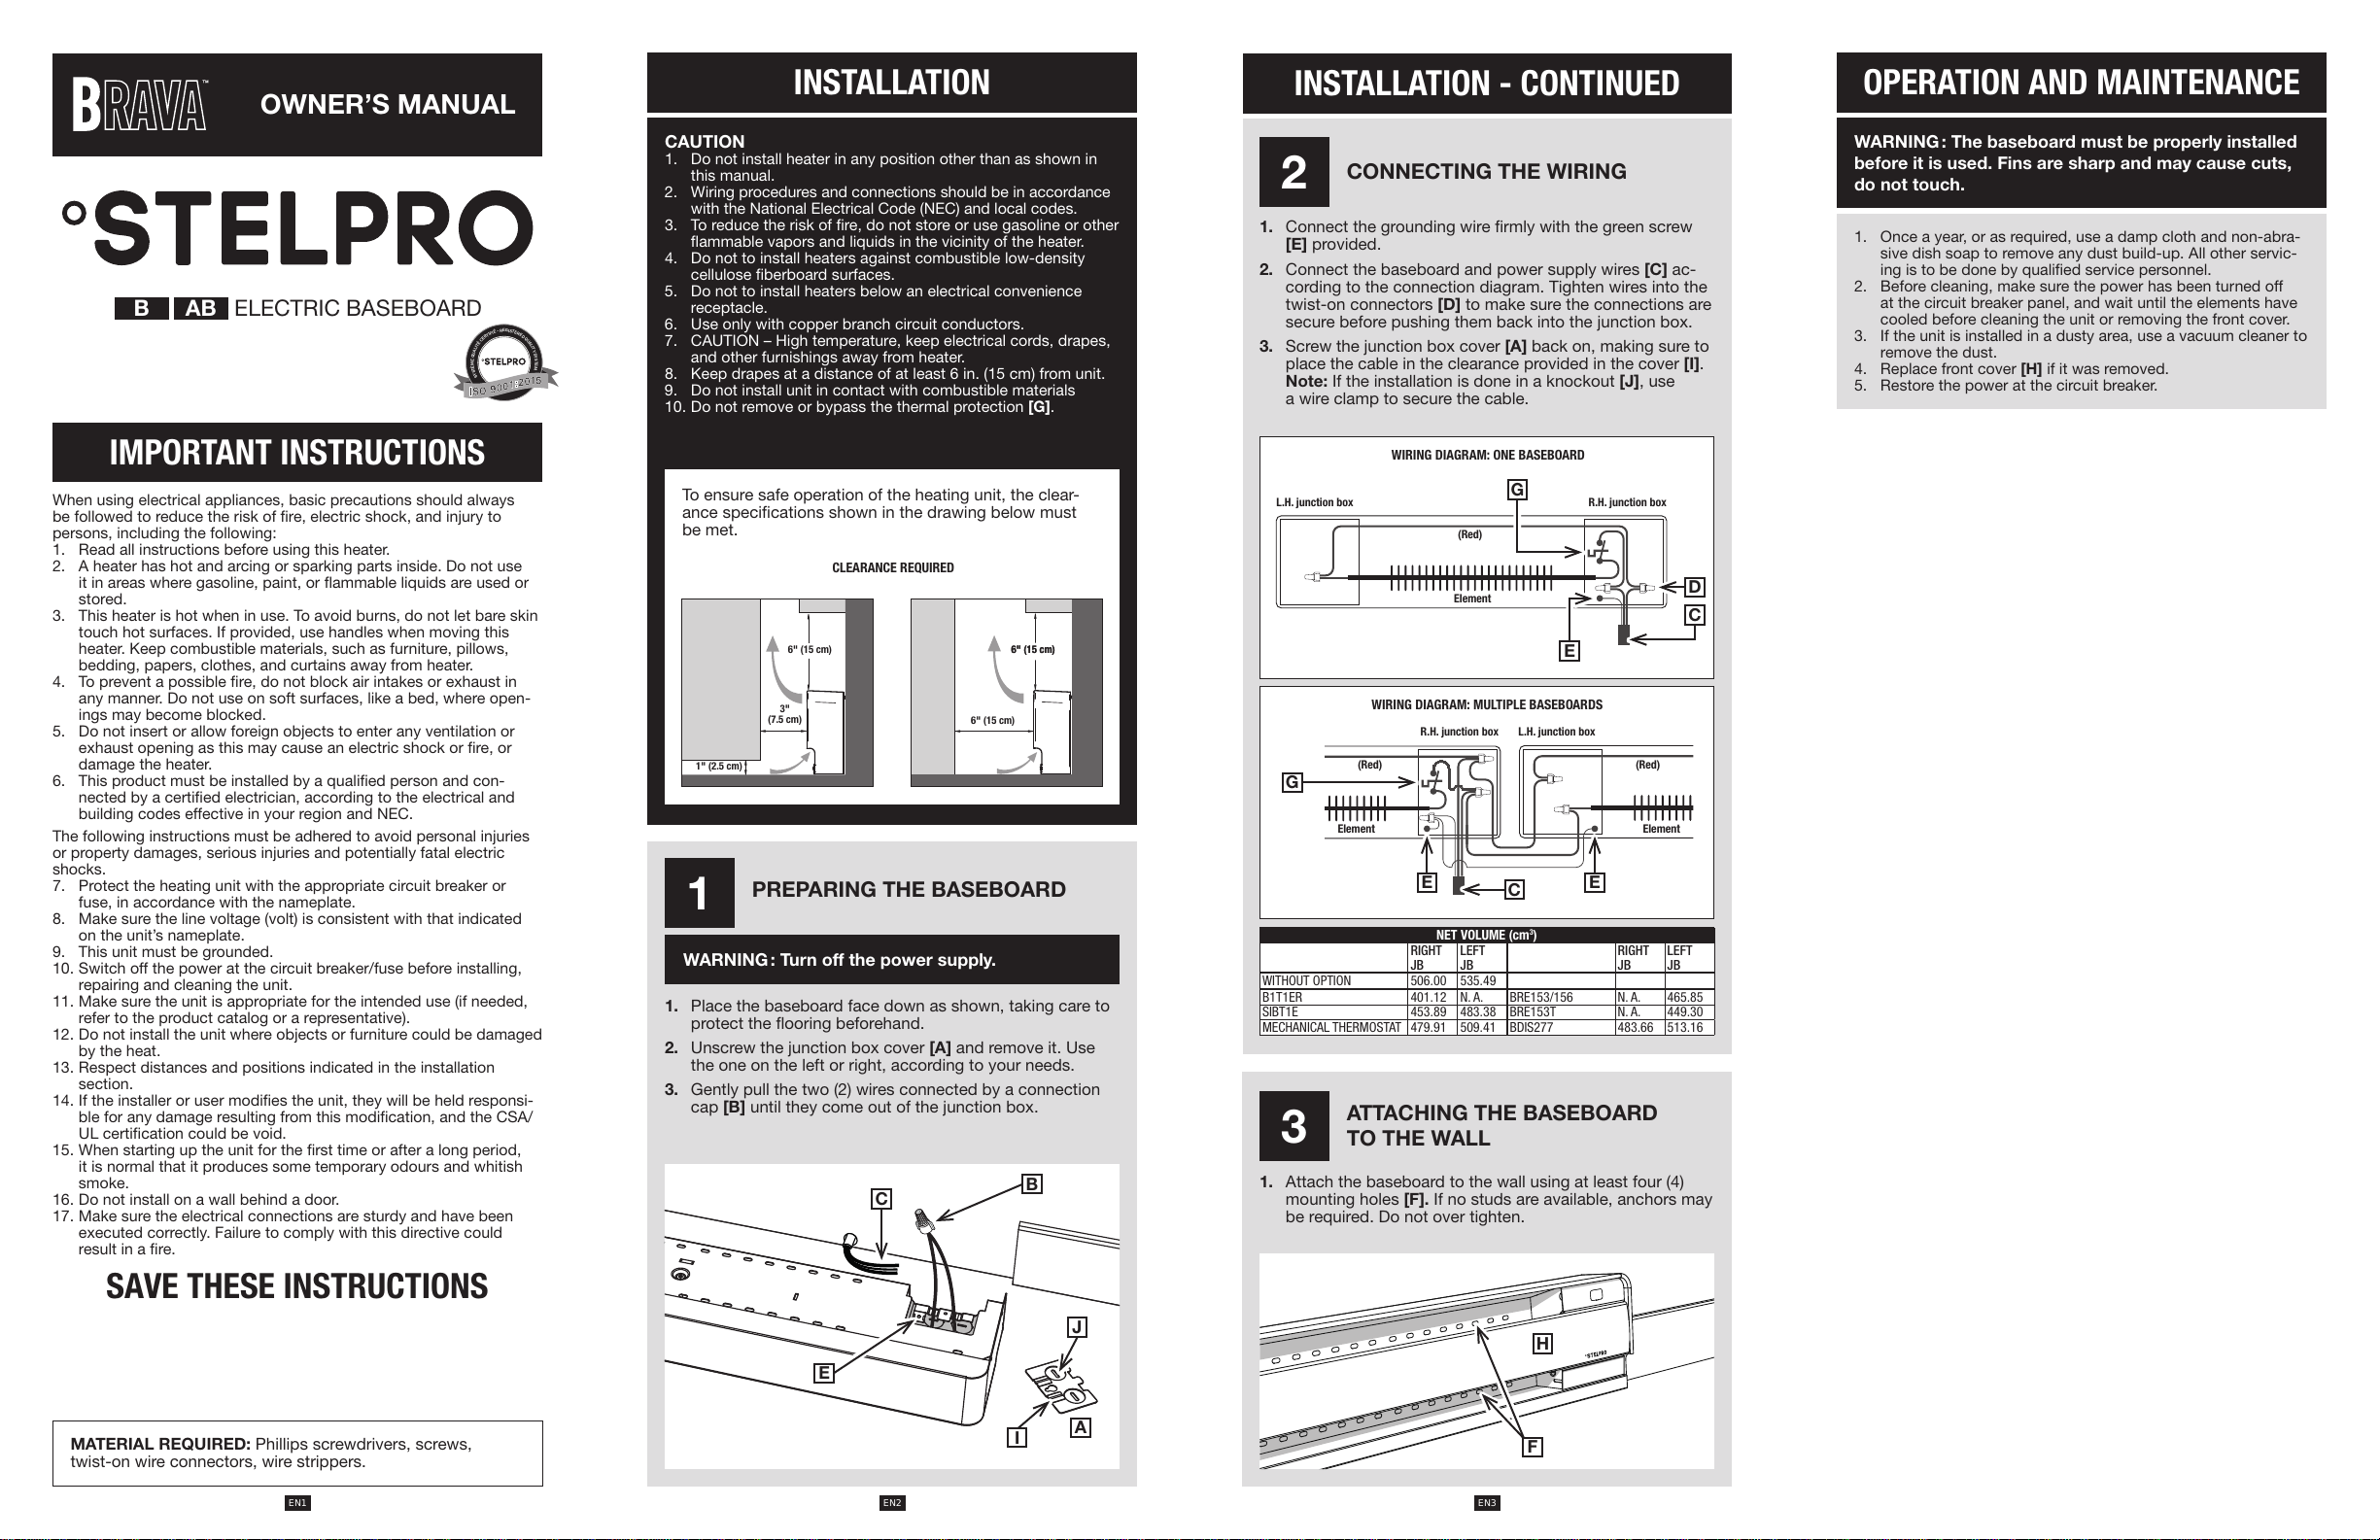
To ensure safe operation of the heating unit, the clear-
ance specications shown in the drawing below must
bemet.
When using electrical appliances, basic precautions should always
be followed to reduce the risk of re, electric shock, and injury to
persons, including the following:
1. Read all instructions before using this heater.
2. A heater has hot and arcing or sparking parts inside. Do not use
it in areas where gasoline, paint, or ammable liquids are used or
stored.
3. This heater is hot when in use. To avoid burns, do not let bare skin
touch hot surfaces. If provided, use handles when moving this
heater. Keep combustible materials, such as furniture, pillows,
bedding, papers, clothes, and curtains away from heater.
4. To prevent a possible re, do not block air intakes or exhaust in
any manner. Do not use on soft surfaces, like a bed, where open-
ings may become blocked.
5. Do not insert or allow foreign objects to enter any ventilation or
exhaust opening as this may cause an electric shock or re, or
damage the heater.
6. This product must be installed by a qualied person and con-
nected by a certied electrician, according to the electrical and
building codes effective in your region and NEC.
The following instructions must be adhered to avoid personal injuries
or property damages, serious injuries and potentially fatal electric
shocks.
7. Protect the heating unit with the appropriate circuit breaker or
fuse, in accordance with the nameplate.
8. Make sure the line voltage (volt) is consistent with that indicated
on the unit’s nameplate.
9. This unit must be grounded.
10. Switch off the power at the circuit breaker/fuse before installing,
repairing and cleaning the unit.
11. Make sure the unit is appropriate for the intended use (if needed,
refer to the product catalog or a representative).
12. Do not install the unit where objects or furniture could be damaged
by the heat.
13. Respect distances and positions indicated in the installation
section.
14. If the installer or user modies the unit, they will be held responsi-
ble for any damage resulting from this modication, and the CSA/
UL certication could be void.
15. When starting up the unit for the rst time or after a long period,
it is normal that it produces some temporary odours and whitish
smoke.
16. Do not install on a wall behind a door.
17. Make sure the electrical connections are sturdy and have been
executed correctly. Failure to comply with this directive could
result in a re.
SAVE THESE INSTRUCTIONS
MATERIAL REQUIRED: Phillips screwdrivers, screws,
twist-on wire connectors, wire strippers.
ELECTRIC BASEBOARD
INSTALLATION - CONTINUED OPERATION AND MAINTENANCE
2CONNECTING THE WIRING
INSTALLATION
CAUTION
1. Do not install heater in any position other than as shown in
this manual.
2. Wiring procedures and connections should be in accordance
with the National Electrical Code (NEC) and local codes.
3. To reduce the risk of re, do not store or use gasoline or other
ammable vapors and liquids in the vicinity of the heater.
4. Do not to install heaters against combustible low-density
cellulose berboard surfaces.
5. Do not to install heaters below an electrical convenience
receptacle.
6. Use only with copper branch circuit conductors.
7. CAUTION – High temperature, keep electrical cords, drapes,
and other furnishings away from heater.
8. Keep drapes at a distance of at least 6 in. (15 cm) from unit.
9. Do not install unit in contact with combustible materials
10. Do not remove or bypass the thermal protection [G].
WARNING: The baseboard must be properly installed
before it is used. Fins are sharp and may cause cuts,
do not touch.
CLEARANCE REQUIRED
IMPORTANT INSTRUCTIONS
1PREPARING THE BASEBOARD
OWNER’S MANUAL
1. Connect the grounding wire rmly with the green screw
[E] provided.
2. Connect the baseboard and power supply wires [C] ac-
cording to the connection diagram. Tighten wires into the
twist-on connectors [D] to make sure the connections are
secure before pushing them back into the junction box.
3. Screw the junction box cover [A] back on, making sure to
place the cable in the clearance provided in the cover [I].
Note: If the installation is done in a knockout [J], use
awire clamp to secure the cable.
WARNING: Turn off the power supply.
1. Place the baseboard face down as shown, taking care to
protect the ooring beforehand.
2. Unscrew the junction box cover [A] and remove it. Use
the one on the left or right, according to your needs.
3. Gently pull the two (2) wires connected by a connection
cap [B] until they come out of the junction box.
WIRING DIAGRAM: ONE BASEBOARD
WIRING DIAGRAM: MULTIPLE BASEBOARDS
L.H. junction box
R.H. junction box
Element
Element Element
R.H. junction box
L.H. junction box
(Red)
(Red) (Red)
3ATTACHING THE BASEBOARD
TO THE WALL