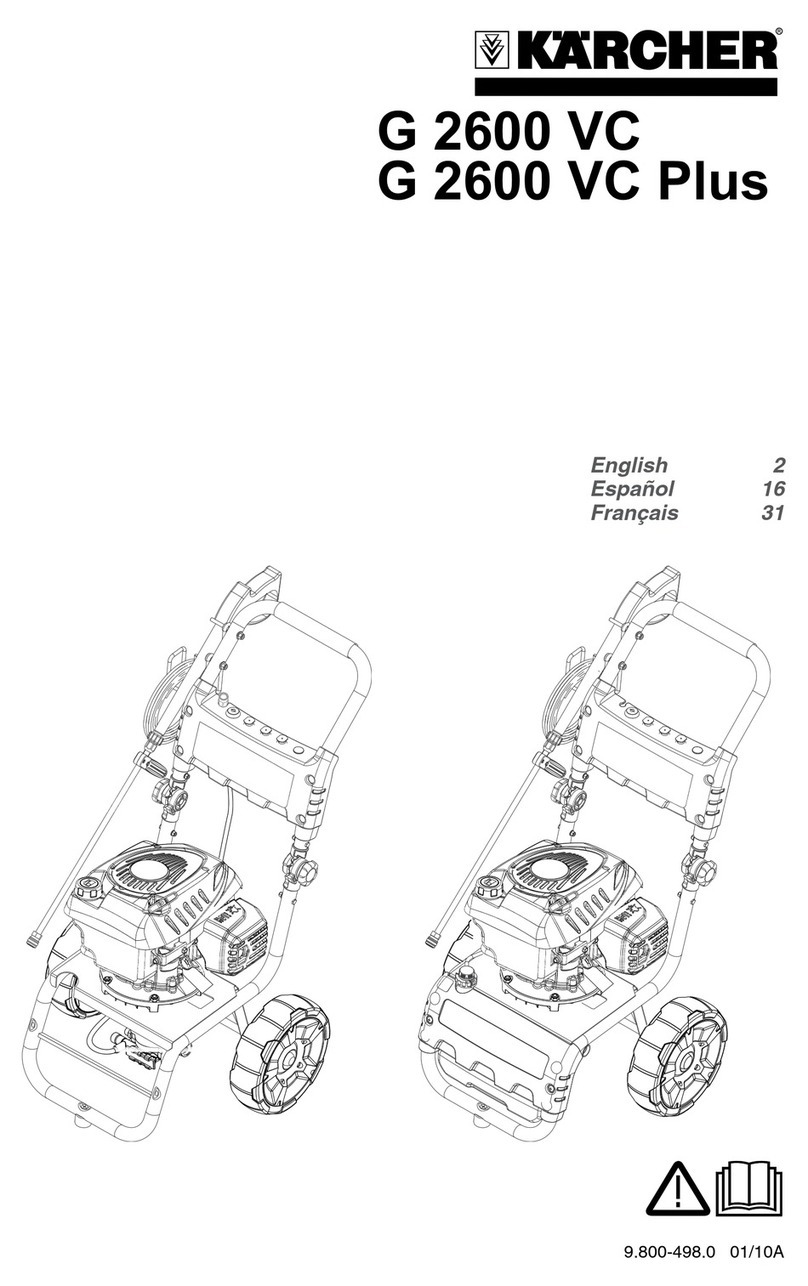
Brave BRP4030HAR User manual

operation manual
* IMPORTANT SAFETY INSTRUCTIONS
* SAVE THESE INSTRUCTIONS
Any Questions, Comments, Problems, or Parts Orders
Call BRAVE Product Support 1-800-350-8739
mBrp4030Hara.1
moDel
Brp4030Har

2Any Questions, Comments, Problems, or Parts Orders
Call BRAVE Product Support 1-800-350-8739
taBle of contents
Warranty
3 Warranty Statement
Introduction
4 Using the Operators Manual
Product Identication
5 Pressure Washer
5 Engine
Safety
6 Understanding the Machine Safety Decal
7 Safety Rules
7 Hazard Symbols and Meanings
Gas Washer Components
14 Component Chart
16 Pump Component Chart
Specications
17 Pressure Washers Specications
Assembly
18 Unpack the Pressure Washer
18 Attach Handle
Pre-Operation Checklist
19 Follow the Checklist Below
19 Connect Hose and Water Supply to Pump
Starting Your Washer
20 How to Start your Pressure Washer
Shutting Down Your Washer
24 How to Shut Down your Pressure Washer
Spray Tips
25 How to Use Spray Tips
25 Change Spray Tips
25 Usage Tips
Using Black Soap Nozzle
26 Apply Detergent
Trouble Shooting
27 Gas Engine Trouble Shooting Chart
28 Pump Trouble Shooting Chart
Storage
29 Winter Storage
29 Long Term Storage
29 Protect Fuel System
30 Storing the Engine
30 Other Storage Tips
Registration
31 Registration Form

3
Any Questions, Comments, Problems, or Parts Orders
Call BRAVE Product Support 1-800-350-8739
WarrantY
For products purchased on or after February 1, 2015
20195 South Diamond Lake Road, Suite 100 • Rogers, MN 55374
Toll-Free: 800-350-8739 • Website: braveproducts.com • Email: [email protected]
Dear Valued Customer:
The Brave product you just purchased is built with the finest material and craftsmanship. Use this product properly and enjoy the benefits
from its high performance. By purchasing a Brave product, you show a desire for quality and durability. Like all mechanical equipment this
unit requires a due amount of care. Treat this unit like the high quality piece of machinery it is. Neglect and improper handling may impair its
performance.
Thoroughly read the instructions and understand the operation before using your product. Always contact Brave Product Support at
1-800-350-8739 prior to having any service or warranty work performed, as some services performed by parties other than Brave approved
service centers may void this warranty. This limited warranty is in lieu of any other warranty expressed or implied, written or oral and Brave
assumes no other responsibility or liability outside that expressed within this limited warranty.
Limited Warranty for Brave and Brave Pro Pressure Washer Models:
BR1517ECO
BR2528HCO
BR2530HCO
BRP2530HCA
BRP3033HCA
BRP3540HCA
BRP1520ECA
BRP4030HCA
BRP4030HAR
Consumer Warranty Period
Commercial Warranty Period
Weldments
2years from date of purchase by user 2year from date of purchase by user
Electric Motor,Burner, Pumps
2years from date of purchase by user 1 year from date of purchase by user
Wear Parts
In addition to the normal warranty, Brave shall warrant some normal wear itemsfrom defects in material or
workmanship for a period of 30 days from the date of purchase by user. Normal wear items covered under
this warranty are limited to: filters, gaskets, o-rings, oil seals, springs, nozzles, lance, bushings, grease zerks,
switches, hoses, tires.Routine maintenance items such as lubricants, clutch adjustments, tune ups are not
covered under warranty.
Engines
The engine warranty is covered under the terms and conditions as outlined by the engine manufactures
warranty contained herein and is the sole responsibility of the engine manufacturer. Normal engine
maintenance such as spark plugs, oil changes, air filters, adjustments, fuel system cleaning and obstruction
due to build up is not covered by this Brave limited warranty.
“Consumer use” means personal residential household use by a consumer. “Commercial use” means all other uses, including, but not
limited to, use for commercial, income producing or rental purposes or when purchased by a business.
This limited warranty applies to the original purchaser of the equipment (verification of purchase, in the form of a receipt, is the responsibility
of the buyer), is non-transferable, and covers parts and labor. Parts will be replaced or repaired at no charge, except when the equipment has
failed due to lack of proper maintenance. If a part is no longer available, the part may be replaced with a similar part of equal function. Any
misuse, abuse, alteration or improper installation or operations will void warranty. Determining whether a part is to be replaced or repaired is
the sole decision of Brave.Brave will not provide for replacement of complete products due to defective parts. Any costs incurred due to
replacement or repair of items outside of a Brave approved facility is the responsibility of the buyer and not covered under warranty.
Transportation costs to and from service center and/or service calls are the responsibility of the customer.
This limited warranty specifically excludes the following; failure of parts due to damage caused by accident, fire, flood, windstorm, acts of
God, applications not approved by Brave in writing, corrosion caused by chemicals, use of replacement parts which do not conform to
manufacturer’s specifications, damage related to rodent and/or insect infestation and damage caused by vandalism. Additional exclusions: loss
of running time, inconvenience, loss of income, or loss of use, including any implied warranty of merchantability of fitness for a specific use.
Also, power equipment needs periodic parts and service to perform well, and this limited warranty does not cover instances when normal use
has exhausted the life of a component or the engine.
This limited warranty does not cover any personal injury or damage to surrounding property caused by failure of any part, misuse or inability
to use the product.Alteration of the product, including safety features, shall void this limited warranty.
Repair or replacement of parts does not extend the warranty period. This limited warranty gives you specific legal rights. You may also have
other rights that vary by state.
Please have model number, item number and serial number on hand prior to making a warranty claim or inquiry.

4Any Questions, Comments, Problems, or Parts Orders
Call BRAVE Product Support 1-800-350-8739
Using the Operator’s manual
The operating manual is an important part of your pressure washer and
should be read thoroughly before initial use, and referred to often to make
sure adequate safety and service concerns are being addressed.
Reading the owner’s manual thoroughly will help avoid any personal injury
or damage to your machine. The information in this manual will oer you
the most eective tools for cleaning as well as the safest. By knowing
how best to operate this machine you will be better positioned to show
others who may also operate the unit.
This manual contains information for the complete range of pressure
washers, and is placed in order starting from the safety requirements
to the operating functions of your machine. You can refer back to the
manual at any time to help troubleshoot any specic operating functions,
so store it with the machine at all times.
Notice
Actual pressure released at the point of discharge may very by machine
due to varying factors including: Volume of water being fed to the ma-
chine by the water source, the inclusion of a Chemical injector in the line,
or variations in Engine performance
Attention: Read through the complete
manual prior to the initial use of your
pressure washer.
introDuction

5
Any Questions, Comments, Problems, or Parts Orders
Call BRAVE Product Support 1-800-350-8739
proDuct iDentification
Record Identication Numbers
Pressure Washer
If you need to contact an Authorized Dealer or Customer Service line for
information on servicing, always provide the product model and identica-
tion numbers.
You will need to locate the model and serial number for the machine and
record the information in the places provided below.
Date of Purchase:
Dealer Name:
Dealer Phone:
Product Identication Numbers
Model Number:
Serial Number:
Engine
Model Number:

6Any Questions, Comments, Problems, or Parts Orders
Call BRAVE Product Support 1-800-350-8739
safetY
IMPORTANT SAFETY INSTRUCTIONS
SAVE THESE INSTRUCTIONS
WARNING – When using this product basic precautions should
always be followed, including the following:
1. Read all the instructions before using the product.
2. To reduce the risk of injury, close supervision is necessary when a
product is used near children.
3. Know how to stop the product and bleed pressures quickly. Be
thoroughly familiar with the controls.
4. Stay alert – watch what you are doing.
5. Do not operate the product when fatigued or under the inuence
of alcohol or drugs.
6. Keep operating area clear of all persons
7. Do not overreach or stand on unstable support. Keep good
footing and balance at all times.
8. Follow the maintenance instructions specied in the manual.
9. To order replacement safety labels, call Brave Product Support at
1-800-350-8739.

7
Any Questions, Comments, Problems, or Parts Orders
Call BRAVE Product Support 1-800-350-8739
Understanding the Machine Safety Labels
The machine safety label shown below is placed on your machine
to draw attention to potential safety hazards.
safetY
START-UP INSTRUCTIONS
1. Attach garden hose.
2. Attach pressure hose.
3. Attach gun and lance.
4. Turn water supply ON.
5. Squeeze trigger to
purge air from pump.
6. Insert nozzle.
7. Start engine.
SHUT-DOWN INSTRUCTIONS
1. Turn engine OFF.
2. Turn water supply OFF.
3. Squeeze trigger to
relieve system pressure.
4. Remove garden hose.
5. Remove pressure hose.
6. Turn fuel valve OFF
(if equipped).
1 2
Location Part # Description
1 789002 Warning
1 781027 Instruction
WARNING:
ALWAYS make sure safety labels are in place and in good condition. If
a safety label is missing or not legible, order new labels because unsafe
operation can result. Call 1-800-350-8739 to order new safety labels.
1.) Burn hazard.
Do not touch hot muer.
WARNING
PN 781026
3.50"
4.63”
1.25”
3.00”
DIE CUT LAYOUT
File Name: 781026_RevC.ai
Decal Part Number: 781026
Decal Description: Decal, PW Warning Sheet
Material: KB15
Colors: White, Black, Safety Orange (PMS 152)
Drawn By: Nate Sherwood
Date Drawn: 2/10/14 REV
CN157 2/14
Material Change to KB15
ECN # DESCRIPTION DATE

8Any Questions, Comments, Problems, or Parts Orders
Call BRAVE Product Support 1-800-350-8739
safetY
The safety alert symbol ( ) is used with a signal word (DANGER,
CAUTION, WARNING), a pictorial and/or a safety message to alert
you to hazards.
DANGER indicates a hazard which, if not avoided, will result in death
or serious injury.
WARNING indicates a hazard which, if not avoided, could result in
death or serious injury.
CAUTION indicates a hazard which, if not avoided, might result in
minor or moderate injury.
NOTICE indicates a situation that could result in equipment damage.
Follow safety messages to avoid or reduce the risk of injury or
death.
Hazard Symbols and Meanings
Save these Instructions
Safety Rules
This is the safety alert symbol. It is
used to alert you to potential personal
injury hazards. Obey all safety
messages that follow this symbol to
avoid possible injury or death.
explosion
kickBack
fall fluiD injection moving parts reaD manual
Hot surface flYing oBjects slipperY
fire electric sHock toxic fumes

9
Any Questions, Comments, Problems, or Parts Orders
Call BRAVE Product Support 1-800-350-8739
safetY
WARNING
Fuel and its vapors are extremely ammable and
explosive.
Fire or explosion can cause severe burns or death.
When Adding or Draining Fuel
• Turn pressure washer OFF and let it cool at least 2 minutes before
removing fuel cap. Loosen cap slowly to relieve pressure in tank.
• Fill or drain fuel tank outdoors.
• DO NOT overll tank. Allow space for fuel expansion.
• If fuel spills, wait until it evaporates before starting engine.
• Keep fuel away from sparks, open ames, pilot lights, heat, and other
ignition sources.
• DO NOT light a cigarette or smoke.
When Starting Equipment
• Ensure spark plug, muer, fuel cap, and air cleaner are in place.
• DO NOT crank engine with spark plug removed.
When Operating Equipment
• DO NOT tip engine or equipment at angle which causes fuel to spill.
• DO NOT spray ammable liquids.
When Transporting or Repairing Equipment
• Transport/repair with fuel tank EMPTY or with fuel shuto valve OFF.
• Disconnect spark plug wire.
When Storing Fuel or Equipment with Fuel in Tank
• Store away from furnaces, stoves, water heaters, clothes dryers, or
other appliances that have pilot light or other ignition source because
they can ignite fuel vapors.
WARNING
Risk of electrocution.
Contact with power source can cause electric shock
or burn.
• NEVER spray near power source.

10 Any Questions, Comments, Problems, or Parts Orders
Call BRAVE Product Support 1-800-350-8739
safetY
WARNING
Starter cord kickback (rapid retraction) can result in
bodily injury. Kickback will pull hand and arm toward
engine faster than you can let go.
Broken bones, fractures, bruises, or sprains could
result.
• NEVER pull starter cord without rst relieving spray gun pressure.
• When starting engine, pull cord slowly until resistance is felt and then
pull rapidly to avoid kickback.
• After each starting attempt, where engine fails to run, always point
spray gun in safe direction and squeeze spray gun trigger to release
high pressure.
• Firmly grasp spray gun with both hands when using high pressure
spray to avoid injury when spray gun kicks back.
WARNING
Running engine gives o carbon monoxide, an odorless,
colorless, poison gas.
Breathing carbon monoxide can cause headache,
fatigue, dizziness, vomiting, confusion, seizures, nausea,
fainting or death.
Some chemicals or detergents may be harmful if inhaled
or ingested, causing severe nausea, fainting, or
poisoning.
• Operate pressure washer ONLY outdoors.
• Keep exhaust gas from entering a conned area through windows,
doors, ventilation intakes, or other openings.
• DO NOT start or run engine indoors or in an enclosed area, even if
windows and doors are open.
• Use a respirator or mask whenever there is a chance that vapors may
be inhaled.
• Read all instructions with mask so you are certain the mask will
provide the necessary protection against inhaling harmful vapors.

11
Any Questions, Comments, Problems, or Parts Orders
Call BRAVE Product Support 1-800-350-8739
safetY
WARNING
Contact with muer area can result in serious burns.
Exhaust heat/gases can ignite combustibles, structures
or damage fuel tank causing a re.
• DO NOT touch hot parts and AVOID hot exhaust gases.
• Allow equipment to cool before touching.
• Keep at least 5 feet (1.5 m) of clearance on all sides of pressure
washer including overhead.
WARNING
Use of pressure washer can create puddles and
slippery surfaces.
Kickback from spray gun can cause you to fall.
• Operate pressure washer from a stable surface.
• The cleaning area should have adequate slopes and drainage to
reduce the possibility of a fall due to slippery surfaces.
• Be extremely careful if you must use the pressure washer from a
ladder, scaolding, or any other similar location.
• Firmly grasp spray gun with both hands when using high pressure
spray to avoid injury when spray gun kicks back.
WARNING
Risk of eye injury.
Spray can splash back or propel objects.
• Always wear safety goggles when using this equipment or in vicinity
of where equipment is in use.
• Before starting the pressure washer, be sure you are wearing
adequate safety goggles.
• NEVER substitute safety glasses for safety goggles.

12 Any Questions, Comments, Problems, or Parts Orders
Call BRAVE Product Support 1-800-350-8739
safetY
WARNING
Starter and other rotating parts can entangle hands,
hair, clothing, or accessories.
• NEVER operate pressure washer without protective housing or
covers.
• DO NOT wear loose clothing, jewelry or anything that may be caught
in the starter or other rotating parts.
• Tie up long hair and remove jewelry.
WARNING
The high pressure stream of water that this equipment
produces can cut through skin and its underlying
tissues, leading to serious injury and possible
amputation.
Spray gun traps high water pressure, even when engine
is stopped and water is disconnected, which can cause
injury.
• DO NOT allow CHILDREN to operate pressure washer.
• NEVER repair high pressure hose. Replace it.
• NEVER repair leaking connections with sealant of any kind. Replace
o-ring or seal.
• NEVER connect high pressure hose to nozzle extension.
• Keep high pressure hose connected to pump and spray gun while
system is pressurized.
• ALWAYS point spray gun in safe direction and squeeze spray gun
trigger, to release high pressure, every time you stop engine.
• NEVER aim spray gun at people, animals, or plants.
• DO NOT secure spray gun in open position.
• DO NOT leave spray gun unattended while machine is running.
• NEVER use a spray gun which does not have a trigger lock or trigger
guard in place and in working order.
• Always be certain spray gun, nozzles and accessories are correctly
attached.

13
Any Questions, Comments, Problems, or Parts Orders
Call BRAVE Product Support 1-800-350-8739
safetY
NOTICE
High pressure spray may damage fragile items including glass.
• DO NOT point spray gun at glass when using red 0° spray tip.
• NEVER aim spray gun at plants.
NOTICE
Improper treatment of pressure washer can damage it and shorten its
life.
• If you have questions about intended use, ask dealer or contact
nearest authorized dealer.
• NEVER operate units with broken or missing parts, or without
protective housing or covers.
• DO NOT by-pass any safety device on this machine.
• DO NOT tamper with governed speed.
• DO NOT operate pressure washer above rated pressure.
• DO NOT modify pressure washer in any way.
• Before starting pressure washer in cold weather, check all parts of
the equipment to be sure ice has not formed there.
• NEVER move machine by pulling on hoses. Use handle provided on
unit.
• Check fuel system for leaks or signs of deterioration, such as chafed
or spongy hose, loose or missing clamps, or damaged tank or cap.
Correct all defects before operating pressure washer.
WARNING
Unintentional sparking can result in re or electric
shock.
When Adjusting or Making Repairs to Your Pressure Washer
• Disconnect the spark plug wire from the spark plug and place the
wire where it cannot contact spark plug.
When Testing for Engine Spark
• Use approved spark plug tester.
• DO NOT check for spark with spark plug removed.

14 Any Questions, Comments, Problems, or Parts Orders
Call BRAVE Product Support 1-800-350-8739
Read this operator’s manual and safety
rules before operating your pressure
washer.
gas WasHer components
1. Spray Tips Detergent, 0°, 15°, and 40°: for various high pressure cleaning applications.
2. High Pressure Hose Connect one end to water pump and the other end to spray gun.
3. Pressure Control Knob Varies pressure of high pressure spray.
4. Water Inlet Connection for garden hose.
5. High Pressure Outlet Connection for high pressure hose.
6. Pump Develops high pressure.
7. Oil Level Indicator Level should be at halfway
8. Detergent Siphoning Tube/Filter Use to siphon pressure washer safe detergent into
the low pressure stream.
9. Choke Lever Prepares a cold engine for starting.
10. Fuel Valve Used to turn fuel supply on and o to engine.
11. Recoil Starter Used for starting the engine manually.
12. Throttle Lever Sets engine in starting mode for recoil starter.
13. Engine Switch Set switch to“On” for recoil starting. Set switch to “O” to stop a
running engine.
14. Air Filter Protects engine by ltering dust and debris out of intake air.
15. Fuel Tank Fill tank with regular unleaded fuel. Always leave room for fuel expansion.
16. Spray Gun Extension with Quick Connect Nozzles Controls the application of
water onto cleaning surface with trigger device. Includes trigger lock. Allows you to
switch between ve dierent spray tips.
1.
16.
2.
5.
9.
8.
10.
6.
11.
13.
7.
3.
12.
14. 15. 4.

15
Any Questions, Comments, Problems, or Parts Orders
Call BRAVE Product Support 1-800-350-8739
Ref Description Part #
1 Spray Gun & Wand Assy. 779165
2 High Pressure Hose (50’) 38525
3Spray Tips 900050Q (0°), 915050Q (15°), 940050Q (40°), 965050Q (65°)
4 Wheels 788813F
5 Feet 2215-1
6 1/2” Inlet Filter 35169
7 Quick Connect Outlet 777915
8 AR Pump with Unloader GRKV4G35HF35VR31D
9 Soap Injector Hose 777165
10 Frame Assembly 780223GB-1
11 Decal 792154-1
12 Hose Hanger 779761L (left) | 779761R (right)
13 Rubber Grommets 35198-1
14 Engine - Honda GX340 BRAVEGX340
15 Unloader Valve AR20992
16 Knob 85601004
13.
10.
5.
11.
14.
8.
7.
6.
9.
4.
3.
12.
900050Q (0°), 915050Q (15°)
940050Q (40°), 965050Q (65°)
gas WasHer components
15.
16.

16 Any Questions, Comments, Problems, or Parts Orders
Call BRAVE Product Support 1-800-350-8739
A.R. North America, Inc. • www.arnorthamerica.com • info@arnorthamerica.com
P
arts
B
reakdown
Pos Code Description Qty
Pos Code Description Qty
Special Parts / Kits
Repair Kits
P
arts
B
reakdown
Pos Code Description Qty
Code Description Qty
rKV 3400
rPm
60 61
69 73
"D" VERSION
21
22
23
25
24
26
29
30
1516
48
46
1
5
6
4
3
1
2
4
11
12
13
14
49
47
42
50
19 20
18
40
17
27
28
43
72
2
3
75
42
34
86
87 88 89
36
35 42 43
77
70
71
F41
1 960160 O-Ring
Ø
17.86x2.62
6
960090 Valve cap
- Brass
(478 in/lbs) ml
6
960850 Valve cap
- SS
(478 in/lbs) ³n«ux
6
1380740 Valve cap
- Brass
(478 in/lbs) r
6
960090T Valve cap
- 1/4”threaded - Brass
(478 in/lbs)
1
2
960850T Valve cap
- 1/4”threaded - SS
(478 in/lbs)
1
3 889052 Complete valve 6
4 880830 O-Ring
Ø
15.54x2.62
6
880581 Plug
1/4” G - Brass
mln
2
5
1380690 Plug
1/4” G - NP
³«ux
2
6 820510 O-Ring
Ø
10.82x1.78
2
11 960110 Support ring 3
12 880320 High pressure packing
(Red1)
3
12 1382740 High pressure packing
(Brown)
3
13 1380090 Piston guide 3
14 961240 O-Ring
Ø
31.47x1.78
3
15 880330 Gasket 3
16 1383130 Oil seal 3
17 850370 Bolt
M8x16
(217in/lbs)
8
18 1380050 Closed bearing support 1
19 640030 O-Ring
Ø
59.99x2.62
2
20 2280240 Bearing 1
21 1382770 Pump housing 1
22 880130 Vented oil cap 1
23 962010 Nut
M8
(106 in/lbs)
3
24 962000 Washer
Ø
8.1
3
25 1380940 Ceramic piston 3
26 1380950 Slinger 3
27 600180 O-Ring
Ø
7.66x1.78
3
28 1380920 Guiding piston 3
29 1380060 Piston pin 3
1383020 Con rod
- Bronze
3
30
1383050 Con rod
- Aluminum
3
34 1780510 O-Ring 1
35 1789010 Complete cover 1
36 1343510 Bolt
M6x14
(89 in/lbs)
6
1380120 Shim
0.10 mm
1-3
1380130 Shim
0.20 mm
1-3
1380530 Shim
0.25 mm
1-3
40
1382810 Shim
0.05 mm
1-3
42 740290 O-Ring
Ø
14x1.78
3
43 1980740 Plug
3/8” G - Brass
2
1980740 Plug
3/8” G - Brass
mln
1
46
1981180 Plug
3/8” G - NP
³«ux
1
47 180101 O-Ring
Ø
17.5x2
1
820361 Plug
1/2” G - Brass
mln
1
48
960870 Plug
1/2” G - NP
³«ux
1
1381071 Pump head
- Brass
mln
1
49
1381070 Pump head
- NP
³«ux
1
50 820150 Head bolt
M8x70
(217 in/lbs)
8
60 1380320 Bearing 1
61 621170 Oil seal 1
62 1380220 O-Ring
Ø
72.75x1.78
1
2280140 Hollow shaft
Ø
1
m³
1
2280130 Hollow shaft
Ø
1
ln«
1
2280590 Hollow shaft
Ø
1
u
1
69
2280600 Hollow shaft
Ø
1
x
1
70 2281510 Gas engine ange 1
71 180030 Bolt
M8x20
(216 in/lbs)
4
72 1381850 Washer 8
73 820440 Set screw
M6x6
1
75 1080401 Back-up ring 3
2289208 Complete pump head
ml
1
2289209 Complete pump head
n
1
77
2289221 Complete pump head
³«ux
1
86 1260250 Oil sight glass 1
87 1260430 Snap ring 1
88 1780690 Contrast disc 1
89 1140450 O-Ring
Ø
20.24x2.62
1
AR64516 Oil 1
Oil CapaCity - 15 Oz
Legend
Ø18 Ø18 Ø18 Ø18
For mFor lFor uFor x
RKV3.5G25 RKV4G30A RKA4.5G32 RKV5.5G40H
RKV3.5G30 RKV4G30 RKV4.5G40H
RKV3.5G37 RKV4G36
RKV4037 RKV4G37
For n For ³For « For o
RKV4G32 RKV3.5G35H RKV4G35H RKV3.5G30H
RKV3.5G40H RKV4G40H
2809 Viton water seals
Ø
18
1
42213 Kit for up to 180° F
Ø
18
High Temp 1
42149 Single Cylinder Piston Kit
Ø
18
1
Valves
Kit 1828
3(6)
4(6)
Pistons
Kit 2546
23(3)
24(3)
25(3)
26(3)
27(3)
61
16(3)
34
19
Water Seals
Kit 1857
12(3)
14(3)
15(3)
Oil Seals
Kit 1856
75(3)
62
Support Rings
Kit 1829
11(3)
Valves
Kit 1828
3(6)
4(6)
Pistons
Kit 2546
23(3)
24(3)
25(3)
26(3)
27(3)
61
16(3)
34
19
Water Seals
Kit 1857
12(3)
14(3)
15(3)
Oil Seals
Kit 1856
75(3)
62
Support Rings
Kit 1829
11(3)
Valves
Kit 1828
3(6)
4(6)
Pistons
Kit 2546
23(3)
24(3)
25(3)
26(3)
27(3)
61
16(3)
34
19
Water Seals
Kit 1857
12(3)
14(3)
15(3)
Oil Seals
Kit 1856
75(3)
62
Support Rings
Kit 1829
11(3)
Valves
Kit 1828
3(6)
4(6)
Pistons
Kit 2546
23(3)
24(3)
25(3)
26(3)
27(3)
61
16(3)
34
19
Water Seals
Kit 1857
12(3)
14(3)
15(3)
Oil Seals
Kit 1856
75(3)
62
Support Rings
Kit 1829
11(3)
Valves
Kit 1828
3(6)
4(6)
Pistons
Kit 2546
23(3)
24(3)
25(3)
26(3)
27(3)
61
16(3)
34
19
Water Seals
Kit 1857
12(3)
14(3)
15(3)
Oil Seals
Kit 1856
75(3)
62
Support Rings
Kit 1829
11(3)
pump components

17
Any Questions, Comments, Problems, or Parts Orders
Call BRAVE Product Support 1-800-350-8739
BRP4030HAR
FLOW OUTPUT
PSI (bar) 3000 (207)
GPM (I/min) 4.25 (16.09) Max
Water Temp 140° F (60°C)
ENGINE
Engine Honda GX 340
Horsepower 10.7 Net
DIMENSIONS/COM-
PONENTS
Length 34″
Width 21″
Height 38″
Pump Model AR GRKV4G35HV-F35
Pump Oil Capacity 15 oz
SUPPLIES REQUIRED (not included)
Engine Oil Refer to Engine Owner’s
Manual
Pump Oil (Shipped with Oil, but rells
required SAE 30 Non-Deter-
gent Oil
specifications

18 Any Questions, Comments, Problems, or Parts Orders
Call BRAVE Product Support 1-800-350-8739
Your pressure washer requires some assembly and is ready for use after
it has been properly serviced with the recommended oil and fuel.
If you have any problems with the assembly of your pressure washer,
please call the pressure washer help line. If calling for assistance, please
have the model and serial number from the data tag available.
Unpack the Pressure Washer
1. Remove the parts bag, accessories, and inserts included with
pressure washer.
2. Open box completely by cutting each corner from top to bottom.
3. Ensure you have all included items prior to assembly.
Attach Handle
1. Place handle (A) onto handle supports (B) connected to main unit.
Make sure holes (C) in handle align with holes on handle supports.
assemBlY
NOTE: It may be necessary to move the handle supports from
side to side in order to align the handle so it will slide over the
handle supports.
3. Insert multi-colored quick connect spray tips and other supplied
accessories in spaces provided on handle.
2. Insert carriage bolts through holes from outside of unit and
attach a plastic knob from inside of unit. Tighten by hand.
C
B
A

19
Any Questions, Comments, Problems, or Parts Orders
Call BRAVE Product Support 1-800-350-8739
pre-operation cHecklist
Follow the Checklist Below Prior to Using the Machine Each Time
1. Check to ensure the engine oil is at the proper level.
Use SAE 10W30 Oil
2. Check the 2 handle knobs to ensure they are tight and will not vibrate
loose.
3. Add fuel to the gas tank.
4. Connect and tighten the garden hose to the GHA (garden hose inlet)
connection.
** Water must be turned on prior to starting the washer, pull the
spray trigger to ensure water is moving the through the lines and
out the nozzle without any leaks before starting the unit.**
5. Review the safety guidelines in the manual prior to starting the unit.
If you have any issues operating the pressure washer, call the customer
service line.
Connect Hose and Water Supply to Pump Before Starting
WARNING
DO NOT start your pressure washer without the water
supply turned on.
• Failure to do so will result in damaging the pump from overheating
and void the warranty.
WARNING
Always check the level of the engine oil prior to starting
the washer.
• Failure to do so could cause the engine to seize if the oil is low or
empty.

20 Any Questions, Comments, Problems, or Parts Orders
Call BRAVE Product Support 1-800-350-8739
starting Your WasHer
How to Start Your Pressure Washer
To start your pressure washer for the rst time, follow these instructions
step-by-step. This starting information also applies if you have let the
pressure washer sit idle for at least a day.
1. Place pressure washer near an outside water source capable of
supplying water at a ow rate greater than 3.8 gallons per minute and
no less than 20 PSI at pressure washer end of garden hose. DO NOT
siphon supply water.
2. Make sure unit is in a level position.
3. Connect garden hose to water inlet on pressure washer pump.
4. Attach wand extension to spray gun. Tighten by hand.
5. Choose desired spray tip, pull back nozzle extension collar, insert spray
tip and release collar. Tug on spray tip to make sure it is securely in
place. See Spray Tips.
NOTICE
DO NOT run the pump without the water supply connected and
turned on.
• Damage to equipment resulting from failure to follow this instruction
will void warranty.
Select Nozzle for Spray Gun
Your pressure washer is equipped with four high-pressure nozzles and one low-
pressure nozzle. Generally, the wider the spray angle of the nozzle, the lower the
spray impact produced. Select the appropriate nozzle for the job based on the
following table:
Color of Nozzle: Spray Angle Used For:
Red 0 Highest Impact
Yellow 15 Tough Stains/Stripping
Green 25 General
White 40 Light Cleaning
Black-Low pressure 65 Chemicals
NOTE: You must use the low pressure black nozzle for spraying chemicals.
Table of contents
Other Brave Pressure Washer manuals


