manuals.online logo
Brands
  1. Home
  2. •
  3. Brands
  4. •
  5. Broan
  6. •
  7. Ventilation Hood
  8. •
  9. Broan B5936SS User manual

Broan B5936SS User manual

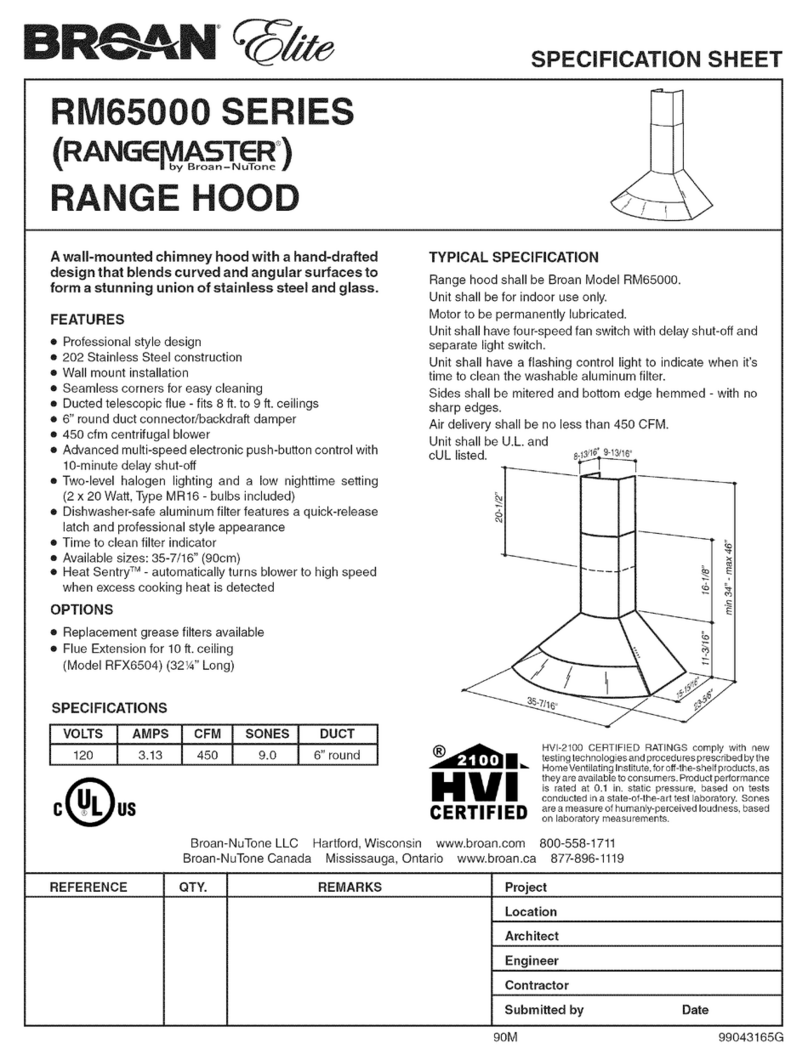
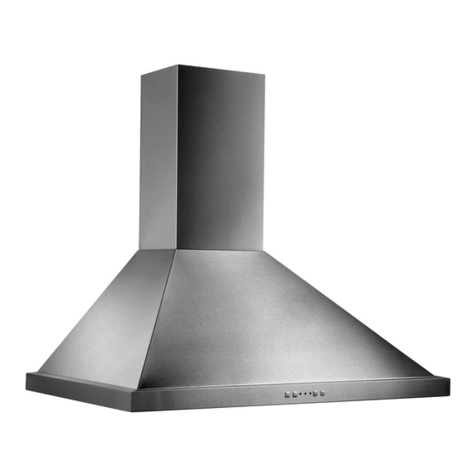
MODEL B5936SS
Page 5
7. Attach the hood assembly to the ceiling bracket using (8)
M4 x 10mm machine screws (2 for each support leg).
8. Connect metal duct to ceiling duct and seal with duct tape.
9. Connect power cable to house wiring inside of electrical
outlet box. Black to Black, White to White, and Green to
Green or Bare wires. Secure power cable to wiring box with
appropriate connector and re-attach outlet box cover.
FRONT
(8) M4 x 10mm
PAN HEAD
MACHINE
SCREWS
POWER
CABLE
10. Slide the inner flue up to the ceiling and secure with (4) M4
x 8mm sheet metal screws.
11. Remove the protective coating from the hood and the
outer flue.
(4) M4 x 8mm
SHEET METAL
SCREWS
INSTALL THE HOOD
(Non-Ducted Installation Only)
NON-DUCT
PLENUM
2 TIE
WRAPS FLEXIBLE DUCT
NON-DUCTED
RECIRCULATION
FILTER
NON-DUCT PLENUM
COLLAR
8 MOUNTING
SCREWS
(M4 x 8
Pan Head
Sheet Metal)
FRONT
NOTE:
Non-ducted installations require Non-Duct kit; model RK59
(purchased separately).
Do not use plastic or rigid metal duct.
1. Remove the damper flaps from the damper / duct connector
and discard flaps.
FRONT
DAMPER
FLAPS
2. Attach non-duct collar to non-duct plenum using (4) M4 x
8mm sheet metal screws.
(4) M4 x 8mm
SHEET METAL
SCREWS
NON-DUCT OPTION AVAILABLE ONLY IN THE U. S.
MODEL B5936SS
Page 6
5. Measure the length of 6” round flexible duct required from
the damper / duct connector to the ductwork rough-in in the
ceiling. Connect the duct to the damper / duct connector,
secure with tie wrap and seal with duct tape.
6. Attach the aluminum flexible duct to the non-duct plenum
collar. Make sure non-duct plenum “front” is facing front of
hood. Secure with tie wrap and seal with duct tape.
7. Remove the protective coating from the inner the flue. Turn
the inner flue so that the louvers are at the top. Carefully
slide the inner flue down into the outer flue. Slide the flues
over the angle brackets. Make sure the side marked “front”
faces the control side of the hood. Feed the power cable up
through the flues.
8. Pull the inner flue up and attach the non-duct plenum with
collar to the upper flue using (4) M4 x 8mm sheet metal screws.
FRONT
(4) M4 x 8mm
SHEET METAL
SCREWS INNER
FLUE
OUTER
FLUE
FLEXIBLE
DUCT
DUCT
TAPE
DAMPER /
DUCT
CONNECTOR
POWER
CABLE
NON-DUCT
PLENUM
(8) M4 x 10mm
PAN HEAD
MACHINE
SCREWS
1. Assemble (4) angle brackets to the hood using (8) M4
x 10mm pan head machine screws (2 for each angle
bracket).
2. Determine dimension “H” based upon ceiling height and
height of hood installation above cooktop:
8-ft. ceiling Hood 30” above cooktop H = 30”
Hood 30½” above cooktop H = 29½”
9-ft. ceiling Hood 30” above cooktop H = 42”
Hood 36” above cooktop H = 36”
10-ft. ceiling Hood 30” above cooktop H = 54”
Hood 36” above cooktop H = 48”
For 10-ft. ceilings: Purchase a 10-ft. flue extension (Model
FXN59SS) which includes (4) additional angle mounting
brackets, (1) longer upper flue, and additional mounting
hardware.
H
3”
(16) M4 x 10mm
PAN HEAD
MACHINE
SCREWS &
(16) M4
SERRATED
FLANGE NUTS
(8) M4 x 10mm
PAN HEAD
MACHINE
SCREWS
3. Attach the upper set of (4) angle brackets to the outside of
the lower angle brackets according to dimension “H”. Use
(16) M4 x 10mm pan head machine screws and (16) M4
serrated flange nuts (4 at each angle bracket connection).
4. Attach the angle bracket assemblies to the upper hood
mounting locations using (8) M4 x 10mm pan head machine
screws (2 for each angle bracket).
For 10-ft. ceilings: Attach a third set of (4) angle brackets
to the inside of the second set of angle brackets using
hardware supplied.
MODEL B5936SS
Page 7
FRONT
9. Attach the hood assembly to the ceiling bracket using (8)
M4 x 10mm machine screws (2 for each support leg).
10. Connect power cable to house wiring. Black to Black,
White to White, and Green to Green or Bare wires. Secure
power cable to wiring box with appropriate connector.
(8) M4 x 10mm
PAN HEAD
MACHINE
SCREWS
11. Slide the inner flue up to the ceiling and secure with (4) M4
x 8mm sheet metal screws.
12. Remove the protective coating from the hood and the
outer flue.
(4) M4 x 8mm
SHEET METAL
SCREWS
13. Remove the grease filters by pulling down the metal latch
tab and tilting the filters downward to remove.
14. Install the non-duct recirculation filter as shown. Turn
mounting tabs on hood to secure filter.
15. Reinstall grease filters by aligning rear filter tabs with
slots in the hood. Pull down the metal latch tab, push filter
into position and release. Make sure filters are securely
engaged after installation.
METAL
LATCH
GREASE
FILTERS
NON-DUCT
RECIRCULATION
FILTER
NON-DUCT
FILTER
MOUNTING
TABS

Other manuals for B5936SS

2

Other Broan Ventilation Hood manuals

Broan Best K29 User manual

Broan

Broan Best K29 User manual

Broan BCS3 Series Assembly instructions

Broan

Broan BCS3 Series Assembly instructions

Broan RMPE Series User manual

Broan

Broan RMPE Series User manual

Broan EVOLUTION 3 User manual

Broan

Broan EVOLUTION 3 User manual

Broan F40000 Series User manual

Broan

Broan F40000 Series User manual

Broan BCDF1 Series Instruction and safety manual

Broan

Broan BCDF1 Series Instruction and safety manual

Broan QS330BL User manual

Broan

Broan QS330BL User manual

Broan Nutone PM25 User manual

Broan

Broan Nutone PM25 User manual

Broan NuTone 1536 User manual

Broan

Broan NuTone 1536 User manual

Broan Quiet Hood QT20000 SERIES User manual

Broan

Broan Quiet Hood QT20000 SERIES User manual

Broan CLDA136SS Instruction and safety manual

Broan

Broan CLDA136SS Instruction and safety manual

Broan ELITE E661 User manual

Broan

Broan ELITE E661 User manual

Broan QP236BL User manual

Broan

Broan QP236BL User manual

Broan AEEPD2445SS User manual

Broan

Broan AEEPD2445SS User manual

Broan EPD61 SERIES User manual

Broan

Broan EPD61 SERIES User manual

Broan PM250 SERIES Installation instructions

Broan

Broan PM250 SERIES Installation instructions

Broan Antero CLSC230WW Instruction and safety manual

Broan

Broan Antero CLSC230WW Instruction and safety manual

Broan Elite EW43 Series Instruction and safety manual

Broan

Broan Elite EW43 Series Instruction and safety manual

Broan Rangemaster 61000 Series User manual

Broan

Broan Rangemaster 61000 Series User manual
Broan Quiet Hood QT20000 SERIES User manual

Broan

Broan Quiet Hood QT20000 SERIES User manual

Broan CLDA1 Series Instruction and safety manual

Broan

Broan CLDA1 Series Instruction and safety manual

Broan 614804EX Series User manual

Broan

Broan 614804EX Series User manual

Broan PM300SS Installation guide

Broan

Broan PM300SS Installation guide

Broan QDE30WW User manual

Broan

Broan QDE30WW User manual

Popular Ventilation Hood manuals by other brands

Salda SMARTY 2R SLIMLINE operating instructions

Salda

Salda SMARTY 2R SLIMLINE operating instructions

Amica FH 664 300 S operating instructions

Amica

Amica FH 664 300 S operating instructions

Caple CCH100 technical information

Caple

Caple CCH100 technical information

AirJet LC installation guide

AirJet

AirJet LC installation guide

Wolf Downdraft Ventilation Use & care guide

Wolf

Wolf Downdraft Ventilation Use & care guide

Blaupunkt 5DB66250 Instructions for installation and use

Blaupunkt

Blaupunkt 5DB66250 Instructions for installation and use

Franke FCS 90 NF EV8 user manual

Franke

Franke FCS 90 NF EV8 user manual

Xo XORI42SC User instructions

Xo

Xo XORI42SC User instructions

Silverline 3490 user guide

Silverline

Silverline 3490 user guide

Residentia RH60 user manual

Residentia

Residentia RH60 user manual

Proline Island Pro installation guide

Proline

Proline Island Pro installation guide

Bull 1250 CFM Installation instructions & use & care guide

Bull

Bull 1250 CFM Installation instructions & use & care guide

Zanussi ZHC 605 Installation, use and maintenance handbook

Zanussi

Zanussi ZHC 605 Installation, use and maintenance handbook

LuxeAir PINAR134SS Installation instruction guide

LuxeAir

LuxeAir PINAR134SS Installation instruction guide

Wolf W662418 Planning information

Wolf

Wolf W662418 Planning information

Dacor ERV48-ER installation instructions

Dacor

Dacor ERV48-ER installation instructions

Atag WV60 MS Series Instructions for use

Atag

Atag WV60 MS Series Instructions for use

ELICA HAIKU 32 Instruction on mounting and use

ELICA

ELICA HAIKU 32 Instruction on mounting and use

manuals.online logo
manuals.online logoBrands
  • About & Mission
  • Contact us
  • Privacy Policy
  • Terms and Conditions

Copyright 2025 Manuals.Online. All Rights Reserved.