7
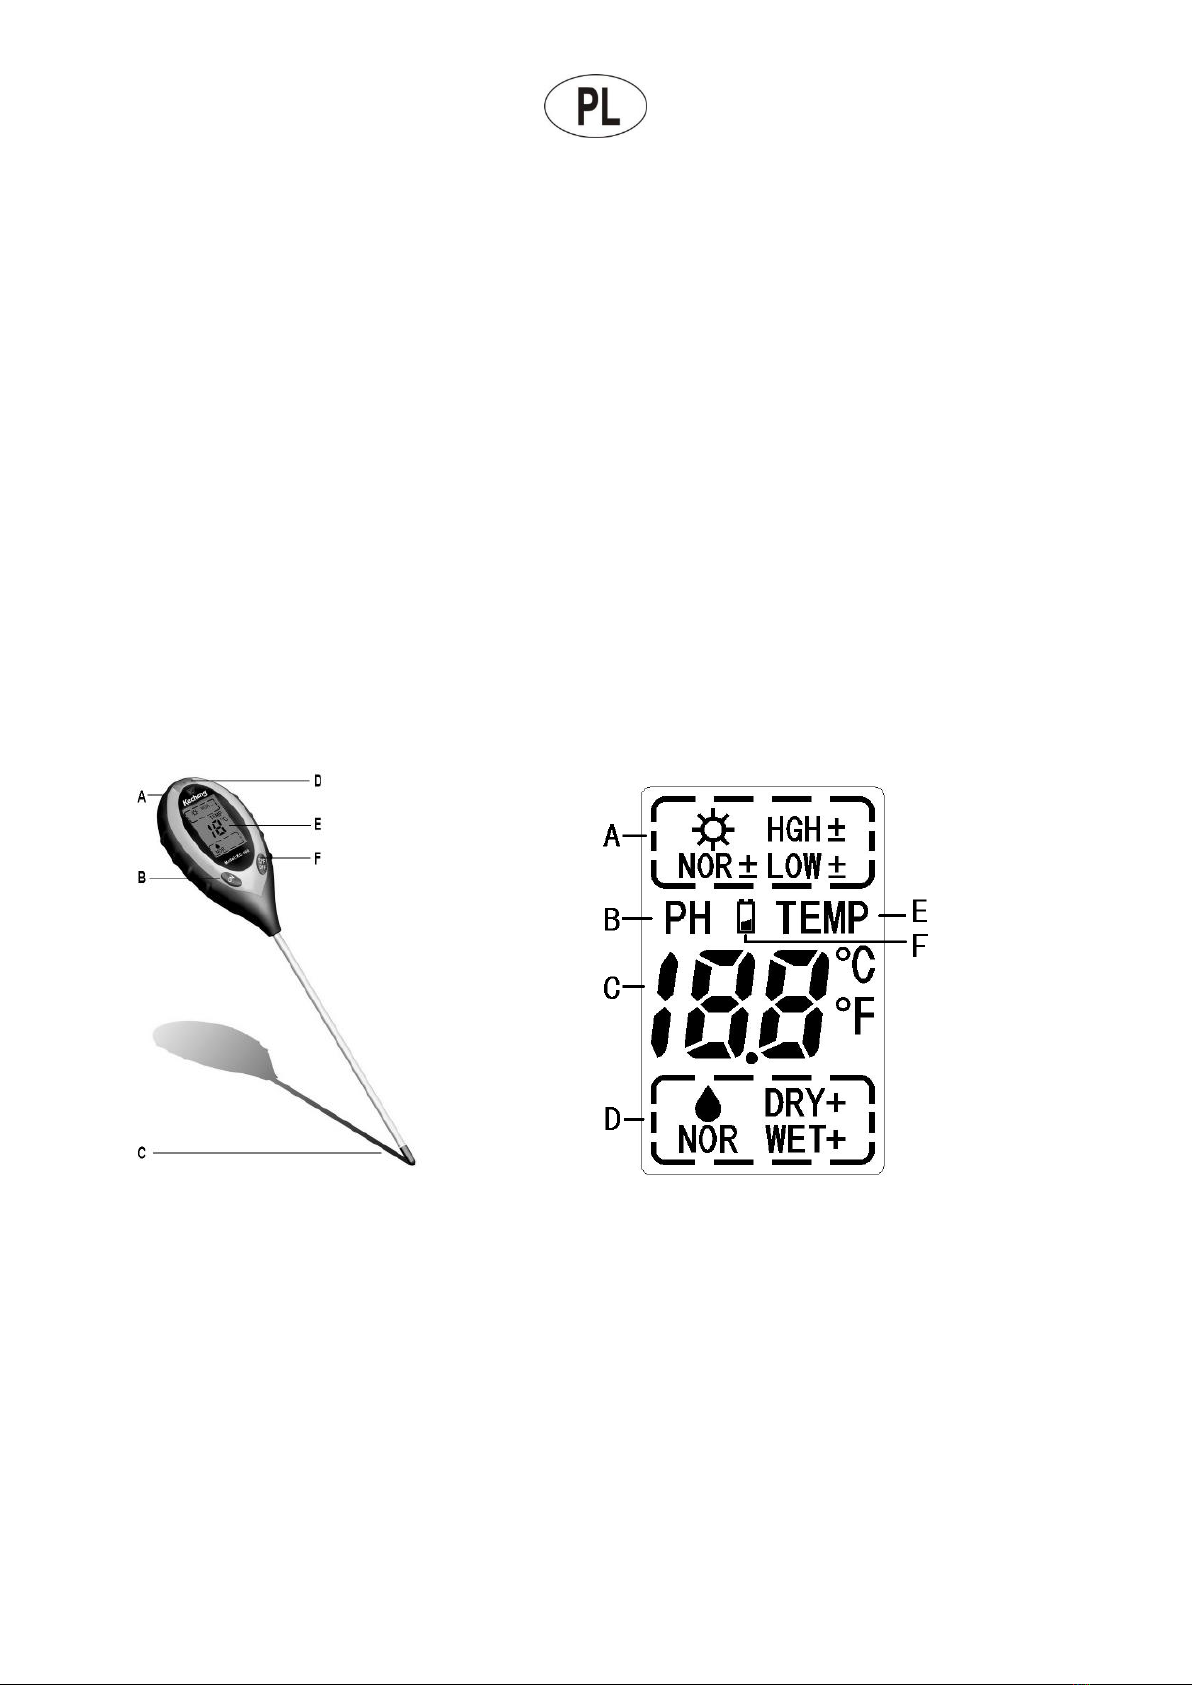
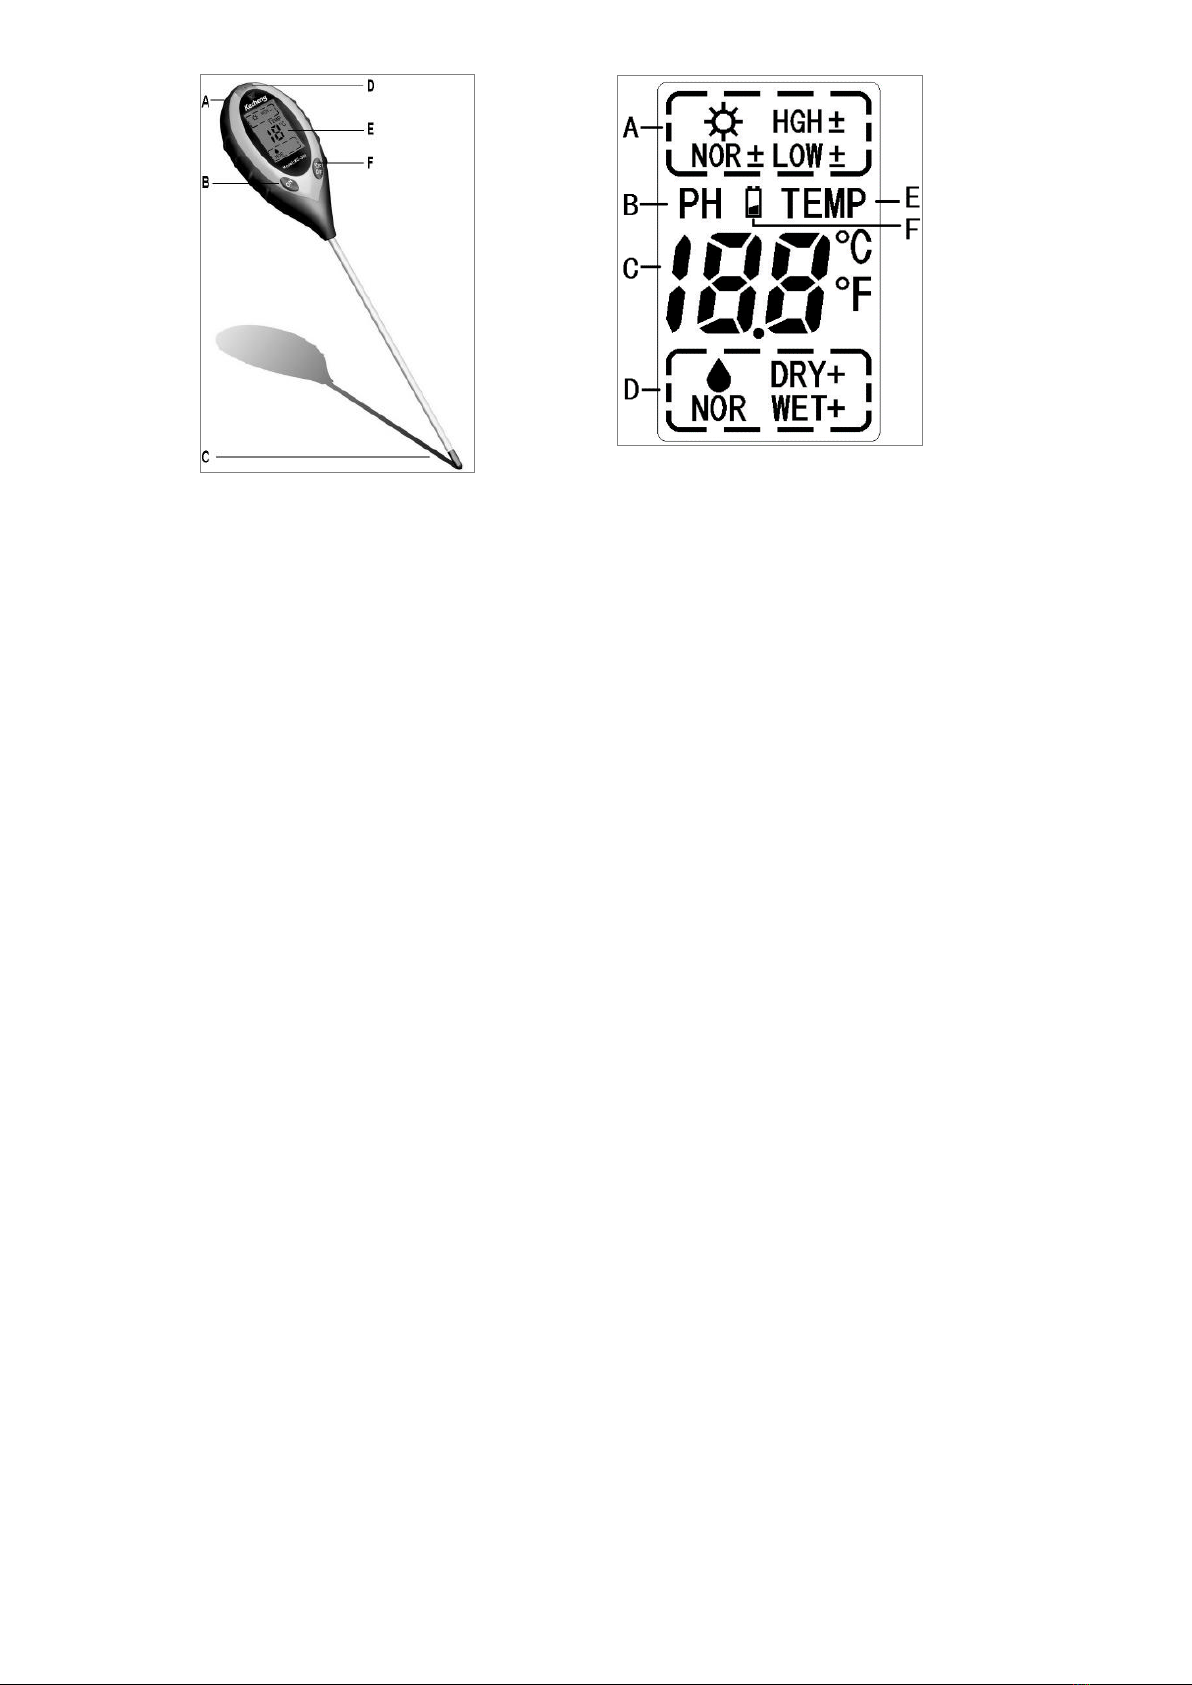
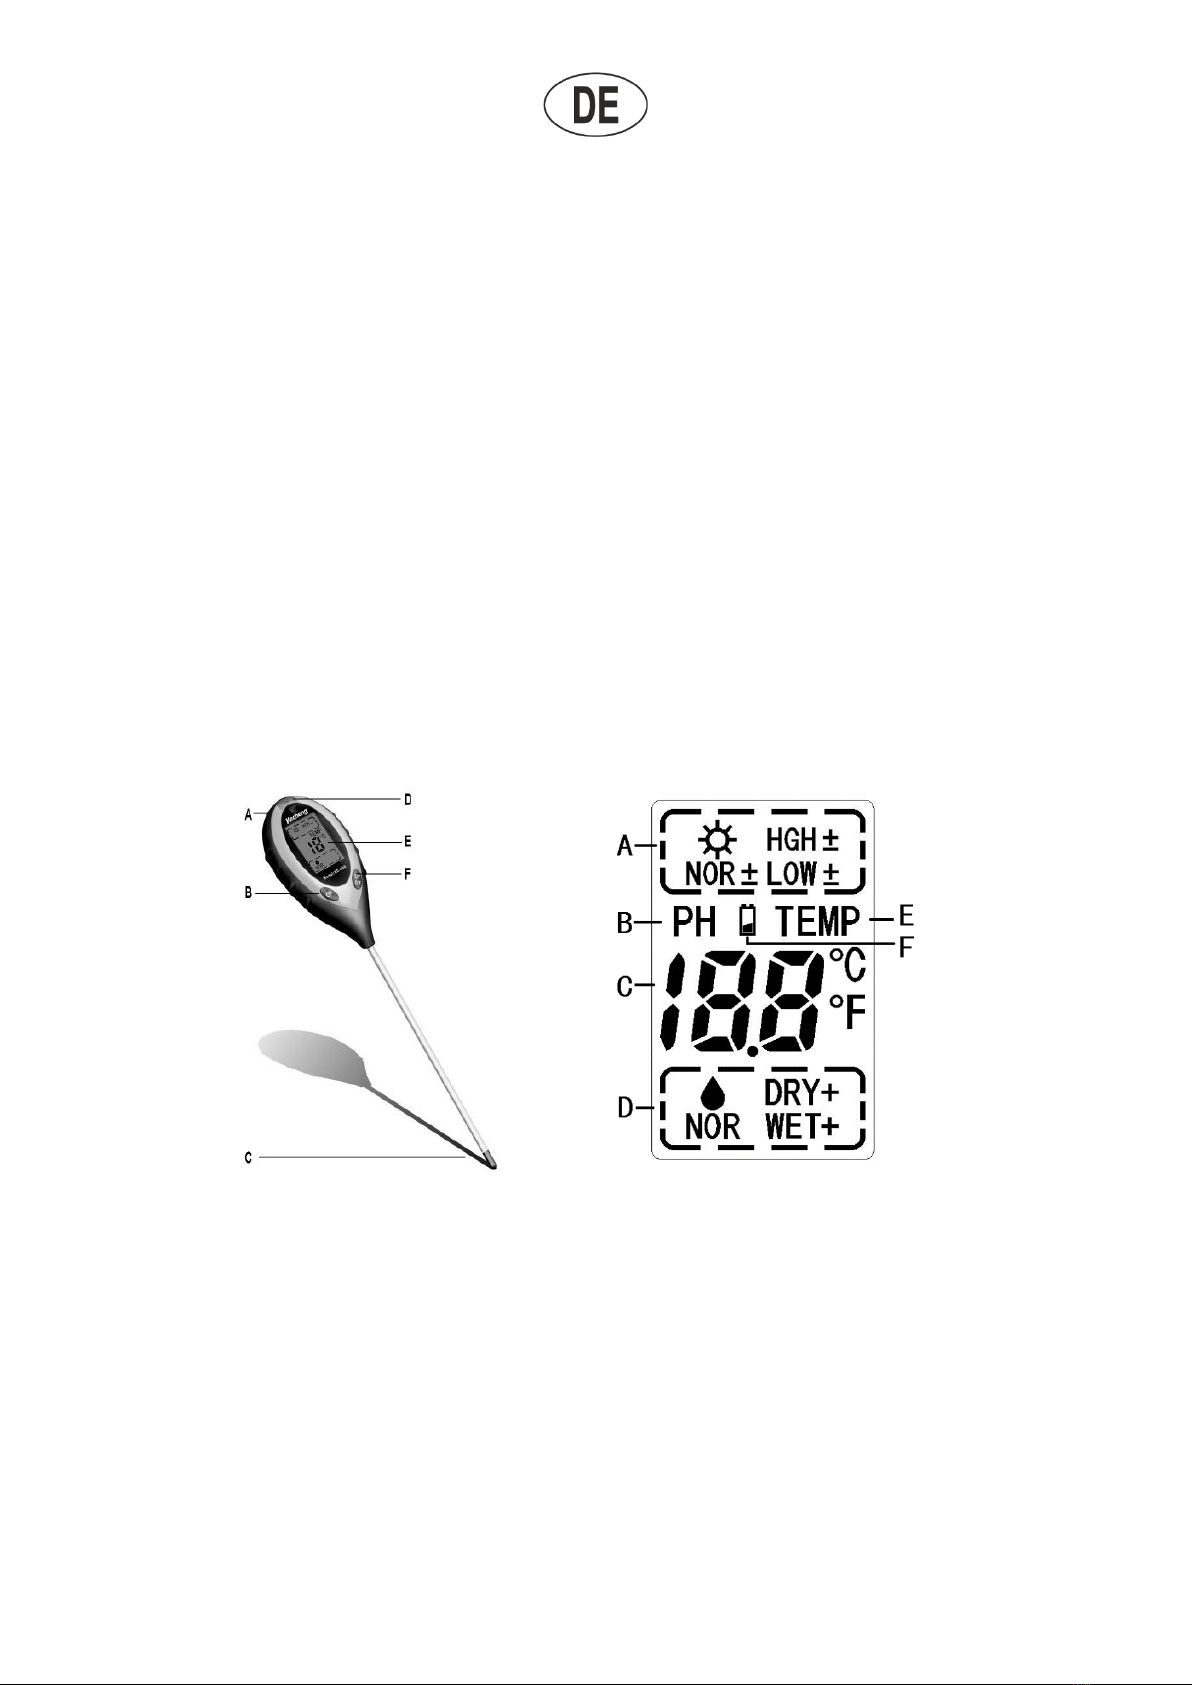
4. LCD DISPLAY DESCRIPTION
A - Sunlight intensity measurement. Depending on the amount and quality of sunlight, the device displays one of the
following nine sunlight intensity levels: LOW-, LOW, LOW +, NOR-, NOR, NOR +, HGH-, HGH, HGH +, where "LOW-"
indicates very low sunlight intensity and "HGH +" indicates very high sunlight intensity.
B - When "PH" is displayed, the device is set into pH measurement mode.
C -Measurement result (pH or temperature). For acidity, the result is displayed between 3.5 and 9.0 pH. For
temperature, the result is displayed between -9°C and 50°C (16°F and 122°F)
When "Lo" or "hh" are displayed, the measurement result is outside the measurement range.
D - Moisture measurement result. The device displays one of the following five moisture levels: DRY +, DRY, NOR,
WET, WET +, where "DRY +" indicates a very dry environment and "WET+" indicates a very wet environment.
E - When "TEMP" is displayed, the device is set into soil temperature measurement mode.
F –Low battery indicator. Low battery is displayed when the battery is discharged.
5. STARTING THE DEVICE
Battery installation
•Prior to starting the device, a 9V battery must be installed.
Open the battery cover at the back of the device.
•Connect a 9V battery to the battery connector.
•Insert the battery and close the battery cover.
6. USING THE DEVICE
6.1. Measuring acidity
•Switch the "Ph/C" switch located at the back of the device into "Ph".
•Insert the probe into surface (soil). The probe must not be inserted near a plant stem/trunk to avoid any damage
to roots.
•Press the "ON" button to start the device.
•The measurement result will be displayed on LCD.
•A few measurements must be performed to confirm the result.
6.2. Measuring moisture
•Switch the "Ph/C" switch located at the back of the device into "C".
•Insert the probe into surface (soil). The probe must not be inserted near a plant stem/trunk to avoid any damage
to roots.
•Press the "ON" button to start the device.
•The measurement result will be displayed on LCD.
•A few measurements must be performed to confirm the result.
GUIDELINES
1. Insert the probe into the soil in the middle between a plant stem and the edge of the pot. If the pot diameter is over
12" (30cm), the probe must be inserted at 1/3 of the distance between the plant and the edge of the pot. If the pot is
deep, the probe must be inserted slightly deeper to reach the place of the highest root concentration.
2. The probe must be inserted into the soil carefully to avoid any damage.