EXTENSION CABLES
1. Use only extension cables that are intended for outdoor use. These extension cables are identified by a marking
“Acceptable for use with outdoor appliances: store indoors while not in use.” Use only extension cables having an
electrical rating equal to or greater than the rating of the product. Do not use damaged extension cables. Examine
extension cable before using and replace if damaged. Do not abuse extension cables and do not pull on any cable to
disconnect. Keep cable away from heat and sharp edges. Always disconnect the extension cable from the socket before
disconnecting the product from the extension cable.
2. WARNING - To reduce the risk of electrocution keep all connections dry and off the ground. Do not touch plug with
wet hands.
3. Residual current device (RCD) protection should be provided on the circuit(s) or outlet(s) to be used for the tile saw.
4. Use proper extension cable. Make sure your extension cable is in good condition. When using an extension cable be
sure to use a cable heavy enough to carry the current your product will draw. An undersized cable will cause a drop in
line voltage resulting in loss power and overheating.
CAUTION! To avoid permanent motor damage you must use the correct extension cable. Never use more
than one extension cable at a time.
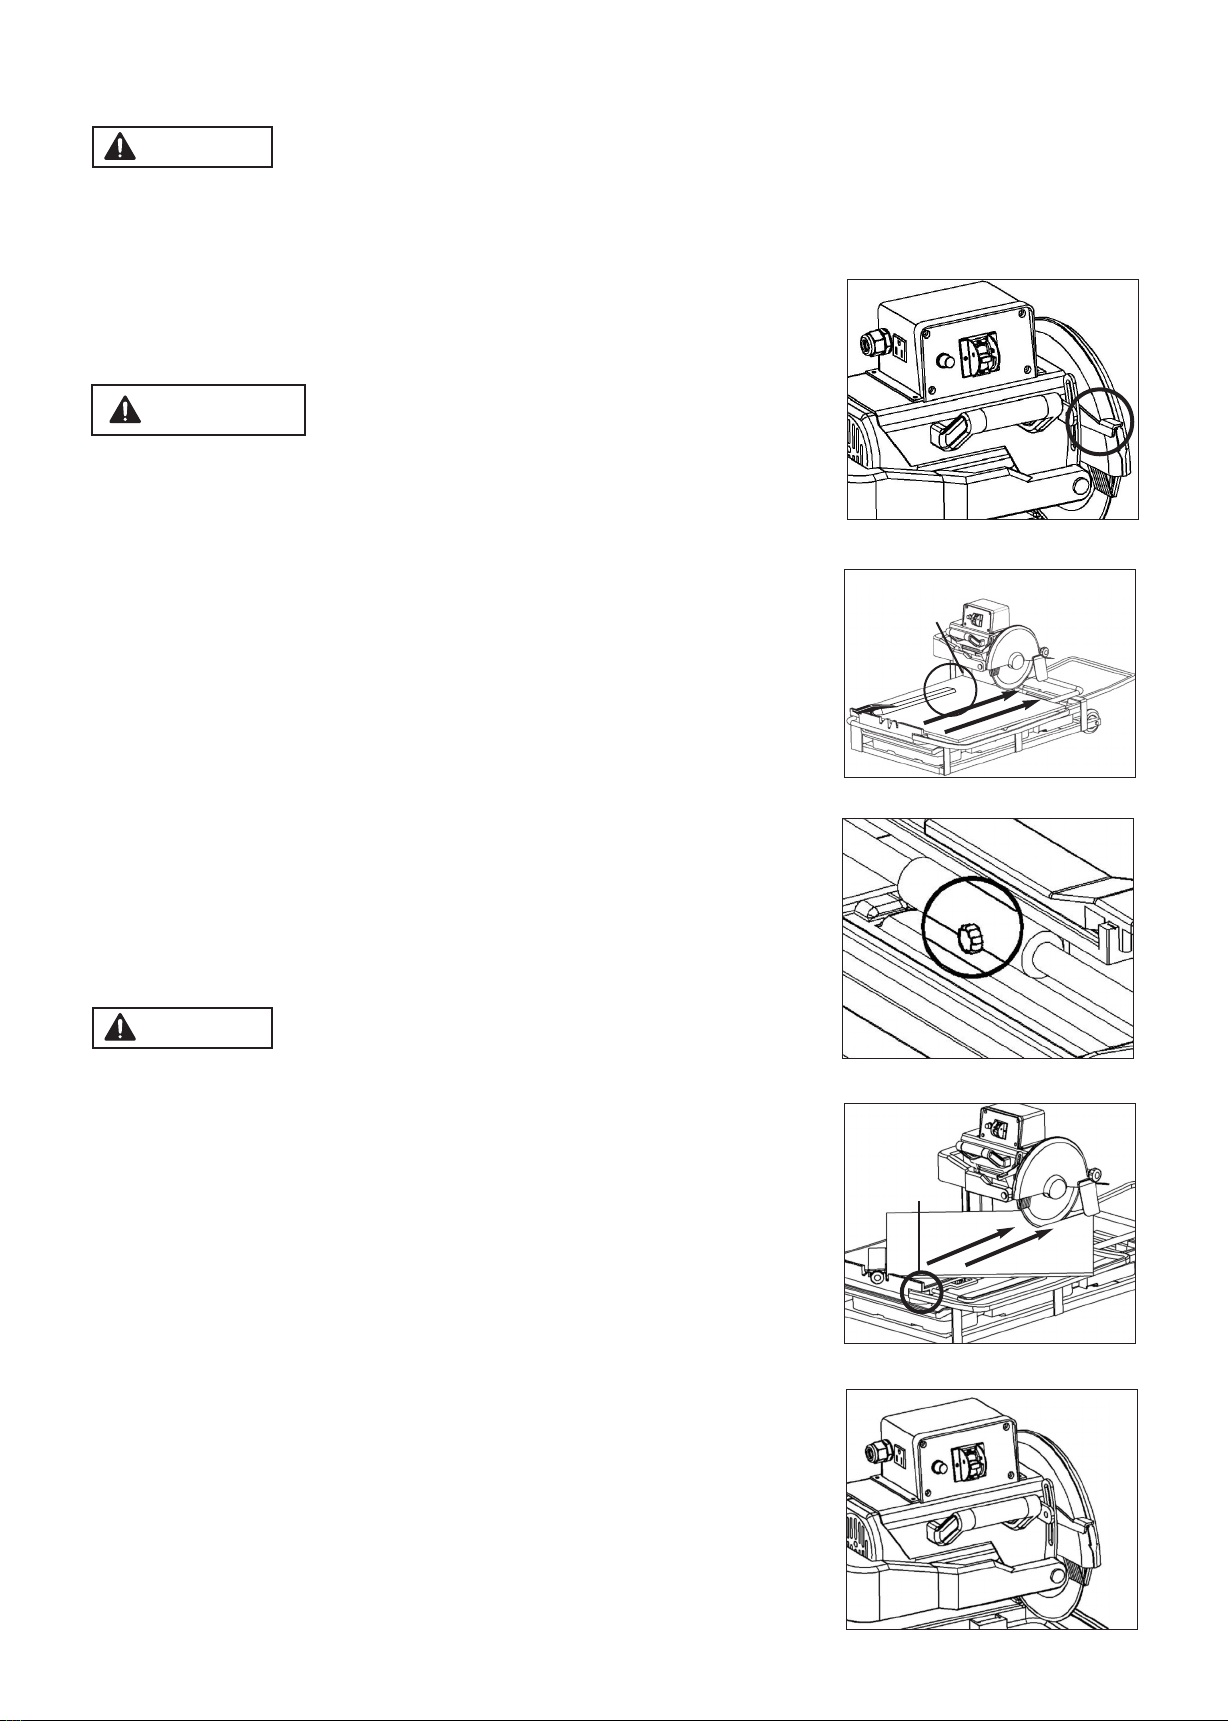
GENERAL SAFETY INSTRUCTIONS FOR TILE SAW
For Your Own Saf ty R ad Instruction Manual B for Op rating Saw
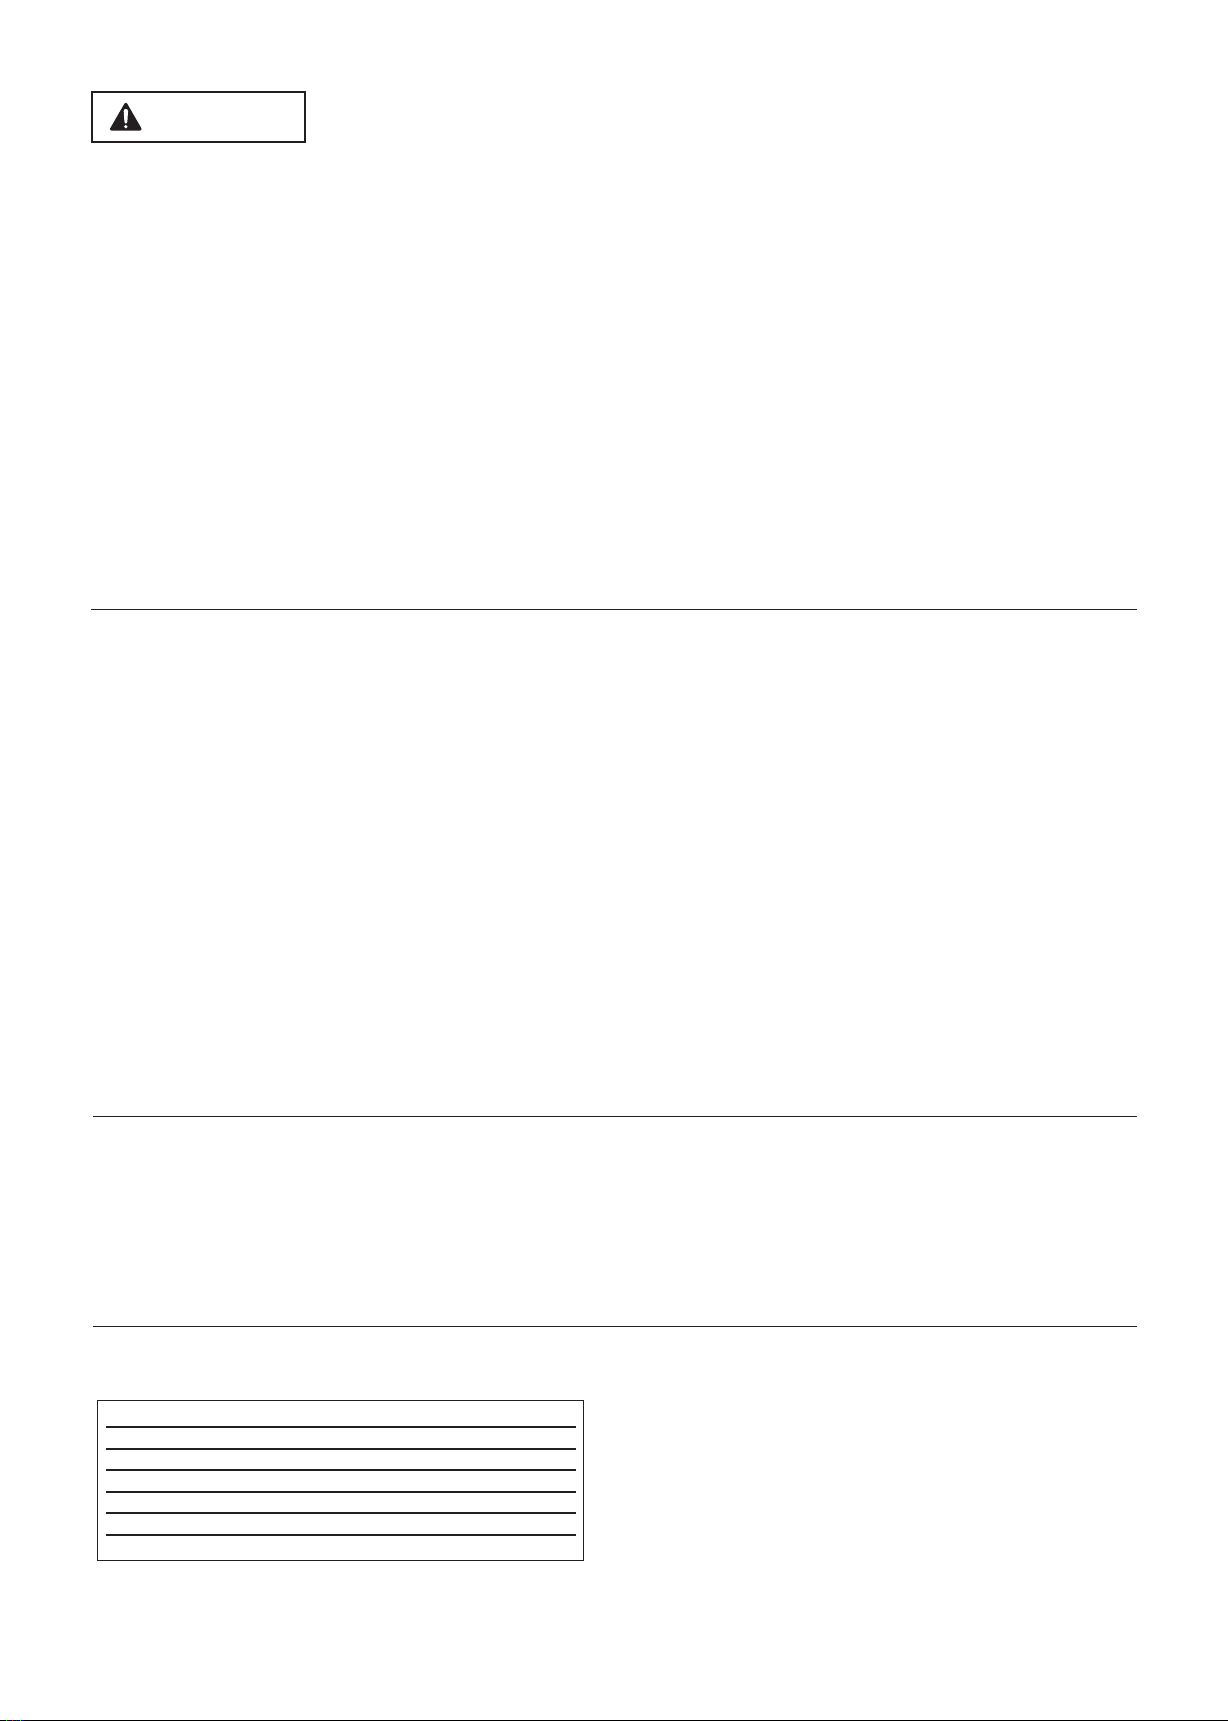
•Wear eye protection.
•Use blade guard when cutting.
• Disconnect saw before servicing when changing cutting wheels and cleaning.
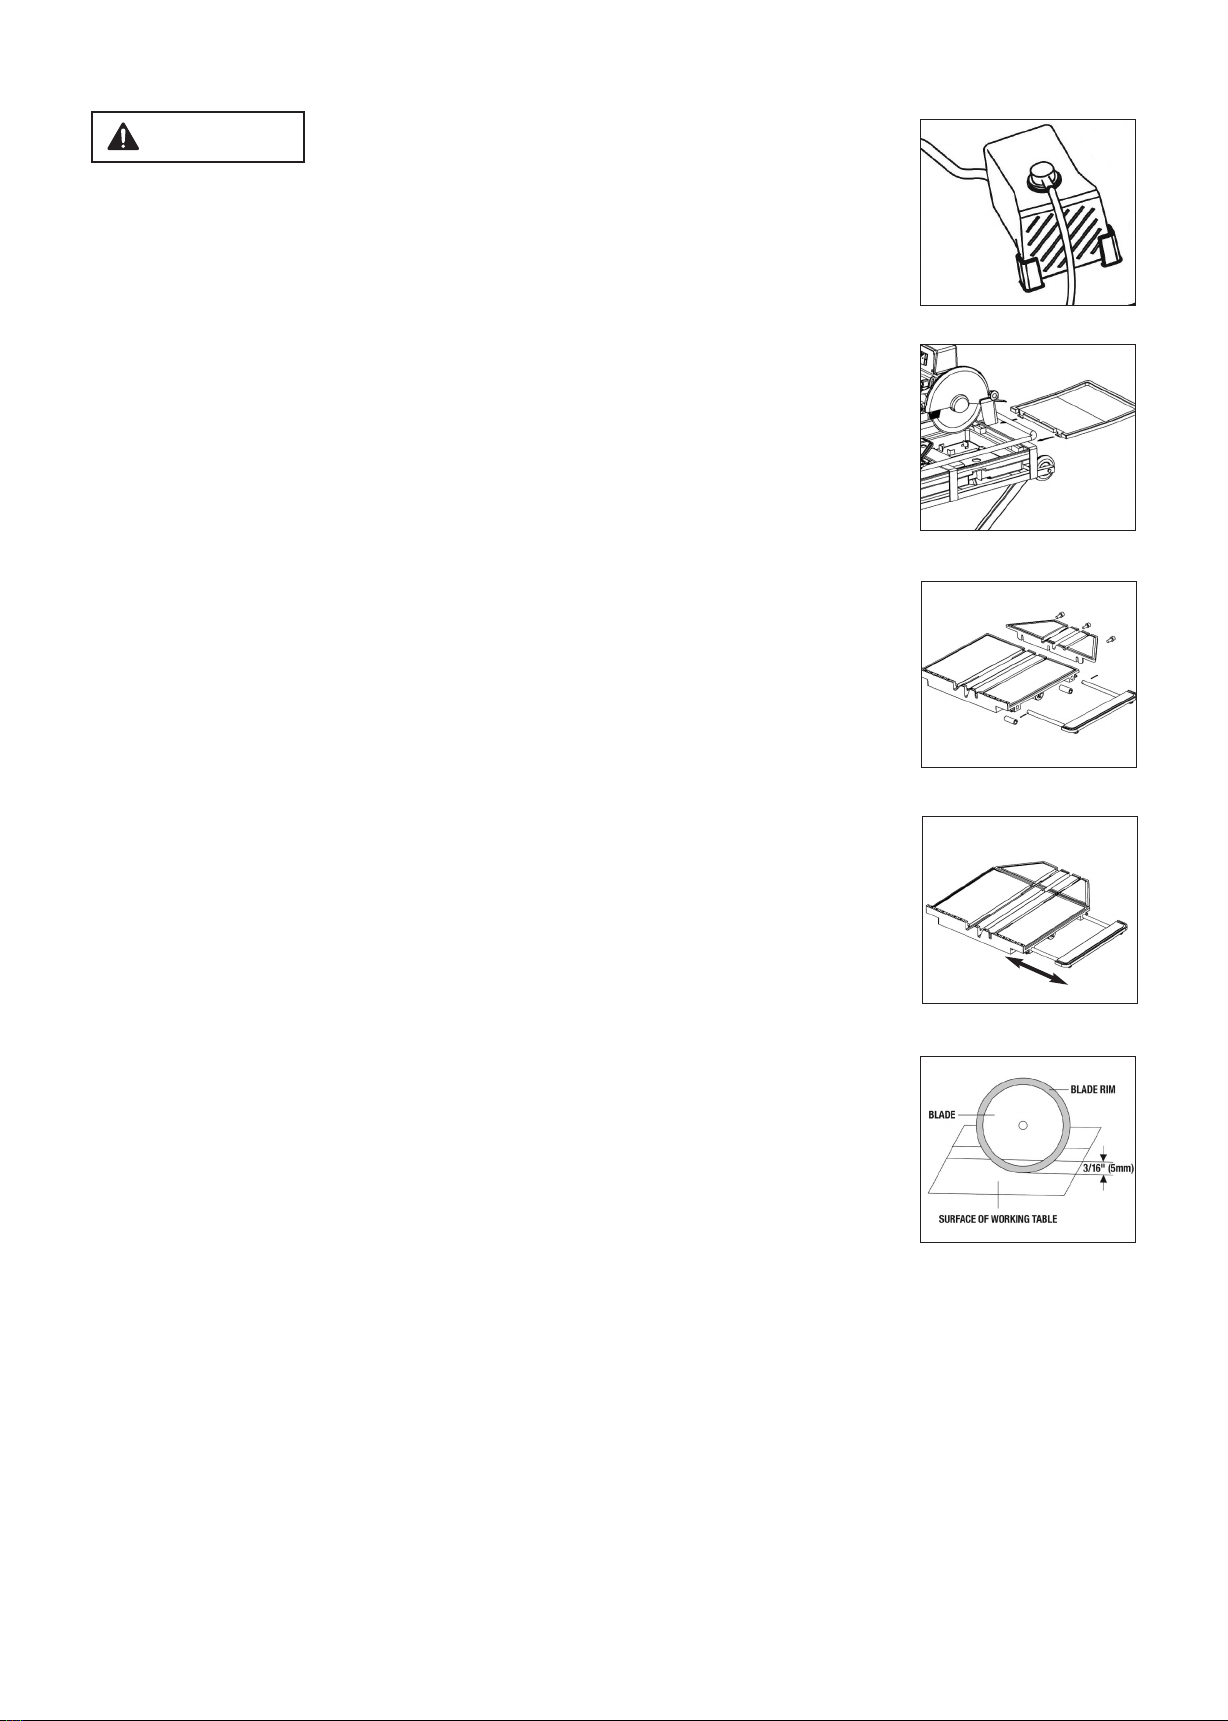
• Use tool only with continuous rim cutting wheels free of opening and grooves.
• Replace damaged blades before operating.
• Do not expose to rain or use in damp location.
• Turn off the power before adjusting the angle for mitre cuts.
ELECTRICAL REQUIREMENTS
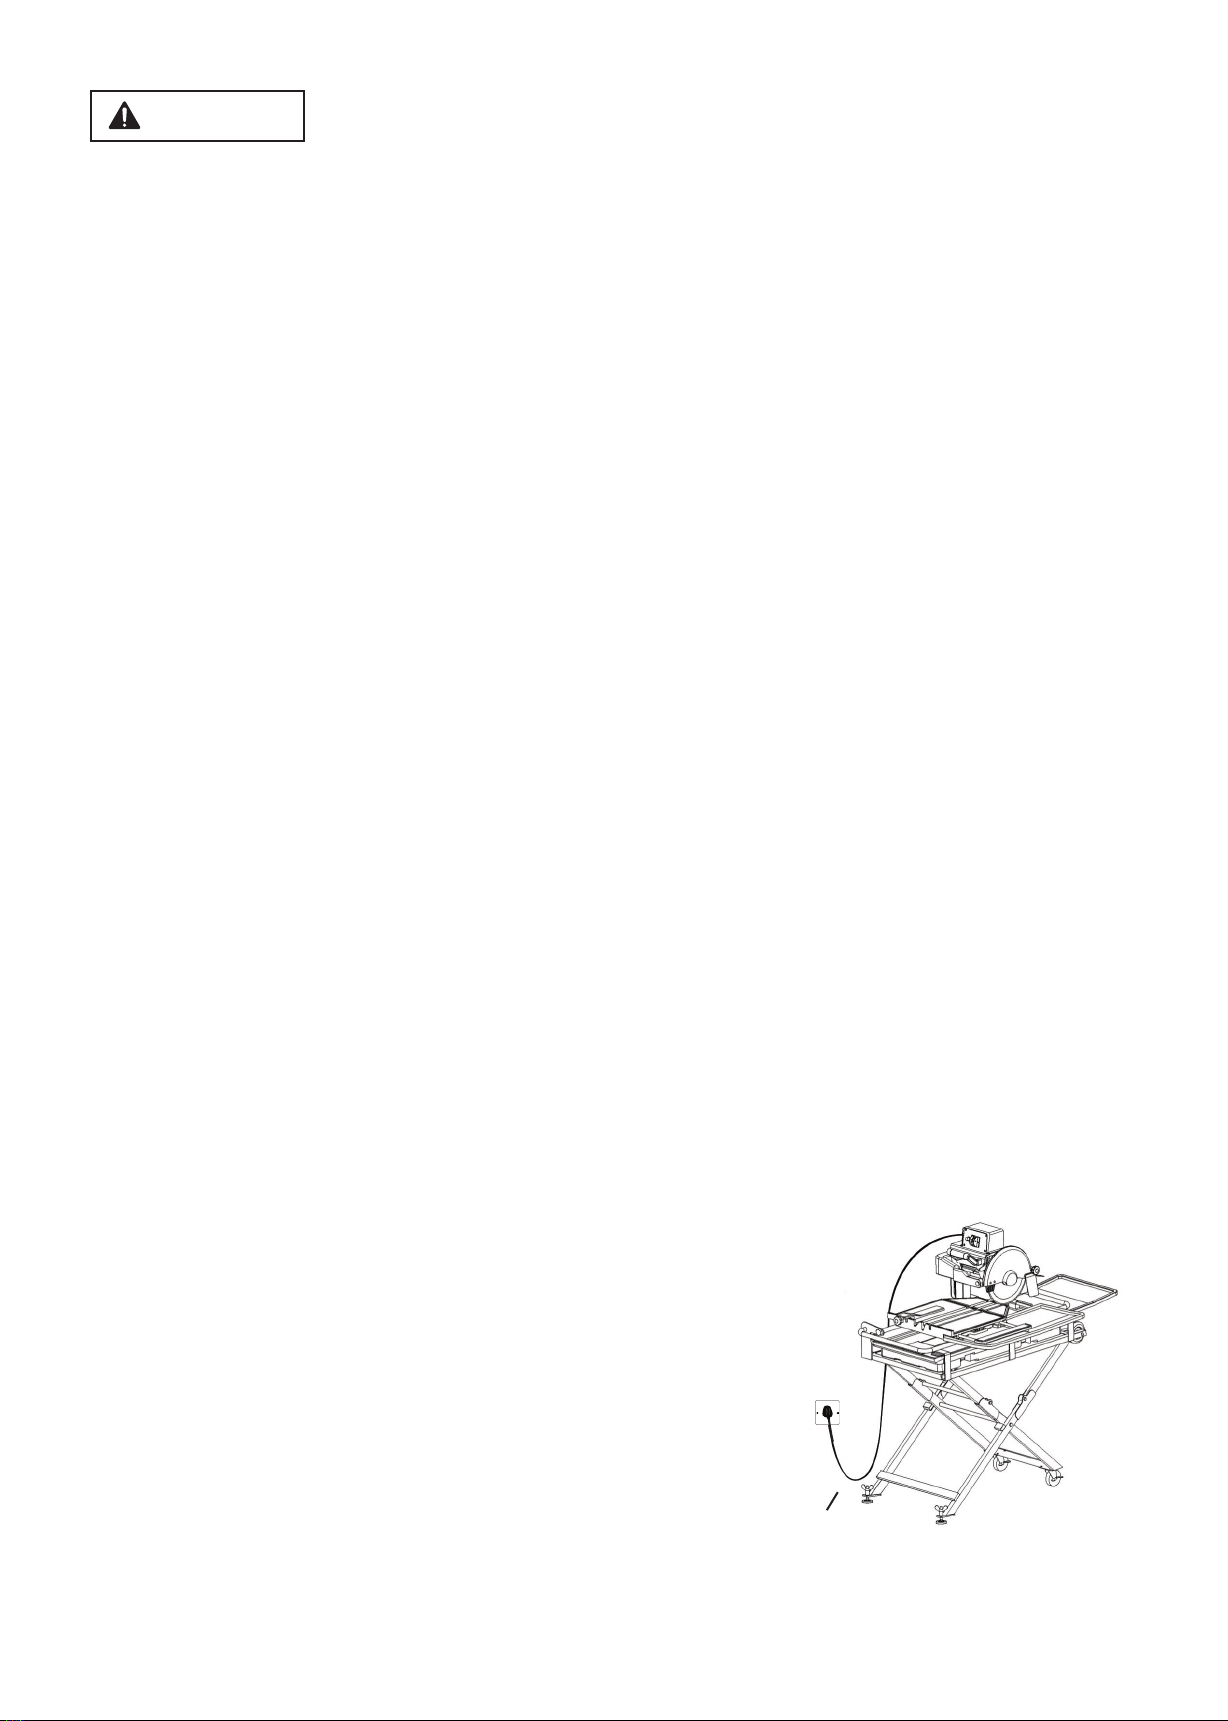
1. CONNECTING TOO TO POWER SOURCE OUT ET. THIS TI E SAW MUST BE CONNECTED TO A GROUNDED POWER
SOURCE while in use to protect the operator from electrical shock. (Figure 1)
2. IN THE EVENT OF A MA FUNCTION OR BREAKDOWN, grounding provides a path of least resistance for electrical
current to reduce the risk of electrical shock. This tool is equipped with an electric cable having equipment grounding
conductor and a grounding plug. Insert the 3-prong electrical plug into a 3-pole socket that is properly installed and
grounded in accordance with all local codes and ordinances.
3. Do not modify the plug provided if it will not fit the outlet. Have the proper outlet installed by a qualified electrician.
4. Improper connection of the equipment-grounding conductor can result in a risk of electric shock. The conductor with
insulation having an outer surface that is green (with or without yellow stripes) is the equipment-grounding conductor.
If repair or replacement of the electric cable or plug in necessary do not connect the equipment – grounding conductor
to a live terminal.
5. Check with a qualified electrician or service personnel if the grounding instructions are not completely understood or
if in doubt as to whether the tool is properly grounded.
6. Use only 3-wire extension cables that have 3-prong grounding plugs and 3-pole sockets that accept the tool’s plug.
7. Repair or replace damaged or worn cable immediately.
8. To avoid the possibility of the appliance plug or socket getting wet position tile saw to one side of a wall-mounted socket
to prevent water from dripping onto the socket or plug. The user should arrange a “drip loop” in the cable connecting
the saw to a socket. The “drip loop” is that part of the cable below the level of the socket or the connector if an extension
cable is used to prevent water traveling along the cable and coming in contact with the socket.
9. If the plug or socket does get wet, DO NOT unplug the cable. Disconnect the fuse or circuit breaker that supplies power
to the tool. Then unplug and examine for presence of water in the socket.
10.Only CE listed extension cables should be used with this product.
11.Improper use of extension cables may cause inefficient operation of your tool, which can result in overheating. Be sure
your extension cable is rated to allow sufficient current flow to the motor. For the proper gauge for your tool see chart.
12.Do not let your fingers touch the terminals of plug when installing or removing the plug to or from the outlet.
13.THIS TI E SAW MUST BE PROPER Y GROUNDED. If not properly grounded, this power tool can incur the potential
hazard of electrical shock particularly when used in damp locations or in proximity to plumbing. If an electrical shock
occurs there is the potential of a secondary hazard such as your hands contacting the saw blade.
WARNING!
-4-