manuals.online logo
Brands
  1. Home
  2. •
  3. Brands
  4. •
  5. Bticino
  6. •
  7. Thermostat
  8. •
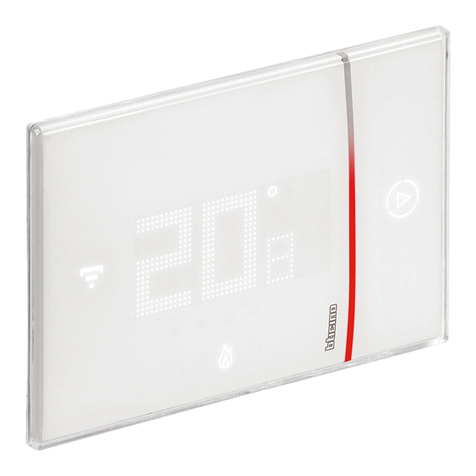
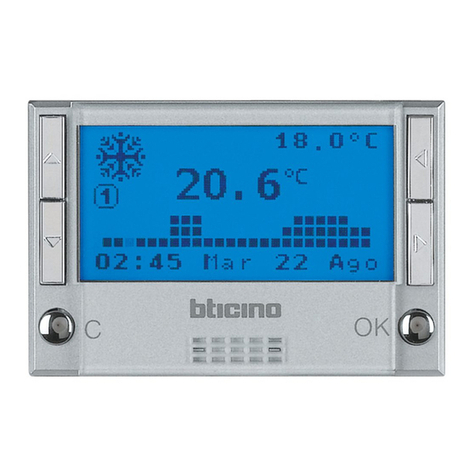
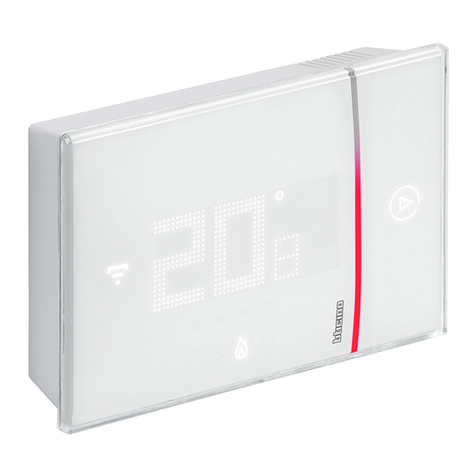
  9. Bticino KW4441 User manual

Bticino KW4441 User manual

KW4441
KG4441
KM4441
03/18-02 PC
LE10330AA
BTicino SpA – Viale Borri, 231 – 21100 Varese – Italy – www.bticino.com
• Descrizione
• Description
• Description
• Beschreibung
• Descripción
• Beschrijving
• Descrição
• Описание

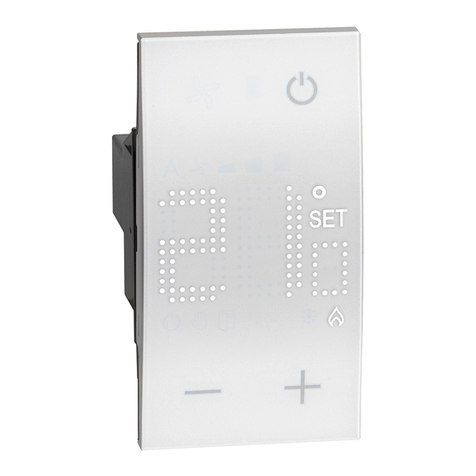
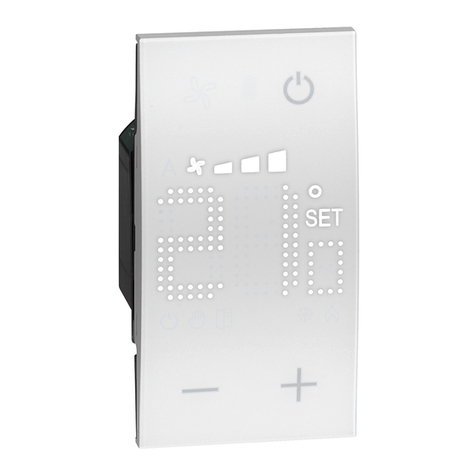
1. Display retroilluminato
2. Visualizzazione temperatura
3. Sensore luminosità
4. Tasto ON / OFF
imposta l'impianto OFF
in modalità antigelo (7 °C)
o protezione termica (35 °C)
5. Indicatore settaggio temperatura:
appare quando è in corso l'impostazione
della temperatura
6. Indicatore riscaldamento acceso
7. Indicatore raffrescamento acceso
8. Tasti per impostazione temperatura
9. Indicatore termostato OFF (vedi punto 4)
10.Morsetti di collegamento (vedi schemi)
1 2 3 4
5
6
7
89
NO
NC C
5(2) A
110 - 240 V 50/60 Hz
2 W max.
LN
10
10
1. Display mit Rückbeleuchtung
2. Anzeige der Temperatur
3. Lichtsensor
4. Taste ON / OFF
Stellt das System OFF
auf Frostschutz (7°C)
oder Wärmeschutz (35°C) ein.
5. Anzeige Temperatureinstellung:
erscheint, wenn die Temperatureinstellung läuft.
6. Anzeige Heizung ON
7. Anzeige Kühlung ON
8. Tasten zur Temperatureinstellung
9. Anzeige Thermostat OFF (siehe Punkt 4)
10.Anschlussklemmen (siehe Pläne)
1. Display retroiluminado
2. Visualização da temperatura
3. Sensor de luminosidade
4. Tecla ON / OFF
Configura a instalação OFF
na modalidade anticongelante (7 °C)
ou proteção térmica (35 °C)
5. Indicador de configuração da temperatura:
aparece quando está em andamento a
configuração da temperatura
6. Indicador de aquecimento ligado
7. Indicador de arrefecimento ligado
8. Teclas de configuração da temperatura
9. Indicador de termostato OFF (ver o item 4)
10.Blocos de terminais (ver os diagramas)
1. Backlight display
2. Temperature display
3. Lighting sensor
4. ON / OFF key
sets the system OFF
anti-frost (7 °C)
or heat-protection (35 °C) mode
5. Temperature setting indicator:
appears when the temperature is being set
6. ON heating indicator
7. ON cooling indicator
8. Keys for temperature setting
9. Thermostat OFF indicator (see point 4)
10.Connection clamps (see diagrams)
1. Pantalla retroiluminada
2. Visualización temperatura
3. Sensor de luminosidad
4. Botón ON / OFF
ajusta el sistema OFF
en el modo antihielo (7 °C)
o protección térmica (35 °C)
5. Indicador de ajuste temperatura:
aparece cuando se está ajustando la temperatura
6. Indicador de calefacción encendida
7. Indicador de refrigeración encendida
8. Teclas para el ajuste de la temperatura
9. Indicador termostato OFF (véase el punto 4)
10.Bornes de conexión (véase los esquemas)
1. Дисплей с задней подсветкой
2. Отображение температуры
3. Световой сенсор
4. Кнопка ON/OFF
устанавливает систему OFF
в режим противоморозной (7 °C)
или тепловой (35 °C) защиты
5. Индикатор настройки температуры:
появляется во время настройки температуры
6. Индикатор включенного отопления
7. Индикатор включенного охлаждения
8. Кнопки для установки температуры
9. Индикатор термостата OFF (см. пункт 4)
10.Соединительные клеммы (см. схемы)
1. Écran à rétro-éclairage
2. Visualisation température
3. Capteur de luminosité
4. Touche ON / OFF
installation OFF
réglée en modalité antigel (7°C)
ou protection thermique (35°C)
5. Indicateur réglage température:
s’affiche quand le réglage de la température est
en cours
6. Indicateur chauffage allumé
7. Indicateur climatisation allumée
8. Touches de réglages température
9. Indicateur thermostat OFF (voir point 4)
10.Bornes de branchement (voir schémas)
1. Display met verlichting
2. Weergave temperatuur
3. Detector verlichting
4. ON/OFF-toets
stelt de antivries (7 °C)
of de thermische beveiliging (35 °C)
van de installatie in
5. Indicator temperatuurinstelling:
wordt weergegeven tijdens het instellen van de
temperatuur
6. Indicator verwarming ingeschakeld
7. Indicator koeling ingeschakeld
8. Toetsen voor temperatuurinstelling
9. Indicator thermostaat OFF (zie punt 4)
10.Aansluitklemmen (zie schema's)
150 cm
Altezza installativa
Installation height
Hauteur d’installation
Installationshöhe
Altura de instalación
Installatiehoogte
Altura de instalação
Высота установки

1
2
 
3
4

357

5

6
7
8
49
10
2
• Montaggio
• Mounting
• Montage
• Montage
• Montaje
• Montage
• Montagem
• Монтаж

• Smontaggio
• Disassembling
• Démontage
• Demontage
• Desmontaje
• Demontage
• Desmontagem
• Демонтаж

1
1
2
3
4
3
2
• Blocco anti-rimozione
• Anti-removal block
• Blocage anti-extraction
• Entfernungsschutz
• Bloqueo anti-extracción
• Blokkering antisabotage
• Bloqueio anti-remoção
• Механизм блокировки
для защиты от
извлечения 
1
2
3
4
3
• Schemi di collegamento
• Wiring diagrams
• Schémas de branchement
• Anschlussschema
• Esquemas de conexión
• Aansluitschema's
• Esquemas de ligação
• Схемы соединения

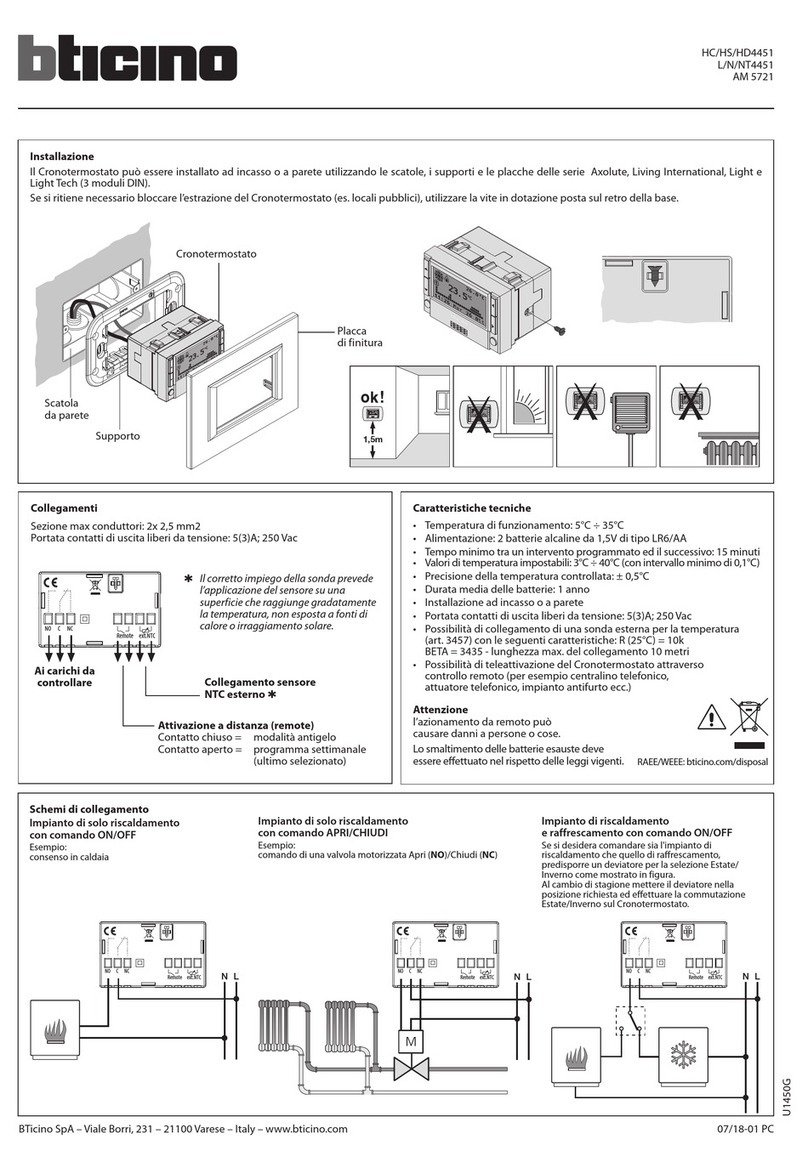
- Impianto per solo riscaldamento con carico da comandare alla tensione di rete (es.
elettrovalvola 230Vac)
- System only for heating with load to be controlled to the network voltage (e.g. 230Vac solenoid valve)
- Installation pour chauffage uniquement avec charge à commander à la tension de
secteur (ex. électrovanne 230V)
- Anlage nur für Heizen mit durch die Netzspannung zu steuernde Stromlast (z.B. Magnetventil 230Vac)
- Instalación para solamente refrigeración con carga que accionar a la tensión de red (ej.
electroválvula 230 Vca)
- Installatie enkel verwarming met door netspanning aangestuurde lading (bijv. magneetklep 230Vac)
- Instalação somente para aquecimento com carga a comandar à tensão de rede (por
exemplo, válvula solenoide de 230 Vca)
- Система только для отопления с нагрузкой, управляемой при сетевом напряжении
(например, электроклапан 230 В Пер.т.)
230

ALL 'IMPIANTO DI RISCALDAMENTO (CARICO DA COMANDARE ALLA TENSIONE DI RETE)
TO THE HEATING SYSTEM (LOAD TO BE CONTROLLED TO THE NETWORK VOLTAGE)
A L’INSTALLATION DE CHAUFFAGE (CHARGE A COMMANDER A LA TENSION DE SECTEUR)
ZUR HEIZANLAGE (DURCH DIE NETZSPANNUNG ZU STEUERNDE STROMLAST)
A LA INSTALACIÓN DE CALEFACCIÓN (CARGA QUE ACCIONAR A LA TENSIÓN DE RED)
NAAR DE VERWARMINGSINSTALLATIE (DOOR NETSPANNING AANGESTUURDE LADING)
NA INSTALAÇÃO DE AQUECIMENTO (CARGA A COMANDAR À TENSÃO DE REDE)
К СИСТЕМЕ ОТОПЛЕНИЯ (НАГРУЗКА, УПРАВЛЯЕМАЯ ПРИ СЕТЕВОМ НАПРЯЖЕНИИ)
NO
NC C
5(2) A
110 - 240 V 50/60 Hz
2 W max.
LN
110 – 240 Vac, 50/60 HZ
110 – 240 В Пер. тока, 50/60 Гц

- Riscaldamento e raffrescamento con sistema a pavimento
- Heating and cooling with floor system
- Chauffage et climatisation avec système au sol
- Heizen und Kühlen mit Bodenanlage
- Calefacción y refrigeración con sistema de suelo radial
- Verwarming en koeling met vloerinstallatie
- Aquecimento e arrefecimento com sistema de piso
- Отопление и охлаждение с напольной установкой

- ALL'IMPIANTO DI RISCALDAMENTO E RAFFRESCAMENTO CON SISTEMA A PAVIMENTO
- TO THE HEATING AND COOLING SYSTEM WITH FLOOR SYSTEM
- A L’INSTALLATION DE CHAUFFAGE ET CLIMATISATION AVEC SYSTÈME AU SOL
- ZUR HEIZ- UN KÜHLANLAGE IN DER BODENAUSFÜHRUNG
- A LA INSTALACIÓN DE CALEFACCIÓN Y REFRIGERACIÓN CON SISTEMA DE SUELO RADIAL
- NAAR DE VERWARMINGS- EN KOELINSTALLATIE MET VLOERINSTALLATIE
- NA INSTALAÇÃO DE AQUECIMENTO E ARREFECIMENTO COM SISTEMA DE PISO
- К СИСТЕМЕ ОТОПЛЕНИЯ И ОХЛАЖДЕНИЯ С НАПОЛЬНОЙ УСТАНОВКОЙ
NO
NC C
5(2) A
110 - 240 V 50/60 Hz
2 W max.
LN
110 – 240 Vac, 50/60 HZ
110 – 240 В Пер. тока, 50/60 Гц

- Riscaldamento e raffrescamento con sistemi differenti
- Heating and cooling with different systems
- Chauffage et climatisation avec systèmes différents
- Heizen und Kühlen mit anderen Systemen
- Calefacción y refrigeración con sistemas diferentes
- Verwarming en koeling met verschillende installaties
- Aquecimento e arrefecimento com sistemas diferentes
- Отопление и охлаждение с разными установками

*Il commutatore esterno deve essere correttamente attivato quando la funzione del sistema passa da riscaldamento a raffreddamento e viceversa.
External changeover switch must be properly switched when system function is changed from heating to cooling and vice versa.
Le commutateur externe doit être correctement activé quand la fonction du système passe du chauffage à la climatisation et inversement.
Der externe Schalter muss richtig betätigt werden, wenn die Funktion des Systems von Heizen auf Kühlen und umgekehrt umschaltet.
El conmutador externo ha de estar correctamente activado cuando la función del sistema pasa de calefacción a refrigeración y viceversa.
De externe schakelaar moet correct geactiveerd worden wanneer de functie van het systeem overschakelt van verwarming naar koeling en omgekeerd.
O comutador externo deve ser ativado corretamente quando a função do sistema passa de aquecimento a arrefecimento e vice-versa.
Внешний переключатель должен быть правильно активирован, когда система переходит от отопления к охлаждению и наоборот.

- ALL'IMPIANTO DI RISCALDAMENTO
- TO THE HEATING SYSTEM
- A L’INSTALLATION DE CHAUFFAGE
- ZUR HEIZANLAGE
- A LA INSTALACIÓN DE CALEFACCIÓN
- NAAR DE VERWARMINGSINSTALLATIE
- NA INSTALAÇÃO DE AQUECIMENTO
- К СИСТЕМЕ ОТОПЛЕНИЯ
NO
NC C
5(2) A
110 - 240 V 50/60 Hz
2 W max.
LN
*
- ALL'IMPIANTO DI RAFFRESCAMENTO
- TO THE COOLING SYSTEM
- A L’INSTALLATION DE CLIMATISATION
- NA INSTALAÇÃO DE ARREFECIMENTO
- К СИСТЕМЕ ОХЛАЖДЕНИЯ
- ZUR KÜHLANLAGE
- A LA INSTALACIÓN DE REFRIGERACIÓN
- NAAR DE KOELINSTALLATIE
110 – 240 Vac, 50/60 HZ
110 – 240 В Пер. тока, 50/60 Гц


- Impianto per solo riscaldamento con contatto pulito (es. consenso caldaia)
- System only for heating with clean contact (e.g. boiler agreement)
- Installation pour chauffage uniquement avec contact libre (ex. signal de validation chaudière)
- Anlage nur für Heizen mit reinem Kontakt (z.B. Freigabe des Heizkessels)
- Instalación para solamente calefacción con contacto limpio (ej. consenso caldera)
- Installatie enkel verwarming met potentiaalvrij contact (bijv. consensus ketel)
- Instalação somente para aquecimento com contato limpo (por exemplo, consentimento caldeira)
- Система только для отопления с сухим контактом (например, разрешение котла)

110 – 240 Vac, 50/60 HZ
110 – 240 В Пер. тока, 50/60 Гц
- ALL'IMPIANTO DI RISCALDAMENTO (CONTATTO PULITO) (ON/OFF)
- TO THE HEATING SYSTEM (CLEAN CONTACT) (ON/OFF)
- A L’INSTALLATION DE CHAUFFAGE (CONTACT LIBRE) (ON/OFF)
- ZUR HEIZANLAGE (REINER KONTAKT) (ON/OFF)
- A LA INSTALACIÓN DE CALEFACCIÓN (CONTACTO LIMPIO) (ON/OFF)
- NAAR DE VERWARMINGSINSTALLATIE (POLTENTIAALVRIJ CONTACT) (ON/OFF)
- NA INSTALAÇÃO DE AQUECIMENTO (CONTATO LIMPO) (ON/OFF)
- К СИСТЕМЕ ОТОПЛЕНИЯ (СУХОЙ КОНТАКТ) (ON/OFF)
NO
NC C
5(2) A
110 - 240 V 50/60 Hz
2 W max.
LN

4
• Impostazioni
• Settings
• Réglages
• Einstellungen
• Ajustes
• Instellingen
• Configurações
• Настройки

- Impostazione modalità impianto
riscaldamento / raffrescamento
- Heating/cooling system mode
setting
– Réglage modalité installation
chauffage/climatisation
- Den Betriebsmodus Heizen oder
Kühlen einstellen
- Ajuste modo sistema calefacción /
refrigeración
- Instelling installatie verwarmen/
koelen
- Configuração da modalidade
instalação de aquecimento /
arrefecimento
- Настройка режима системы
отопления/охлаждения

- Tocca per più di 5 secondi il tasto ON/OFF (A), viene visualizzata la modalità corrente
(H= riscaldamento , C=raffrescamento), tocca i tasti + o - (B) per modificarla.
- Touch the ON/OFF key (A) for more than 5 seconds. The current mode (H = heating, C = cooling) is
displayed. Touch the + or – keys (B) to modify it.
- Appuyer sur la touche ON/OFF (A) pendant plus de 5secondes: la modalité actuelle s’affiche
(H=chauffage, C=climatisation); appuyer sur la touche + ou - (B) pour la modifier.
- Die ON/OFF-Taste (A) mehr als 5 Sekunden lang berühren, um den aktuellen Modus (H=Heizen, C=Kühlen)
anzuzeigen oder auf + oder - (B) drücken, um ihn zu ändern.
- Toca más de 5 segundos la tecla ON/OFF (A), se visualiza el modo corriente (H= calefacción,
C=refrigeración), toca las teclas + o - (B) para modificarlo.
- Raak de ON/OFF-toets (A) meer dan 5 seconden aan: de actuele modus (H = verwarmen, C = koelen) wordt
weergegeven. Wijzig de instelling met de toets + of - (B).
- Pressionar a tecla ON/OFF (A) por mais de 5 segundos, será exibida a modalidade atual (H =
aquecimento, C = arrefecimento), pressionar as teclas + ou - (B) para alterá-lo.
- Прикоснуться более чем на 5 секунд к кнопке ON/OFF (A), отобразится текущий режим (H=
отопление, C=охлаждение), прикоснуться к кнопкам + или - (B) для его изменения..
CHA5
B
A
B
Nota: attendere alcuni minuti prima di verificare di nuovo la temperatura ambiente misurata.
Note: wait a few minutes before checking the measured room temperature again.
Note: attendez quelques minutes avant de vérifier à nouveau la température ambiante mesurée.
Anmerkung: Warten Sie einige Minuten, bevor Sie die gemessene Umgebungstemperatur
erneut überprüfen.
Nota: esperar unos minutos antes de comprobar de nuevo la temperatura ambiente medida.
Opmerking: wacht een aantal minuten alvorens de gemeten omgevingstemperatuur opnieuw
te verifiëren.
Nota: aguarde alguns minutos antes de verificar novamente a temperatura ambiente medida.
Примечание: подождать несколько минут перед следующей проверкой измеренной
температуры помещения.

- Impostazione formato temperatura
- Temperature format setting
- Réglage format température
- Temperaturformat einstellen
- Ajuste formato temperatura
- Instelling temperatuurformaat
- Configuração do formato da
temperatura
- Настройка формата
температуры

- Tocca contemporaneamente i tasti + e - (A) per più di 5 secondi, viene visualizzata il formato di
temperatura corrente (C= gradi Celsius, F= gradi Fahrenheit), tocca i tasti + o - (B) per modificarla.
- Touch both the + and - keys (A) for more than 5 seconds. The current temperature format is displayed (C =
degrees Celsius, F = degrees Fahrenheit). Touch the + or – keys to modify it.
- Appuyer simultanément sur les touches + et - (A) pendant plus de 5secondes: le format actuel de
température s’affiche (C=degrés Celsius ou F=degrés Fahrenheit); appuyer sur la touche + ou - (B)
pour le modifier.
- Gleichzeitig die Tasten + und - (A) mehr als 5 Sekunden lang berühren, um das aktuelle Temperaturformat
(C=Grad Celsius, F=Grad Fahrenheit) anzuzeigen oder die Tasten + oder - (B) berühren, um es zu ändern.
- Toca al mismo tiempo las teclas + y - (A) más de 5 segundos, se visualiza el formato de temperatura
corriente (C= grados Celsius, F=grados Fahrenheit), toca las teclas + o - (B) para modificarlo.
- Raak de ON/OFF-toets (A) meer dan 5 seconden aan: de actuele modus (H = verwarmen, C = koelen) wordt
weergegeven. Wijzig de instelling met de toets + of - (B).
- Pressionar simultaneamente as teclas + e - (A) por mais de 5 segundos, será exibido o formato atual da
temperatura (C = graus Celsius, F = graus Fahrenheit), pressionar as teclas + ou - (B) para alterá-lo.
- Прикоснуться одновременно более чем на 5 секунд к кнопкам + или - (A), отобразится текущий
формат температуры (С= градусы Цельсия, F=градусы Фаренгейта), прикоснуться к кнопкам +
или - (B) для его изменения.
FC5A
B
- Calibrazione temperatura
- Temperature calibration
- Calibrage température
- Temperatur kalibrieren
- Calibración temperatura
- Afstelling temperatuur
- Calibração da temperatura
- Калибровка температуры

- Tocca contemporaneamente per più di 5 secondi i tasti ON/OFF (A) e + (B), viene visualizzato lo scostamento
tra la temperatura misurata e quella visualizzata dal termostato, tocca i tasti + o - (C) per modificarlo.
- Touch both the ON/OFF (A) and + (B) keys for more than 5 seconds. The deviation between the measured
temperature and the temperature displayed by the thermostat is displayed. Touch the + or – keys to modify it.
- Appuyer simultanément sur les touches ON/OFF (A) et + (B) pendant plus de 5secondes: l’écart entre
la température mesurée et celle affichée par le thermostat s’affiche; appuyer sur la touche + ou - (C)
pour le modifier.
- Die ON/OFF-Taste (A) und + (B) mehr als 5 Sekunden lang gleichzeitig berühren, um den Unterschied zwischen der vom
Thermostat gemessenen und angezeigten Temperatur anzugeben oder auf + oder - (C) drücken, um ihn zu ändern.
- Toca al mismo tiempo más de 5 segundos las teclas ON/OFF (A) y + (B), se visualiza la diferencia entre
la temperatura medida y la visualizada por el termostato, toca las teclas + o - (C) para modificarlo.
- Raak de ON/OFF-toets (A) en de toets + (B) tegelijkertijd meer dan 5 seconden aan: het verschil tussen de
gemeten temperatuur en de temperatuur weergegeven op de thermostaat wordt weergegeven. Wijzig de
instelling met de toets + of - (C).
- Pressionar simultaneamente as teclas ON/OFF (A) e + (B) por mais de 5 segundos, será visualizado o
desvio entre a temperatura medida e aquela visualizada pelo termostato, pressionar as teclas + ou -
(C) para alterá-lo.
- Прикоснуться одновременно более чем на 5 секунд к кнопкам ON/OFF (A) и + (B), отобразится
отклонение между измеренной температурой и температурой, показываемой термостатом,
прикоснуться к кнопкам + или - (B) для его изменения.
BA5
C
A
B
BB
BB
AA
A
5
Alimentazione 110 – 240 Vac , 50/60Hz
Assorbimento 2 W max
Sezione massima dei cavi 1 x 1,5mm2
Temperature di funzionamento 5 – 40 °C
Setpoint temperature 3 – 40 °C; incrementi di 0,5 °C
Tipo azionamento 1BU
Grado inquinamento 2
Tensione impulsiva nominale 4 kV
Portata contatti 5(2) A
Alimentation 110 – 240 Vac , 50/60Hz
Absorption 2 W max
Section maximale des câbles 1 x 1,5mm2
Température de fonctionnement 5 – 40 °C
Réglage température 3 – 40°C; par palier de 0,5°C
Type d’activation 1BU
Degré de pollution 2
Tension nominale à impulsions 4 kV
Portée contacts 5(2) A
Power supply 110 – 240 Vac , 50/60Hz
Absorption 2 W max
Maximum cable section 1 x 1.5mm2
Operating temperature 5 – 40 °C
Temperature set-point 3 – 40 °C; increase of 0.5 °C
Type of activation 1BU
Pollution level 2
Rated pulse voltage 4 kV
Contact output 5(2) A
Speisung 110 – 240 Vac , 50/60Hz
Stromaufnahme 2 W max.
Maximaler Kabelschnitt 1 x 1,5mm2
Betriebstemperatur 5 – 40 °C
Temperatursetpoint 3 – 40 °C; in Schritten von 0,5 °C
Betriebsweise 1BU
Verschmutzungsgrad 2
Impulsive Nennspannung 4 kV
Kontaktleistung 5(2) A
• Caratteristiche tecniche
• Technical features
• Caractéristiques techniques
• Technische Daten
• Características técnicas
• Technische eigenschappen
• Características técnicas
• Технические характеристики

Alimentación 110 – 240 Vac , 50/60Hz
Consumo 2 W max
Máxima sección de los cables 1 x 1,5mm2
Temperatura de funcionamiento 5 – 40 °C
Punto de ajuste temperaturas 3 – 40 °C; incrementos de 0,5 °C
Tipo de activación 1BU
Grado de contaminación 2
Tensión nominal de impulsos 4 kV
Capacidad contactos 5(2) A
Voeding 110 – 240 Vac , 50/60Hz
Stroomopname 2 W max
Maximum doorsnede van de kabels 1 x 1,5mm2
Bedrijfstemperatuur 5 – 40 °C
Temperatuur setpoint 3 – 40 °C; met stappen van 0,5 °C
Soort aansturing 1BU
Vervuilingsgraad 2
Nominale pulsspanning 4 kV
Bereik contacten 5(2) A
Alimentação 110 – 240 Vac , 50/60Hz
Absorção 2 W 2 W máx.
Seção dos cabos máxima 1 x 1,5mm2
Temperaturas de funcionamento 5 – 40 °C
Set-point das temperaturas De 3 a 40 °C; incrementos de 0,5 °C
Tipo de accionamento 1BU
Grau de poluição 2
Tensão de impulso nominal 4 kV
Alcance dos contatos 5(2) A
Питание 110 – 240 В Пер. тока , 50/60Гц
Потребление 2 Вт макс.
Максимальное сечение кабелей 1 x 1,5мм2
Рабочая температура 5 – 40 °C
Уставка температуры 3 – 40 °C; приращение 0,5 °C
Тип привода 1BU
Степень загрязнения 2
Номинальное импульсное
напряжение 4 кВ
Номинальный ток контактов 5(2) A
• Avvertenze e diritti del consumatore
Leggere attentamente prima dell’uso e conservare per un riferimento futuro
Divieto di toccare le unità con le mani bagnate
Divieto di utilizzo di pulitori liquidi o aerosol
Divieto di occludere le aperture di ventilazione
Diveto di modificare i dispositivi
Divieto di rimuovere parti di protezione dai dispositivi
Divieto di eseguire il lavoro di installazione da parte di operatore non qualificato
Divieto di installare le unità in prossimità di liquidi e polveri
Divieto di installare le unità in prossimità di fonti di calore / freddo o punti di
emissione di aria calda/fredda
Divieto di installare le unità in prossimità di gas nocivi, polveri metalliche o simili
Divieto di fissaggio delle unità su superfici non adatte
Pericolo di shock elettrico
Rischio caduta dei dispositivi a causa di cedimento della superficie su cui sono
installati o installazione inappropriata
Togliere l’alimentazione prima di ogni intervento sull’impianto
Attenzione: le operazioni di installazione, configurazione, messa in servizio e ma-
nutenzione devono essere effettuate esclusivamente da personale qualificato.
Assicurarsi che l’installazione a parete sia effettuata correttamente
Effettuare la posa dei cavi rispettando le normative vigenti
Collegare i cavi di alimentazione secondo le indicazioni
Per eventuali espansioni di impianto utilizzare solo gli articoli indicati nelle
specifiche tecniche
Warnings and consumer rights
Read carefully before use and keep for future reference
Touching the units with wet hands is forbidden
Using liquid cleaners or aerosols is forbidden
Blocking the ventilation openings is forbidden
Modifying the devices is forbidden
Removing protective parts from the devices is forbidden
It is forbidden for unqualified operators to carry out the installation work
Installing the units near liquids and powders is forbidden
Installing the units near heat/cold sources or hot/cold air emission points is
forbidden
Installing the units near harmful gases, metal dusts or similar is forbidden
Fastening the units on unsuitable surfaces is forbidden
Danger of electrical shock
Risk of devices falling because the surface on which they are installed col-
lapses or inappropriate installation
Switch the power supply OFF before any work on the system
Caution: Installation, configuration, starting-up and maintenance must be
performed exclusively by qualified personnel.
Check that the wall installation has been carried out correctly
Lay out the wires respecting the standards in force
Connect the power supply wires as indicated
Use only the items indicated in the technical specifications for any system
expansions
240110 
2
21,51
405
0,5403
1BU 
2
4
5(2) A 

This manual suits for next models

2

Other Bticino Thermostat manuals

Bticino KW4691 User manual

Bticino

Bticino KW4691 User manual

Bticino Smarther SX8000W User manual

Bticino

Bticino Smarther SX8000W User manual

Bticino XW8002W User manual

Bticino

Bticino XW8002W User manual

Bticino X8000W User manual

Bticino

Bticino X8000W User manual

Bticino L4450 Polyx Clima User manual

Bticino

Bticino L4450 Polyx Clima User manual

Bticino HC4451 User manual

Bticino

Bticino HC4451 User manual

Bticino HC/HS4451 User manual

Bticino

Bticino HC/HS4451 User manual

Bticino Legrand MyHome User guide

Bticino

Bticino Legrand MyHome User guide

Bticino KW4441 User manual

Bticino

Bticino KW4441 User manual

Bticino KW4691 User manual

Bticino

Bticino KW4691 User manual

Bticino HC 4695 User manual

Bticino

Bticino HC 4695 User manual

Bticino LIVING L4448 User manual

Bticino

Bticino LIVING L4448 User manual

Bticino HC4451 User manual

Bticino

Bticino HC4451 User manual

Bticino Smarther SX8000 User manual

Bticino

Bticino Smarther SX8000 User manual

Bticino Smarther X8000W User manual

Bticino

Bticino Smarther X8000W User manual

Bticino L4450 Polyx Clima User manual

Bticino

Bticino L4450 Polyx Clima User manual

Bticino Living 4477 User manual

Bticino

Bticino Living 4477 User manual

Bticino MyHOME User manual

Bticino

Bticino MyHOME User manual

Bticino Smarther User manual

Bticino

Bticino Smarther User manual

Popular Thermostat manuals by other brands

Full Gauge TIC-17C product manual

Full Gauge

Full Gauge TIC-17C product manual

Imit Chronomix S manual

Imit

Imit Chronomix S manual

ChiliTec ST-35 ana instruction manual

ChiliTec

ChiliTec ST-35 ana instruction manual

Salus VS05 Installer's/user's manual

Salus

Salus VS05 Installer's/user's manual

Azel D-500 user guide

Azel

Azel D-500 user guide

Honeywell Chronotherm III owner's manual

Honeywell

Honeywell Chronotherm III owner's manual

Charmeg MP-R user manual

Charmeg

Charmeg MP-R user manual

dixell WING XW40LS Installing and operating instructions

dixell

dixell WING XW40LS Installing and operating instructions

Network Thermostat NetX X7C-WIFI Installation and programming manual

Network Thermostat

Network Thermostat NetX X7C-WIFI Installation and programming manual

Radio Thermostat CT80 Operation guide

Radio Thermostat

Radio Thermostat CT80 Operation guide

HAI Omnistat RC-120 installation manual

HAI

HAI Omnistat RC-120 installation manual

Lennox iComfort E30 Installation and setup guide

Lennox

Lennox iComfort E30 Installation and setup guide

Lux Products PSD011Ba Installation and operating instructions

Lux Products

Lux Products PSD011Ba Installation and operating instructions

Computherm Q20 operating instructions

Computherm

Computherm Q20 operating instructions

Heatmiser neoStat user manual

Heatmiser

Heatmiser neoStat user manual

Mars HEAT CONTROLLER IR Wireless Thermostat user manual

Mars

Mars HEAT CONTROLLER IR Wireless Thermostat user manual

LUX LP0511D user manual

LUX

LUX LP0511D user manual

Saswell SAS920XWHB-7-S-RF User manual and warranty card

Saswell

Saswell SAS920XWHB-7-S-RF User manual and warranty card

manuals.online logo
manuals.online logoBrands
  • About & Mission
  • Contact us
  • Privacy Policy
  • Terms and Conditions

Copyright 2025 Manuals.Online. All Rights Reserved.