manuals.online logo
Brands
  1. Home
  2. •
  3. Brands
  4. •
  5. Bticino
  6. •
  7. Thermostat
  8. •
  9. Bticino Smarther User manual

Bticino Smarther User manual

X8000
BTicino SpA –Viale Borri, 231 –21100 Varese –Italy –www.bticino.com 12/16-01 PC
•Installazione
•Installation
•Installation
•Instalare
2
1
3
Con scatole 503E
With 503E boxes
Avec boîtes 503E
Cu doze 503E
Con scatole 500
With 500 boxes
Avec boîtes 500
Cu doze 500
4
4
5
Con scatole 502PB Avec boîtes 502PB
With 502PB boxes Cu doze 502PB
Attenzione: evitare serrare le viti con eccessiva forza,
al fine di evitare deformazioni della base che potrebbero compromettere la corretta installazione del dispositivo.
La parte frontale deve agganciarsi saldamente alla base e la molletta di aggancio deve scattare in posizione.
Una volta finita l’installazione attendere 2 ore prima di verificare la temperatura letta.
Caution: avoid tightening the screws too much, in order to prevent any base distortion that may compromise
the correct installation of the device. The front must be tightly fixed to the base and the fastening clip should
lock into place.
Once the installation has been done, wait for 2 hours before checking the read temperature.
Attention : éviter de serrer excessivement les vis pour prévenir les déformations de la base susceptibles de
compromettre la bonne installation du dispositif. La partie frontale doit être solidement fixée à la base et le
ressort de fixation doit s’engager dans la position prévue à cet effet.
Une fois l’installation terminée, attendre 2 heures avant de contrôler la température mesurée.
Atenţie: Evitaţi strângerea excesivă a şuruburilor pentru a preveni orice distorsiune a bazei care poate compromite
instalarea corectă a dispozitivului. Partea frontală trebuie să fie bine fixată pe bază, iar clema de prindere trebuie să
se blocheze în locaş.
După ce aţi efectuat instalarea, aşteptaţi timp de 2 ore înainte de a citi temperatura măsurată..
4
•Descrizione
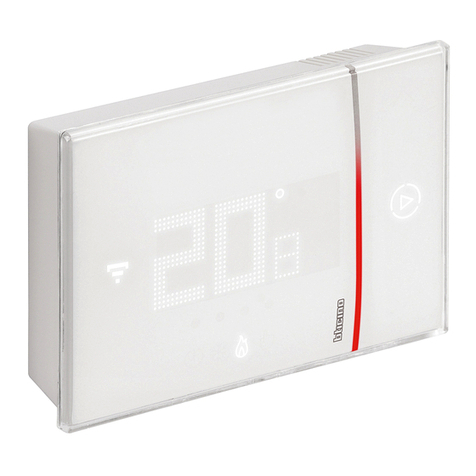
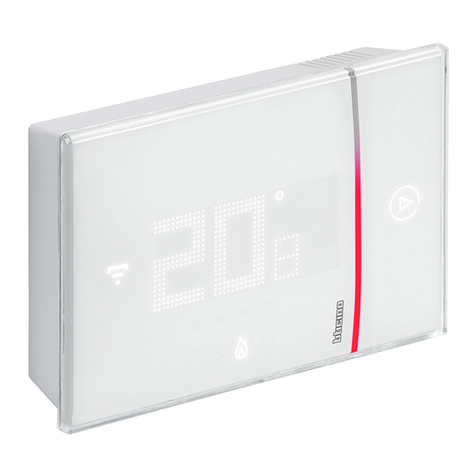
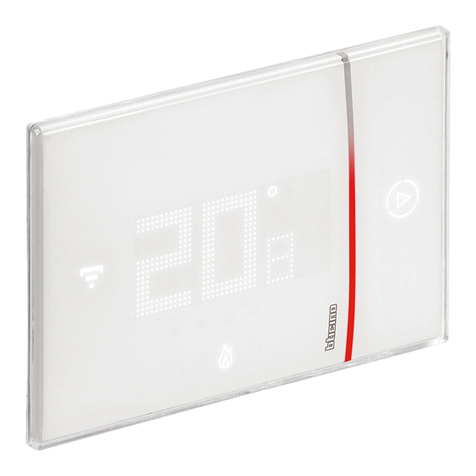
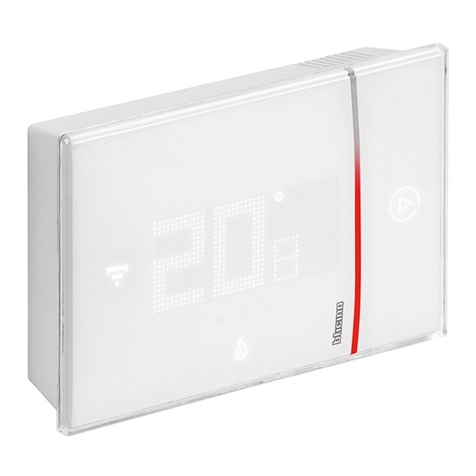
Il termostato connesso Smarther in abbinamento con l’App dedicata Thermostat
permette di regolare e monitorare la temperatura all’interno degli ambienti in
locale e da remoto.Localmente è possibile modificare l’impostazione del livello di
temperatura per il funzionamento manuale e attivare a modalità Boost che permette
di forzare l’accensione dell’impianto per un periodo limitato (30, 60 o 90 minuti)
indipendentemente dalla temperatura misurata e da quella programmata; permette
inoltre di visualizzare la temperatura e l’umidità misurate.
Grazie alla connessione Wi-Fi di cui è dotato, tutta la programmazione e gran parte delle
funzioni vengono effettuate in maniera semplice ed intuitiva utilizzando l’App in casa o
da remoto.
Smarther è installabile sia in scatole da incasso tonde 500/502PB che in scatole 503E.
•Description
The Smarther connected thermostat, together with the dedicated Thermostat App, is a
device which allows you to adjust and monitor the temperature in the rooms locally or
remotely. The temperature level can be set locally for manual operation and the Boost
mode can be activated. The Boost forces the switching on of the system for a limited time
(30, 60 or 90 minutes) independent of the measured and programmed temperature. It can
also display the temperature and humidity measured.
Thanks to its Wi-Fi connection, all the programming and most of the functions
are performed simply and intuitively using the App in the home or remotely.
Smarther can be installed both in 500/502PB flush-mounted round boxes and in 503E
boxes.
•Description
Le thermostat connecté Smarther associé à l’Appli dédiée Thermostat permet de régler
et de contrôler la température à l’intérieur des pièces. Localement, il est possible de
modifier le réglage du niveau de température pour le fonctionnement manuel et
d’activer la modalité Boost qui permet de forcer l’allumage de l’installation pendant une
durée limitée (30, 60 ou 90 minutes) indépendamment de la température mesurée et de
la température programmée ; il permet en outre de visualiser la température et
l’humidité mesurées.
Grâce à la connexion Wi-Fi dont il est doté, toute la programmation et la plupart des
fonctions sont simples à utiliser et intuitives en utilisant l’Appli, dans l’habitation ou à
distance.
Le thermostat Smarther peut être installé sous boîtes encastrées rondes 500/502PB et
sous boîtes 503E.
•Descriere
Termostatul electronic conectat Smarther, împreună cu aplicaţia dedicată, Thermostat, este un
dispozitiv care vă permite să reglaţi şi să monitorizaţi temperatura din camere local sau de la distanţă.
Nivelul temperaturii poate fi setat local pentru operare manuală, iar modul Boost poate fi activat.
Modul Boost forţează pornirea sistemului pentru o perioadă limitată (30, 60 sau 90 minute),
independent de temperatura măsurată şi programată. De asemenea, poate afişa temperatura şi
umiditatea măsurate.
Datorită conexiunii sale WiFi, programarea şi majoritatea funcţiilor sunt efectuate simplu şi intuitiv, cu
ajutorul aplicaţiei, în casă sau de la distanţă.
Smarther poate fi instalat atât în doze rotunde incastrabile 500/502PB, cât şi în doze 503E.
Smarther puede instalarse en cajas de empotrar redondas 500/502PB y en cajas 503E.
LE09487AA
2
•Schemi di collegamento
•Wiring diagrams
•Schémas de branchement
•Diagrame de cablare
Impianto per solo riscaldamento con contatto pulito (es.
consenso caldaia)
System only for heating with clean contact
(e.g. boiler agreement)
Installation pour chauffage uniquement avec contact libre
(ex. signal de validation chaudière)
Instalație doar pentru încălzire cu contact liber de potențial
(ex. validare boiler)
Impianto per solo riscaldamento con carico da comandare alla tensione di rete (es.
elettrovalvola 230Vac)
System only for heating with load to be controlled to the network voltage
(e.g. 230Vac solenoid valve)
Installation pour chauffage uniquement avec charge à commander à la tension de
secteur (ex. électrovanne 230 V)
Instalație doar pentru încălzire cu sarcină care va fi controlată în funcţie de tensiunea de
reţea (de ex., electrovană 230Vca)
L
N
NO
5(2) A NC
C
100 –240 Vac, 50/60 HZ
ALL 'IMPIANTO DI RISCALDAMENTO (CONTATTO PULITO)
(ON/OFF)
TO THE HEATING SYSTEM (CLEAN CONTACT)
(ON/OFF)
A L’INSTALLATION DE CHAUFFAGE (CONTACT LIBRE)
(ON/OFF)
LA SISTEMUL DE ÎNCĂLZIRE (CONTACTUL LIBER DE
POTENȚIAL)
(PORNIT/OPRIT)
L
N
NO
5(2) A NC
C
100 –240 Vac, 50/60 HZ
ALL 'IMPIANTO DI RISCALDAMENTO
(CARICO
DA COMANDARE ALLA TENSIONE DI RETE)
TO THE HEATING SYSTEM
(LOAD TO BE CONTROLLED TO THE NETWORKVOLTAGE) A
L’INSTALLATION DE CHAUFFAGE
(CHARGEACOMMANDERALATENSIONDESECTEUR)
LA SISTEMUL DE ÎNCĂLZIRE
(SARCINĂ CONTROLATĂ LA TENSIUNEA DE REȚEA)
Riscaldamento e raffrescamento con sistema a pavimento
Heating and cooling with floor system
Chauffage et climatisation avec système au sol
Încălzire și răcire cu sistem în pardoseală
Riscaldamento e raffrescamento con sistemi differenti
Heating and cooling with different systems
Chauffage et climatisation avec systèmes différents
Încălzire și răcire cu sisteme diferite
L
N
NO
5(2) A NC
C
100 –240 Vac, 50/60 HZ
ALL'IMPIANTO DI RISCALDAMENTO E RAFFRESCAMENTO
CON SISTEMA A PAVIMENTO
TO THE HEATING AND COOLING SYSTEM WIRTH
FLOOR SYSTEM
A L’INSTALLATION DE CHAUFFAGE ET CLIMATISATION
AVEC SYSTÈME AU SOL
L
N
NO
5(2) A NC
C
100 –240 Vac, 50/60 HZ
*
ALL 'IMPIANTO DI RISCALDAMENTO
TO THE HEATING SYSTEM
A L’INSTALLATION DE CHAUFFAGE
LA SISTEMUL DE ÎNCĂLZIRE
LA SISTEMUL DE ÎNCĂLZIRE ȘI RĂCIRE CU SISTEM ÎN
PARDOSEALĂ
ALL 'IMPIANTO DI RAFFRESCAMENTO
TO THE COOLING SYSTEM
AL’INSTALLATIONDECLIMATISATION
A
LA SISTEMUL DE RĂCIRE
Il commutatore esterno deve essere correttamente attivato quando la funzione del sistema passa da riscaldamento a raffreddamento e viceversa. *
External changeover switch must be properly switched when system function is changed from heating to cooling and vice versa.
Le commutateur externe doit être correctement activé quand la fonction du système passe du chauffage à la climatisation et inversement.
Comutatorul extern trebuie să fie corect activat atunci când funcția sistemului este modificată de la încălzire la răcire și invers.
110 - 240 V 50/60 Hz
2 W max.
1
2
3
4
5
L
N
6
NO
5(2) A
NC
C
5
7
12
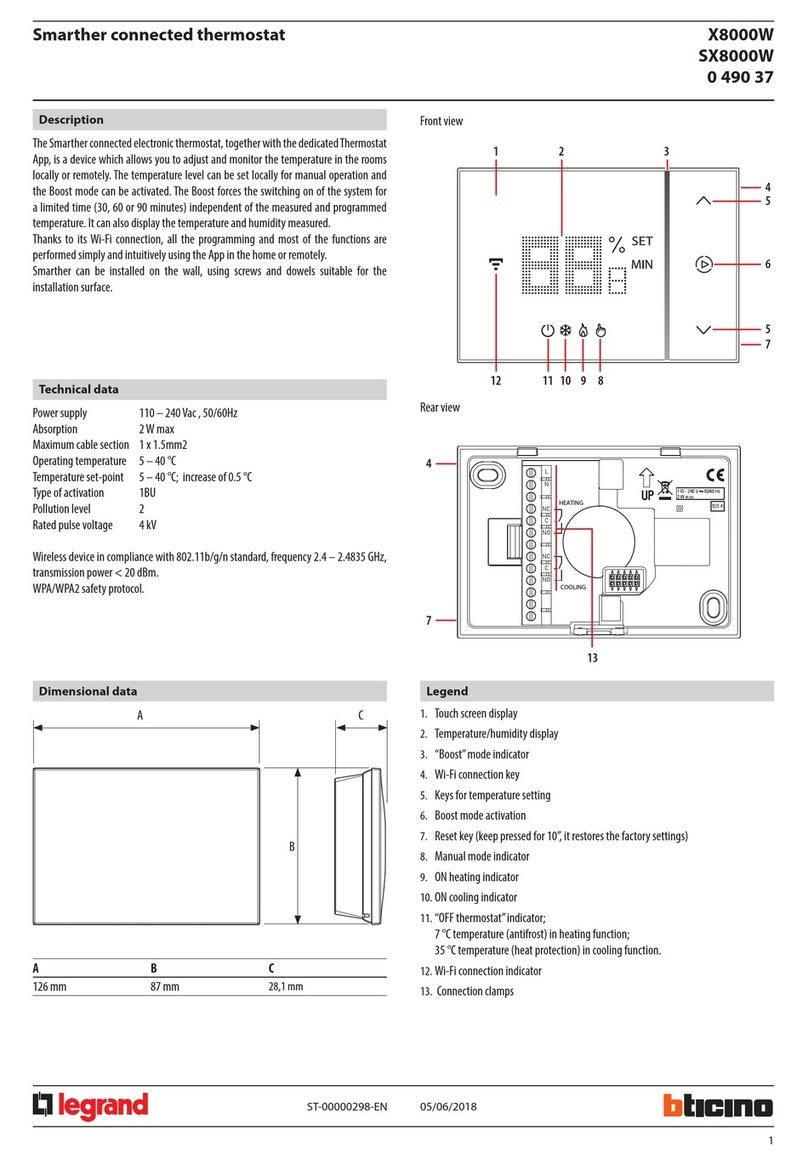
1. Display touch-screen
11 10
9
8
2. Visualizzazione temperatura/umidità
3. Indicatore funzionamento in modalità
“Boost”
4. Tasto connessione WiFi
5. Tasti per impostazione temperatura
6. Attivazione modalità Boost
7. Tasto Reset (tenere premuto 10”,
riporta alle condizioni di fabbrica)
8. Indicatore modalità manuale
9. Indicatore riscaldamento acceso
10. Indicatore raffrescamento acceso
11. Indicatore “Termostato spento”;
temperatura di 7 °C (antigelo) in
funzionamento riscaldamento;
temperatura di 35 °C (protezione
termica) in funzionamento
raffrescamento.
12. Indicatore connesione Wi-Fi
13. Morsetti di collegamento (vedi schemi)
1. Touch screen display
2. Temperature/humidity display
3. “Boost” mode indicator
4. Wi-Fi connection key
5. Keys for temperature setting
6. Boost mode activation
7. Reset key (keep pressed for 10”, it
restores the factory settings)
8. Manual mode indicator
9. ON heating indicator
10. ON cooling indicator
11. “OFF thermostat” indicator;
7 °C temperature (antifrost) in
heating function; 35 °C temperature
(heat protection) in cooling function.
12. Wi-Fi connection indicator
13. Connection clamps (see diagrams)
1. Écran tactile
2. Visualisation température/humidité
3. Indicateur de fonctionnement en
modalité « Boost »
4. Touche connexion Wi-Fi
5. Touches de réglages température
6. Activation modalité Boost
7.
Touche
Reset
(maintenir
enfoncée
pendant
10”
;
rétablit
les
réglages
par
défaut)
8. Indicateur modalité manuelle
9. Indicateur chauffage allumé
10. Indicatore raffrescamento acceso
11. Indicateur « Thermostat éteint »
; température de 7°C (antigel)
en fonctionnement chauffage ;
température de 35°C (protection
thermique) en fonctionnement
climatisation.
12. Indicateur connexion Wi-Fi
13. Bornes de branchement (voir schémas)
13
1. Afișaj cu ecran tactil
2. Afișaj temperatură/umiditate
3. Indicator mod "Boost"
4. Tastă conexiune WiFi
5. Tastă pentru setarea temperaturii
6. Activare mod Boost
7. Tasta Reset (apăsați10", restabilește
setările din fabrică)
8. Indicator mod manual
9. Indicator încălzire pornită
10. Indicator răcire pornită
11. Indicator „termostat oprit";
temperatura de 7 °C (anti-îngheț)
la funcția de încălzire; temperatura
de 35 °C (protecție termică) la
funcția de răcire.
12. Indicator conexiune Wi-Fi
13. Cleme conexiune (a se vedea schemele)
110 - 240 V 50/60 Hz
2 W max.
110 - 240 V 50/60 Hz
2 W max.
110 - 240 V 50/60 Hz
2 W max.
110 - 240 V 50/60 Hz
2 W max.
3
•Funzioni attivabili localmente
•Functions that can be locally activated
•Fonctions activables localement
•Funcții care pot fi activate local
Modalità Boost
Boost mode
Modalité Boost
Mod Boost
Attivazione e scorrimento pagine
Activation and page scrolling
Tocca il display (A) per attivarlo.
Activation et défilement des pages
Activare și derulare pagină
Dalla pagina di visualizzazione temperatura tocca il display, il simbolo si accende.
Tocca una o più volte il simbolo (D) per impostare la durata della funzione; il display
visualizza il tempo impostato, contemporaneamente l’indicatore si illumina.
Dopo aver impostato la durata voluta (30, 60 o 90 minuti) attendi che le cifre smettanodi
lampeggiare dopodichè la modalità Boost sarà attivata.
Scorri sul display (B) per passare alla pagina desiderata
Touch the display (A) to activate it.
Scroll on the display (B) to go to the desired page.
Toucher l’écran (A) pour l’activer.
Glisser sur l’écran (B) pour passer à la page voulue
Apasă ecranul (A) pentru a-l activa.
Derulează pe ecran (B) pentru a trece la pagina dorită.
Il display mostra la temperatura misurata; l’indicatore luminoso (E) sispegne
gradualmente al trascorrere del tempo impostato.
Touch the display on the temperature display page, the symbol comes on.
Touch the symbol (D) once or more to set the function duration; the display shows the set
time, at the same time the LED lights up.
After setting the desired duration (30, 60 or 90 minutes) wait until the digits stop flashing
after which the Boost mode will be activated.
The display shows the measured temperature; the LED (E) gradually switches off while the
set time passes by.
Reset
Reset
Réinitialisation
Reset Depuisla pagedevisualisationdela température,toucherl’écran:le symbole
s’allume.
Toucher une ou plusieurs fois le symbole (D) pour régler la durée de la fonction : l’écran
Questa azione riporta Smarther alla condizione di fabbrica, tutte le programmazioni
verranno cancellate.Tieni premuto il pulsante di reset presente sul lato di Smarther (C) sino
ad udire il beep di conferma (circa 10 secondi)
This operation restores the Smarther factory settings and all the programming will
becancelled. Keep pressed the reset pushbutton on the side of Smarther (C) until
aconfirmation beep is heard (about 10 seconds)
Cette action rétablit les réglages par défaut du thermostat Smarther : toutes les
programmations sont effacées. Maintenir enfoncé le bouton Reset présent sur le côté du
thermostat Smarther (C) jusqu’à ce qu’un bip de confirmation soit émis (au bout de 10
secondes environ).
Această acțiune readuce Smarther la setările din fabrică, toate programările vor fi anulate.
Apasă butonul de reset de pe partea laterală a Smarther (C) până când se aude un sunet de
confirmare (aproximativ 10 secunde ).
affiche la durée programmée et simultanément l’indicateur s’allume.
Après avoir programmé la durée voulue (30, 60 ou 90 minutes), attendre que leschiffres
cessent de clignoter ; ensuite la modalité Boost est active.
L’écran affiche la température mesurée ; l’indicateur lumineux (E) s’éteint
progressivement au fur et à mesure que la durée programmée s’écoule.
Pe pagina de vizualizare a temperaturii, apasă ecranul, simbolul se luminează.
Apasă o dată sau de mai multe ori ecranul(D) pentru a regla durata funcției; ecranul
afișează durata programată și, simultan, indicatorul se luminează.
După programarea duratei dorite (30, 60 sau 90 minute), așteaptă ca cifrele să nu mai
lumineze intermitent; apoi, modul Boost este activat.
Ecranul afișează temperatura măsurată; indicatorul luminos (E) se stinge progresiv, pe
măsură ce durata programului se scurge.
Imposta la temperatura
Set the temperature
Réglage de la température
Reglarea temperaturii
Visualizzazione umidità ambiente
Room humidity display
Visualisation de l’humidité ambiante
Afișaj umiditate mediu
Il livello di temperatura impostabile localmente è riferito al solo funzionamento in modalità
manuale.
Viene visualizzata l’impostazione attuale, modifica l’impostazione con itasti (F)
The temperature level that can be locally set refers only to the manual mode
operation. The actual setting is displayed, modify the setting with the keys (F)
Le niveau de température programmable localement se réfère au seul fonctionnement en
modalité manuelle.
Le réglage actuel s’affiche : modifier le réglage à l’aide des touches (F)
Nivelul temperaturii reglabile local se referă doar la modul manual.
Se afișează setarea actuală, utilizează tastele (F) pentru a o modifica.
Smarther integra un sensore che rileva la percentuale di umidità presente nell’ambiente; la
percentuale di umidità misurata rimane visibile per alcuni secondi (G), in seguito ritorneràla
visualizzazione della temperatura misurata.
Smarther contains a sensor that detects the humidity percentage in the room; the
measured humidity percentage is visible for a few seconds (G), then the measured
temperature display will appear again.
Le thermostat Smarther est doté d’un capteur qui mesure le pourcentage d’humidité
ambiante ; le pourcentage d’humidité mesuré reste affiché pendant quelques secondes (G) au
bout desquelles la visualisation de la température mesurée s’affiche à nouveau.
Smarther include un senzor care afișează procentul de umiditate din cameră ; procentul de
umiditate măsurată rămâne afișat pentru câteva secunde (G), apoi se revine la afișarea
temperaturii măsurate.
G
F
E
10”...
bip
D
B
A
C
4
•Dati tecnici
•Technical data
•Données techniques
•Date tehnice
Dispositivo wireless conforme allo standard 802.11b/g/n,
frequenza 2.4 –2.4835 GHz, potenza di trasmissione < 20 dBm.
Protocollo di sicurezza WPA/WPA2.
Dispositif sans
fil
conforme au standard 802.11b/g/n,
fréquence 2.4 –2.4835 GHz, puissance de transmission < 20 dBm.
Protocole de sécurité WPA/WPA2.
Wireless device in compliance with 802.11b/g/n standard,
frequency 2.4 –2.4835 GHz, transmission power < 20 dBm.
WPA/WPA2 safety protocol.
Dispozitiv wireless conform cu standardul 802.11b/g/n,
frecvență 2.4 – 2.4835 GHz, putere de transmisie < 20 dBm.
Protocol de securitate WPA/WPA2.
1 ANNO DI GARANZIA IN PIÙ SENZA COSTI AGGIUNTIVI!
REGISTRATI SUL PORTALE BTICINO PER ESTENDERE LA NORMALE GARANZIA DI 2 ANNI
Vai alla pagina www.bticino.it/registraprodotto o leggi il QRcode qui a destra per effettuare gratuitamente la registrazione.
AN EXTRA YEAR’S WARRANTY WITHOUT ADDITIONAL COSTS!
REGISTER ON THE BTICINO PORTAL TO EXTEND THE NORMAL TWO-YEAR WARRANTY
Go to www.bticino.it/registraprodotto or read the QR code to the right to register free-of-charge.
1
AN
DE
GARANTIE
SUPPLÉMENTAIRE
SANS
SUPPLÉMENT
!
ENREGISTREZ-VOUS
SUR
LE
PORTAIL
BTICINO
POUR
PROLONGER
LES
2
ANS
DE
GARANTIE.
Allez
à
la
page
www.bticino.it/registraprodotto
ou
scannez
le
code
QR
ci-contre
(à
droite)
pour
effectuer
gratuitement
l’enregistrement.
1 AN GARANȚIE IN PLUS FĂRĂ COSTURI SUPLIMENTARE!
ÎNREGISTREAZĂ-TE PE PORTALUL BTICINO PENTRU A EXTINDE GARANȚIA NORMALĂ DE 2 ANI
Intră pe pagina www.bticino.it/registraprodotto sau citește codul QR din dreapta pentru a te înregistra gratis.
Scarica
tutta
la
documentazione
tecnica
relativa
a
Smarther
Download
all
the
technical
documentation
about
Smarther
Téléchargez
toute
la
documentation
technique
du
thermostat
Smarther
Descarcă toată documentația tehnică referitoare la Smarther
Per
scaricare
l’applicazione
da
Apple
Store
o
Google
Play
scansionare
il
codice
QR
oppure
cercare“Thermostat”
Scan
the
QR
code
or
look
for
“Thermostat”
to
download
the
application
in
Apple
Store
or
Google
Play
Pour
télécharger
l’application
sur
Apple
Store
ou
Google
Play,
scanner
le
code
QR
ou
rechercher
«
Thermostat
».
Scanează codul QR sau caută „Thermostat”pentru a descărca aplicația din Apple Store sau Google Play
App Thermostat
Smarthe
r
•Avvertenze
•Warning
•Avertissement
•Avertisment
•Attenzione: le operazioni di installazione, configurazione, messa in servizio e manutenzione devono essere effettuate da personale qualificato.
•Caution: installation, configuration, starting-up and maintenance must be performed by qualified personnel.
•Attention: les opérations d’installation, de configuration, de mise en service et d’entretien doivent être confiées à un personnel qualifié.
•Atenție: operațiunile de instalare, configurare, punere în funcțiune și întreținere trebuie să fie efectuate de personal calificat.
Leggere attentamente questo documento prima dell’uso e conservarlo per un Lire attentivement le présent document avant toute utilisation et le conser-
riferimento futuro ver pour le consulter au besoin.
Divieto di toccare le unità con le mani bagnate Interdiction de toucher les unités avec les mains mouillées.
Divieto di utilizzo di pulitori liquidi o aerosol Interdiction d’utiliser des produits de nettoyage liquides ou des aérosols.
Divieto di occludere le aperture di ventilazione Interdiction de boucher les ouvertures de ventilation.
Divieto di
modificar
e i dispositivi Interdiction de
modifier
les dispositifs.
Divieto di rimuovere parti di protezione dai dispositivi Interdiction des retirer les parties de protection des dispositifs.
Pericolo di shock elettrico Risque d’électrocution
Togliere l’alimentazione prima di ogni intervento sull’impianto
Couper
l’alimentation
avant
toute
intervention
sur
l’installation.
Read carefully this document before use and keep it for future reference Citește cu atenție acest document înainte de utilizare și păstrează-l pentru consultări ulterioare
Touching the units with wet hands is forbidden Atingerea cu mâinile ude este interzisă
Using liquid cleaners or aerosols is forbidden Utilizarea produselor de curățare lichide sau a aerosolilor este interzisă
Blocking the ventilation openings is forbidden Obstrucționarea gurilor de aerisire este interzisă
Modifying the devices is forbidden Modificarea dispozitivelor este interzisă
Removing protective parts from the devices is forbidden Eliminarea părților de protecție ale dispozitivelor este interzisă
Danger of electrical shock Pericol de electrocutare
Switch
the
power
supply
OFF
before
any
work
on
the
system
Alimentare
110 –240 Vac , 50/60Hz
Absorbție
2 W max
Secțiune maximă cablu
1 x 2,5mm2
Temperatura de funcționare
5 –40 °C
Valoare de referință temperatură
5 –40 °C; creștere cu 0,5 °C
Alimentation
110 –240 Vac , 50/60Hz
Absorption
2 W max
Section maximale des câbles
1 x 2,5mm2
Température de fonctionnement
5 –40 °C
Réglage température
5 –40°C ; par palier de 0,5°C
Alimentazione
110 –240 Vac , 50/60Hz
Assorbimento
2 W max
Sezione massima dei cavi
1 x 2,5mm2
Temperature di funzionamento
5 –40 °C
Setpoint temperature
5 –40 °C; incrementi di 0,5 °C
Power supply
110 –240 Vac , 50/60Hz
Absorption
2 W max
Maximum cable section
1 x 2.5mm2
Operating temperature
5 –40 °C
Temperature set-point
5 –40 °C; increase of 0.5 °C
Opriți alimentarea înainte de a efectua orice lucrări la nivelul sistemului

This manual suits for next models

1

Other Bticino Thermostat manuals

Bticino KW4691 User manual

Bticino

Bticino KW4691 User manual

Bticino KW4441 User manual

Bticino

Bticino KW4441 User manual

Bticino MyHOME User manual

Bticino

Bticino MyHOME User manual

Bticino HC 4695 User manual

Bticino

Bticino HC 4695 User manual

Bticino LIVING L4448 User manual

Bticino

Bticino LIVING L4448 User manual

Bticino L4450 Polyx Clima User manual

Bticino

Bticino L4450 Polyx Clima User manual

Bticino HC4451 User manual

Bticino

Bticino HC4451 User manual

Bticino Legrand MyHome User guide

Bticino

Bticino Legrand MyHome User guide

Bticino Smarther SX8000W User manual

Bticino

Bticino Smarther SX8000W User manual

Bticino X8000W User manual

Bticino

Bticino X8000W User manual

Bticino L4450 Polyx Clima User manual

Bticino

Bticino L4450 Polyx Clima User manual

Bticino KW4691 User manual

Bticino

Bticino KW4691 User manual

Bticino HC/HS4451 User manual

Bticino

Bticino HC/HS4451 User manual

Bticino HC4451 User manual

Bticino

Bticino HC4451 User manual

Bticino Smarther X8000W User manual

Bticino

Bticino Smarther X8000W User manual

Bticino KW4441 User manual

Bticino

Bticino KW4441 User manual

Bticino Smarther SX8000 User manual

Bticino

Bticino Smarther SX8000 User manual

Bticino Living 4477 User manual

Bticino

Bticino Living 4477 User manual

Bticino XW8002W User manual

Bticino

Bticino XW8002W User manual

Popular Thermostat manuals by other brands

Bryant TSTAT Homeowner's guide

Bryant

Bryant TSTAT Homeowner's guide

CityGrow CG100HTH-IR user manual

CityGrow

CityGrow CG100HTH-IR user manual

Flash THERMOFLASH DIGI 2 Eco quick start guide

Flash

Flash THERMOFLASH DIGI 2 Eco quick start guide

DELTA DORE D10 W RF installation guide

DELTA DORE

DELTA DORE D10 W RF installation guide

Uponor A3030102 instruction sheet

Uponor

Uponor A3030102 instruction sheet

Stelpro MAESTRO quick start guide

Stelpro

Stelpro MAESTRO quick start guide

Vive Comfort TP-P-725 installation manual

Vive Comfort

Vive Comfort TP-P-725 installation manual

Everex WT-11 user manual

Everex

Everex WT-11 user manual

Tech Controllers EU-280 user manual

Tech Controllers

Tech Controllers EU-280 user manual

Tekmar tekmarNet 532 Quick setup guide

Tekmar

Tekmar tekmarNet 532 Quick setup guide

BVF 24-F user manual

BVF

BVF 24-F user manual

Ween Ween installation instructions

Ween

Ween Ween installation instructions

Honeywell Home CT230-GA installation guide

Honeywell Home

Honeywell Home CT230-GA installation guide

Aube Technologies TH132 F owner's guide

Aube Technologies

Aube Technologies TH132 F owner's guide

MRC TEPS-4 instruction manual

MRC

MRC TEPS-4 instruction manual

Hitachi ATW-RTU-08 Installation and operation manual

Hitachi

Hitachi ATW-RTU-08 Installation and operation manual

Klima C16 manual

Klima

Klima C16 manual

Honeywell 32207484 owner's manual

Honeywell

Honeywell 32207484 owner's manual

manuals.online logo
manuals.online logoBrands
  • About & Mission
  • Contact us
  • Privacy Policy
  • Terms and Conditions

Copyright 2025 Manuals.Online. All Rights Reserved.