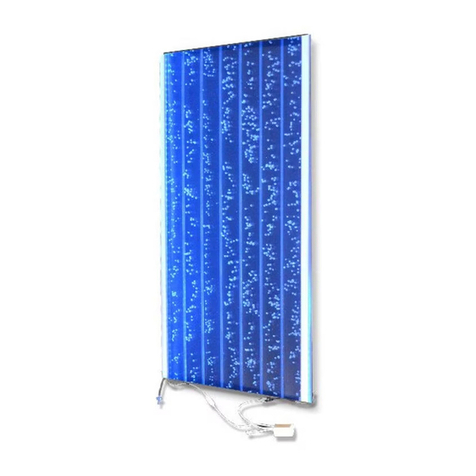
Bubble Wall 200FS Operating instructions

Troubleshooting Your Bubble Wall –Bubble Output
Description: Intermittent or low bubble output, bubbles stop or slow in some channels
Please follow the steps below. Check each in order, until the problem is identified.
Important Notes:
If your air pump is brand new, there will be a break-in period in which the pump will have a
decreased air pressure and decreased bubble output for approximately 24-48 hours. Allow the
pump to run and after this time the unit will reach maximum bubble output.
If you have experienced a power loss or turned your air pump off for an extended period of time
and upon re-powering the unit you do not have proper bubble output, this is caused by water
back feeding into the air lines and will need to be removed. First, check and verify there is no
water in the air tubing exiting the pump or coming from the pump body, if so disconnect from
power and replace the air pump. If pump is ok, you can leave the pump run for a 24 hour period
and in most cases the air pressure will slowly remove the water during this time and normal
bubble output will resume. If you need a faster solution, or this method does not work, you will
need to remove and drain the tank of the bubble wall completely. Re-assemble the tank and run
with the tank empty for about an hour to clear all water from the bubble wand tube and
associated air tubing before refilling with water.
If your unit has been operating normally for a long period of time, and recently the bubble
output has slowed or stopped in some channels, clogging in the small outlet holes in the bubble
wand tube has occurred from particles in the air collecting over time. In highly humid locations
and dusty environments this effect is magnified. It is likely that removing the bubble wand tube,
and cleaning or replacing, will result in you bubble wall performing like new again. See below for
instructions on how to clean the bubble wand.
If none of the common solutions solve your issue, please continue to the steps below.
Air Pump & Tubing Operation
Check all blue tubing lines and connections for possible disconnections and/or leaks leading up
to the bubble tank, especially check for kinks or pinched sections of tubing which will restrict air
flow to the bubble wand tube. Re-route tubing as necessary, and replace any leaking sections.
Check for any water present in the air line tubing exiting the pump, or coming from the pump
body –if so, disconnect from power and drain the tank. For details on removing the tank from
particular models, view the model’s instruction manual (also available on our website at:
http://www.bubblewall.com/pages/support) The air pump and blue one way valve located in-
line on the air tubing will need to be replaced.
Verify the air pump is properly plugged in –it should have a slight vibration and low toned
exhaust sound indicating it is powered on.
If the pump is equipped with an air output control knob, verify the output is turned all the way
to the up position.
Momentarily remove the air tubes from the front of pump, hold finger over the air output(s) and
verify the pump is producing air pressure.

If the pump is making any extremely loud vibrating and/or rattling sounds when held in hand, it
has likely experienced an internal mechanical failure and will require replacement.
Pick up the pump in hand and lightly shake the unit, and listen for a “rattle” sound –this will
indicate if there is any mechanical parts which may have failed inside the pump body. If so, the
pump will likely need replacement.
Air pump replacements can be found on our website at:
http://www.bubblewall.com/collections/bubble-wall-parts
If you have purchased your bubble wall within the last 90 days, contact us at
contact@bubblewall.com for a replacement.
If the pump and air lines appear to be operating properly, move on to the following steps.
Bubble Wand “Tap Method”
Firmly tap the bubble tank at the position of the bubble wand which has stopped bubbling. If
bubbles begin to exit the wand at this point there may have been some surface tension causing
the bubbles to stop and the problem is solved. If the problem persists, the wand may require
cleaning or replacement. If you notice a small amount of bubbles exit the wand at this time and
then stop again, or no bubbles are released, the wand will need to be removed for cleaning or
replacement.
Bubble Wand Removal for Cleaning or Replacement
Disconnect the blue air tubing at the blue one-way valve leading to the tank. Also any lighting
connections required to separate the bubble tank from its base, stand, or frame
Remove the bubble panel from any base, stand, or frame. For details on removing the tank from
particular models, view the model’s instruction manual (also available on our website at:
http://www.bubblewall.com/pages/support)
Drain the bubble tank by taking the top cap off of the unit and dumping out in a utility sink or
outdoor area
Lay the tank on a soft flat surface, grasp the end of the bubble wand which is sticking out at the
bottom corner of your tank, and pull carefully straight away from the tank to remove the bubble
wand tube
The bubble wand tube should be firm to move at first, and will begin to slide more easily out of
the tank as you progress
It is recommended to do a basic tank cleaning at this point to keep the unit from building up
deposits, algae etc. Spray out with a hose or flush repeatedly with clean water. Remove
blemishes at the top opening of the tank with a small tooth brush or similar tool.
Cleaning the Bubble Wand Tube
Cleaning of the tube body and small holes in the tube should only be done with a tooth brush or
similar soft bristled plastic brush. Alternatively, the tube may be blown out with compressed air
where available. The tubing material is fragile, do not use needles, sharp tools, or metal brushes
of any kind to attempt to clean the wand or it will be damaged and require replacement.
Replacement bubble wands can be purchased on our website at:
www.bubblewall.com/collections/bubble-wall-parts

Re-inserting the Wand Tube after Cleaning or Replacement
Take your time and follow directions closely for successful re-installation of the wand tube
Lubrication may be necessary if significant time has passed since the tank was drained of water
and it is now dry. Mild dish or hand soap diluted with water may be applied to the inserting end
of the wand tube and inside rubber seal at the bottom of the tank to help the wand slide into
the seal. If lubricant has been applied, dry hands fully before trying to grasp the wand tube.
To re-insert, holding approximately one inch back from the inserting end of the tube, carefully
push the end of the tube back in through the rubber seal in the tank. While re-inserting the
tube, do not hold any further back than one inch at a time, inserting in small increments until
fully seated. Holding further back on the tube while pushing it in may result in the tube bending
and/or collapsing from the pressure. Slightly turning, and angling the tube will allow passage
through each channel of the bubble tank.
All possible bubble output issues should be resolved by performing these steps. If you continue to
experience issues, replacement of the air delivery components is recommended. We offer a special
discounted purchase for a replacement air pump and wand combo on our website at:
http://www.bubblewall.com/collections/bubble-wall-parts
This manual suits for next models
5
Table of contents
Other Bubble Wall Indoor Furnishing manuals
Popular Indoor Furnishing manuals by other brands

Emmezeta
Emmezeta BUGK221B Assembling Instruction

Geberit
Geberit ONE 500.493.00.1 user manual

VECELO
VECELO KHD-LT-05 installation manual

BullFrog
BullFrog OD2211 ECKfrog Assembly and instruction manual

Lifestyle Solutions
Lifestyle Solutions SECTIONAL ROLL ARM Assembly instructions

Midway
Midway MOD-5184 quick start guide

Winners Only
Winners Only AP100C Aassembly Instructions

Next
Next 645958 Assembly instructions

Signature Design by Ashley
Signature Design by Ashley Footboard Assembly instructions

Schulte
Schulte Classica Series manual

CASARIA
CASARIA Lucca 100610 manual

Furniture of America
Furniture of America CM-AC6931 Assembly instructions