Page | 2
Using a level and tape measure, make two marks exactly 32 inches apart at the stud locations on your wall
Install suitable screws for your planned installation - Due to the broad range of possible installations we do not
provide fasteners. Note: If you are unsure what fasteners to use, we recommend consulting with a
representative at your local hardware store for advice on screw types and lengths for your particular
installation –bubble wall weight is approximately 16lbs full of water
Optionally for tamper resistant applications, the unit is equipped to allow additional mounting points at the
lower mounting key holes exactly 14”below the first set of fasteners.
Once all fasteners are installed and protruding approximately 3/8 inch from the wall surface, hang the fountain
by sliding it down onto fastener heads through the key holes at the rear of the unit.
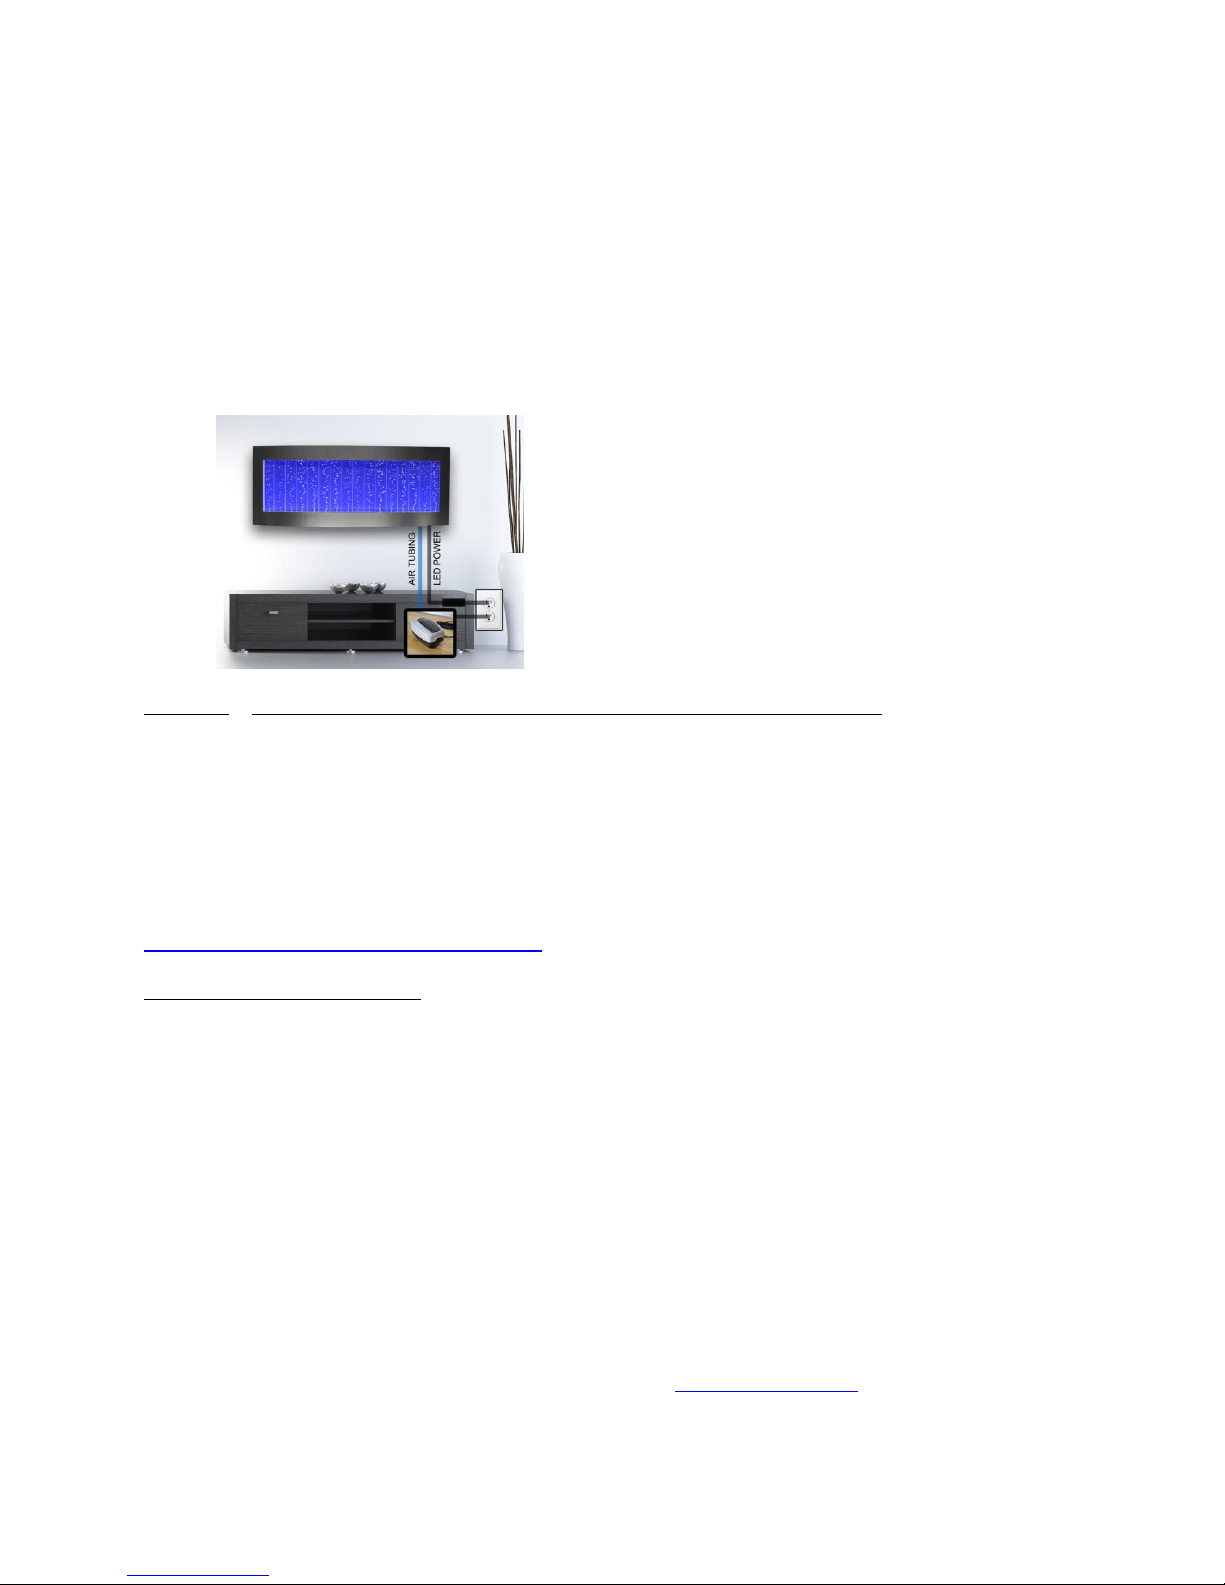
Route LED lighting power cord and blue air tubing to the planned location and connect to power as seen below.
Water Fill –*Air pump must be on before filling with water and should remain on at all times
Air pump must be on, and delivering air to the unit before filling with water.
Using the provided funnel, slowly begin filling the unit through the fill tube in the top of the tank
Fill to about 1/4 full with distilled water and check for leaks (if leaks are present, be sure to unplug the
power cord and drain the tank immediately). Finally, fill the tank to about 1 inch from the top
Use care to not over fill and spill water down the front or back of your tank
LED Lighting and Remote Control Programming Instructions can be found at:
www.youtube.com/watch?v=AXjKZ15-qTM
Important Care and Maintenance
Regular top offs should be performed to maintain water level, keep top plastic cover in place to prevent
evaporation
Check airline connections regularly to inspect for leaks or loosening tubes
Wipe down your bubble wall with a damp soft towel to clean, never use abrasive cleaners or glass
cleaners
To drain your tank, disconnect from power and connections, detach from wall, then tank may be drained
out from the top fill area
If bubble output becomes clogged, drain tank and remove bubble wand tubes from tank by carefully
pulling the wand straight out away from the tank. Bubble output holes may be cleaned with a tooth brush
(do not use metal brushes, picks, needles etc. as they will damage your bubble wand)
Re-insert the bubble wand by first lubricating well with soapy water and sliding back into place carefully 1
inch at a time
Replacement parts may be purchased on our website at www.bubblewall.com


