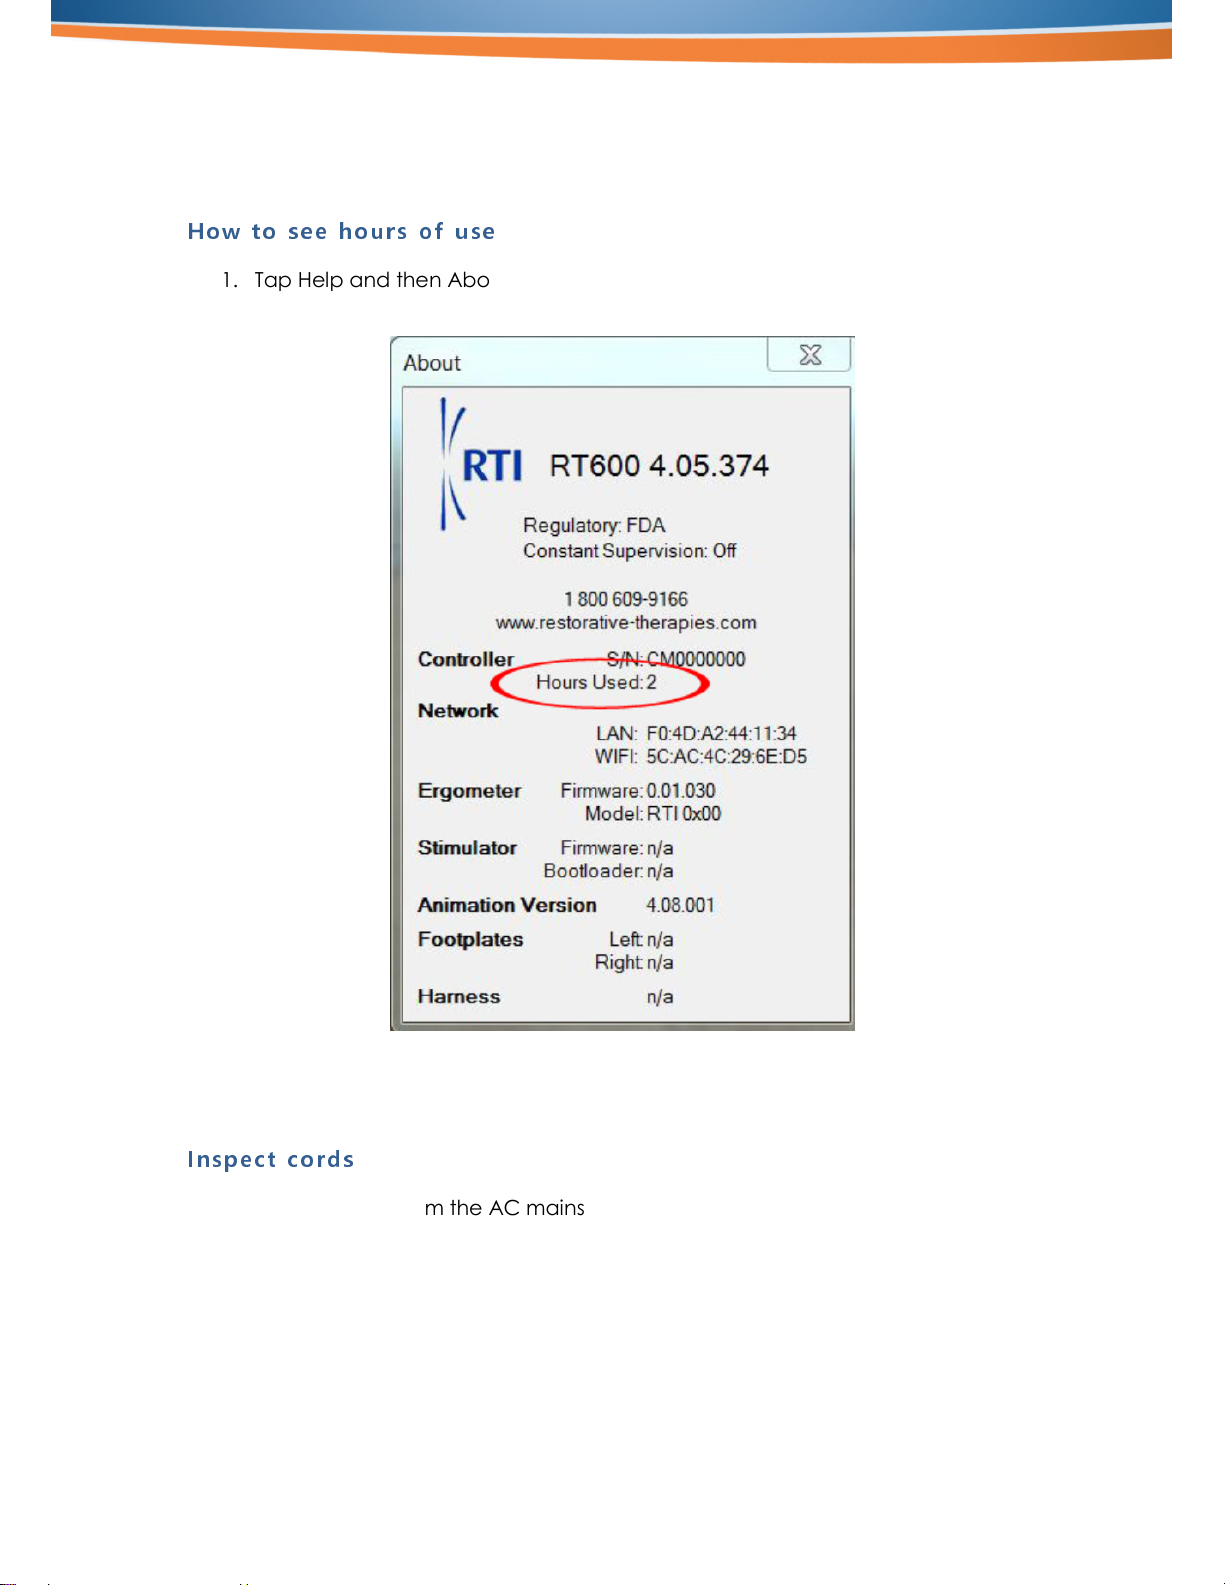
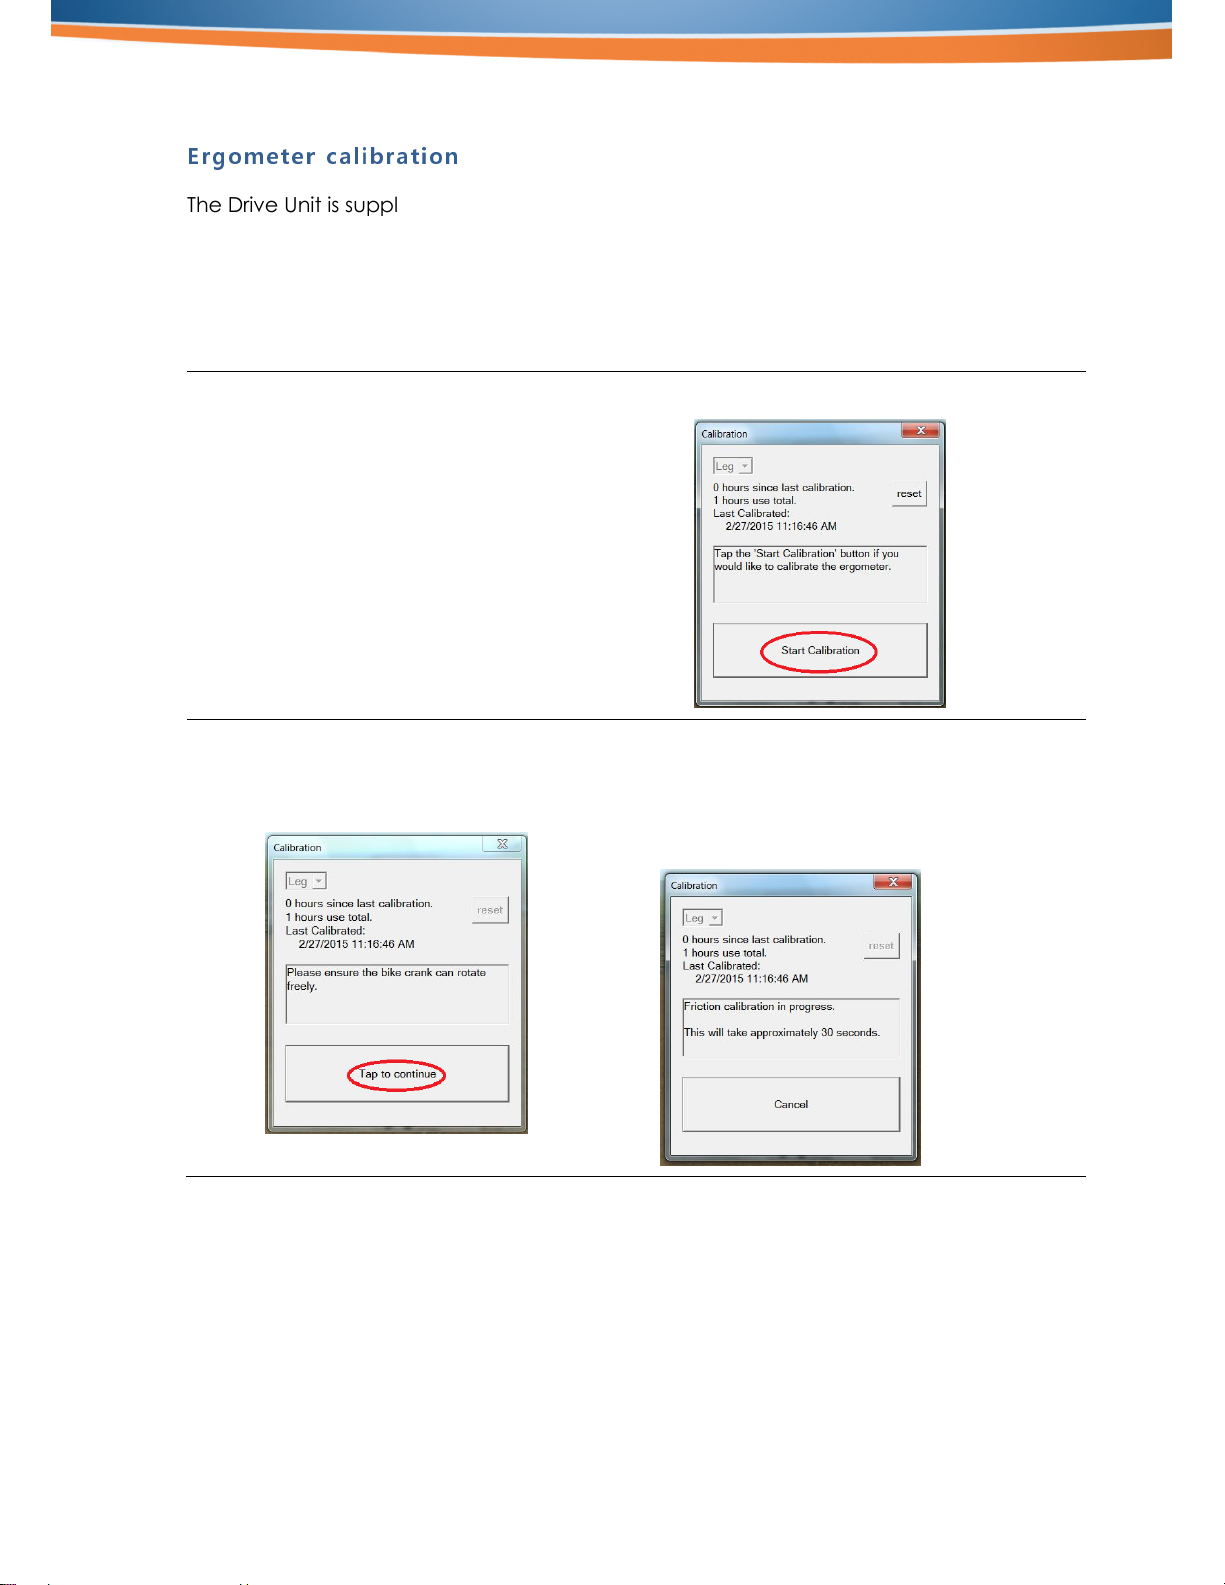
RT300 Supine Service Guide, © Restorative Therapies Inc. 2017. LB217394 Issue 2.1 Page 19
Procedures annually
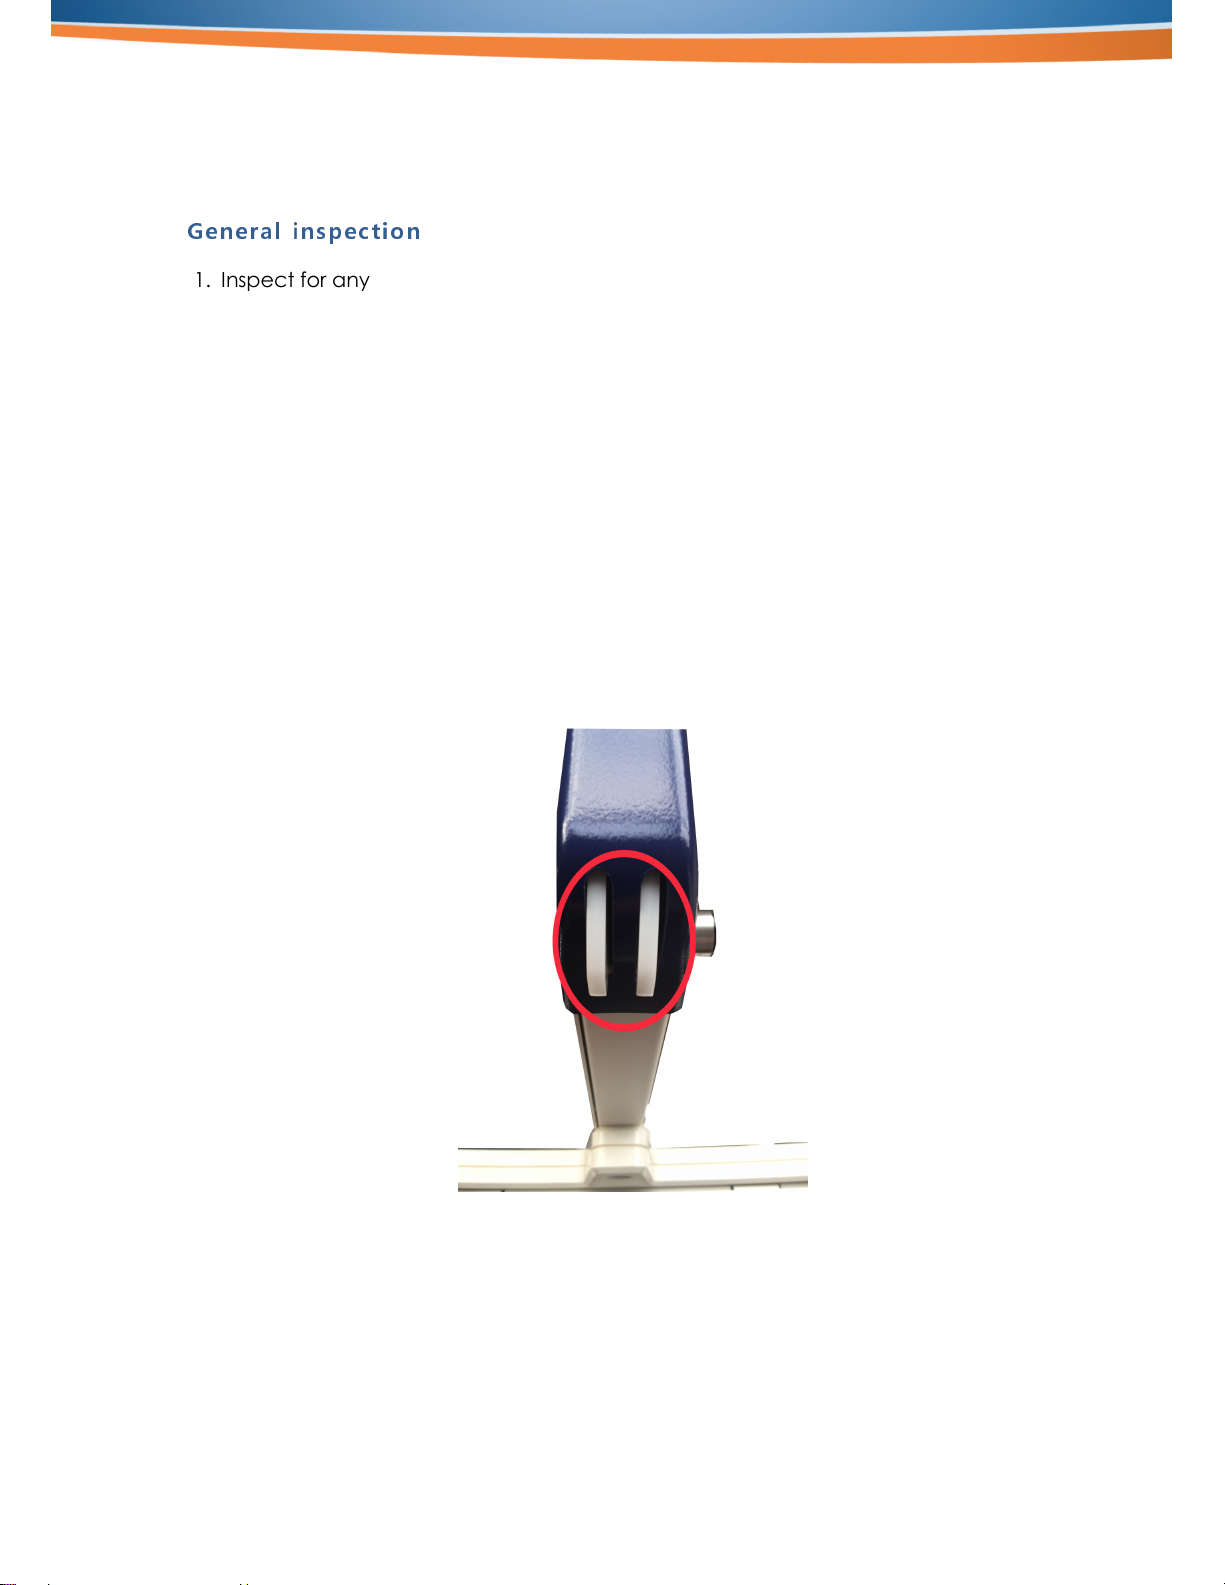
General inspection
1.
Inspect for any damaged components and replace
2.
onfirm the condition and test the operation of the RT300 Supine ergometer
emergency stop switch
3.
onfirm the operation of the down stop switches beneath the electronics
compartment and on the underside of the distal part of the snout.
a.
Position the height of the RT300 Supine to approximately ½ way
b.
While lowering the RT300 Supine using the Up/Down switch press the
blue plastic plate beneath the electronics compartment. The
downward motion should stop. Release the blue plate and downward
motion should continue.
c.
While lowering the RT300 Supine using the Up/Down switch press the
white plastic switch on the underside of the distal part of the snout.
The downward motion should stop. Release the white plastic switch
and downward motion should continue.
Figure 7 Snout s itch