6
EN
Operation
1. Connect the appliance to the mains power supply.
2. Press the Start button (I) to turn on.
3. Pulse function: Press down and hold the pulse button to start. Release to stop.
4. Once all food are cut, press the Stop button (O) to turn Off. Disconnect from power supply and let
the motor cool down.
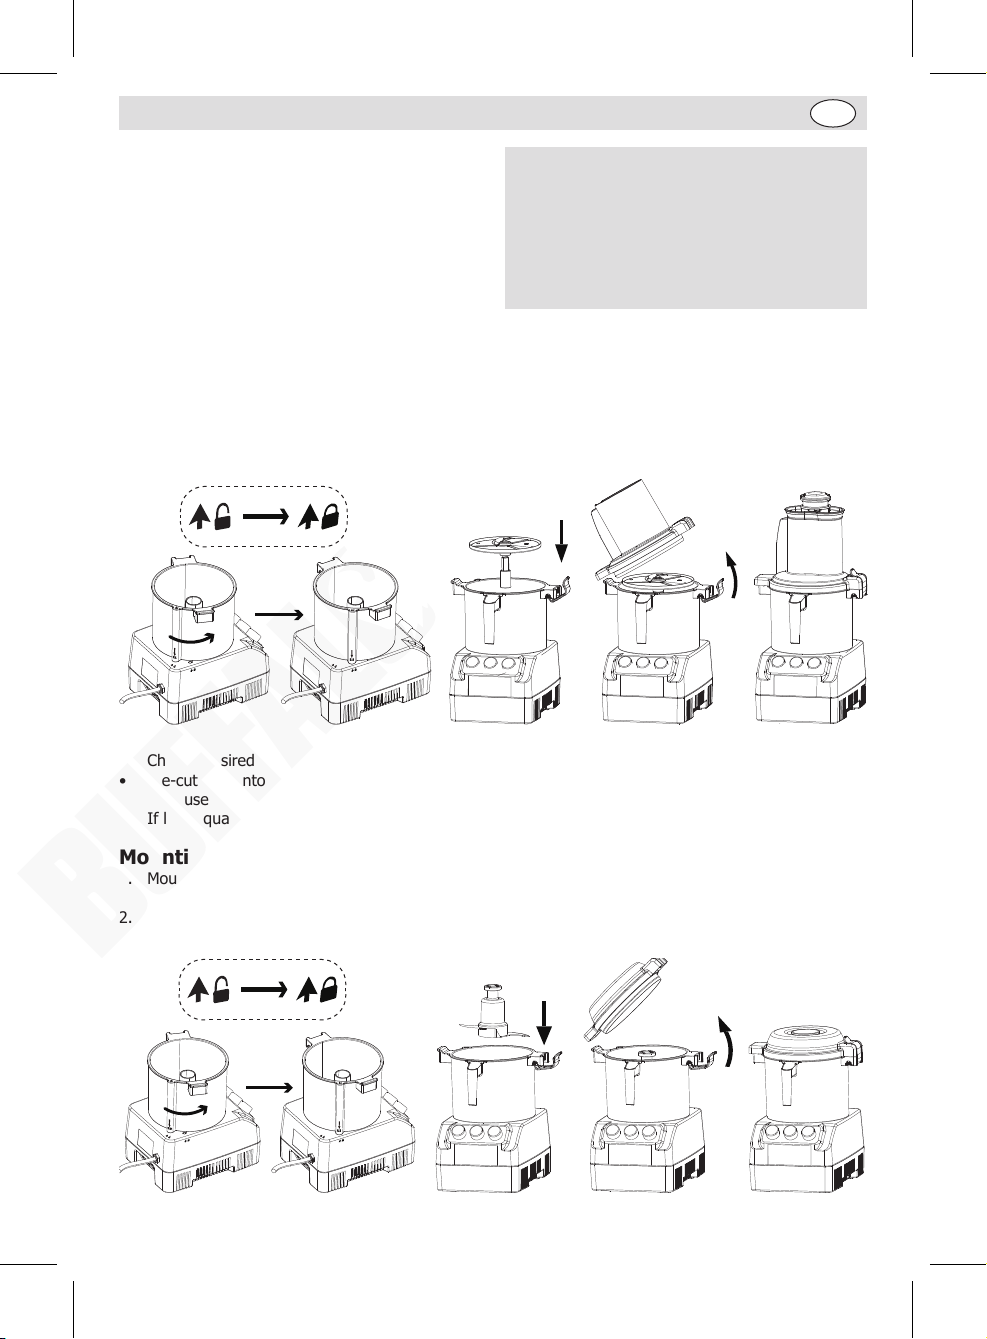
Changing the cutting blades
Warning: Cutting blades are sharp! Handle with care!
1. Turn off and disconnect the appliance from the mains power supply.
2. Reverse the steps as stated in section “Assembly” to remove the lid.
3. Remove the cutting disc or S blade then slot a new one in place.
Note: Ensure the appliance is clean and free from food debris to ensure the cutting disc/blade can be
securely fitted.
4. Re-mount the lid attachments.
Cleaning, Care & Maintenance
• Always turn off and disconnect the appliance from the power supply before cleaning.
• Allow to cool before cleaning.
• Let the motor come to a complete stop before disassembly and cleaning.
• Remove all food debris.
• Never immerse the motor base in water, nor rinse it under running water. Clean the surface using a
damp cloth.
• Use warm, soapy water and a damp cloth to clean all removable parts. No parts are dishwasher safe.
• Dry all parts well and re-assemble.
• Periodically lubricate the shaft with some vegetable oil.
Troubleshooting
A qualified technician must carry out repairs if required.
Fault Probable Cause Solution
The unit is not working The unit is not switched on Check the unit is plugged in correctly and
switched on
Plug or lead is damaged Replace plug or lead
Fuse in the plug has blown Replace the plug fuse
Mains power supply fault Check mains power supply
Unit does not work after
assembled Safety interlock system is
functioning due to improper
assembling
Assemble the appliance correctly, referring to
section “Assembly”
Appliance stops working
suddenly Overheating protection is
activated due to overload or
short circuit
1. Turn off and disconnect from power supply
2. Empty the bowl and allow cooling down for
about 15 seconds
3. Restart the appliance
CK164_ML_A5_v1_20230724.indb 6CK164_ML_A5_v1_20230724.indb 6 2023/7/24 17:192023/7/24 17:19