manuals.online logo
Brands
  1. Home
  2. •
  3. Brands
  4. •
  5. Bull
  6. •
  7. Grill
  8. •
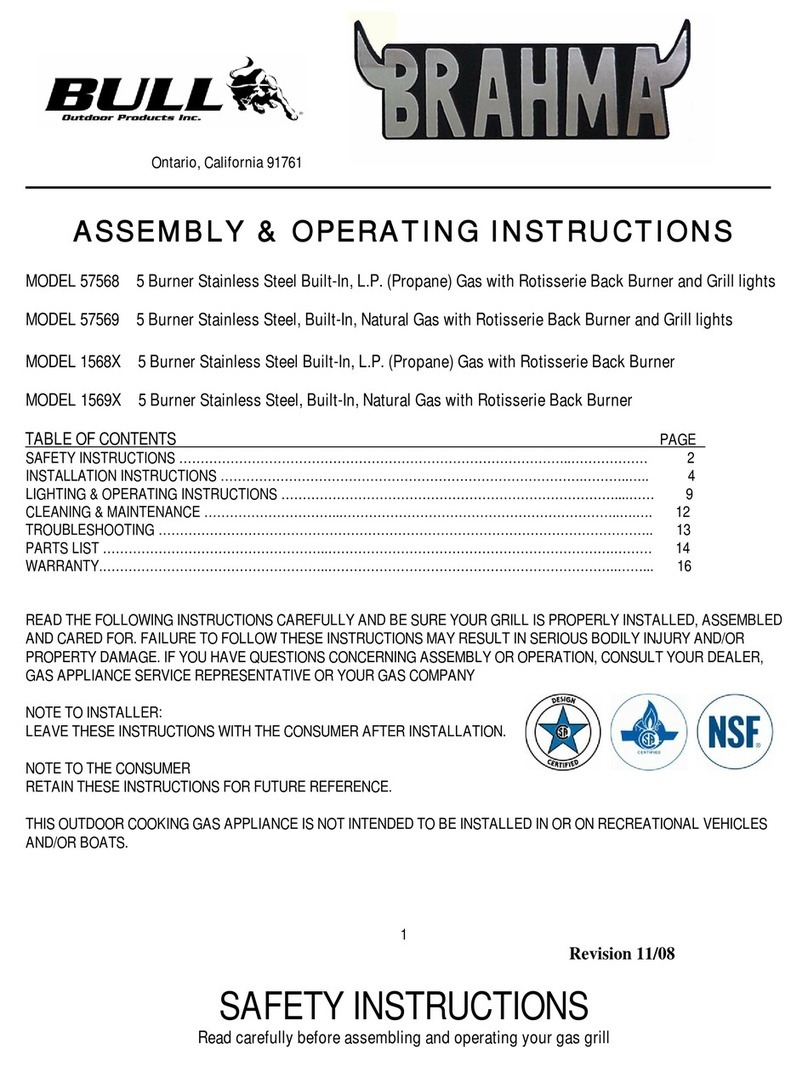
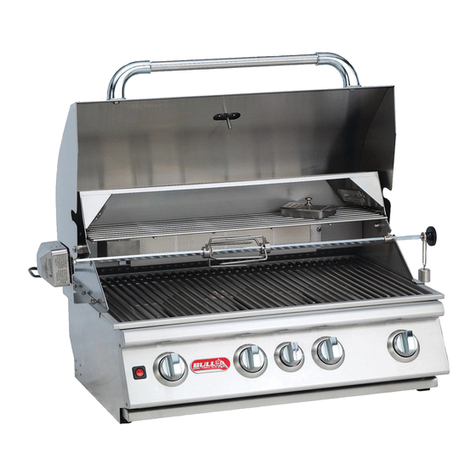
  9. Bull 48050 User manual

Bull 48050 User manual

This manual suits for next models

1

Other Bull Grill manuals

Bull 41628 User manual

Bull

Bull 41628 User manual

Bull 18248 Quick reference guide

Bull

Bull 18248 Quick reference guide

Bull 47629 Quick reference guide

Bull

Bull 47629 Quick reference guide

Bull OUTLAW 26038 Quick reference guide

Bull

Bull OUTLAW 26038 Quick reference guide

Bull 47628 Quick reference guide

Bull

Bull 47628 Quick reference guide

Bull 69008 User manual

Bull

Bull 69008 User manual

Bull OUTLAW 26038 Quick reference guide

Bull

Bull OUTLAW 26038 Quick reference guide

Bull 6328 Quick reference guide

Bull

Bull 6328 Quick reference guide

Bull BRAHMA 1568X Quick reference guide

Bull

Bull BRAHMA 1568X Quick reference guide

Bull OUTLAW 26038 Quick reference guide

Bull

Bull OUTLAW 26038 Quick reference guide

Bull 69008 Quick reference guide

Bull

Bull 69008 Quick reference guide

Bull Bison Premium 88787 Quick reference guide

Bull

Bull Bison Premium 88787 Quick reference guide

Bull Bison Premium 88787 Quick reference guide

Bull

Bull Bison Premium 88787 Quick reference guide

Bull 67529 Quick reference guide

Bull

Bull 67529 Quick reference guide

Bull 47628 Quick reference guide

Bull

Bull 47628 Quick reference guide

Bull 45550 Quick reference guide

Bull

Bull 45550 Quick reference guide

Bull Texan Lonestar 07638 Quick reference guide

Bull

Bull Texan Lonestar 07638 Quick reference guide

Popular Grill manuals by other brands

LMS BBQ08873P owner's manual

LMS

LMS BBQ08873P owner's manual

Cookworks LW-8010A Care & instruction manual

Cookworks

Cookworks LW-8010A Care & instruction manual

Campingaz CV Instructions for use

Campingaz

Campingaz CV Instructions for use

Metos XBL Series Installation and operation manual

Metos

Metos XBL Series Installation and operation manual

Fiesta ET34567 Use and care instructions

Fiesta

Fiesta ET34567 Use and care instructions

Mayer Barbecue BRENNA MKG-318A BASIC Assembly instructions

Mayer Barbecue

Mayer Barbecue BRENNA MKG-318A BASIC Assembly instructions

Landmann Avalon PTS Plus 5.1 Plus 12122 Assembly and operating manual

Landmann

Landmann Avalon PTS Plus 5.1 Plus 12122 Assembly and operating manual

Kenyon B70200 owner's manual

Kenyon

Kenyon B70200 owner's manual

Better Homes and Gardens GBC1486W owner's manual

Better Homes and Gardens

Better Homes and Gardens GBC1486W owner's manual

Orbegozo GR 2300 instruction manual

Orbegozo

Orbegozo GR 2300 instruction manual

bora PT11 Operating and installation instructions

bora

bora PT11 Operating and installation instructions

Klarstein 10031664 manual

Klarstein

Klarstein 10031664 manual

Garland MWE3W Installation and operation manual

Garland

Garland MWE3W Installation and operation manual

Char-Broil 463722714 Product guide

Char-Broil

Char-Broil 463722714 Product guide

MPM MOP-03 user manual

MPM

MPM MOP-03 user manual

Kenmore 415.16123800 Use and care guide

Kenmore

Kenmore 415.16123800 Use and care guide

Tucker Barbecues GTR Series Assembly, installation and operating instructions

Tucker Barbecues

Tucker Barbecues GTR Series Assembly, installation and operating instructions

Monogram ZGG540NCP1SS owner's manual

Monogram

Monogram ZGG540NCP1SS owner's manual

manuals.online logo
manuals.online logoBrands
  • About & Mission
  • Contact us
  • Privacy Policy
  • Terms and Conditions

Copyright 2025 Manuals.Online. All Rights Reserved.

1
STALLION 4 BURNER GRILL
OWNERS MANUAL
MODEL # 48050 LIQUID PROPANE (LP)
MODEL # 48051 NATURAL GAS (NG)
2
TABLE OF CONTENTS PAGE # 2
HOW TO REGISTER YOUR GRILL 3
HOW TO ORDER GRILL REPLACEMENT PARTS 3
GRILL DETAILS
REPLACEMENT PARTS LIST
4
REPLACEMENT PARTS ILLUSTRATION
5
OPERATIONAL SAFETY
SAFETY INSTRUCTIONS
6
CHECKING FOR GAS LEAKS
7
LIQUID PROPANE SAFETY GUIDELINES 8-9
NATURAL GAS SAFETY GUIDELINES 10
SAFETY GUIDELINES FOR GRILL INSTALLATION
GRILL INSTALLATION AND OVER HEAD VENTILATION
11
GRILL VENTILATION FOR OUTDOOR KITCHENS 12
LIQUID PROPANE GAS CONNECTION 13
LIQUID PROPANE TANK RETENTION 14
NATURAL GAS CONNECTION 15
OPERATING INSTRUCTIONS
FIRST USE OR NEW SEASON GUIDELINES
15
STANDARD AND MANUAL LIGHT PROCEDURES
16
COOKING COMPONENT INSTALLATION 17
COOKING TEMPERATURE GUIDELINES 18
INDIRECT COOKING GUIDELINES 19
INSPECTION AND MAINTENANCE
BURNER REMOVAL, INSPECTING AND CLEANING GAS VALVE ORIFICES
20
BURNER SHUTTER CLIP INSPECTION AND ADJUSTMENT
21
BURNER OPERATION CHECK AND INSERTING BACK INTO GRILL 22-23
CLEANING AND MAINTENANCE 23-24
TROUBLESHOOTING
YELLOW FLAME AND FLASHBACK
25
LIMITED WARRANTY POLICY
26
3
REGISTERING YOUR GRILL
In order to validate your Bull Limited Warranty, you must complete the Warranty
Registration Card within 90 days from the Proof of Purchase. You may register your unit
either online at www.bullbbq.com or by sending in the completed hard copy along with a
copy of the Proof of Purchase to:
Bull Outdoor Products, Inc.,
1011 East Pine Street. Lodi,
California 94520 United States
ATTN: Warranty Service Center
LOCATION OF SERIAL NUMBERS
Essential information about your product is encoded in the serial number of your grill. This information will be required for all warranty claims,
ordering replacement parts and will identify any variations of your unit. It is extremely important that you record your serial number and register your
grill from the Proof of Purchase. The grill serial number locations are shown below.
INSIDE OF THE LEFT SIDE PANEL OR ON RIGHT SIDE OF GREASE TRAY AT THE END OF YOUR GRILL’S BOX OR INSIDE OF BOX FLAP
HOW TO ORDER REPLACEMENT PARTS
The following information is required before contacting your Bull Authorized Dealer to assure getting the correct part(s) for your Grill or Rotisserie.
Gas grill model number and type of gas hook up used as stated on your Grill’s data sticker which is located on the right side of the grease tray drawer
or on the inside of the left side panel as shown in your owner manual.
FOR WARRANTY PURPOSES,
PLEASE RECORD OR RETAIN THE
FOLLOWING:
1)
MODEL NUMBER
2)
SERIAL NUMBER (SEE INFO
BELOW)
3)
DATE OF PURCHASE
4)
COPY OF YOUR RECEIPT OR
INVOICE
4
STALLION GRILL PARTS LIST
MODELS #48050 LP (LIQUID PROPANE) & #48051 NG (NATURAL GAS)
PLEASE NOTE: YOUR GRILL SERIAL NUMBER WILL BE REQUESTED WHEN ORDERING ANY ITEM
WITH A NEXT TO IT.
DWG REF # BULL PART # DESCRIPTION
QTY
WARRANTY PERIOD
(SHOWN IN YEARS)
1 48064 INSERT ASSEMBLY 1 1
2 48062 REAR HOOD 1 1
3 48063 REAR HOOD PANEL 1 1
4 48061 FRONT HOOD 1 LIFETIME
5 21106 HOOD-FRONT HANDLE 1 3
6 16509 TEMPERATURE GAUGE 1 1
7 16673 TEMP GAUGE BEZEL 1 1
8 48071 WARMING RACK 1 3
9 48070
PORCELAIN COOKING GRATE V-SHAPE 4 LIFETIME
10 48069 FLAME TAMER 4 3
11 48068 REALIBUL PORCELAIN BURNER 4 3
12 48067 HEAT SHIELD 3 3
13 48066 GREASE TRAY 1 1
14 57008 MANIFOLD 1 3
15 48065 CONTROL PANEL 1 1
16 16629 CONTROL KNOB BEZEL-MAIN BURNER 4 1
17 16613 CONTROL KNOB-MAIN BURNER 4 1
18 48072 (LP) LP VALVE-MAIN BURNER (LP ONLY) 4 1
19 48073 (NG) NG VALVE-MAIN BURNER (NG ONLY) 4 1
20 16538 (LP)
LP REGULATOR (LPONLY)
WITH SST BRAIDED LINE 1 1
21 48094 (LP) LP HOSE CLIP (LP ONLY) 1 1
22 16589 (NG) NG REGULATOR (NG ONLY) 1 1
23 16598 (LP) LP REGULATOR FITTING (LP ONLY) 1 1
24 16599 (NG) NG REGULATOR FITTING (NG ONLY) 2 1
25 47006
STAINLESS STEEL FLEX TUBE 1 1
26 97022 LIGHTING ROD WITH CHAIN 1 1
5
6
STALLION GRILL OPERATIONAL SAFETY
WARNING! FOR YOUR SAFETY, FOLLOW THE
GUIDELINES BELOW:
YOUR GAS GRILL IS ONLY FOR OUTDOOR USE.
PROTECT CHILDREN: DO NOT ALLOW CHILDREN TO
OPERATE GRILL. KEEP THEM AWAY FROM THE GRILL
DURING USE, AND UNTIL THE GRILL HAS COOLED
COMPLETELY.
WARNING: DO NOT USE YOUR GAS GRILL UNDER
EXTENDED AWNINGS, GARAGES, PORCHES, BREEZEWAYS,
SHEDS OR OTHER ENCLOSED
AREAS. FAILURE TO DO SO COULD RESULT IN A FIRE
OR PERSONAL INJURY.
DANGER: DO NOT PUT GRILL IN STORAGE OR TRAVEL
MODE IMMEDIATELY AFTER USE. ALLOW GRILL TO
COOL TO TOUCH BEFORE MOVING OR STORAGE.
FAILURE TO DO SO COULD RESULT IN FIRE
RESULTING IN PROPERTY DAMAGE, PERSONAL
INJURY OR DEATH.
THIS GRILL CART IS NOT INTENDED FOR USE IN OR ON
RECREATIONAL VEHICLES AND/OR BOATS.
DO NOT PLACE GRILL UNDER OR ON TOP OF ANY
SURFACE THAT WILL BURN.
DO NOT ALLOW OBSTRUCTION OR RESTRICTION TO
THE FLOW OF COMBUSTION AND VENTILATION AIR AROUND THE GRILL HOUSING.
GRILL CLEARANCE FROM THE BACK AND SIDE OF ANY COMBUSTIBLE SURFACE MUST BE AT LEAST 21 INCHES DO NOT STORE
OR USE GASOLINE, OR OTHER LIQUIDS EMITTING FLAMMABLE VAPOURS IN THE VICINITY OF GRILL OR ANY OTHER APPLIANCES.
DO NOT STORE EMPTY OR FULL SPARE LP GAS CYLINDERS AND/OR CHEMICALS UNDER OR NEAR GRILL OR ANY OTHER
APPLIANCES.
KEEP THE FUEL HOSE AND ELECTRICAL CORDS AWAY FROM HOT SURFACES AND DRIPPING GREASE.
CHECK AND CLEAN BURNER VENTURI TUBES FOR INSECTS AND DEBRIS. A CLOGGED TUBE CAN LEAD TO A FIRE BENEATH
THE GRILL.
KEEP THE VENT OPENINGS OF THE CYLINDER ENCLOSURE FREE AND CLEAR FROM DEBRIS.
CLEAN OUTDOOR COOKING GAS APPLIANCE WITH RECOMMENDED CLEANING AGENTS.
AVOID UNNECESSARY TWISTING OF THE HOSE. VISUALLY INSPECT THE HOSE PRIOR TO EACH USE FOR CUTS, CRACKS,
EXCESSIVE WEAR OR OTHER DAMAGE AND REPLACE
IF NECESSARY. THE REPLACEMENT HOSE SHOULD BE THAT SPECIFIED BY THE MANUFACTURER
NEVER LIGHT GRILL WITH LID CLOSED OR BEFORE CHECKING TO ENSURE BURNER TUBES ARE FULLY SEATED OVER GAS
VALVE ORIFICES.
NEVER LEAN OVER COOKING SURFACE WHILE LIGHTING GRILL. USE BARBECUE TOOLS WITH WOOD HANDLES AND GOOD
QUALITY INSULATED OVEN MITTS WHEN OPERATINGGRILL
NEVER PLACE OBJECTS OR UTENSILS ON TOP OF GRILL LID.
SAFETY INSTRUCTIONS
BEWARE OF CLOGGED BURNERS
DUE TO SPIDER WEBS
CAUTION: BURNERS MUST BE INSPECTED AND CLEANED
BEFORE FIRST USE
Spiders and small insects occasionally spin webs or make nests
in the burners during warehousing, transit and/or after long
periods of non- use. These webs can lead to a gas flow
obstruction, which could result in a fire in and around the
burner venturi tubes. This type of fire is known as “FLASH-
BACK” and can cause serious damage to your grill and create
an unsafe operating condition for the user. Although an
obstructed burner tube is not the only cause of “FLASH BACK” it
is the most common cause, and frequent inspection and
cleaning of the burners is necessary.
WARNING
NEVER cover slots, holes or passage
in the grill bottom or cover an entire
cooking grate with material such as
aluminium foil. Doing so blocks air
flow through the oven and may cause
carbon monoxide poisoning.
Aluminium foil linings may trap heat causing
a fire hazard.
7
STALLION GRILL OPERATIONAL SAFETY, CONTINUED
DANGER! IF YOU SMELL GAS, FOLLOW THE GUIDELINES BELOW:
1)
Visually check burner flame status, and pilot burner flame if provided.
2)
NEVER test for gas leaks with a lighted match or open flame.
3)
Shut off gas source to the appliance.
4)
Extinguish any open flame.
5)
Open grill lid to release any accumulation of fumes.
6)
If gas odor persists, immediately contact your gas supplier or your fire department.
CHECKING FOR GAS LEAKS NEVER TEST FOR GAS LEAKS WHILE THE GRILL IS LIT!
It is a must that you use the steps below to check for leaks on LP Gas Grills prior to first use, start
of a new BBQ season and
whenever the gas cylinder is changed on LP Gas Grills.
1) Turn off heat control valve(s), and then turn on gas at source.
2) Make a soap solution by mixing one-part liquid detergent and one-part water.
3) Apply the soap solution to all gas connections: If ai r bubbles appear in the soap solution it
mea n s th e connections are not properly
sealed and need to be tighten or repaired as needed.
4) If you have a gas leak that you cannot repair, turn off the gas at the source, disconnect fuel line
from the grill and immediately
call your grill dealer and gas supplier for professional assistance.
WARNING: If these guidelines are not followed, fire causing serious injury or death may occur.
LIQUID PROPANE (LP) SAFETY GUIDELINES
Your Propane gas grill is designed to operate on propane gas ONLY, at a pressure regulated at 11” water
column (wc.) or 27.4 mbar
when equipped with the correct propane orifices on the valves and a propane
regulator on the supply line.
It is required that you only use an LP gas cylinder measuring 12 inches in diameter X 18 inches tall with a
maximum capacity of 20 lb. In
the United States, the LP gas cylinder must be constructed and marked
in accordance with specifications of the US Department of
Transportation for Propane Gas Cylinders.
1)
Always keep LP gas cylinder securely fastened in an upright position.
2)
Never connect an unregulated LP gas cylinder to the grill.
3)
Do not subject LP gas cylinders to excessive heat.
4)
Do not fill LP gas cylinder beyond 80% full.
CAUTION:
NEVER STORE LP GAS CYLINDERS INSIDE A BUILDING, GARAGE OR IN THE VICINITY OF ANY GAS-BURNING APPLIANCE.
8
LIQUID PROPANE (LP) SAFETY GUIDELINES, CONTINUED
1)
DO NOT STORE SPARE LP GAS CYLINDERS UNDER OR NEAR THIS APPLIANCE.
2)
DO NOT FILL LP GAS CYLINDER BEYOND 80% FULL.
IF WARNING NOTICES 1 AND 2 ARE NOT FOLLOWED, A FIRE CAUSING SERIOUS INJURY OR DEATH MAY OCCUR
3)
CAUTION: CHANGING THE GAS TANKS MUST BE DONE AWAY FROM ANY SOURCE OF IGNITION.
4)
LP GAS TANK MUST BE MARKED IN ACCORDANCE WITH THE SPECIFICATIONS FOR LP GAS CYLINDERS, SPHERES
AND TUBES FOR TRANSPORTATION OF DANGEROUS GOODS AND COMMISSION, CAN/CSA- B339, AS APPLICABLE
5)
LP GAS TANK CONNECTION DEVICE IS COMPATIBLE WITH OUTDOOR COOKING APPLIANCES.
6)
LP GAS TANK HAS APPROPRIATE VAPOR WITHDRAWAL.
7)
LP GAS TANK MUST HAVE A LISTED OVERFILLING PREVENTION DEVICE. SEE ILLUSTRATION FOR INSTRUCTIONS 7-11
8)
LP GAS TANK MUST INCLUDE A COLLAR TO PROTECT THE CYLINDER VALVE.
9)
LP GAS TANK USES A TYPE 1 TANK VALVE THAT IS FIRMLY SECURED IN AN UPRIGHT POSITION.
10)
DO NOT USE AN LP CYLINDER THAT IS DAMAGED.
11)
VISUALLY INSPECT THE LP HOSE PRIOR TO EACH USE FOR CUTS, CRACKS, EXCESSIVE WEAR OR DAMAGE. IF
FOUND THE HOSE ASSEMBLY SHOULD BE REPLACED.
12)
THE LP HOSE HAS A PRE-INSTALLED LP HOSE CLIP TO PREVENT THE REGULATOR FROM TOUCHING THE GROUND. DO NOT
ALTER THE LOCATION OF THE LP HOSE CLIP. AVOID UNNECESSARY TWISTING OF THE LP HOSE
13)
INSPECT LP HOSE FOR PHYSICAL DAMAGE PRIOR TO EACH USE.
14)
LP GAS PRESSURE REGULATOR AND 31” INCH HOSE ASSEMBLY (BULL PART # 16589) AND LP HOSE CLIP (BULL
PART # 48094) ARE SUPPLIED AND MUST BE USED WITHOUT ALTERATION AND SHOULD ONLY BE USED ON YOUR
STALLION GRILL.
15)
IF THE HOSE ASSEMBLY OR HOSE CLIP NEED TO BE REPLACED, USE ONLY THE BULL PART NUMBERS SHOWN IN
THE PARTS LIST SUPPLIED WITH THIS UNIT.
16)
TO CONNECT THE BLACK COUPLING, TURN NUT OF THE HOSE AND REGULATOR ASSEMBLY IN A CLOCKWISE
DIRECTION (SEE ILLUSTRATION BELOW) UNTIL IT IS COMPLETELY THREADED ONTO THE CYLINDER VALVE BEFORE
TURNING GAS SUPPLY ON. TO REMOVE TURN THE BLACK COUPLING NUT OF THE HOSE AND REGULATOR ASSEMBLY IN A
COUNTER- CLOCKWISE DIRECTION.
9
LIQUID PROPANE (LP) SAFETY GUIDELINES
WHEN THE OUTDOOR COOKING GAS APPLIANCE IS NOT IN USE:
1)
The LP gas must be turned off at the supply cylinder.
2)
Do not store spare LP gas cylinders under or near this appliance.
3)
Spare LP gas cylinders must be stored outside in an adequately ventilated area that is isolated from the
grill.
4)
Spare LP gas cylinders must be kept out of reach of children and must not be stored in a building,
garage or any other enclosed
area.
5)
Storage of an outdoor cooking gas appliance indoors is permissible only if the cylinder is disconnected
and removed from the
outdoor cooking gas appliance
6)
The LP gas cylinder must be equipped with an arrangement for vapor withdrawal.
7)
The LP gas cylinder must include a collar to protect the cylinder valve.
8)
Place dust cap on cylinder valve outlet whenever the cylinder is not in use. Only install the type of dust
cap on the cylinder valve
outlet that is provided with the cylinder valve. Other types of caps or plugs may
result in leakage of propane.
WARNING: If these guidelines are not followed, fire causing serious injury or death may occur.
LIQUID PROPANE GAS TO NATURAL GAS CONVERSION
Gas valves are pre-set at the Bull factory to operate on LP Gas or Natural Gas. If you wish to convert to a
different gas type,
other than LP or NG, be sure to contact your grill dealer, licensed plumber or
authorized service center for further details.
Conversion kits are not sold to the general public and require a
professional to perform service. Failure to properly convert a
unit can cause serious injury to yourself and/or
others, irreparable damage to your grill and void of warranty.
WARNING: If these guidelines are not followed, fire causing serious injury or death may occur.
10
NATURAL GAS (NG) SAFETY GUIDELINES
Your Natural Gas (G20) grill is designed to use natural gas ONLY. The grill operates at a pressure of 4” water column
(wc) or 10 mbar set at the natural gas regulator attached at the back of the grill. Prior to installing gas supply lines, check
with your local gas utility or municipality regarding local gas pressure and for building code requirements and instructions
or consult a licensed and knowledgeable installer.
NATURAL GAS PLUMBING GUIDELINES:
1)
Install an “ON-OFF” shutoff valve for OUTDOOR gas supply source after gas line piping exits outside wall, or before
gas piping enters ground.
2)
Install an “ON-OFF” shutoff valve for INDOOR gas supply source to the branch fuel line in an accessible location near
the supply line.
3)
Do not use Teflon ® tape or pipe sealant on any flare ends because you will not obtain a leak-free seal.
4)
Use only Pipe sealing compound or pipe thread tape of the type resistant to the action of natural gas to at least the first
three threads of all male pipe threads when making the connection.
5)
Disconnect your gas grill from fuel source when the gas supply is being tested at high pressures. This appliance and its
individual shutoff valve must be disconnected from the gas supply piping system during any pressure testing of that
system at pressures in excess of 1/2 psig or 37 mbar.
6)
Turn off your gas grill when the gas supply is being tested at low pressures. This appliance must be isolated
from the gas supply piping system by closing its individual valve.
Refer to the following instructions and illustrations for typical gas supply connections.
We strongly suggest professional installation and hook-up of the Gas BBQ. All regulators must meet EN16129 standard.
IMPORTANT: Before connecting grill to gas source, make sure BBQ Grill control knobs are in “OFF” position.
Be sure to follow instructions for connecting an appliance to a fixed fuel piping system specifying the use of a rigid pipe,
semi-rigid tubing, and/or a connector that complies with the Standard for Connectors for Outdoor Gas Appliances and
Manufactured Homes, ANSI Z21.75 For post-mounted outdoor cooking gas appliances, in-ground metallic posts shall be
protected against corrosion as warranted by soil conditions. A suitable coating of corrosion protection will retard the effects
of corrosion and help your Bull purchase last longer.
IMPORTANT: Bull Outdoor Products does not recommend the use of any quick connect fittings or lines to the unit. Use of
these types of fittings or lines could cause low gas flow and greatly reduce the performance of the unit.
1) Do not use Teflon tape or pipe sealant
on any flare ends because you will not
obtain a leak free seal.
2) Remove plastic cap from regulator
installed on grill.
3) Attach stainless steel flex line 3/8 flare
female end to the regulator and the
other end to a nipple to allow
connection to a shut-off valve to the
gas supply.