Attaching the SceneCatcher handle to the Bullard
Thermal Imager: The Bullard Thermal Imager can
be equipped with an optional SceneCatcher digital
video recorder. The SceneCatcher is housed in a
convenient handle. To attach the handle to the
TI, simply align the handle so the handle brackets
cradle the camera just under the display and
the electrical contacts on the handle align with
corresponding contacts on the camera (Figure 1).
Turn the thumbscrew until it is tightened and the
handle is fully secure. To disconnect the transmitter
handle, loosen the thumbscrew and remove the
handle from the thermal image.
NOTE
The electrical contacts on the thermal imager
that connect with the SceneCatcher may require
periodic cleaning. To clean these contacts, use
soapy water and a non-abrasive cloth or a
cotton swab and isopropyl alcohol. Rubbing a
pencil eraser on the contacts is another
effective, non-abrasive means to clean the
contacts.
Using the SceneCatcher: The SceneCatcher is
powered via the thermal imager’s 10-Volt NiMH
rechargeable battery, while the camera is powered
on. It functions through the use of one button only.
The button, or Momentary Switch, located on the
left outer circle of the pistol grip handle controls
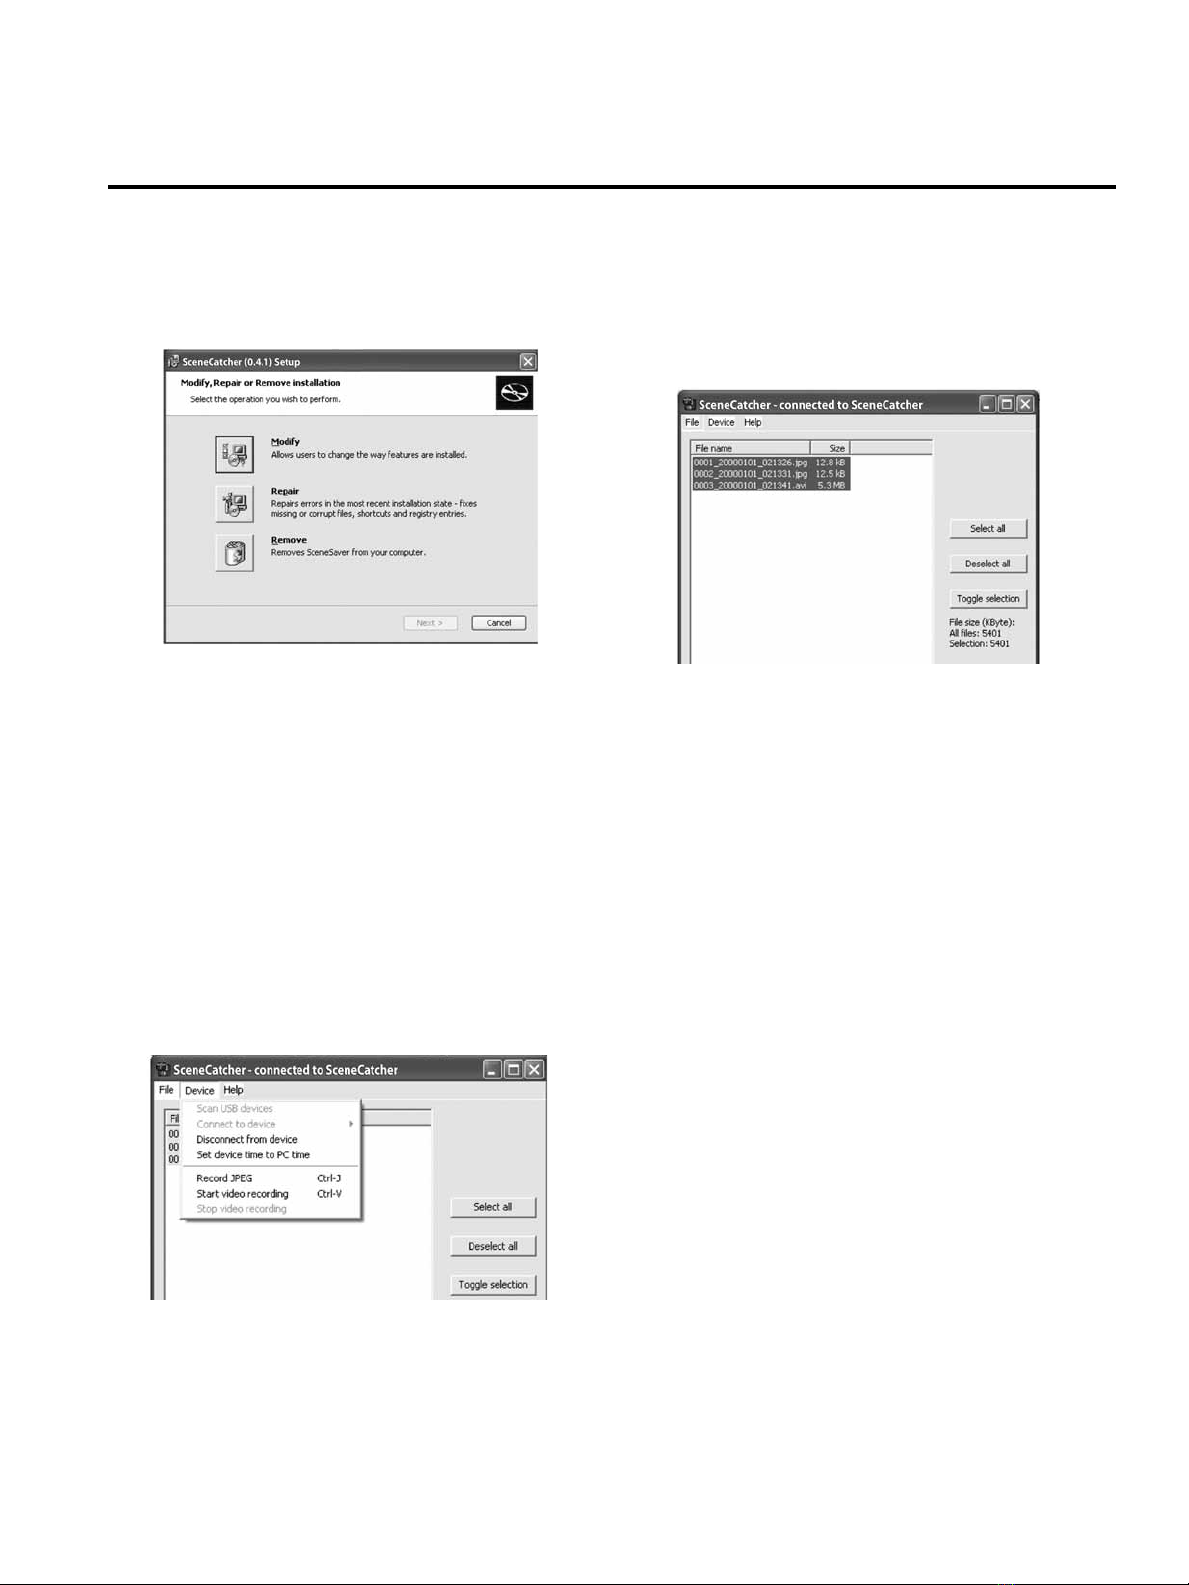
both image and video capture (Figure 2). The
download feature, which allows image and video
to be downloaded to a computer, is functional only
when the SceneCatcher is connected through a USB
cable. The USB port is located on the front right side
of the handle (Figure 3).
SceneCatcher Only Mode: When the DVR is
attached to the camera, the SceneCatcher LED
indicator will illuminate green when the camera is
powered on. No function of the SceneCatcher has
yet been initiated. The solid green LED indicates the
Standby/Ready mode.
To engage the Image Capture Mode, begin with a
solid green LED. Depress the Momentary Switch for
less than one second. The green SceneCatcher LED
will turn red while the image is being generated,
and then it will return to green (ready mode) when
the SceneCatcher has completed generating the
image.
To engage the Video Capture Mode, begin with a
solid green LED. Depress the Momentary Switch for
more than two seconds. The green SceneCatcher
LED will produce an alternating green/red flash
(approximately one flash per second) while the
video is being generated. Press the Momentary
Switch again to disable the video capture mode. The
SceneCatcher LED will return to green (ready mode)
when the SceneCatcher has completed capturing the
video.
SceneCatcher Low Memory Mode
When the SceneCatcher memory storage capacity
is low, the LED indicator will illuminate in red. No
function of the SceneCatcher has yet been initiated.
The solid red LED indicates the standby/ready mode
with low memory.
To engage the Image Capture Mode (while memory
is available), begin with a solid red LED. Depress
the Momentary Switch for less than one second. The
red SceneCatcher LED will turn off while the image
is being generated and then it will return to red
(ready mode) when the SceneCatcher has completed
generating the image.
To engage the Video Capture Mode (while memory
is available), begin with a solid red LED. Depress
the Momentary Switch for more than two seconds.
The red SceneCatcher LED will produce a slow red
flash (approximately one flash per second) while
the video is being generated. Press the Momentary
Switch again to disable the video capture mode. The
SceneCatcher LED will return to red (ready mode)
when the SceneCatcher has completed capturing the
video.
When memory capacity has been reached, the
SceneCatcher LED will generate a fast green flash
(approximately three flashes per second) to indicate
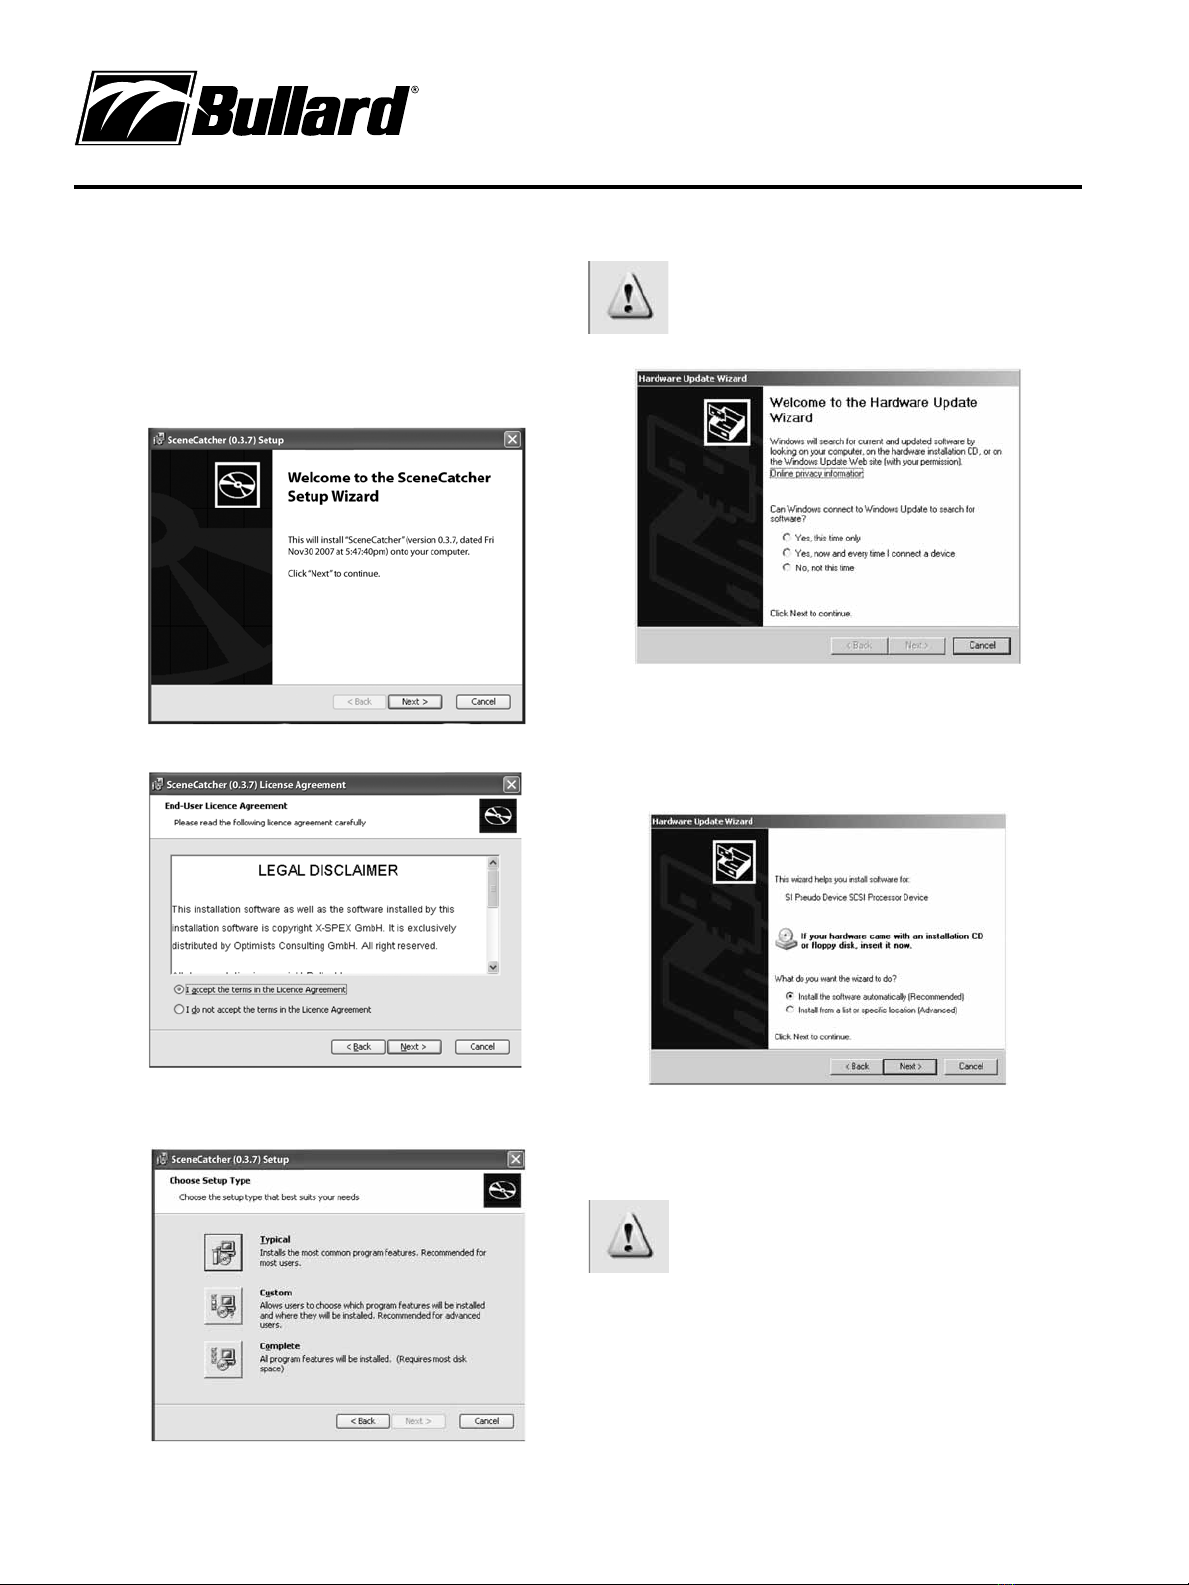
SceneCatcher™ Digital Video Recorder
User Manual
for the Bullard T3 series, T4 and TacSight Series Thermal Imagers
Figure 1
Figure 3
Momentary Switch
USB port
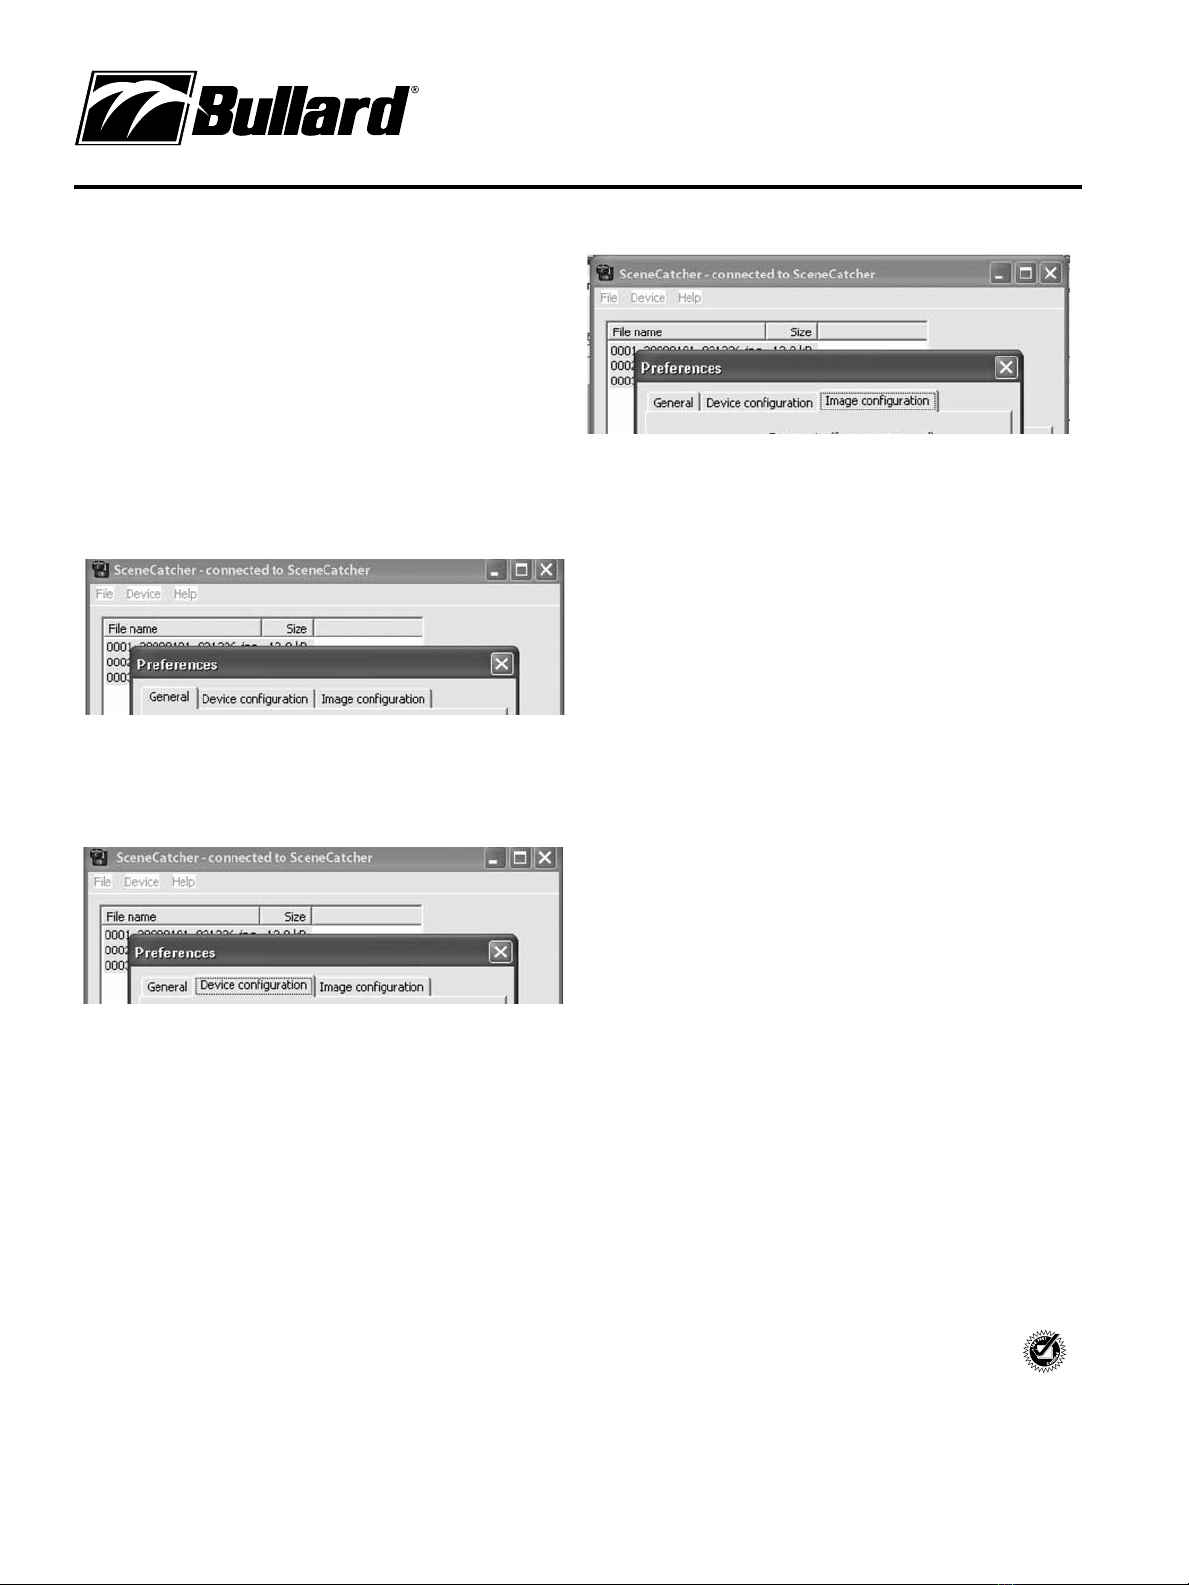
The SceneCatcher is
compatible with the
following operating
systems:
Windows Vista
Windows Vista x64
Windows XP
Windows XP x64
Windows 2000
Windows Server 2003
Windows Server 2003 x64
Figure 2