Bulldog Security 40860-EU User manual

Instructions
инструкции - Instrukcja - Bruksanvisning
Instruksjon - Instrucción

The Bulldog Brewer is the perfect all-in-one brewing system for making your own cra beer. It of-
fers features like sparge in place, a four step mashing controller and a high quality construcon.
Combine with the Bulldog Sparger for handling of large volumes of sparging water and you have a
full system for cra beer brewing.
1. Read all instrucons carefully before use!
2. Always unplug the Brewer before cleaning and aer use.
3. Before rst using the Brewer, check that the voltage marked on the Brewer is correct.
4. Do not connect the Brewer if the cord or plug is damaged. Use only earthed socket.
6. Always switch o before removing plug from the outlet.
7. Unplug unit aer use. Unplug and allow cooling down before moving or cleaning.
8. Do not aempt to move Brewer if more than 5-10L liquid inside, this could cause injury or
strain.
9. Place the Brewer on a horizontal surface, away from table edges, hot surfaces or open re.
Always consider the risk of accidental leaks when choosing where to place the unit.
10. Do not use the Brewer outdoors or near unsupervised children.
11. Do not switch on the Brewer, if it is empty.
13. Do not allow cord to touch hot surface of the Brewer.
14. To protect against electric shock, do not immerse Brewer in water.
15. Do not overll the Brewer, liquid will expand when heated up.
16. Improper use of the Brewer may result in severe scalding.
17. Beware of hot steam when removing the lid.
18. If lled to near maximum, do not exceed 95°C to avoid boiling over.
19. If the Brewer should boil dry there is an thermal cut-out which can automacally reset. How-
ever repeated overheang will eventually damage the heang element.
20. Do not aempt to disassemble the Brewer. This would void your warranty.
21. This appliance may be used by persons of reduced physical, sensory or mental capability, or
lack of experience and knowledge, if they have been given supervision or instrucon concern-
ing the use of the appliance in a safe way and if they understand the hazards involved.
THE BULLDOG BREWER
Model No. Max power Voltage Operang temp Max volume
40860-EU/UK 2.5kW 230V 10-38 °C 25L
40860-US/CA 1.5kW 110V 10-38 °C 25L
40860-AU/NZ 2.2kW 240V 10-38°C 25L
SPECIFICATIONS
IMPORTANT SAFETY RULES
English Instructions

English Instructions
OPTIONAL EQUIPMENT
The Bulldog Stainless Steel Beer Paddle is an invaluable com-
panion. For sterilizing all equipment - use Bulldog Oxy no-rinse
sanizer.
The easiest way to provide plenty of hot sparge water is to use a
Bulldog Sparger, this is a separate water heater which connects to
the pump from the Brewer for perfect circulaon.
FEATURES & HIGHLIGHTS
Separate inner container (malt pipe) with a per-
forated boom, for lautering, sparging and easy
malt removal.
The malt pipe can be xed in lowered posion
for mashing or raised for lautering and sparging.
The tap is connected to a “bazooka” lter to
separate out malt and hop residues.
The included wort cooler ts inside the Brewer
and connects to cold water tap for rapid cooling
down aer boiling. The sparging plate increases
eciency. The posion of this can be adjusted.
The Brewer is ed with a thermal cut-out as well as the dry-boil protecon (see below) for double
safety protecon. When the Brewer runs dry and if the dry-boil protecon fails to work, the ther-
mal cut-out will trigger and the Brewer will stop working. Cut-out temperature is 240°C.
The thermal cut-out is a disposable component. When triggered, it will be broken and cannot be
used again. The Brewer should be brought to an authorized agent to replace the thermal cut-out.
Please note that you may be charged for this as it is not covered by any warranty.
THERMAL CUT-OUT
The Bulldog Brewer is equipped with an advanced 4-step controller for automated brewing.

1. Cleaning the Brewer
a) Only perform cleaning once the plug has been removed and the Brewer has completely cooled
down.
b) Never immerse the Brewer into water.
c) Pour small amount of hot water into the tank, brush sides with a so brush and rinse with hot
water.
d) Do not use any cleaning products which could cause a health hazard.
e) Use a so cloth to wipe the urn body dry. Do not use abrasive materials to avoid scratches.
f) Always remember to empty and rinse the urn with hot water before using again.
2. De-scaling the Brewer
a) It is important to de-scale the Brewer at regular intervals.
b) Limescale build up can aect the eciency of the Brewer element.
c) Please note most supermarket de-scaling products are based on treang a 2 litre kele only.
d) Always rinse thoroughly aer de-scaling.
3. Discolouring
This may be caused by oxidizing of iron in tap water. It can be removed by the following steps:
a) Cut a lemon into four, wrap the lemon in cloth and place in the water tank.
b) Pour water up to the “MAX” water level indicator.
c) Boil the water and make sure the mixture remains inside the unit for about 1 hour.
d) Pour out the water and use a nylon brush to scrub the water tank.
e) To remove the smell of the lemon, boil water again, and dispose of the water.
CLEANING & MAINTENANCE
English Instructions
The Brewer is protected by a thermal limiter with automacally reset funcon to prevent acciden-
tal dry-boil. If this is acvated, the appliance will turn itself o, whilst the display will remain on.
The Brewer must be unplugged before it can be reset. To reset the Brewer, wait unl it has cooled
down, then power it on again and check if the “pilot light” symbol on the display is on. If the pilot
light is on, it indicates the unit has recovered to normal working condion; if the light is sll o,
unplug the cord, wait 5 minutes and then power on again. Repeat this operaon several mes unl
the Brewer starts up normally.
The thermal limiter is for protecng the user as well as the Brewer itself. In case of repeated inci-
dents, the bi-metal may malfuncon, leading to irreparable damage. Please note that the manufac-
turer warranty will then not apply.
If reseng this thermal cut-out does not switch the appliance back on, please call for service or
professional maintenance agent to check further.
This safety device may have been acvated during transport, if so reset the thermal cut-o before
rst use, following the above instrucons.
DRY-BOIL PROTECTION

1. Remove all packaging from the inside and outside of the Brewer.
2. Fill the Brewer to 5 cm (2 inches) below Max, boil and discard the water.
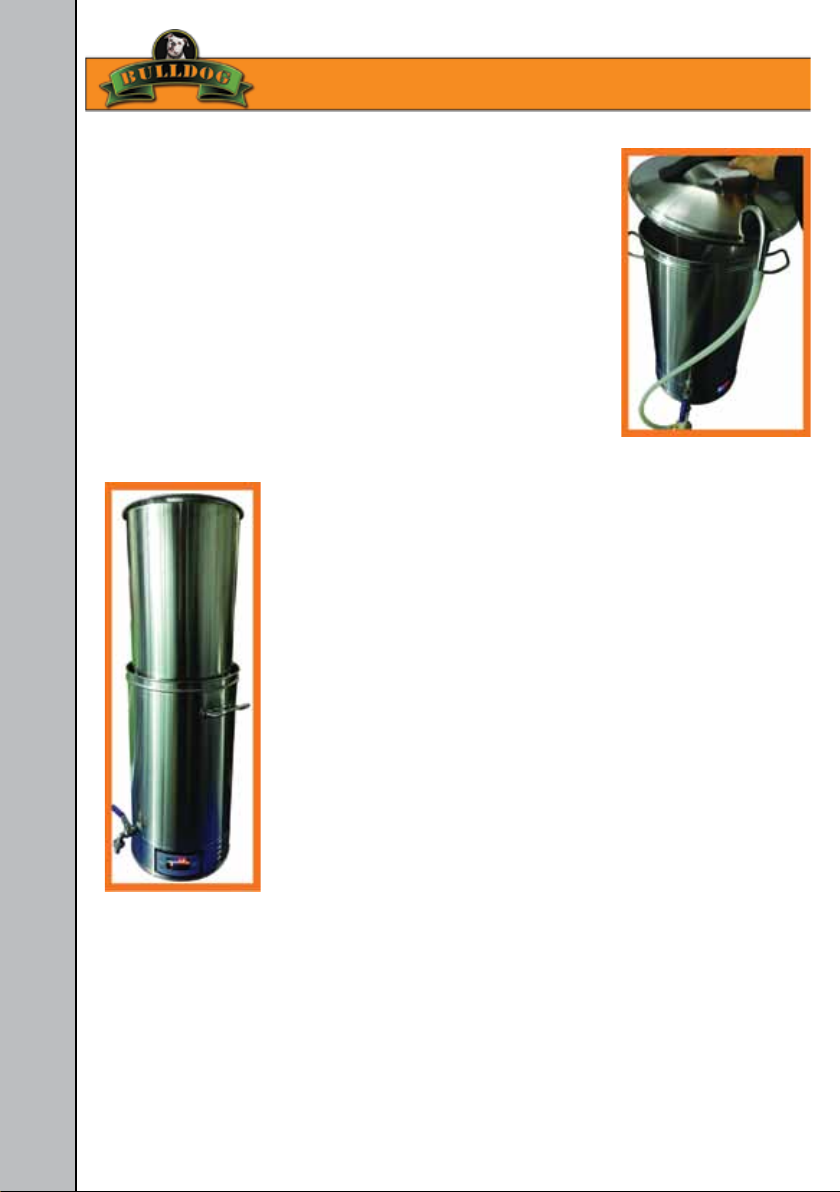
3. Assemble the Brewer - t the bazooka lter on the inside of the tap, prepare the wort cooler
so it is ready to put into the brew later. Connect the pump to the tap but don’t hang the tube
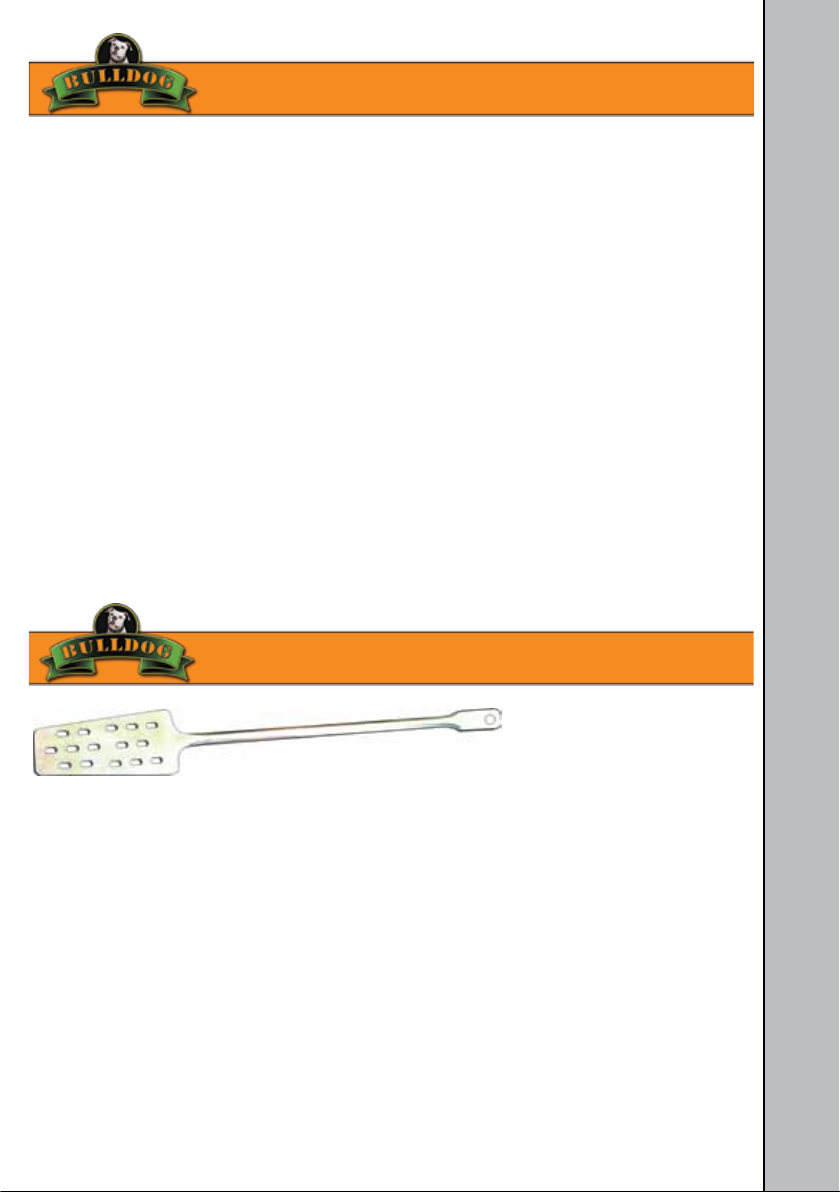
into the lid. Don’t start the pump yet. Have the sparging plate ready, but don’t put it in yet, that
comes in later (see below).
BEFORE FIRST USE
7. Once your Brewer has reached the target temperature, mashing
can start. Your Brewer will now keep the brew at the mash tem-
perature +/- 2°C (4°F) for the TIME set and then move to next step,
or shut o. At this point, it is me to add the crushed malt. Sr it in
unl there are no more lumps.
BREWING
1. Fill approximately 20 litres of water into malt pipe.
2. Plug in the Brewer to start
the display which then shows
liquid temperature. Start set-
ngs for step 1 (S1) by pressing
SET STEP buon.
For seng of steps 2-4 (S2-S4),
press buon twice instead.
3. Set the temperature you want for step 1 (S1), or for S2-S4, by pressing TEMP, then adjust with
SET+ or SET-. Brewer defaults to °C, you can change that to °F with a long (5 sec) push on TEMP.
4. Set the me you want to hold in S1 (or S2-S4) by rst pressing TIME, then using SET+ or SET-.
The Brewer will default to 60 minutes and you can set anything within 1-99 minutes.
5. Set the average power you want to use in S1 (or S2-S4) by rst pressing POWER, then using SET+
or SET-. Default is full power. This can be adjusted in 100W steps.
6. Repeat sengs for each step (press SET STEP twice for next step). You can use a maximum of
four steps, or fewer if you like. When ready with sengs, press START (upper right buon again)
for 5 seconds, this starts the automac step mashing process.
Note: Aer all sengs in a step, you can either start (and skip remaining steps) by a long push on
STA RT, or you can set the next step by pressing SET STEP twice.
While temperature is held in a step, you can press PAUSE to pause the me countdown. Press again
to resume. It is also possible to do a long press (5 sec) of same buon,
this will cancel all sengs. At the end of each step, there will be a
series of short beeps to let you know the step is nished.
English Instructions

8. Mount the round top sparge plate, then hang the pump tube
into the lid and plug in the power supply to start circulang the
wort.
Regulate circulaon to slow and steady by using the tap handle.
A posion between 3-4 o’clock is typically OK. With the right slow
ow, you will get natural lter support from the malt bed as well as
the perforated boom and bazooka lter.
If the pump stops, you need to unplug it, open it and clean it out.
This will usually get it going again, somemes aer a delay if the
power supply has cut out and needs some me to recover. It is
good pracce to clean out pump aer each use.
9. When the mashing is done, it is me for the lautering (draining the
malt bed). Check that heang has turned o. Turn o the pump. Then
carefully li up the malt pipe so it rests on the top support bolts in the
boiler (as picture). Let the wort drain down into the boiler. WARNING,
the liquid wort is very hot, you need to li very carefully.
Aer lautering, it is me for the sparging (rinsing out the last good
stu from the malt bed). Start to sparge with 8-16L (depending on
your recipe) of water that you have pre-heated to 75-78°C (165-172°F).
This is best done using a separate Bulldog Sparger. Connect the Brewer
pump to the Sparger tap and pump sparge water over to the Brewer.
10. Aer sparging, it is me for the boiling. Remove the malt pipe and clean it out. Use a Bulldog
Spider for adding hops (pellets or cones). Be careful when boiling starts, it may foam over. Keep
a spray bole with water handy for disrupng any boiling over, or use the stainless Bulldog Beer
Paddle to sr it down.
During the boil, add hops as set out in your recipe. Note that mes are given from end of boiling
period.
Aer boiling, turn o Brewer. Insert wort cooler, connect to cold water tap and lower the brew to
desired fermentaon temperature. when done, transfer to your fermenter and pitch the specialist
Bulldog Brewing Yeast of your choice to start the fermentaon.
BREWING
English Instructions


The Bulldog Brewer is the perfect all-in-one brewing system for making your own cra beer. It of-
fers features like sparge in place, a four step mashing controller and a high quality construcon.
Combine with the Bulldog Sparger for handling of large volumes of sparging water and you have a
full system for cra beer brewing.
1. Read all instrucons carefully before use!
2. Always unplug the Brewer before cleaning and aer use.
3. Before rst using the Brewer, check that the voltage marked on the Brewer is correct.
4. Do not connect the Brewer if the cord or plug is damaged. Use only earthed socket.
6. Always switch o before removing plug from the outlet.
7. Unplug unit aer use. Unplug and allow cooling down before moving it or cleaning it.
8. Do not aempt to move Brewer if more than 5-10L liquid, that could cause injury or strain.
9. Place the Brewer on a horizontal surface, away from table edges, any hot surfaces or open re.
Always consider the risk of accidental leaks when choosing where to place the unit.
10. Do not use the Brewer outdoors or near unsupervised children.
11. Do not switch on the Brewer, if it is empty.
13. Do not allow cord to touch hot surface of the Brewer.
14. To protect against electric shock, do not immerse Brewer in water.
15. Do not overll the Brewer with liquid as it will expand when heated up.
16. Improper use of the Brewer may result in severe scalding.
17. Beware of hot steam when removing the lid
18. If lled to near maximum, set it to max 95°C to avoid boiling over.
19. If the Brewer should boil dry there is an overheat cut-out which can automacally reset. How-
ever repeated overheang will eventually damage the heang element.
20. Do not aempt to disassemble the Brewer. This would void your warranty.
21. This appliance may be used by persons of reduced physical, sensory or mental capability, or
lack of experience and knowledge, if they have been given supervision or instrucon concern-
ing the use of the appliance in a safe way and if they understand the hazards involved.
THE BULLDOG BREWER
Model No. Max power Voltage Operang temp Max volume
40860-EU/UK 2.5kW 230V 10-38 °

Russian Instructions (translate)
OPTIONAL EQUIPMENT
The Bulldog Stainless Steel Beer Paddle is an invaluable com-
panion. For sterilizing all equipment - use Bulldog Oxy no-rinse
sanizer.
The easiest way to provide enough amount of hot sparge water
is to use a Bulldog Sparger, this is a separate water heater which
connects to the pump from the Breoor perect circulaon.
FEATURES & HIGHLIGHTS
Separate inner container (malt pipe) with a per-
orated boom, or lautering, sparging and easy
malt removal.

1. Cleaning the Brewer
a) Only perform cleaning once the plug has been removed and the Brewer has completely cooled
down
b) Never immerse the Brewer into water
c) Pour small amount of hot water into the tank, brush sides with a so brush, and rinse with hot
water.
d) Do not use any cleaning products which could cause a health hazard
e) Use a so cloth to wipe the urn body dry. Do not use abrasive materials to avoid scratches.
f) Always remember to empty and rinse the urn with hot water before using again.
2. De-scaling the Brewer
a) It is important to de-scale the Brewer at regular intervals.
b) Limescale build up can aect the workings of the Brewer element.
c) Please note most supermarket de-scaling products are based on treang a 2 litre kele only.
d) Always rinse thoroughly aer de-scaling.
3. Discolouring
This may be caused by oxidizing of iron in tap water. It can be removed by the following steps:
a) Cut a lemon into four, wrap the lemon in cloth and place in the water tank.
b) Pour water up to the “MAX” water level indicator.
c) Boil the water and make sure the mixture remains inside the unit for about 1 hour.
d) Pour out the water and use a nylon brush to scrub the water tank.
e) To remove the smell of the lemon, boil water again, and dispose of the water.
CLEANING & MAINTENANCE
Russian Instructions (translate)
The Brewer is protected by a thermal limiter with automacally reset funcon to prevent acciden-
tal dry-boil. If this is acvated, the appliance will turn itself o, although the lamp with remain on.
The Brewer must be unplugged before it can be reset. To reset the Brewer, wait unl it has cooled
down, then power it on again and check if the heang pilot light is on. If the pilot light is on, it indi-
cates the unit has recovered to normal working condion; if the light is sll o, unplug the cord and
try to power on again. Repeat this operaon several mes unl the Brewer starts up normally.
The thermal limiter is for protecng the user as well as the Brewer itself. In case of repeated inci-
dents, the bi-metal may malfuncon, leading to irreparable damage. Please note that the manufac-
turer warranty will then not apply.
If reseng this thermal cut-out does not switch the appliance back on, please call for service or
professional maintenance agent to check further.
This safety device may have been switched o during transport, if so reset the thermal cut-o
before rst use, following the above instrucons.
DRY-BOIL PROTECTION

1. Remove all packaging from the inside and outside of the Brewer
2. Fill the Brewer to 5cm (2 inches) below Max, boil and discard the water once.
3. Then assemble the Brewer - t the bazooka lter on the inside of the tap, prepare the wort
cooler so it is ready to put into the brew later. Connect the pump to the tap but dont’ hang the
tube into the lid yet and don’t start it just yet. Have the top perforated plate ready, but don’t
put it in yet, it comes in later (see below).
BEFORE FIRST USE
7. Once your Brewer has reached the target temperature, mashing
can start. Your Brewer will now keep the brew at the mash tem-
perature +/- 2°C (4°F) for the TIME set and then move to next step,
or shut o. At this point, it is me to add the crushed malt. Sr it in
unl there are no more lumps.
BREWING
1. Fill approximately 20 litres of water into malt pipe.
2. Plug in the Brewer to start
the display which then shows
liquid temperature. Start set-
ngs for step 1 (S1) by pressing
SET STEP buon.
For seng of steps 2-4 (S2-S4),
press buon twice instead.
Russian Instructions (translate)
3. Set the temperature you want for step 1 (S1), or for S2-S4, by pressing TEMP, then adjust with
SET+ or SET-. Brewer defaults to °C, you can change that to °F with a long (5 sec) push on TEMP.
4. Set the me you want to hold in S1 (or S2-S4) by rst pressing TIME, then using SET+ or SET-.
The Brewer will default to 60 minutes and you can set anything within 1-99 minutes.
5. Set the average power you want to use in S1 (or S2-S4) by rst pressing POWER, then using SET+
or SET-. Default is full power. This can be adjusted in 100W steps.
6. Repeat sengs for each step (press SET STEP twice for next step). You can use a maximum of
four steps, or fewer if you like. When ready with sengs, press START (upper right buon again)
for 5 seconds, this starts the automac step mashing process.
Note: Aer all sengs in a step, you can either start (and skip remaining steps) by a long push on
STA RT, or you can set the next step by pressing SET STEP twice.
While temperature is held in a step, you can press PAUSE to pause the me countdown. Press again
to resume. It is also possible to do a long press (5 sec) of same buon, this will cancel all sengs.
At the end of each step, there will be a series of short beeps to let you
know the step is nished.

8. Mount the round top sparge plate, then hang the pump tube
into the lid and plug in the power supply to start circulang the
wort.
Regulate circulaon to slow and steady by using the tap handle.
A posion between 3-4 o’clock is typically OK. With the right slow
ow, you will get natural lter support from the malt bed as well as
the perforated boom and bazooka lter.
If the pump stops, you need to unplug it, open it and clean it out.
This will usually get it going again, somemes aer a delay if the
power supply has cut out and needs some me to recover. It is
good pracce to clean out pump aer each use.
9. When the mashing is done, it is me for the lautering (draining the
malt bed). Check that heang has turned o. Turn o the pump. Then
carefully li up the malt pipe so it rests on the top support bolts in the
boiler (as picture). Let the wort drain down into the boiler. WARNING,
the liquid wort is very hot, you need to li very carefully.
Aer lautering, it is me for the sparging (rinsing out the last good
stu from the malt bed). Start to sparge with 8-16L (depending on
your recipe) of water that you have pre-heated to 75-78°C (165-172°F).
This is best done using a separate Bulldog Sparger. Connect the Brewer
pump to the Sparger tap and pump sparge water over to the Brewer.
10. Aer sparging, it is me for the boiling. Remove the malt pipe and clean it out. Use a Bulldog
Spider for adding hops (pellets or cones). Be careful when boiling starts, it may foam over. Keep
a spray bole with water handy for disrupng any boiling over, or use the stainless Bulldog Beer
Paddle to sr it down.
During the boil, add hops as set out in your recipe. Note that mes are given from end of boiling
period.
Aer boiling, turn o Brewer. Insert chiller, connected to cold water tap and chill the brew to de-
sired fermentaon temperature. when done, transfer to your fermenter for fermentaon.
BREWING
Russian Instructions (translate)


The Bulldog Brewer is the perfect all-in-one brewing system for making your own cra beer. It of-
fers features like sparge in place, a four step mashing controller and a high quality construcon.
Combine with the Bulldog Sparger for handling of large volumes of sparging water and you have a
full system for cra beer brewing.
1. Read all instrucons carefully before use!
2. Always unplug the Brewer before cleaning and aer use.
3. Before rst using the Brewer, check that the voltage marked on the Brewer is correct.
4. Do not connect the Brewer if the cord or plug is damaged. Use only earthed socket.
6. Always switch o before removing plug from the outlet.
7. Unplug unit aer use. Unplug and allow cooling down before moving it or cleaning it.
8. Do not aempt to move Brewer if more than 5-10L liquid, that could cause injury or strain.
9. Place the Brewer on a horizontal surface, away from table edges, any hot surfaces or open re.
Always consider the risk of accidental leaks when choosing where to place the unit.
10. Do not use the Brewer outdoors or near unsupervised children.
11. Do not switch on the Brewer, if it is empty.
13. Do not allow cord to touch hot surface of the Brewer.
14. To protect against electric shock, do not immerse Brewer in water.
15. Do not overll the Brewer with liquid as it will expand when heated up.
16. Improper use of the Brewer may result in severe scalding.
17. Beware of hot steam when removing the lid
18. If lled to near maximum, set it to max 95°C to avoid boiling over.
19. If the Brewer should boil dry there is an overheat cut-out which can automacally reset. How-
ever repeated overheang will eventually damage the heang element.
20. Do not aempt to disassemble the Brewer. This would void your warranty.
21. This appliance may be used by persons of reduced physical, sensory or mental capability, or
lack of experience and knowledge, if they have been given supervision or instrucon concern-
ing the use of the appliance in a safe way and if they understand the hazards involved.
THE BULLDOG BREWER
Model No. Max power Voltage Operang temp Max volume
40860-EU/UK 2.5kW 230V 10-38 °

Polish Instructions (translate)
OPTIONAL EQUIPMENT
The Bulldog Stainless Steel Beer Paddle is an invaluable com-
panion. For sterilizing all equipment - use Bulldog Oxy no-rinse
sanizer.
The easiest way to provide enough amount of hot sparge water
is to use a Bulldog Sparger, this is a separate water heater which
connects to the pump from the Brewer for perfect circulaon.
FEATURES & HIGHLIGHTS
Separate inner container (malt pipe) with a per-
forated boom, for lautering, sparging and easy
malt removal.
The malt pipe can be xed in lowered posion
for mashing or raised for lautering and sparging.
The tap is connected to a “bazooka” lter to
separate out malt and hop residues.
The included wort cooler ts inside the Brewer
and connects to cold water tap. For cooling
down aer boiling. The top plate increases ef-
ciency. The posion of this can be adjusted.
The Brewer is ed with a thermal cut-out as well as the dry-boil protecon (see below) for double
safety protecon. When the Brewer runs dry and the boil dry protecon fails to work, the thermal
cut-out will trigger and the Brewer will stop working. Cut-out temperature is 240°C.
The thermal cut-out is a disposable part. When triggered, it will be broken and cannot be used
again. The Brewer should be brought to an authorized agent to replace the thermal cut-out. Please
note that you may be charged for this as it is not covered by any warranty.
THERMAL CUT-OUT
The Bulldog Brewer is equipped with an advanced 4-step controller for automated brewing.

1. Cleaning the Brewer
a) Only perform cleaning once the plug has been removed and the Brewer has completely cooled
down
b) Never immerse the Brewer into water
c) Pour small amount of hot water into the tank, brush sides with a so brush, and rinse with hot
water.
d) Do not use any cleaning products which could cause a health hazard
e) Use a so cloth to wipe the urn body dry. Do not use abrasive materials to avoid scratches.
f) Always remember to empty and rinse the urn with hot water before using again.
2. De-scaling the Brewer
a) It is important to de-scale the Brewer at regular intervals.
b) Limescale build up can aect the workings of the Brewer element.
c) Please note most supermarket de-scaling products are based on treang a 2 litre kele only.
d) Always rinse thoroughly aer de-scaling.
3. Discolouring
This may be caused by oxidizing of iron in tap water. It can be removed by the following steps:
a) Cut a lemon into four, wrap the lemon in cloth and place in the water tank.
b) Pour water up to the “MAX” water level indicator.
c) Boil the water and make sure the mixture remains inside the unit for about 1 hour.
d) Pour out the water and use a nylon brush to scrub the water tank.
e) To remove the smell of the lemon, boil water again, and dispose of the water.
CLEANING & MAINTENANCE
Polish Instructions (translate)
The Brewer is protected by a thermal limiter with automacally reset funcon to prevent acciden-
tal dry-boil. If this is acvated, the appliance will turn itself o, although the lamp with remain on.
The Brewer must be unplugged before it can be reset. To reset the Brewer, wait unl it has cooled
down, then power it on again and check if the heang pilot light is on. If the pilot light is on, it indi-
cates the unit has recovered to normal working condion; if the light is sll o, unplug the cord and
try to power on again. Repeat this operaon several mes unl the Brewer starts up normally.
The thermal limiter is for protecng the user as well as the Brewer itself. In case of repeated inci-
dents, the bi-metal may malfuncon, leading to irreparable damage. Please note that the manufac-
turer warranty will then not apply.
If reseng this thermal cut-out does not switch the appliance back on, please call for service or
professional maintenance agent to check further.
This safety device may have been switched o during transport, if so reset the thermal cut-o
before rst use, following the above instrucons.
DRY-BOIL PROTECTION

1. Remove all packaging from the inside and outside of the Brewer
2. Fill the Brewer to 5cm (2 inches) below Max, boil and discard the water once.
3. Then assemble the Brewer - t the bazooka lter on the inside of the tap, prepare the wort
cooler so it is ready to put into the brew later. Connect the pump to the tap but dont’ hang the
tube into the lid yet and don’t start it just yet. Have the top perforated plate ready, but don’t
put it in yet, it comes in later (see below).
BEFORE FIRST USE
7. Once your Brewer has reached the target temperature, mashing
can start. Your Brewer will now keep the brew at the mash tem-
perature +/- 2°C (4°F) for the TIME set and then move to next step,
or shut o. At this point, it is me to add the crushed malt. Sr it in
unl there are no more lumps.
BREWING
1. Fill approximately 20 litres of water into malt pipe.
2. Plug in the Brewer to start
the display which then shows
liquid temperature. Start set-
ngs for step 1 (S1) by pressing
SET STEP buon.
For seng of steps 2-4 (S2-S4),
press buon twice instead.
Polish Instructions (translate)
3. Set the temperature you want for step 1 (S1), or for S2-S4, by pressing TEMP, then adjust with
SET+ or SET-. Brewer defaults to °C, you can change that to °F with a long (5 sec) push on TEMP.
4. Set the me you want to hold in S1 (or S2-S4) by rst pressing TIME, then using SET+ or SET-.
The Brewer will default to 60 minutes and you can set anything within 1-99 minutes.
5. Set the average power you want to use in S1 (or S2-S4) by rst pressing POWER, then using SET+
or SET-. Default is full power. This can be adjusted in 100W steps.
6. Repeat sengs for each step (press SET STEP twice for next step). You can use a maximum of
four steps, or fewer if you like. When ready with sengs, press START (upper right buon again)
for 5 seconds, this starts the automac step mashing process.
Note: Aer all sengs in a step, you can either start (and skip remaining steps) by a long push on
STA RT, or you can set the next step by pressing SET STEP twice.
While temperature is held in a step, you can press PAUSE to pause the me countdown. Press again
to resume. It is also possible to do a long press (5 sec) of same buon, this will cancel all sengs.
At the end of each step, there will be a series of short beeps to let you
know the step is nished.

8. Mount the round top sparge plate, then hang the pump tube
into the lid and plug in the power supply to start circulang the
wort.
Regulate circulaon to slow and steady by using the tap handle.
A posion between 3-4 o’clock is typically OK. With the right slow
ow, you will get natural lter support from the malt bed as well as
the perforated boom and bazooka lter.
If the pump stops, you need to unplug it, open it and clean it out.
This will usually get it going again, somemes aer a delay if the
power supply has cut out and needs some me to recover. It is
good pracce to clean out pump aer each use.
9. When the mashing is done, it is me for the lautering (draining the
malt bed). Check that heang has turned o. Turn o the pump. Then
carefully li up the malt pipe so it rests on the top support bolts in the
boiler (as picture). Let the wort drain down into the boiler. WARNING,
the liquid wort is very hot, you need to li very carefully.
Aer lautering, it is me for the sparging (rinsing out the last good
stu from the malt bed). Start to sparge with 8-16L (depending on
your recipe) of water that you have pre-heated to 75-78°C (165-172°F).
This is best done using a separate Bulldog Sparger. Connect the Brewer
pump to the Sparger tap and pump sparge water over to the Brewer.
10. Aer sparging, it is me for the boiling. Remove the malt pipe and clean it out. Use a Bulldog
Spider for adding hops (pellets or cones). Be careful when boiling starts, it may foam over. Keep
a spray bole with water handy for disrupng any boiling over, or use the stainless Bulldog Beer
Paddle to sr it down.
During the boil, add hops as set out in your recipe. Note that mes are given from end of boiling
period.
Aer boiling, turn o Brewer. Insert chiller, connected to cold water tap and chill the brew to de-
sired fermentaon temperature. when done, transfer to your fermenter for fermentaon.
BREWING
Polish Instructions (translate)


Bulldog Bryggverk är den perfekta allt-i-e maskinen för a brygga di eget öl. Bryggverket kom-
mer med nesser som lakning på plats, en fyrstegs kontrollenhet för stegmäskning och en högkvali-
tav konstrukon. Kombinera med Bulldog Sparger för hantering av stora volymer lakvaen och du
har e komple halvautomaskt mikrobryggeri.
1. Läs igenom hela bruksanvisningen innan du börjar använda bryggverket!
2. Dra alld ur elsladden innan du rengör bryggverket eller ställer undan eer bryggning.
3. Innan du använder första gången - kolla a di bryggverk är märkt med rä spänning.
4. Använd inte bryggverket om elkabeln, kontakten eller något annat är skadat. Jordat endast!
6. Stäng av innan du drar ur sladden om möjligt.
7. Dra ur sladden när du är klar. Låt svalna innan du försöker ya bryggverket eller göra rent.
8. Försök inte ya bryggverket om mer än ca 5-10L vätska inu.
9. Ställ bryggverket på en plan yta, långt ifrån bordskanter, varma ytor eller öppen eld. Tänk på
risken för läckor när du väljer plats för bryggverket.
10. Använd inte bryggverket utomhus eller nära barn utan llsyn.
11. Sä inte igång bryggverket utan vätska i.
13. Undvik a sladdar kommer i kontakt med verkets varma ytor.
14. Av säkerhetsskäl, håll verket torrt på utsidan under användandet.
15. Fyll inte ända upp, tänk på a vätska utvidgar sig när den blir varm.
16. Oförsikghet vid användandet kan orsaka skållning.
17. Se upp för het ånga när du lyer på locket.
18. Om verket är nästan fullt, använd inte högre temperatur än ca 95°C så a det inte rinner över.
19. Om bryggaren skulle koka torr nns e överheningsskydd som kan återställas. Om det händer
oa kan du dock skada värmeelementet.
20. Försök inte montera isär bryggaren, det är riskabelt och kan göra a du tappar alla garaner.
21. Bryggverket får användas av personer med förminskad fysisk, sensorisk eller mental förmåga,
eller med avsaknad av erfarenhet och kunskap - om dessa har få klara instrukoner och har
hjälp och övervakning samt förstår riskerna som nns.
BULLDOG BRYGGVERK
Model Nr. Max eekt Spänning Omgivande temp Max volym
40860-EU/UK 2.5kW 230V 10-38 °C 25L
40860-US/CA 1.5kW 110V 10-38 °C 25L
40860-AU/NZ 2.2kW 240V 10-38°C 25L
SPECIFIKATIONER
VIKTIGT OM SÄKERHET
Svensk Bruksanvisning
This manual suits for next models
5
Table of contents
Popular Brewing System manuals by other brands

BrewBuilt
BrewBuilt X1 Uni Assembly and Instruction Guide

Marco
Marco ColdBRU manual

BRAVILOR BONAMAT
BRAVILOR BONAMAT Aurora GTBSH-001 user manual

Breville
Breville the BrevillePrecision Brewer Thermal Instruction book

Blichmann Engineering
Blichmann Engineering Fermentator F3-42 Supplementary Operation, Assembly, Maintenance Manual

Ginnys
Ginnys PC100 instruction manual