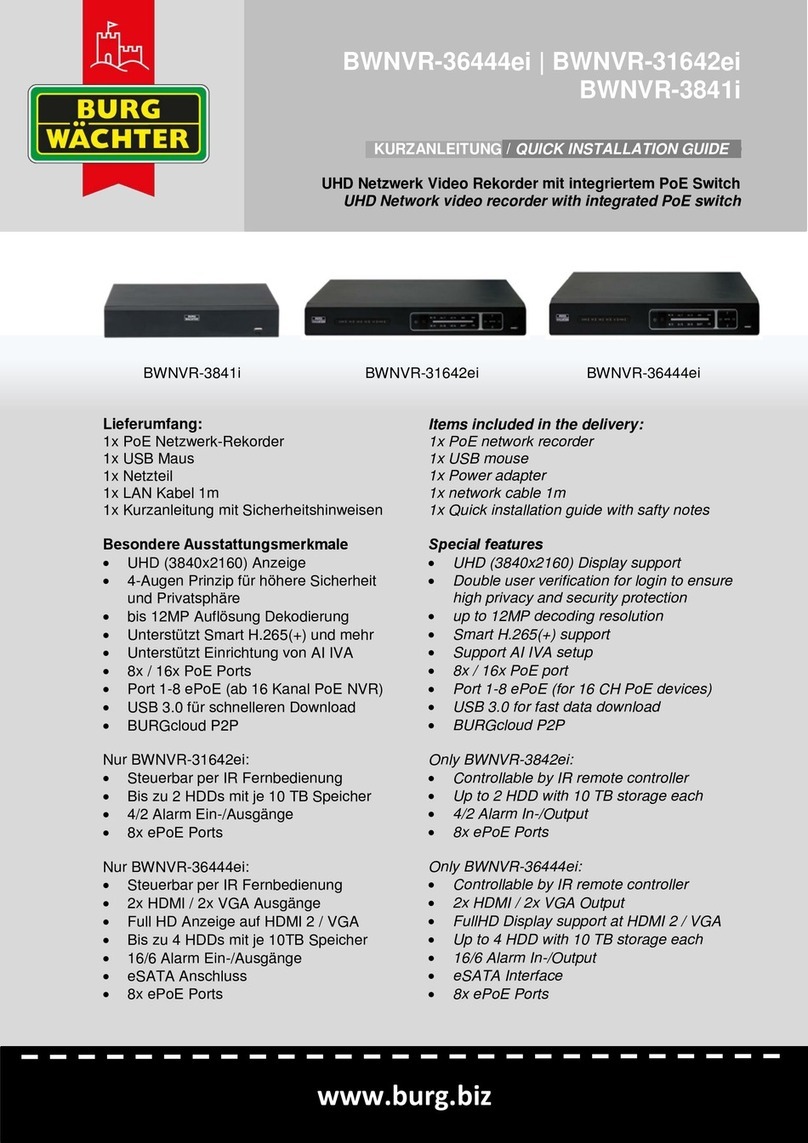
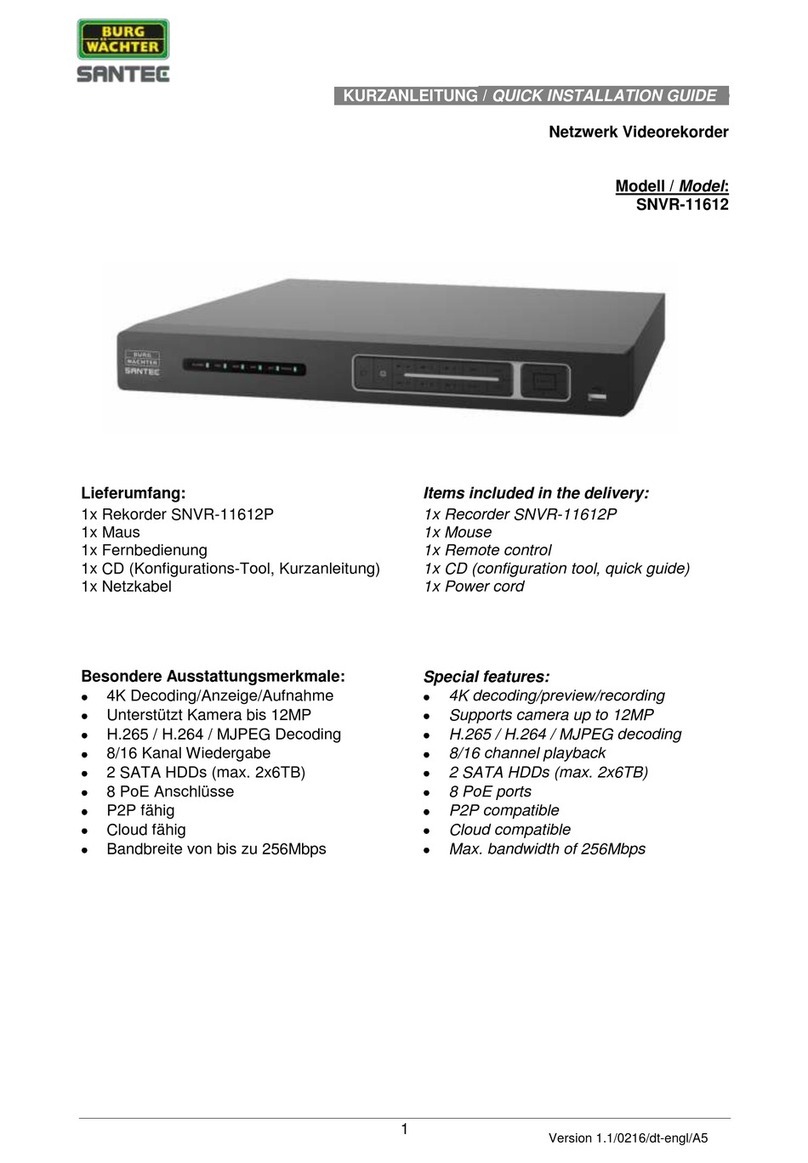
Burg Wächter BWNVR-2411P User manual

Version 1.24/cko/1022/dt/A4
OPERATING INSTRUCTIONS
Ultra HD (e)PoE Network Video Recorder
Models:
BWNVR-2411P
BWNVR-31632Pi
SNVR-3842e
SNVR-31642e
SNVR-36444e

Operating Instructions
BWNVR-2411P, SNVR-3842e, SNVR-31642e, BWNVR-31632Pi, SNVR-36444e
_________________________________________________________________________________
- 2 -
Dear Customer,
Thank you for choosing a BURG-GUARD quality product.
Please read these operating instructions carefully before using the unit for the first time and
be sure to follow all the instructions described here.
If you have any questions about commissioning or if you would like to make use of a
warranty or service, please contact your specialist dealer or contact us.
Additional information can also be found on our website:
www.burg-guard.com
Imprint:
The copyright of these operating instructions is the exclusive property of BURG-GUARD
GMBH.
Any reproduction, including on electronic data carriers, requires the written consent of BURG-
GUARD GMBH. Reprinting - even of extracts - is prohibited.
Errors and technical modifications excepted.
BURG-GUARD is a registered trademark of BURG-GUARD GMBH. Other company and
product names that may be mentioned are trademarks or registered trademarks or brands of
the respective owners.
© Copyright by: BURG-GUARD GMBH
Wormgermühle
58540 Meinerzhagen
Germany
www.burg-guard.com

Operating Instructions
BWNVR-2411P, SNVR-3842e, SNVR-31642e, BWNVR-31632Pi, SNVR-36444e
_________________________________________________________________________________
- 3 -
Table of contents
About this manual...............................................................................................................................6
1. General........................................................................................................................................7
Spare parts and accessories .........................................................................................................10
2. Controls, displays and connections ............................................................................................11
2.1 Front view...........................................................................................................................11
2.2 Connections on the rear of the unit......................................................................................13
2.2.1 BWNVR-2411P................................................................................................................13
2.2.2 SNVR-3842P(e)...............................................................................................................13
2.2.3 SNVR-31642e .................................................................................................................14
2.2.4 BWNVR-31632Pi.............................................................................................................14
2.2.3 SNVR-36444e .................................................................................................................15
2.2.4 Alarm input and output.....................................................................................................16
2.2.4.1 Alarm input...............................................................................................................16
2.2.4.2 Alarm output.............................................................................................................17
3. Local commissioning..................................................................................................................18
3.1 Login...................................................................................................................................18
3.2 Calling up the main menu....................................................................................................19
3.3 Changing the menu language .............................................................................................19
3.4 Logout and switch off recorder............................................................................................19
3.5 Note on cameras.................................................................................................................20
3.6 Note on the first operation of BURG-GUARD cameras on the PoE port...............................20
4. Operating the recorder...............................................................................................................21
4.1 Operating the recorder with the mouse................................................................................21
4.2 Operating the Recorder with the IR Remote Control............................................................22
5. Functional description................................................................................................................23
5.1 Live view.............................................................................................................................23
5.1.1 Event Display...............................................................................................................23
5.1.2 Calling up the menu bar...............................................................................................23
5.2 Access to the quick menu via right mouse button ................................................................25
5.2.1 View(s).........................................................................................................................25
5.2.2 PTZ control..................................................................................................................26
5.2.3 Fisheye........................................................................................................................30
5.2.4 Auto Focus...................................................................................................................31
5.2.5 Camera........................................................................................................................32
5.2.6 Search.........................................................................................................................32
5.2.7 Manual.........................................................................................................................32
5.2.8 Camera Settings..........................................................................................................33
5.2.9 Main menu...................................................................................................................33
5.3 Calling up the navigation bar...............................................................................................34
5.4 USB Auto Pop-up................................................................................................................35
6. Settings via the main menu........................................................................................................36
6.1 Main menuLive ...............................................................................................................37
Navigation bar............................................................................................................................38
6.2 Main menuPlayback View...............................................................................................40
6.2.1 Main menuPlayback Bookmark................................................................................43
6.2.2 Main menuPlayback BookmarkSet marker...........................................................43
6.2.3 Main menuPlayback BookmarkSearch marker .....................................................44
6.2.4 Main menuPlayback BookmarkEdit/remove marker..............................................45

Operating Instructions
BWNVR-2411P, SNVR-3842e, SNVR-31642e, BWNVR-31632Pi, SNVR-36444e
_________________________________________________________________________________
- 4 -
6.3 Main menuAIVA..............................................................................................................46
6.3.1 Main menuAIVAIntelligent search.........................................................................46
6.3.1.1 Face recognition.......................................................................................................46
6.3.1.2 Face recognition.......................................................................................................47
6.3.1.3 IVA / AIVA................................................................................................................48
6.3.1.4 Person recognition....................................................................................................49
6.3.1.5 Vehicle detection......................................................................................................50
6.3.1.6 Non-motorised vehicles ............................................................................................51
6.3.1.7 Census of persons....................................................................................................52
6.3.1.8 Heatmap...................................................................................................................52
6.3.2 Main menuAIVAParameters (Camera Remote Setup)..........................................52
6.3.2.1 IVA Plan...................................................................................................................53
6.3.2.2 Face recognition.......................................................................................................54
6.3.2.3 Face recognition.......................................................................................................55
6.3.2.4 IVA...........................................................................................................................56
6.3.2.5 AI/KI VA....................................................................................................................59
6.3.2.6 People counting / queue...........................................................................................60
6.3.2.7 Heatmap...................................................................................................................61
6.3.2.8 Vehicle number plate recognition..............................................................................63
6.4 Main menuAlarm(s).........................................................................................................65
6.4.1 Main menuAlarm(s)Alarm Info..............................................................................65
6.4.2 Main menuAlarm(s)Alarm.....................................................................................66
6.4.3 Main menuAlarm(s)Alarm input............................................................................66
6.4.4 Main menuAlarm(s)Alarm output..........................................................................68
6.4.5 Main menuAlarm(s)Motion detection....................................................................69
6.4.5.1 Main menuAlarm(s)Motion detection Motion..................................................69
6.4.5.2 Main menuAlarm(s)Motion detectionVideo loss.............................................70
6.4.5.3 Main menuAlarm(s)Motion detectionSabotage..............................................70
6.4.5.4 Main menuAlarm(s)Motion detectionScenes Change....................................71
6.4.5.5 Main menuAlarm(s)Motion detectionPIR alarm.............................................71
6.4.5.6 Main menuAlarm(s)Audio Analysis ...................................................................72
6.4.5.7 Main menuAlarm(s)Thermal image AI Alarms...................................................72
6.4.5.8 Main menuAlarm(s)AbnormalityHDD............................................................73
6.4.5.9 Main menuAlarm(s)AbnormalityNetwork.......................................................73
6.4.5.10 Main menuAlarm(s)AbnormalityUser.............................................................74
6.4.5.11 Main menuAlarm(s)AnomalyDevice..............................................................74
6.5 Main menuPOS (Point of Service)...................................................................................75
6.5.1 Main menuPOS (Point of Service)POS Search.....................................................75
6.5.2 Main menuPOS (Point of Service)POS Setup.......................................................75
6.6 Main menuApplication.....................................................................................................76
6.6.1 Main menuApplicationLog....................................................................................76
6.6.2 Main menuApplicationInformation ........................................................................76
6.6.3 Main menuApplicationNetwork.............................................................................78
6.6.4 Main menuApplicationNetwork Load ....................................................................79
6.6.5 Main menuApplicationNetwork Test .....................................................................79
6.6.6 Main menuApplicationSystem maintenance .........................................................80
6.7 Main menuApplicationBackup.....................................................................................82
6.8 Main menuDisplay ..........................................................................................................84
6.8.1 Main menuDisplayDisplay....................................................................................84
6.8.2 Main menuDisplayTour........................................................................................85
6.8.3 Main menuDisplayUser-defined display................................................................86
6.9 Main menuAudio.............................................................................................................87
6.9.1 Main menuAudioFile manager..............................................................................87
6.9.2 Main menuAudioSchedule ...................................................................................87
6.9.3 Main menuAudioBroadcast ..................................................................................88
6.10 Main menuLog off / Shut down ....................................................................................89
6.11 Main menuAdministrationCamera............................................................................90
6.11.1 Main menuAdministrationCameraIntegrate devices..........................................90

Operating Instructions
BWNVR-2411P, SNVR-3842e, SNVR-31642e, BWNVR-31632Pi, SNVR-36444e
_________________________________________________________________________________
- 5 -
6.11.2 Main menuAdministrationCameraImage settings..............................................93
6.11.3 Main menuAdministrationCameraOverlay ........................................................94
6.11.4 Main menuAdministrationCameraAudio/video..................................................94
6.11.5 Main menuAdministrationCameraCamera name ..............................................95
6.11.6 Main menuAdministrationCameraPoE..............................................................96
6.11.7 Main menuAdministrationCameraPTZ Setup....................................................97
6.12 Main menuAdministrationNetwork............................................................................97
6.12.1 Main menuAdministrationNetworkTCP/IP.........................................................98
6.12.2 Main menuAdministrationNetworkPort Setup....................................................99
6.12.3 Main menuAdministrationNetwork3G/4G........................................................100
6.12.4 Main menuAdministrationNetworkPPPoE.......................................................101
6.12.5 Main menuAdministrationNetworkDDNS........................................................102
6.12.6 Main menuAdministrationNetworkUPnP.........................................................104
6.12.7 Main menuAdministrationNetworkE-mail........................................................105
6.12.8 Main menuAdministrationNetworkFTP setting................................................106
6.12.9 Main menuAdministrationNetworkSNMP........................................................107
6.12.16 Main menuAdministrationNetwork802.1x....................................................113
6.12.17 Main menuAdministrationNetworkIP Filter...................................................114
6.13 Main menuAdministrationMemory......................................................................115
6.13.1 Main menuAdministrationMemoryMemory General ........................................115
6.13.2 Main menuAdministrationMemorySchedule....................................................116
6.13.3 Main menuAdministrationStorageHDD Manager ............................................118
6.13.4 Main menuAdministrationMemoryHDD (hard disk) .........................................119
6.13.5 Main menuAdministrationMemoryRecording ..................................................119
6.13.6 Main menuAdministrationMemoryHDD Detected............................................120
6.13.7 Main menuAdministrationMemoryRecording Estimation.................................121
6.13.8 Main menuAdministrationStorageFTP............................................................122
6.14 Main menuAdministrationSystem .......................................................................123
6.14.1 Main menuAdministrationSystemGeneral settings..........................................123
6.14.2 Main menuAdministrationSystemRS232.........................................................126
6.14.3 Main menuAdministrationSystemSecurity.......................................................127
7. Network access........................................................................................................................131
7.1 Remote Access: Accessing the Recorder via the Web.......................................................131
7.1.1 Establishing a network connection.................................................................................131
7.1.2 Login via the web...........................................................................................................131
7.1.3 Finding a device in the network......................................................................................131
7.1.4 Manual entry of the IP address via the web browser:..................................................132
7.1.5 Login..........................................................................................................................133
7.1.6 Security......................................................................................................................134
7.1.6.1 System services .....................................................................................................135
7.1.6.2 Attack defence........................................................................................................137
7.1.6.3 CA Certificate.........................................................................................................139
7.1.6.4 Audio/Video Encryption...........................................................................................141
7.1.6.5 Safety warning........................................................................................................141
8. Remote connections ................................................................................................................142
8.1 BURGcam App - P2P...........................................................................................................142

Operating Instructions
BWNVR-2411P, SNVR-3842e, SNVR-31642e, BWNVR-31632Pi, SNVR-36444e
_________________________________________________________________________________
- 6 -
About this manual
This manual is intended to assist in the use of the recorders described.
These operating instructions are subject to strict quality control. However, no guarantee can
be given that it does not contain errors. Changes may be made to the operating instructions
without prior notice.
Note: Different firmware versions can, among other things, lead to deviating menu structures
or operation and to altered function sequences compared to the manual or the previous
version.
Before using this recorder, read this manual carefully. Keep this manual in a safe place for
future use. Check that all the components of the recorder have been supplied. If any
components are missing, do not operate the recorder and contact your dealer. Do not
attempt to repair a defective recorder yourself; only have repairs carried out by qualified
personnel!
Improper handling of the appliance will invalidate any warranty claim.

Operating Instructions
BWNVR-2411P, SNVR-3842e, SNVR-31642e, BWNVR-31632Pi, SNVR-36444e
_________________________________________________________________________________
- 7 -
1. General
Please read this manual carefully before operating the unit and keep it as a reference book
for later.
Safety instructions and precautions
Ingress of liquids or objects
Make sure that no moisture or objects can enter the unit.
Lithium battery
Caution! There is a risk of explosion if the lithium battery (RTC battery) is incorrectly
connected. Replace the battery only with identical or equivalent components recommended
by the manufacturer. When disposing of used batteries, follow the manufacturer's
instructions.
CE guidelines
This appliance complies with the CE directives.
If you require an EC Declaration of Conformity for this appliance, please send a request to: BURG-
GUARD-support@burg.biz
Caution:
Changes and modifications not expressly approved by the competent licensing authority
could void the user's authority to operate the equipment.
VORSICHT
LEBENSGEFAHR
NICHT ÖFFNEN
VORSICHT: SETZEN SIE SICH NICHT DER
GEFAHR EINES ELEKTRISCHEN SCHLAGES
AUS UND ÖFFNEN SIE NICHT DIE
GEHÄUSEABDECKUNG ODER DIE
GERÄTERÜCKSEITE.
IM GERÄTEINNERN BEFINDEN SICH KEINE
KOMPONENTEN, DIEGEWARTET WERDEN
MÜSSEN.
ÜBERLASSEN SIE WARTUNGSARBEITEN
QUALIFIZIERTEM PERSONAL.

Operating Instructions
BWNVR-2411P, SNVR-3842e, SNVR-31642e, BWNVR-31632Pi, SNVR-36444e
_________________________________________________________________________________
- 8 -
Cyber Security Information
BURG-WÄCHTER KG follows standard industry practice in product / software testing and
dealing with any vulnerabilities found in products and product software in order to minimise
the risk to customers. Unfortunately, a complete security of products, software and services,
which are created and tested to the best of our knowledge and belief, cannot be completely
guaranteed to be free of errors that cannot be overcome by possibly malicious attackers.
This applies not only to BURG-WÄCHTER devices, but rather to the general public of
networkable devices that have communication interfaces and services. BURG-WÄCHTER
KG can guarantee that we will endeavour to reduce the risk to a minimum.
Vulnerability remediation is an ongoing process, as new vulnerabilities, including in network
protocols and services, are always being found and cannot be completely ruled out.
If you have any questions about the product or its setup, please contact:
camera-service@burg.biz
GDPR
When video security systems are used, personal data is collected, processed and used in
automated form. Such data is protected by the GDPR, which is an EU regulation that applies
directly in Germany.
The operator of the system is responsible for the operation and processing of the data. When
installing the video security system, suitable technical and organisational measures must be
taken to protect the personal rights of the persons concerned.

Operating Instructions
BWNVR-2411P, SNVR-3842e, SNVR-31642e, BWNVR-31632Pi, SNVR-36444e
_________________________________________________________________________________
- 9 -
Setup and installation
On-site installation should only be carried out by qualified personnel and must comply
with local specifications and regulations.
Never operate the unit near water, in dusty rooms or rooms with extremely high
humidity. The unit could otherwise be damaged.
Openings on the unit are for ventilation and protect against overheating. These openings
must never be covered or blocked. The unit may only be installed in a rack if sufficient
ventilation can be ensured. Overheating can lead to damage to the unit.
When connecting the operating voltage, ensure that the polarity is correct. Incorrect
connection may result in damage to or destruction of the unit.
Only the power source indicated on the type plate may be used. If you are not sure
whether the power supply available at the installation site can be used, ask your
electrical installer. Only use the enclosed cables, power supply units or adapters or the
expressly recommended accessories.
Repair and maintenance
Before any cleaning, the appliance must be switched off and the plug removed from the
mains socket. The unit may only be cleaned with a slightly damp cloth. Do not use harsh
cleaning agents or spray cans. The use of harsh solvents such as thinner or petrol may
damage the surface of the housing.
In case of damage to the unit or the cables, switch off the unit immediately and
disconnect it from the operating voltage without delay. Take the unit to a specialist
workshop in the event of the following damage:
oIn case of damage to the power supply cable
oif a liquid has been spilled on the unit or an object has entered the unit
oif the unit has been exposed to water or any other liquid
oif the unit does not work properly despite following the instructions in these
operating instructions. Only the controls described in the operating
instructions may be adjusted. Incorrect settings on all other controls can
damage the unit.
oif the unit has fallen to the floor or if the housing has been damaged
oif the unit falls significantly below the required performance values
Never attempt to carry out maintenance work yourself as you may expose yourself to
dangerous voltages. Leave this maintenance work to qualified personnel.
Attention:
Opening the housing will inevitably invalidate the warranty. Therefore, please
do not carry out any work on the unit yourself, but contact your specialist
dealer.
In digital video recorders, the hard disk is essentially the component that is subject to
natural wear and tear. Here too, after approx. 8,000 to 10,000 hours of operation, signs
of wear and tear may appear and malfunctions may occur. We therefore recommend
replacing the hard disk at regular intervals to ensure trouble-free operation. Furthermore,
we recommend that the fans installed in the unit be regularly cleaned of dust and dirt in
order to avoid malfunctions due to overheating etc. If you have any questions on this
subject, we will be happy to help you.

Operating Instructions
BWNVR-2411P, SNVR-3842e, SNVR-31642e, BWNVR-31632Pi, SNVR-36444e
_________________________________________________________________________________
- 10 -
Attention: Wear of mechanical components
We hereby expressly point out that every recording device, be it an analogue
or a digital device, is subject to natural wear and tear. Every recording device
contains mechanical parts that - as with any other device - must be
maintained or checked regularly. This applies in particular to products that
have been developed for continuous use.
Spare parts and accessories
Do not use any additional devices that have not been recommended by the
manufacturer of the unit. These can affect the functionality of the appliance and, in the
worst case, cause injuries due to electric shock or cause a fire due to a short circuit.
Only parts approved by the manufacturer or those with identical performance data may
be used as spare parts. Unapproved spare parts may cause damage to persons (electric
shock) and to the appliance (fire).

Operating Instructions
BWNVR-2411P, SNVR-3842e, SNVR-31642e, BWNVR-31632Pi, SNVR-36444e
_________________________________________________________________________________
- 11 -
2. Controls, displays and connections
2.1 Front view
Control indicators on the front of the unit:
No.
Display
Description
1
ALARM
Alarm
2
REC
Recording
3
HDD
Hard disk
4
NET
Network connection
5
ACT
IR remote control
6
POWER
Operating voltage
Operating buttons on the front of the unit:
No.
Key
Description
1
On/Off/Login
Press 1x briefly:
The login window appears
With the recorder switched on, press and hold for approx. 3
seconds:
The recorder shuts down.
Press briefly when the recorder is switched off:
The recorder starts up. To do this, however, the on/off toggle
switch on the back of the recorder must first be in the "on"
position.
2
IR receiver
Please do not cover
1
2
3
4
5
6
1
5
6
7
8
9
10
11
12
13
14
2
3
4

Operating Instructions
BWNVR-2411P, SNVR-3842e, SNVR-31642e, BWNVR-31632Pi, SNVR-36444e
_________________________________________________________________________________
- 12 -
3
Playback, Next
In playback mode, use this to go to the next video. In the menu,
use this to go to the last menu item.
4
Fast forward
Fast forward
5
Playback,
Pause
Here you can switch between play and pause.
6
REC
This takes you directly to the recording menu. See also:
Main menuSettingsSaveRecording
7
ESC
Cancel the operation and go back to the previous menu page.
8
Back
In playback mode, go back to the previous video.
In the menu, use this to go to the last menu item.
9
Slow playback
Slow playback
10
Reverse,
Pause
Break
11
SHIFT
When you are in an input field, you can (as an alternative to the
virtual keyboard) use the Shift key to switch between letters and
numbers as well as upper and lower case.
12
FN
For full screen display:
Press this button and the PTZ setting window appears.
For input fields:
Press this key to delete
the entered characters (letters, numbers).
13
Up, down,
right, left,
Enter
As an alternative to the mouse, you can navigate through the
menu with the direction keys and confirm your selection with
Enter.
14
USB
connection
Here you can connect a USB device, e.g. a mouse.

Operating Instructions
BWNVR-2411P, SNVR-3842e, SNVR-31642e, BWNVR-31632Pi, SNVR-36444e
_________________________________________________________________________________
- 13 -
2.2 Connections on the rear of the unit
2.2.1 BWNVR-2411P
2.2.2 SNVR-3842P(e)
4 5 8 9
Connection
Description
1
Connection Operating voltage: 48V AC
2
PoE Switch
3
Network connection
4
VGA connection
5
Audio input/output
6
HDMI
7
USB connection
Connection
Description
1
Connection Operating voltage: 230V AC
2
On/Off switch
3
(e)PoE Switch
4
Network connection
5
VGA connection
6
Microphone input/output
7
RS-232
8
HDMI
9
USB connection
10
Alarm outputs, RS-485
2
3
4
5
6
7
1
1
2
3
6
7
10

Operating Instructions
BWNVR-2411P, SNVR-3842e, SNVR-31642e, BWNVR-31632Pi, SNVR-36444e
_________________________________________________________________________________
- 14 -
2.2.3 SNVR-31642e
2.2.4 BWNVR-31632Pi
Connection
Description
1
Connection Operating voltage: 230V AC
2
On/Off switch
3
ePoE Switch (green) - Port 1-8
PoE Switch (grey) - Port 9-16
4
VGA connection (FullHD)
5
RS-232
6
Microphone input/output
7
Network connection
8
USB connection
9
HDMI (UHD) output
10
Alarm outputs, RS-485
Connection
Description
1
Connection Operating voltage: 230V AC
2
On/Off switch
3
ePoE Switch (green) - Port 1-8
PoE Switch (grey) - Port 9-16
4
VGA connection (FullHD)
5
RS-232
6
Microphone input/output
7
Network connection
8
USB connection
9
HDMI (UHD) output
10
Alarm outputs, RS-485
1
2
3
7
10
4
9
8
5
6
1
2
3
7
10
4
9
8
5
6

Operating Instructions
BWNVR-2411P, SNVR-3842e, SNVR-31642e, BWNVR-31632Pi, SNVR-36444e
_________________________________________________________________________________
- 15 -
2.2.3 SNVR-36444e
Connection
Description
1
Connection Operating voltage: 230V AC
2
On/Off switch
3
eSATA port
4
VGA1/2 connection (FullHD)
5
RS-232
6
Alarm outputs, RS-485
7
Microphone input/output
8
HDMI 1-UHD / 2-FullHD output
9
USB connections
10
Network connection
11
ePoE Switch (green) - Port 1-8
PoE Switch (grey) - Port 9-16
1
2
3
6
10
4
8
7
5
4
11
9

Operating Instructions
BWNVR-2411P, SNVR-3842e, SNVR-31642e, BWNVR-31632Pi, SNVR-36444e
_________________________________________________________________________________
- 16 -
2.2.4 Alarm input and output
Please read the following section carefully before using the contacts.
2.2.4.1 Alarm input
The alarm input is switched when the external signal is switched to ground (mode: NO). For this
purpose, use e.g. a relay or switch.
NO and NC modes are supported.
Note: If you want to interconnect several
recorders, avoid direct series or parallel
connection and use separate relay switching
contacts for each.
[
Num
m
e
r
]
GND
R
e
l
a
i
s
/
Sw
i
tch
(
i
m
S
e
nsor
)

Operating Instructions
BWNVR-2411P, SNVR-3842e, SNVR-31642e, BWNVR-31632Pi, SNVR-36444e
_________________________________________________________________________________
- 17 -
2.2.4.2 Alarm output
The recorders use potential-free switching relays JRC-27F as alarm outputs.
The contact pairs are each marked with a number corresponding to NOx and Cx.
Example circuit
Important note: Please refer to the following table for technical data. Values outside the specification
may destroy the unit.
Model:
JRC-27F
Specification
Switching capacity
125VAC 1A / 30VDC 2A
Max. Switching capacity
125VAAC / 60WDC
Max. Switching voltage
240VAC / 120VDC
Max. Current
2A
Contact opening
time
< 3ms
Contact-
Closing time
< 3ms
NO
C
Rekorder
Ne
t
zteil
Sirene

Operating Instructions
BWNVR-2411P, SNVR-3842e, SNVR-31642e, BWNVR-31632Pi, SNVR-36444e
_________________________________________________________________________________
- 18 -
3. Local commissioning
Connect the mouse, monitor and camera(s) to the recorder
Connect the monitor and the camera(s) to the operating voltage.
Finally, connect the recorder to the operating voltage using the enclosed power
supply unit.
Switch on the recorder using the on/off switch on the back of the unit.
The POWER LED indicator on the front of the recorder lights up green and a beep
sounds when the unit is powered up.
You will first be asked to set the system password. Enter a secure password, confirm
it and click on "Next".
Depending on the default setting, the live image of the camera(s) or the Startup
Wizard appears.
oThe Setup Wizard guides you through the rest of the setup. Here you can
configure the network settings of the unit, date and time settings, as well as
the recording.
3.1 Login
Enter your user name and password and confirm with "Save".
During the initial setup, you will be asked to create the administrator account.
Important notice:
It is recommended to create an account with a separate password for each user:
Main menuSettingsSystem InfoAccountUser
You are now logged in and can access the various functions.
Note on incorrectly entered login information:
If you enter an incorrect user name or password three times within 30 minutes, an
alarm is triggered on the system.
If you make the wrong entries five times, your user account will be blocked for 30 min.
Note: A password that is recognised as insecure will not be allowed by the recorder. Use upper
and lower case letters as well as numbers and, if necessary, special characters.
Enter your e-mail address for resetting to factory settings if necessary.

Operating Instructions
BWNVR-2411P, SNVR-3842e, SNVR-31642e, BWNVR-31632Pi, SNVR-36444e
_________________________________________________________________________________
- 19 -
3.2 Calling up the main menu
There are 2 ways to access the main menu:
Click on the live image with the right mouse button and select
"Main menu" from the quick menu that appears.
Note: You can close the quick menu by right-clicking.
Alternatively, you can call up the main menu via the navigation
bar that appears in the live image when you move the mouse to
the lower edge of the screen.
Note: The display of the navigation bar must be activated first.
Main menuSettingsSystem InfoGeneralNavigation bar
3.3 Changing the menu language
Open the main menu. Select here:
Main menuSettingSystem InfoGeneralLanguage
Here you can choose between the pre-installed languages.
Hint:
After changing the language settings, the recorder must be restarted.
3.4 Logout and switch off recorder
Open the main menu. Select:
Main menuLog offShut down
Alternatively, you can shut down the recorder by pressing the On/Off button on the front of
the recorder.
The recorder shuts down, but is still switched on (the LEDs on the front of the recorder
are still green). To switch off the recorder for good, you can also switch it off using the
power button on the back of the unit.
Hint:
Please always shut down the recorder before switching it off and do not switch it off while
it is running, as this could lead to a defect in the components.

Operating Instructions
BWNVR-2411P, SNVR-3842e, SNVR-31642e, BWNVR-31632Pi, SNVR-36444e
_________________________________________________________________________________
- 20 -
3.5 Note on cameras
Only network cameras (IP cameras) can be connected to this recorder and their images
recorded if they are integrated accordingly and comply with at least ONVIF standard 2.4.
This recorder is an Ultra HD recorder, i.e. it can also record cameras with Ultra HD or 4 K
resolution (IP cameras with up to 12 MP resolution maximum).
BURG-GUARD offers a wide range of IP cameras. You can find them in our webshop at:
www.burg-guard.com. Our competent team will be happy to help you find a suitable solution
for your request.
3.6 Note on the first operation of BURG-GUARD cameras on the PoE port
BURG-GUARD cameras require you to assign a personal, secure password during the first
commissioning in order to comply with the requirements according to DSGVO.
If you have not yet commissioned a camera and connect an uninitialised camera to the PoE
port of the recorder, the camera is not automatically integrated.
Proceed as follows:
Mark the units in the list that you want to initialise.
Select (bottom right) "Initialise".
Now enter your personal administrator password or accept the recorder password
(default).
When you confirm the entry, the account data is transferred to the cameras.
Adjust the user name and password of the camera in the recorder menu to the new settings.
Then restart the system.
This manual suits for next models
4
Table of contents
Other Burg Wächter Network Hardware manuals
Popular Network Hardware manuals by other brands

ASTRO
ASTRO Ulti Box installation guide

HP
HP Ethernet Network Interface Card hn230e quick start guide

Motorola
Motorola W24 technical information

NETGEAR
NETGEAR WN1000RP installation guide

KonNad
KonNad C2000-RSDD-CK-CK31 user manual

Lucent Technologies
Lucent Technologies Stinger STGR-LIM-AP-48 Specifications

Leonton
Leonton REG5-2602-2C Series Hardware user manual

Huawei
Huawei ETP4860-B1A2 user manual

dito
dito Unilink 200 Quick installation guide

Patton electronics
Patton electronics RocketLink-G 3088 Series user manual

evertz
evertz Overture instruction manual

BURK Technology
BURK Technology Plus-X VSWR quick start guide