1.
2.
3.
4.
To manually map Plus-X channels to the ARC Plus, click the Meter or Status
tab as appropriate. Locate an unused channel and click the […] button
in the Source column. This will bring up the Source dialog. Click the Plus-X
button and choose the Plus-X device and channel you wish to use.
Configure labels, limits, and alarms for the newly added Plus-X channels.
Lastly, you will need to calibrate the metering channels. If you have
not already connected the input connector blocks, do so now. Then click
the Calibration icon at the far right of the Source column in the
AutoLoad Plus Meter Channels tab to complete the calibration process.
Select File>Save to save the changes to the ARC Plus.
The Plus-X IIU communicates with the ARC Plus Touch or ARC Plus SL via LAN/
WAN, allowing installation anywhere a network connection is available.
Use AutoLoad Plus to add the Plus-X
device to the ARC Plus Touch or
ARC Plus SL unit. Ensure you have
the current version of AutoLoad
Plus installed on your computer. To
obtain the current version, visit www.
burk.com/downloads and select
the AutoLoad Plus support page.
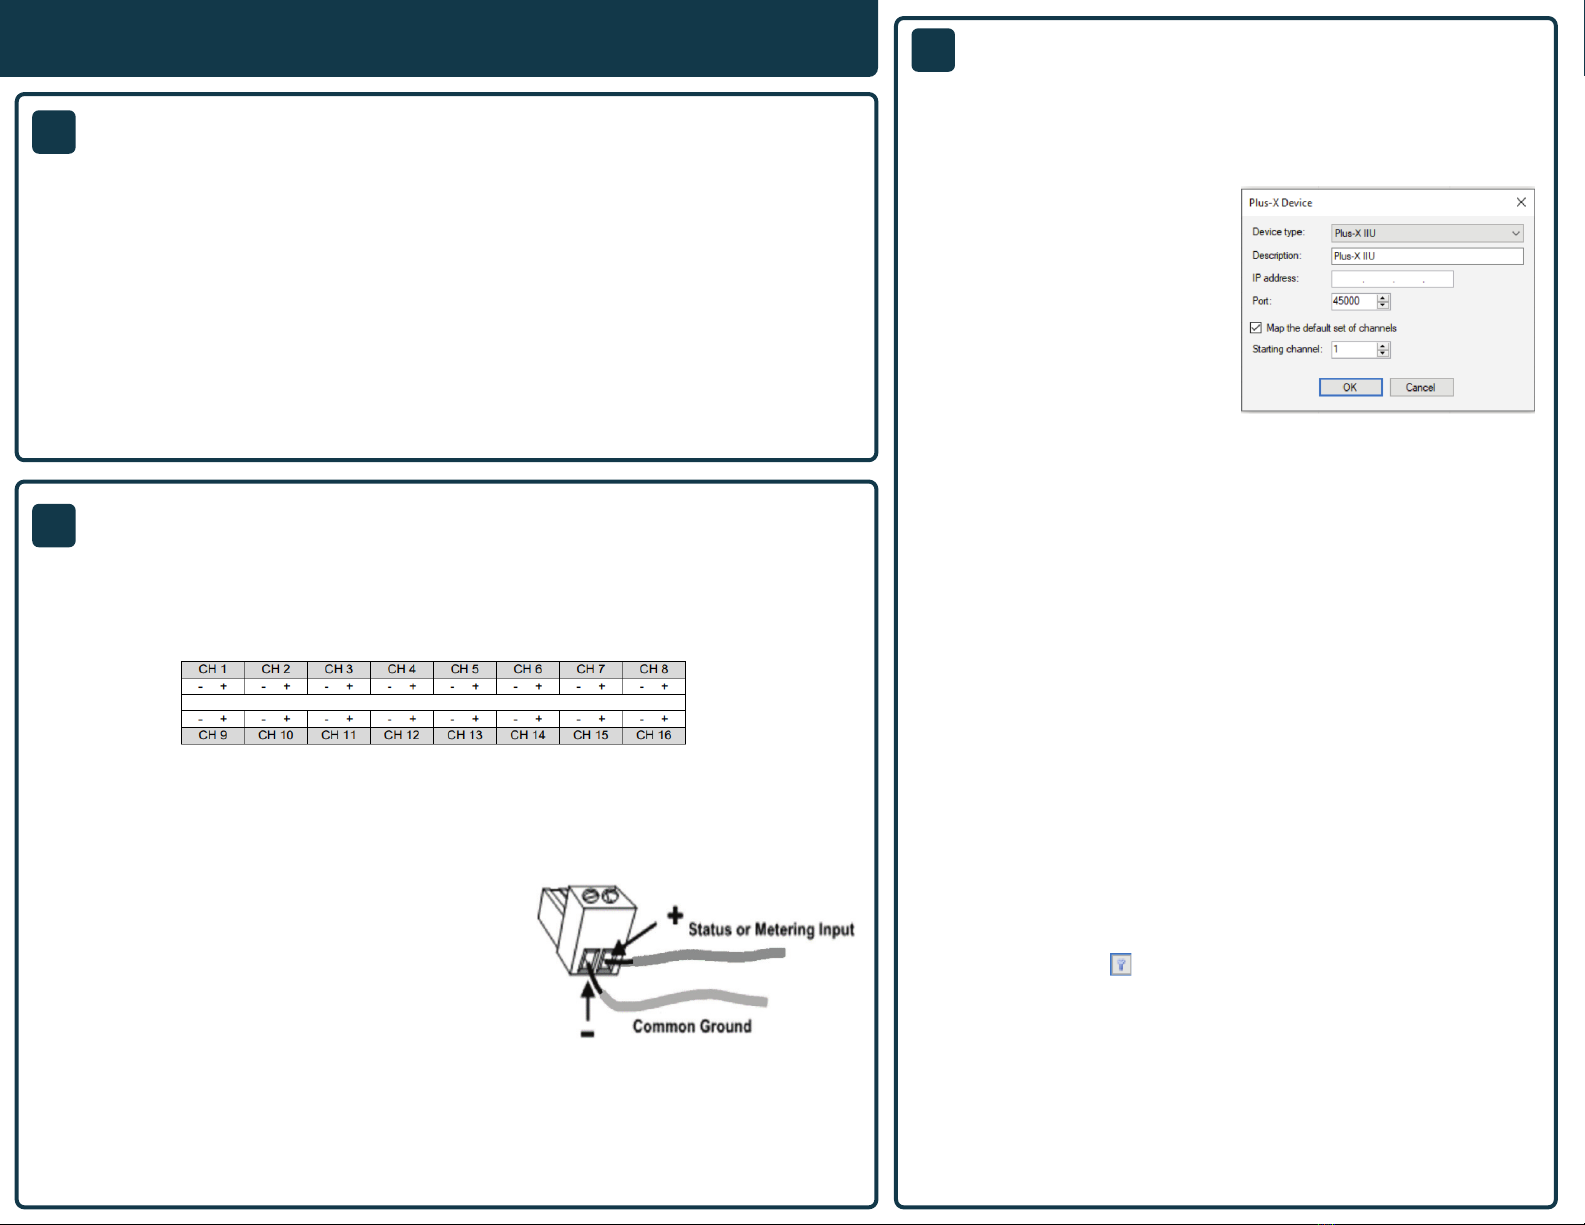
On the AutoLoad Plus menu, select
Edit->Plus-X Devices and click Add.
The dialog box shown to the right will
be displayed.
•Select Plus-X IIU and enter its network information.
Note: If adding more than one Plus X device to an ARC Plus, change the
starting channel so that other assigned channels are not overwritten.
•Select OK to conrm the rst Plus X device.
•If adding more than one Plus X device, repeat the same steps.
•Save the conguration by selecting File>Save in AutoLoad Plus
To conrm that the Plus-X IIU is communicating, log in to the ARC Plus Touch
or ARC Plus SL using the web browser. All assigned channels should show
their default values.
MANUALLY MAPPING PLUS-X CHANNELS
Note: If the meter or status inputs show as offline or a warning is displayed,
check the network conguration and ensure the conguration is saved
within AutoLoad Plus.
Refer to the Plus-X IIU Installation and Operation Manual for further
information on conguring and operating the Plus-X IIU unit.
4CONNECTING TO AN ARC PLUS TOUCH OR
ARC PLUS SL
3CONNECTING A METER OR STATUS INPUT
2NETWORK SETUP (CONTINUED)
QUICK START GUIDE
Each Plus-X IIU connects up to 16 metering inputs (±10VDC) and 16 status inputs (0-28VDC or
switch closure). Meter inputs may be used as status channels by setting the high and low voltage
thresholds. The meter and status pin-outs are as shown in the graphic below.
1. Connect your site equipment to the provided 16-
pin push-on block connectors. Secure the wires with
the built-in setscrews. The status or metering sample
connects to the + terminal, and a common ground
connects to the – terminal.
2. Connect the push-on blocks to the rear panel of the
Plus-X IIU with the setscrews facing up. Be sure to
precisely align the connector terminals to the + and –
contacts on the back panel of the unit.
For information on conguring and calibrating input channels, see the Plus-X IIU Installation &
Operation Manual.
Plus-X IIU |
10. To verify communication, open a command prompt on your computer and ping the
address you just assigned to the unit to ensure it is correctly configured.
e. ARC Plus IP address – Enter the IP address of the ARC Plus Touch or ARC Plus SL unit that the Plus-X
IIU will be connected to.
f. HTTP Port – Check with your network administrator. The factory default setting is port 80.
g. Plus-X Port – Check with your network administrator otherwise the factory default setting can be
used. This port must match the setting for Plus-X Port on your ARC Plus Touch or ARC Plus SL unit.
Connecting a Meter or Status Input


