10
PRE-RIDE CHECKLIST
LOOSE PARTS
Check and secure all fasteners before every ride. Make sure
handlebar clamp bolts are locked properly in place. There should
not be any unusual rattles or sounds from loose parts or broken
components. If you are not sure, ask an experienced mechanic to
check.
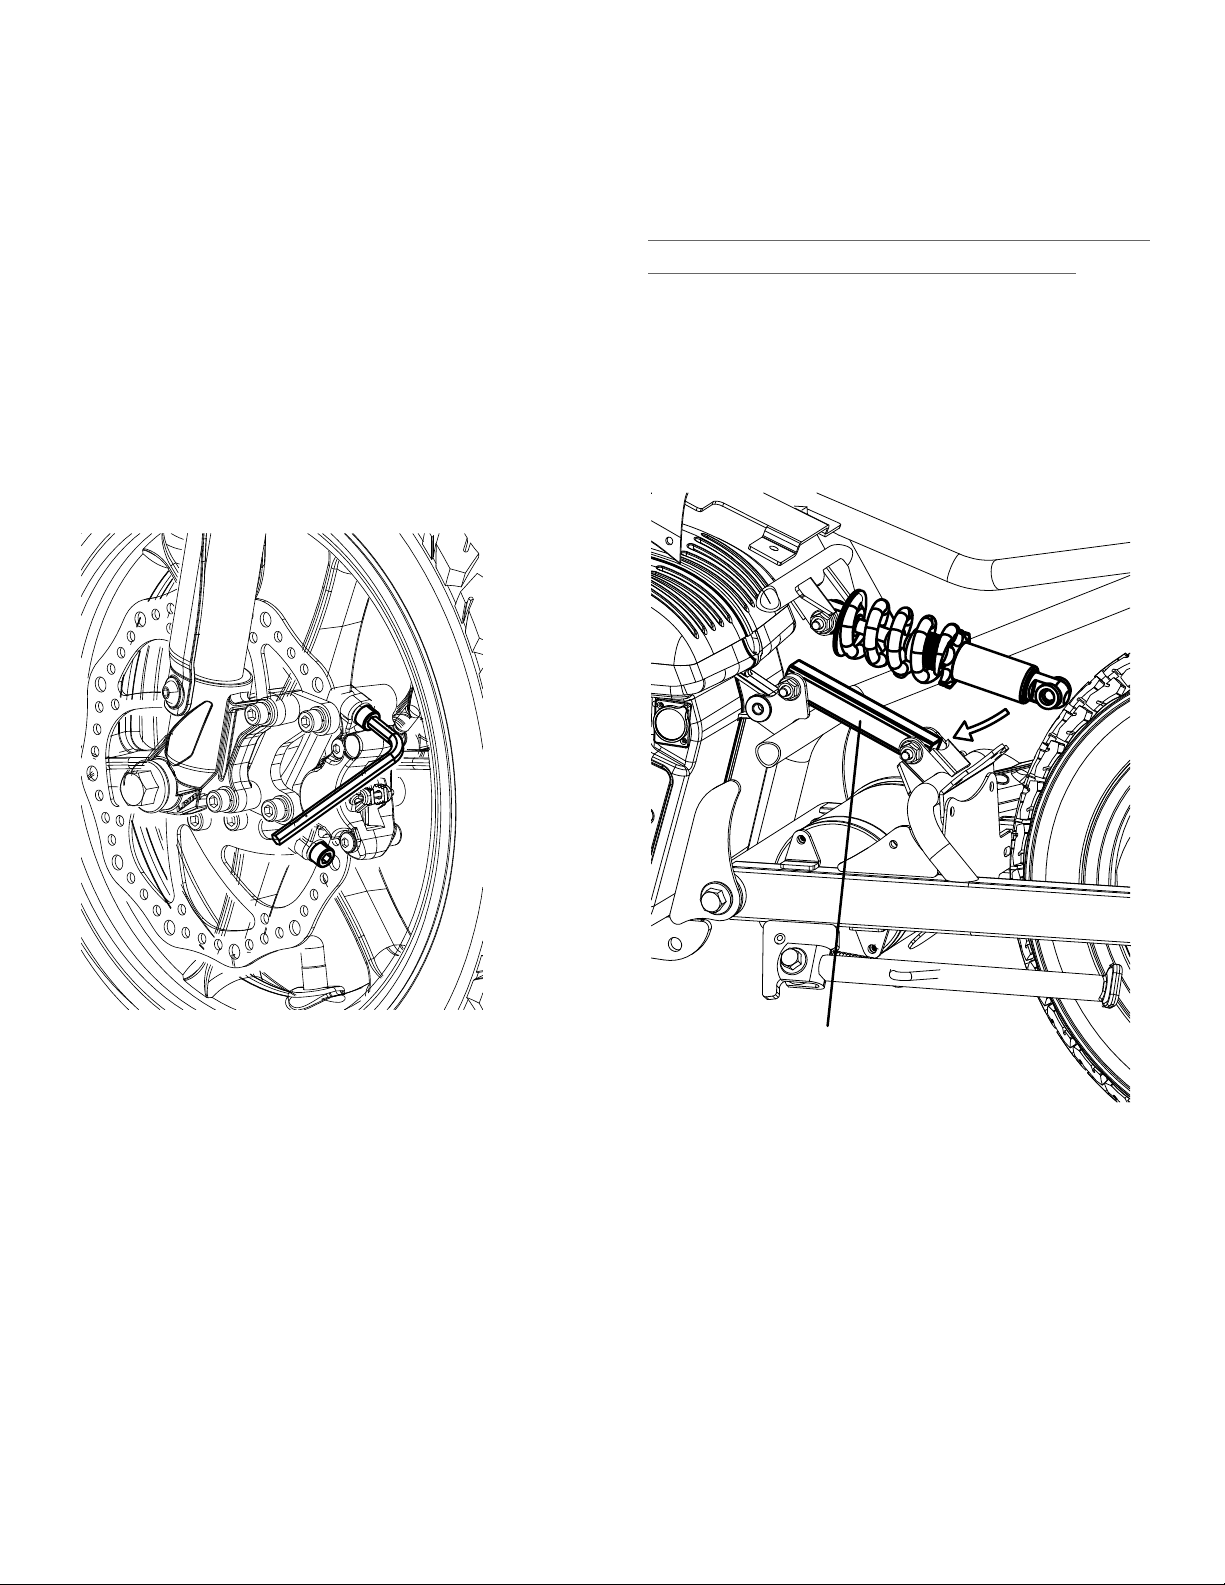
BRAKE
Check the brake for proper function. When you squeeze the lever,
the brake should provide positive braking action. When you apply
the brake with the speed control on, the brake cut-off switch will
stop the motor. When the brake is not in use, the Front and Rear
wheel should spin freely without drag.
FRAME, FORK AND HANDLEBARS
Check for cracks or broken connections. Although broken frames
and chassis components are rare, it is possible for an aggressive
rider to Jump, run into a curb or wall and wreck, bend or break a
frame, fork or suspension components. Get in the habit of
inspecting yours regularly.
Safety Gear
Always wear proper protective equipment such as an approved
safety helmet, elbow pads and knee pads. Always wear athletic
shoes (lace-up shoes with rubber soles), never ride barefooted or in
sandals, and keep shoelaces tied and out of the way of the wheels,
motor and drive system.
RIDERS SAFTEY WARNING
This Mini Bike is designed for Off Road Use Only
and has been designed and intended for use in controlled
environments free of potential traffic hazards and not on public
streets. It is up to the end user to know the local laws governing
such vehicles and where they are legal to be ridden. Burromax
makes no claim that these bikes are street legal.
Riding an electric mini bike can be a hazardous activity. Certain
conditions may cause the equipment to fail without fault of the
manufacturer. Like other electric products, these vehicles can and
are intended to move, and it is therefore possible to lose control,
fall off and/or get into dangerous situations that no amount of care,
instruction or expertise can eliminate. If such things occur you can
be seriously injured or die, even when using safety equipment and
other precautions.
RIDE AT YOUR OWN RISK AND USE COMMON SENSE.
It is your responsibility to review this information and make sure
that all riders understand all warnings, cautions, instructions and
safety topics and assure that young riders can safely and
responsibly use this product. Burromax recommends that you
periodically review and reinforce the information in this manual
with younger riders, and that you inspect and maintain your product
to insure rider safety. The recommended Minimum rider age is 16
years or older is only an estimate, and can be affected by the rider’s
size, weight or skills. Any rider unable to fit comfortably on the Mini
Bike should not attempt to ride it. A parent’s decision to allow a
person younger than 16 years old to ride this product should be
based on the child’s maturity, skill and ability to follow rules.
DO not exceed the maximum recommended rider weight of 300
lbs. Rider weight does not necessarily mean a person’s size is
appropriate to fit or maintain control of the vehicles.
Keep this product away from small children and remember that this
product is intended for use only by persons who are completely
comfortable and confident when operating this mini bike.
Do not touch the brakes or electric motor on your electric mini bike
when in use as they can become very hot.
Always check and obey any local laws or regulations which may
affect the locations where the vehicles may be used.
Ride defensively. Watch out for potential objects that could catch
your wheel or force you to swerve suddenly or lose control.