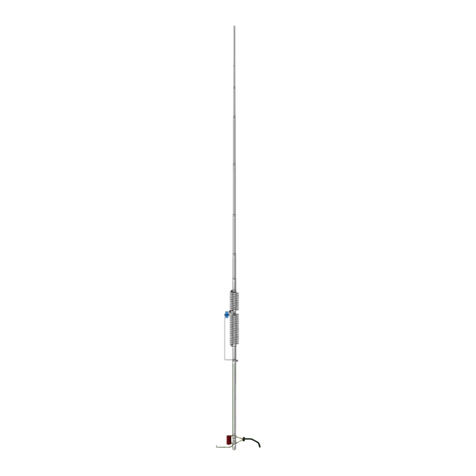
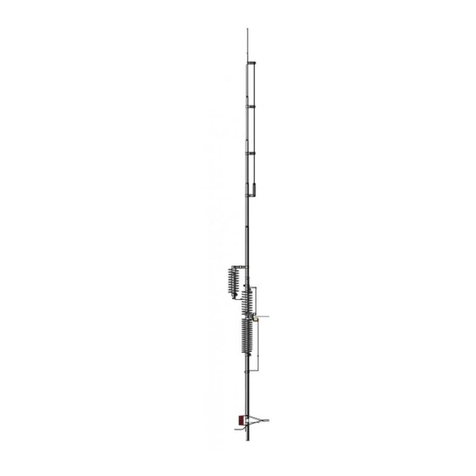
Butternut HF2V User manual

831 N Central Ave Wood Dale IL 60191-1219 Tel: 630.238.1183 Fax: 630.238.1186 e-mail: [email protected] http://www.bencher.com
00156VZI 100700-1-
Instructions
Model HF2V
PLEASE READ THE INSTRUCTIONS THOROUGHLY BEFORE PROCEEDING TO
ASSEMBLY. DURING ASSEMBLY AND INSTALLATION TAKE EXTREME CARE TO
AVOID CONTACTING POWER LINES WITH ANY PART OF THE ANTENNA OR WITH
OTHER CONDUCTORS.
DO NOT INSTALL THE ANTENNA IN ANY PLACE WHERE ANY PART OF IT CAN COME
INTO CONTACT WITH POWER LINES IN THE EVENT OF STRUCTURAL FAILURE OR
ANY PART OF THE INSTALLATION OR IN THE COURSE OF NORMAL FLEXING AFTER
INSTALLATION, FOR SUCH CONTACT CAN RESULT IN DAMAGE TO PROPERTY,
BODILY INJURY, OR EVEN DEATH!
IN NO CASE SHOULD THE ANTENNA BE INSTALLED IN ANY PLACE WHERE
STRUCTURAL FAILURE OR ANY PART OF THE ANTENNA OR ITS SUPPORTING
SYSTEM CAN ENDANGER PERSONS OR PROPERTY.
Tools required for assembly: standard blade screwdriver, pliers, knife; a set of nut
drivers will be useful but not necessary.
NOTE: A small packet of anti-seize/anti-oxide compound (Butter-It's-Not™) will be
found inside mounting post (A). This compound should be applied lightly to each
tubing joint and to the inside of all clamps that must make good electrical contact
with the tubing sections.
A small roll of weatherproof sealing tape (Konnector-Kote™) is also included. Use it to
seal your coax connection.
ASSEMBLY
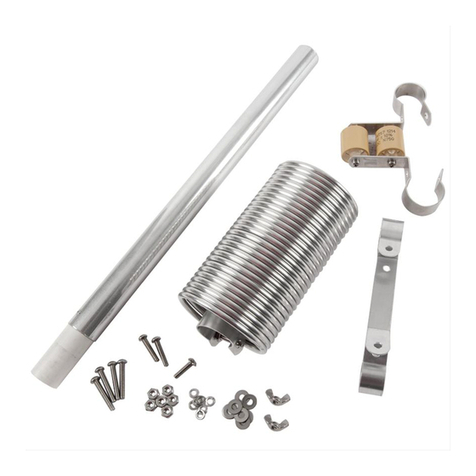
1. Check to be sure that no parts are missing (see part pictorial page)
2. If the antenna is to be installed at ground level, plant mounting post (A) in a hole
approximately 21 inches (.55 meters) deep so that the upper end of the fiber rod
insulator is approximately 5 inches (12 cm.) above ground level. Pack earth
tightly around mounting post (A) so that it will remain vertical. Concrete may be
used in areas of high wind for greater rigidity, in which case the mounting post
should be rotated while the concrete is setting so that it may be easily removed
later.
NOTE: If the antenna is to be mounted in concrete or in damp, acidic or alkaline soil,
the mounting post should be given a protective coating of asphalt roofing compound,
polyurethane varnish, or another suitable covering to protect the metal against
corrosion.
WARNING: DO NOT HAMMER THE MOUNTING POST INTO THE GROUND AS THIS
CAN SPLINTER THE FIBER ROD INSULATOR AND COMPLICATE INSTALLATION.

-2-
ASSEMBLY
3. Slide the insulator on 40 meter tube (B1) into the top of base section (B) and
secure with a #8 x 1 1/2" bolt, #8 lock washer and #8 hex nut.
NOTE: The top of base section (B) has the mounting hole located 1/4" from the end
and the danger label is located near the bottom.
In all subsequent steps involving base section (B), assembly should be done indoors or
in an area where dropped hardware may easily be recovered.
WARNING: IF A FLAT BLADE SCREWDRIVER IS USED DO NOT HOLD THE WORK
OPPOSITE THE BLADE IN ORDER TO AVOID POSSIBLE INJURY INCASE THE BLADE
SLIPS.
4. Locate the 80/40 meter coil assembly (C) and slide the clamp at the outer end of
the larger coil over the 40 meter tube (B1) and onto base section (B), until the
middle clamp can be positioned around the fiber glass insulating rod. The middle
clamp will have to be pulled open slightly to pass over the 40 meter tube (B1)
and bolt that goes through the insulator rod. Position the center coil clamp
around the insulator rod so that the distance from the clamp to the end of either
piece of tubing is approximately equal, and pass a #10 x 1" bolt through the
holes of the center coil clamp as shown in the drawing immediately below. The
outer tab of this clamp may be bent back slightly to provide clearance for the
bolt, and bent back into place after final assembly. Fasten the center coil clamp
firmly in place using a #10 lock washer and #10 wing nut. Using #10 lock
washers and #10 wing nuts secure the two remaining coil clamps, tightening the
wing nuts only enough to hold the hardware in place. Coil adjustments will be
made later.
5. Install the capacitor bracket (E) on the capacitor assembly
(D) using the hardware already on the capacitor. Refer to
the pictorial.
6. Position capacitor assembly (D) over the threaded end of the
bolt protruding from the center coil clamp on the 80/40
meter coil assembly (C). Make sure that the capacitor
bracket (E) runs along side the lower (80 meter) coil of the
80/40 meter coil assembly (C). Fasten the capacitor assembly (D) to the 80/40
meter coil assembly (C) using a #10 flat washer, #10 lock washer and a #10 hex
nut. Using the large non-adjustable clamp, fasten the end of capacitor bracket
(E) firmly against base section (B) and secure it with a #8 x 1" bolt, #8 lock
washer and a #8 hex nut.
NOTE: IN THE FOLLOWING STEPS TUBING SECTIONS GTHROUGH MWILL BE
ASSEMBLED AS A UNIT FOR LATER PLACEMENT ATOP BASE SECTION (B)/40 METER
TUBE (B1). AN 11/32 INCH NUTDRIVER WILL BE A USEFUL (BUT NOT NECESSARY)
TOOL.
7. Insert the unslotted end of tube (H) into the slotted end of tube (G), align the
four holes, and pass a #8 x 1 1/2" bolt through both tubes. Secure it with a #8
lock washer and #8 hex nut and tighten snugly.
8. Insert the unslotted end of tube (I) into the slotted end of tube (H) and proceed
as in step 9, using a #8 x 1 1/4" bolt, #8 lock washer and #8 hex nut.
9. Insert the unslotted end of tube (J) into the slotted end of tube (I) and proceed
as before, using a #8 x 1 1/4" bolt, #8 lock washer and #8 hex nut.
10. Insert tube (K) into tube (J) as in the previous steps, using a #8 x 1" bolt, #8 lock
washer and #8 hex nut.

-3-
ASSEMBLY
11. Insert tube (L) into tube (K) as in the previous steps, using a #8 x 1" bolt, #8 lock
washer and #8 hex nut. Note that the upper end of tube (L) has only slots.
Place the small gear-driven hose clamp around the slotted end of (L) and tighten
only enough to hold the clamp in place.
12. Place a black cap over the end of tube (M) and slide the uncapped end into the
slotted end of tube (L) to a depth of 3 inches (76 mm.). Tighten the hose clamp
around the upper end of tube (L) snugly in order to hold tube (M) in place.
NOTE: If a rooftop or other above-ground installation is intended, please read the
section entitled "Above Ground Installations" immediately following the check-out and
adjustment instructions before proceeding.
13. Take the assembled base section (B), slide its lower end over mounting post
w/insulator (A) and align the holes in the tube with the hole through the
insulator. Pass a #8 x 2" bolt through the tube and insulator securing it with a
#8 lock washer and #8 hex nut.
WARNING: AVOID POWER LINES!!
14. Raise tube assembly G through M vertically and slide the lower end of tube (G)
into the upper end of 40 meter tube (B1). Align the holes of tube (G) with those
of 40 meter tube (B1), pass a #8 x 1-1/2" bolt through the holes and tighten
securely with a #8 lock washer and #8 hex nut.
WARNING: DURING THE FOLLOWING STEPS PLEASE REMEMBER THAT A
DIFFERENCE IN POTENTIAL MAY EXIST BETWEEN COAXIAL LINES CONNECTED TO
STATION TRANSMITTING OR OTHER EQUIPMENT AND THE ANTENNA OR THE
EARTH AROUND IT. IN ORDER TO AVOID A POSSIBLY FATAL SHOCK HAZARD BE
SURE THAT THE FEEDLINE TO THE ANTENNA IS DISCONNECTED FROM STATION
EQUIPMENT BEFORE ATTACHING IT TO THE ANTENNA OR OTHERWISE COMING
INTO CONTACT WITH IT.
15. Any length of cable having a characteristic impedance of 50 to 53 ohms may be
used to feed the HF2V. Refer to figure 3 for the procedure to be followed in
preparing the cable for attachment to the antenna. Note that the center
conductor of the coax goes to the bottom of base section (B) and the outer
(braid) conductor goes to mounting post w/insulator (A). Place a #8 washer over
the threaded end of each feedline terminal before attaching the feedline. When
the feedline is attached, place another #8 washer over each feedline terminal. Do
not attach lock washers and hex nuts at this time.
16. Place base matching coil (Q) across the feedline terminals as shown in figure 3.
Place #8 washers over each feedline terminal. Use #8 lock washers and #8 hex
nuts to secure the feedline and base matching coil (Q) to the feedline terminals.
The "tail" at the lower end of the base matching coil (Q) may be connected to a
ground rod or stake a short distance away.
NOTE: The function of a ground rod is to place the antenna at D.C. ground potential.
It cannot take the place of an effective r.f. ground system, such as a number of radial
wires, regardless of its depth in the earth. It does, however, serve as a convenient tie-
point for such radials, as does the bolt through mounting post w/insulator (A) to
which radials can be connected by means of the remaining #8 hardware. The exact
number of radials required for low SWR and reasonably efficient operation on 80 and
40 meters will depend in large measure on local earth conductivity, and this may vary
considerably from one place to the next and from one frequency band to the next.
The best procedure is to assume that most earth is a poor conductor over the HF range
and that some radial wires will be needed. Radials may be placed on the surface of the
earth or buried slightly below the surface to get them out of the way, and their length
is largely a matter of convenience,

-4-
ASSEMBLY
although it is a good idea to make each radial at least as long as the antenna is tall. In
general, a large number of short radials is preferable to a small number of longer radials
for a given amount of wire, especially if fewer than a dozen radials are to be used.
Unlike resonant radials that must be cut to the proper lengths for use with elevated
verticals, ground-level radials need not to be cut to any particular length; their sole
purpose is to provide less lossy return paths for currents flowing along the earth than
the earth itself can provide. And, since "return" currents will be flowing back to the
antenna from all points of the compass, the radial wires should be spaced uniformly
over 360 degrees, although physical circumstances will often make this "ideal"
distribution impossible. For a discussion of ground system for elevated verticals, see
the section entitled "Above Ground Installations" following Checkout and Adjustment
instructions.
CHECKOUT AND ADJUSTMENT
NOTE: The two coil shorting straps (F) are provided as a means of decreasing the
inductance of the 80 and 40 meter coils more than is possible simply by stretching the
coils. Lower than normal inductance may be necessary if the HF2V is top loaded as
described later for the sake of greater SWR bandwidth on 80/75 meters and on 160
meters with the optional TBR-160-S unit.
For operation of the HF2V without top loading or any optional accessories for other
bands attach the lug end of one shorting strap to the upper clamp of the 40 meter
coil. This is done by removing the wing nut and other hardware from the upper clamp
and placing the lug end of the coil shorting strap (F) over the #10 bolt ahead of the
locking washer and the wing nut. The other end (clamp end) of the coil shorting strap
(F) should be tapped down along the 40 meter coil so that four full turns are shorted
out. Secure it with #8 x 3/4 bolt, #8 lock washer and #8 hex nut.
The other shorting strap, if needed, may be attached to the lower clamp of the 80
meter coil and tapped upward along the coil for decreased inductance. Secure it with
#8 x 3/4 bolt, #8 lock washer and #8 hex nut. With no top loading, however, it is
unlikely that any turns will need to be shorted to achieve satisfactory operation over
any 60 kHz segment of the 3500-4000 kHz range. For MARS or other operation above
4000Khz the shorting strap will probably be required.
With the 40 meter coil shorted as noted above and with the following coil settings
resonance and lowest SWR should occur at approximately 7150 and 3750 kHz.
1. Refer to figure 1 and set the 80 meter coil so that the distance between the
upper edge of the lower coil clamp to the lower edge of the center clamp around
the insulator is 14 inches or approximately 35.6 centimeters. The 40 meter coil
should be adjusted so that the distance between the lower edge of the upper
clamp and the upper edge of the center clamp is 10 inches or approximately 25.4
centimeters.
2. For purposes of adjustment a simple SWR indicator at the transmitter will be
adequate. More accurate SWR measurements can be obtained at the antenna,
but the tuning conditions that exist at the end of the line will normally be of
more practical interest to the operator.
3. Determine the frequency at which the SWR reading is lowest on 80/75 meters.
In order to minimize interference to other stations adjust the SWR indicator for
maximum sensitivity and use only enough power for full scale deflection in the
"forward" position. Resonance on this band is fairly sharp, so it may be
necessary to take readings at every 25 kHz or so across the band to find the
frequency at which the SWR drops to a minimum value. If lowest SWR (not
necessarily less than 2:1 at this point) occurs at a higher frequency than desired,
simply loosen the wing nut on the lower 80 meter coil clamp and readjust its
position upward for greater

-5-
Length 240
Frequency(MHz)
=
CHECKOUT AND ADJUSTMENT
compression of the coil and increased inductance. If, on the other hand, the
initial reading of lowest SWR occurs at a lower frequency than desired, position
the 80 meter coil for less compression and decreased inductance. Adjustments in
either directions should be made in steps of one inch or less to avoid
"overshooting the desired setting." A one-inch change in the position of the
lower coil clamp will produce a 75-100 kHz change in resonance.
Once the 80/75 meter coil adjustment has been made for lowest SWR at a particular
frequency it may be found that the SWR cannot be lowered further without the
adjustment of the base matching coil (Q), especially if an effective ground system is
used with the antenna. One should remember that the radiation resistance of a vertical
antenna that is physically shorter than a quarter wavelength will be less than 35 ohms
and that the total feedpoint impedance at resonance will be the sum of this radiation
resistance, plus conductor and loading losses, plus earth loss resistance. With a loss-
free ground system the resistive part of the feedpoint impedance of the HF2V on
80/75 meters will be less than 20 ohms and the resulting mismatch with 50-ohm cable
would produce SWR of greater than 2:1. Base matching coil (Q) may be viewed as a
step-up transformer that will match the lower impedance at the feedpoint, to the
characteristic impedance of the feedline, and proper adjustment will produce SWR of
close to unity in those cases where the earth loss resistance is sufficiently low to keep
the feedpoint impedance below the characteristic impedance of the cable used. If
earth losses are unusually great, as in desert areas, and if no efforts are made to reduce
these losses, base matching coil (Q)'s transformational properties will be the opposite
of what is needed. In such a case base matching coil (Q) should be left fully
compressed or disconnected entirely, depending on which condition produces lower
SWR.
4. Stretch base matching coil (Q) a slight amount from its fully compressed
condition and observe the effect on SWR. In general, the more efficient the
ground system is in reducing earth losses, the greater the amount of stretch
required for low SWR, and if one is fortunate enough to have a zero-load ground
system base matching coil (Q) may have to be stretched to several times its
compressed length for a proper match, in this case it may be more convenient to
reduce its inductance by sniping off several turns rather than continued
stretching. If base matching coil (Q) has to be stretched a good deal for the sake
of a good match the frequency of minimum SWR may drop slightly, in which
case the adjustment of the 80/75 meter coil setting may be touched up as in the
preceding step.
5. Determine the frequency at which SWR is lowest on 40 meters and adjust the
upper or 40 meter coil in exactly the same manner as the 80/75 meter coil was
adjusted. Since the antenna is a full quarter wavelength tall on this band, tuning
will be fairly broad and the radiation resistance will be close to 35 ohms with
negligible conductor loss. Depending on the adjustment that has been made to
base matching coil (Q) in connection with the 80/75 meter tuning, 40 meter SWR
should be no worse than 1.5 at resonance, and even lower SWR is likely.
ABOVE GROUND INSTALLATION
If the HF2V is to be mounted some distance above the earth a resonant-radial ground
system will most likely be necessary for low SWR and efficient operation. The length
in feet of radial wires for any band can be found from the formula:
At least two radials per band should be used if at all possible for the sake of efficiency,
although operation with a reasonably low SWR may be possible with only a single
radial per band. If only two radials are used per band these should run at 180 degrees
to each

-6-
ABOVE GROUND INSTALLATION
other. Resonant radials should be connected to the braid side of the coax at the
feedline terminals and insulated at the far end. Resonant radials need not remain
parallel to the earth, and a fair amount of slope will not significantly affect SWR or
performance. If, however, resonant radials are not sufficiently elevated, the earth
below them can cause them to resonate at a much lower frequency than expected, and
their length may have to be trimmed considerably to restore the overall system (vertical
radiator and radials) to resonance for low SWR operation without having to resort to a
transmatch at the input end of the feedline.
If the antenna is to be mounted above ground it is recommended that one set of short
guys be attached to the antenna at a point that is approximately 1/3 of the way up
from the feedpoint. These will help to steady the lower sections and to prevent the
wind loading on the upper sections of tubing from transmitting an overturning
moment to the base. Four guys will offer more support than three, and unusually long
guys should be avoided. Under no circumstances should guys be placed on the upper
section of an antenna. The light tubing used in the upper half of the antenna is
capable of supporting itself in very high winds, but it cannot support itself and guy
lines that will themselves will be subject to wind and perhaps ice loading. Guys
should be made of non-stretch non-conductive material such as monofilament fishing
line in the larger sizes. Light nylon twine should be avoided regardless of its strength
rating because it can stretch as much as 15%. Polypropylene rope or even nylon rope
may also be used, although the former should be checked periodically for signs of
weather deterioration.
OPTIONAL ACCESSORIES FOR THE HF2V AND NOTES ON TOP LOADING
In its basic configuration the HF2V stands 32 feet tall and thus operates as a quarter-
wave vertical on 40 meters with reasonably good efficiency over fair to good ground
system. On 80 meters, however, this height represents something of a compromise
compared to a full quarter-wave vertical antenna fir this band. One simple way to
approach the performance of a full size vertical on this band is to attach top-loading
wires near or at the top of the antenna in order to simulate a much taller physical
structure as in figure 4. Maximum loading will occur when the wires are extended
parallel to the earth, but that arrangement would call for additional supports that are
nearly as tall as the antenna itself. The "umbrella" system shown will conserve space
and resources in that the support lines to the top loading wires may be placed at
ground level. The angle of slope for each wire is not especially critical, but 45 degrees
represents a good compromise between loading and space conservation. Fewer than
four wires may be used, although in such a case it may be expected that three wires of
given length will provide less loading than four wires of the same length. It is obvious
that the addition of top-loading wires to the HF2V will call for less inductance in the
80 and 40 meter tuning circuits, in which case the shorting strap for the 80 meter
circuit will be needed. Unfortunately, there is a limit to the amount of top loading
that may be used with the HF2V before 40 meter operation is adversely affected. Four
"umbrella" wires each attached to the antenna at the junction of tubes (K) and (L) and
each approximately 12 feet (3.65 meters) long and sloping downwards at 45 degrees,
is probably the greatest amount of loading that can be used for coverage of the entire
40 meter band with acceptable SWR, even if all the turns of the 40 meter coil are
shorted out. With this particular top-loading arrangement the 80/75 meter bandwidth
between the 2:1 SWR points should be nearly 100 kHz, and if the optional TBR-160-S
unit is used for 160 meter operation the SWR bandwidth on that band will increase to
approximately 25 kHz from the 13 kHz or so that could be expected in the absence of
top loading. If one is willing to sacrifice 40 meter operation for the sake of even
greater operating bandwidth and greater efficiency on the lower bands the "umbrella"
wires can be lengthened considerably. Four 25-foot "umbrella" wires, for example,
would provide some 125 kHz of operating bandwidth on 80/75 meters and up to 35
kHz on 160 meters. Top-loading wires should not be attached to the very tip of the
antenna because the tubing in the two uppermost sections is no stronger than it needs
to be to support itself. Operation of the HF2V may be extended to the other bands
through the addition of the following
-7-
OPTIONAL ACCESSORIES FOR THE HF2V AND NOTES ON TOP LOADING
accessories without sacrificing 80 and 40 meter performance:
Model TBR-160-S
160 meter base resonator; may be used with or without top loading; rated at 500
watts C.W./1000 watts to antenna
Model 30 MRK
30 meter resonator kit (not recommended if top loading is used)
Model TLK
Top loading kit of four 25-ft. stranded "umbrella" wires and insulators (see above
notes concerning 40 meter operation).

-8-
Feedline Preperation
Remove outer insulation with a sharp knife.
Push the braid according fashion against the outer jacket.
Separate strands of braid with an awl being careful not to
break any.
Draw center conductor out with and awl or other dull
pointed instrument.
Feedline Detail
Figure 3
NOTE: All dimensions are in inches(millimeters) unless otherwise noted
Code Part No Description Qty
A00110SZV TUBE A W/INSULATOR 1-1/4(32) X 24(606) 1
B00117SZV TUBE B SECTION 1-1/4(32) X 48(1216) 1
B1 00121SZV TUBE B1 W/INSULATOR 1-1/4(32) X 14(356) 1
C00152SZV COIL ASSEMBLY 80/40 METER 1
D00155SZV CAPACITOR ASSEMBLY 80 METER 1
E00150BAV CAPCITOR BRACKET 80 METER 1
F00140RZV COIL SHORTING STRAP 1
G00122BAV TUBE 1-1/8(29) X 48(1216) 1
H00123BAV TUBE 1(25) X 48(1216) 1
I00124BAV TUBE 7/8(22) X 48(1216) 1
J00125BAV TUBE 3/4(19) X 48(1216) 1
K00126BAV TUBE 5/8(16) X 48(1216) 1
L00127BAV TUBE 1/2(13) X 48(1216) 1
M00128BAV TUBE 3/8(10) X 48(1216) 1
Q00137SZV COIL Q BASE MATCHING 1
00109JZV # 8-32 X 2(51) SCREW 1
00114JZV # 8-32 X 1-1/2(38) SCREW 2
00079JZV # 8-32 X 1-1/432) SCREW 2
00078JZV # 8-32 X 1(25) SCREW 3
00077JZV # 8-32 X 3/4(19) SCREW 2
00083JZV # 8 FLAT WASHER 6
00080JZV # 8 LOCK WASHER 13
00081JZV # 8-32 HEX NUT 13
00131JZV #10-24 X 1(25) SCREW 1
00132JZV #10 FLAT WASHER 1
00133JZV #10 LOCK WASHER 4
00134JZV #10-24 HEX NUT 1
00135JZV #10-24 WING NUT 3
00144JZV SMALL ADJUSTABLE COMPRESSION CLAMP 1
00143BAV CAPACITOR BRACKET CLAMP 1
00050DZV KONNEKTOR-KOTE 1(25) X 8(203) .05
Other manuals for HF2V
1
Table of contents
Other Butternut Antenna manuals

Butternut
Butternut 10 User manual

Butternut
Butternut HF6V-X User manual

Butternut
Butternut BUT-HF9V User manual

Butternut
Butternut HF5B User manual

Butternut
Butternut HF5B User manual

Butternut
Butternut CPK User manual

Butternut
Butternut HF9V User manual

Butternut
Butternut BUT-HF6V User manual

Butternut
Butternut TBR-160-S User manual

Butternut
Butternut HF2V User manual