By The Glass Slim Series User manual
User Manual

1. Safety Precautions …………………………………..1
2. Setup and General Use ……………………………..3
3. Defrost and Clean ……………………………………8
4. FAQ/Troubleshooting Guide ………………………10
5. Addendums – Checklists and Forms …………....13
6. Technical Specifications …………………………..15
7. Debit System Manual .………………………………16
List of Contents
1
The instructions for use and installation regulation should be read carefully.
It contains important information on installation, use and maintenance of the
Wine Dispenser. The manufacturer shall not be held liable if the instructions
and notices in the operating manual are not observed.
2SAFETY PRECAUTIONS
General
• Only a trained installer/authorized service technician of By the Glass is
allowed to perform repairs to the unit. Any unauthorized repair may void
your warranty.
• If a part is damaged, unplug the Wine Dispenser and contact By The Glass.
Setup and Placement
• Never place the wine dispenser on its side.
• Do not install the unit close to inflammables.
• Do not position the wine dispenser near sources of heat, such as stoves,
heating radiators etc as this will negatively impact the cooling efficiencies.
• The wine dispenser should not be exposed to the constant sunlight.
• When installing the wine dispenser, be sure to allow the unit time to
acclimate to changes in temperature/humidity prior to use.
• The wine dispenser should be positioned on a flat even surface to avoid
excessive noise caused by vibrations of the cooling system.
• Ventilation holes + panels on the back and on sides of the dispenser
should never be covered up. The back side should be placed 3 inches from
the wall as a minimum and the side of the wine dispenser should be a
minimum 4 inches to provide for air supply.
• Cooling unit should be placed at a well-ventilated service well accessible.
• If positioning outdoors, be careful about excessive noise and protection
against extreme cold.
Electrical
• For every cooling unit, a separated electrical group 115 V/16 A and a wall
socket should be available.
• Only use the approved voltage amount, incorrect voltage could result in the
unit malfunctioning or being damaged, it may also void your warranty.ion
2
• To protect the user, the wine dispenser should always be connected to a
grounded socket when in use.
• The wine dispenser heat output is 700+ watts depending on model.
• Do not use any extension cords to plug in the Wine dispenser.
• Do not put the machine in operation if
o The cord is damaged
o The socked is damaged.
• If the supply cord is damaged, the whole cord should be replaced by the
servicing department of By the Glass.
• Never unplug by pulling on the cord.
Packaging
• During transportation, your new Wine Dispenser is protected with packing
materials. These materials are not harmful to the environment
and are suitable for recycling. Please dispose of the packaging in
a responsible way recycling authority.
• The packaging material is not a child toy – there is a
danger of suffocation – KEEP OUT OF REACH!
3
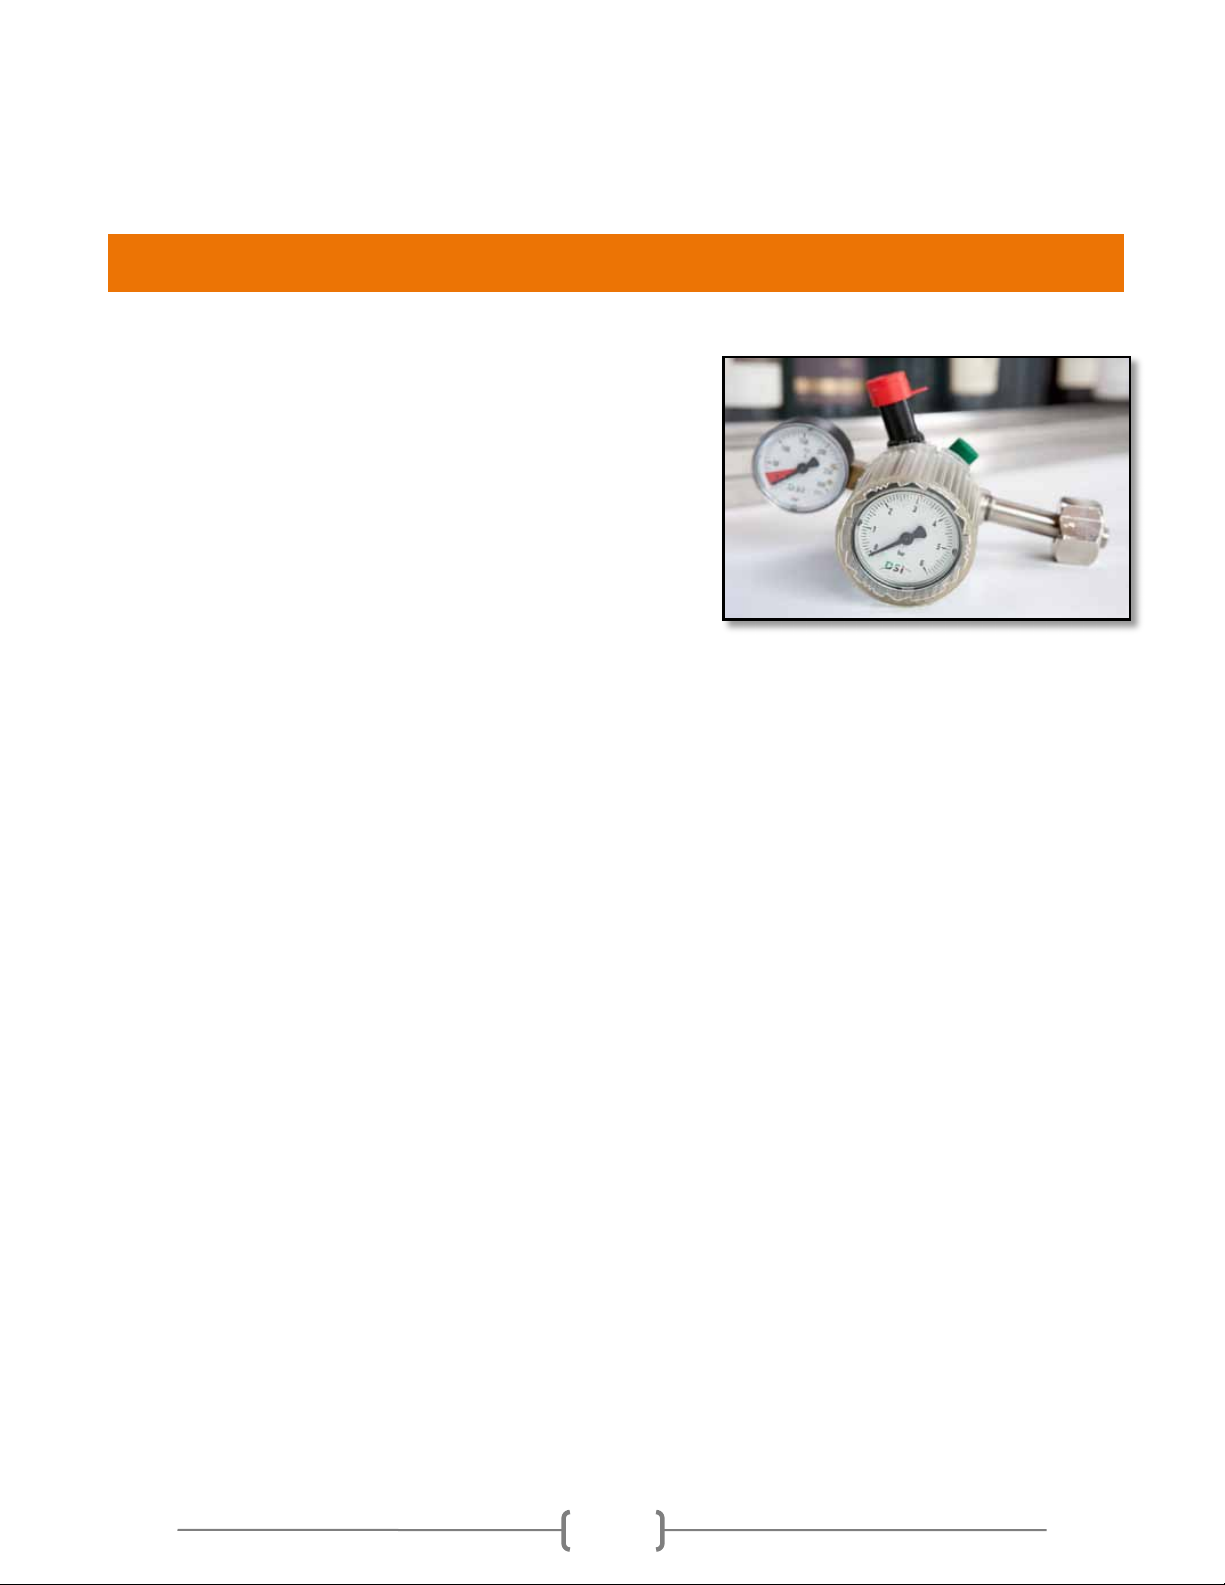
Setup and General Use
• Connect the pressure gauge to the Argon
bottle. Make sure it is not leaking. Tighten
if necessary.
• Connect the nitrogen hose from the Wine
Dispenser to gauge by setting the pipe
into the push fitting connector. Before
connecting, remove the clip and put it
back after the connection.
• There are 2 pressure gauges on the unit.
The small one gives reading of the pressure in the bottle from 0 to 3625 psi
while the large one shows the pressure in the pipeline from 0 to 87 psi.
• Usually, the Argon bottle volume may range from 330 to 440 lbs/cm2. The
pressure in the pipeline should be between 1.5 and a maximum of 6 psi.
Higher pressure may negatively affect the operation of the system. What if
it does?
• The pressure can be adjusted manually. Pull the pressure gauge plastic
cover forward. The pressure can be controlled by turning the plastic
surrounding of the large dial. The pressure increases by turning clockwise
and decreases by turning it anti clockwise. After setting the correct
pressure level the plastic cover can be pushed back again, this maintains
and locks the setting. This should be performed whenever a new tank is
installed or as the tank level decreases.
Argon bottle connection and pressure gauge
4
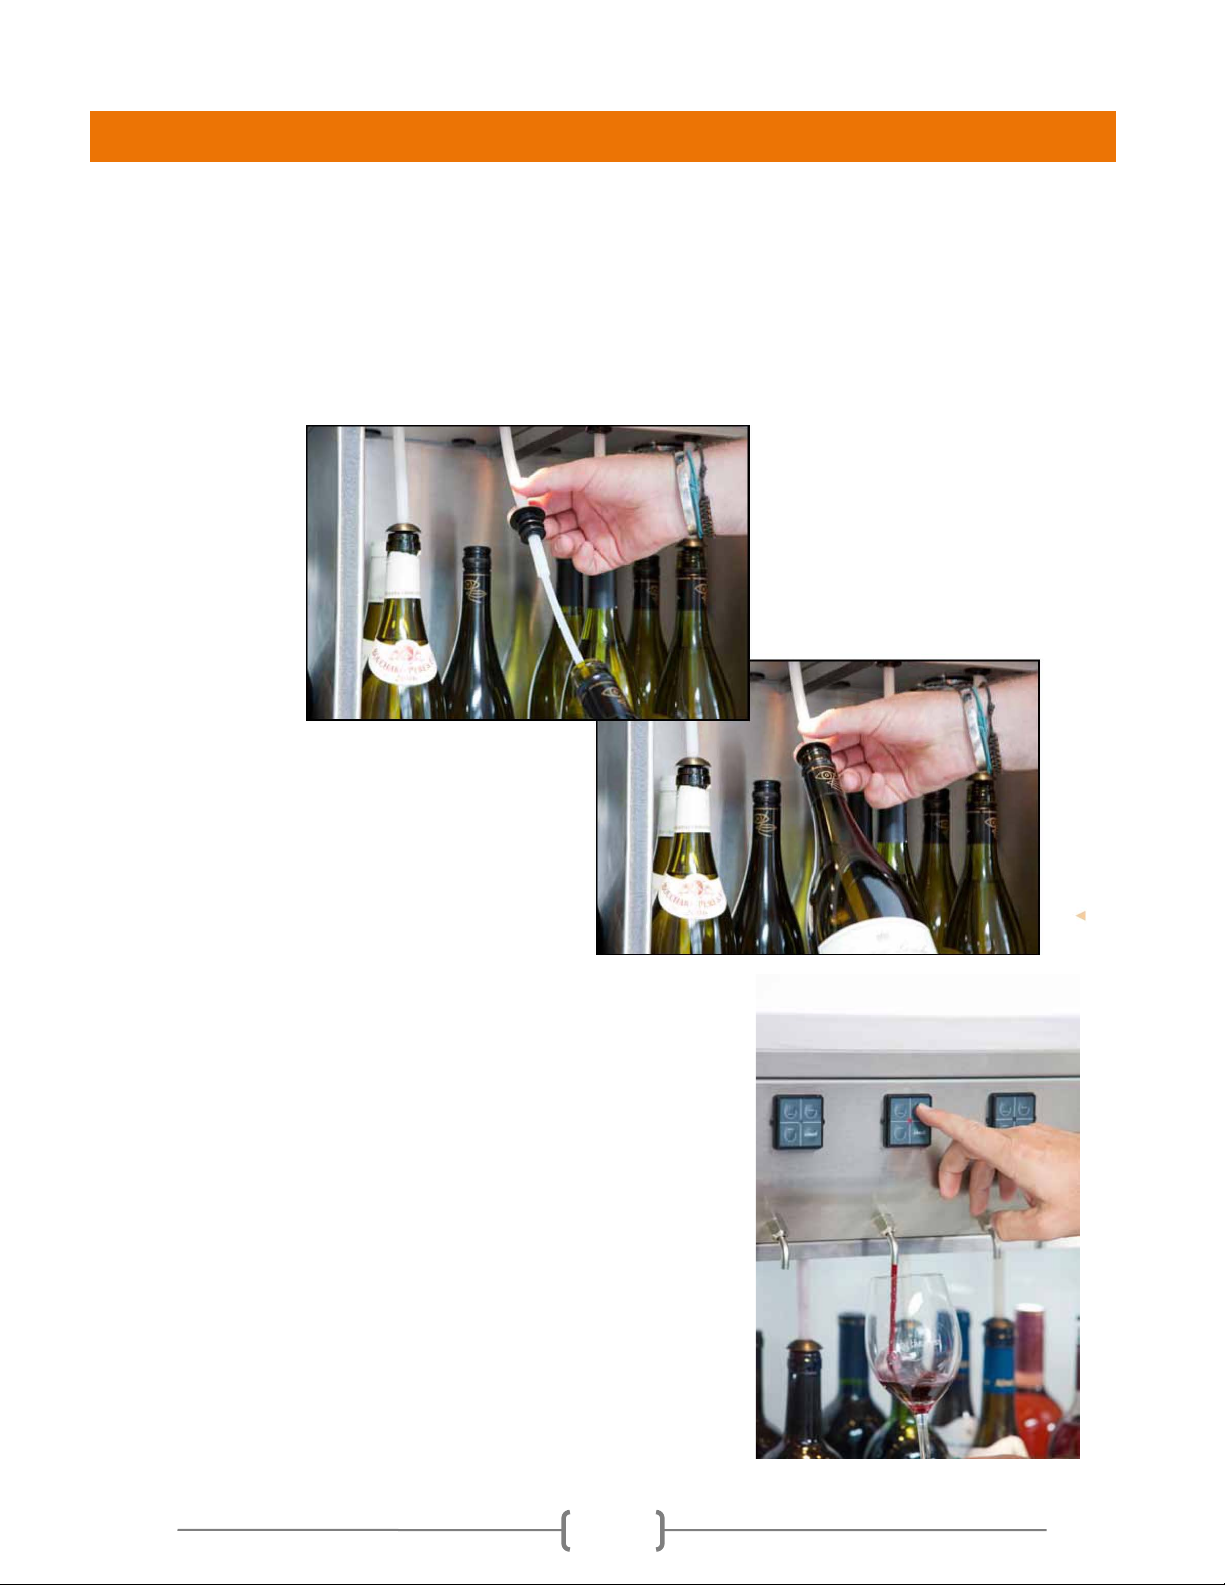
1. Remove carefully the flexible hose from the wine bottle.
2. Move the rubber plug down to the very end of strengthened larger part of
the hose and put it directly on the bottle.
3. Slide the bottle up on the hose carefully until it touches the bottom of the
bottle.
Close the bottle well using a rubber plug.
4. Place the bottle in the wine dispenser.
.dispenser
Argon bottle connection and pressure gauge
5. The wine dispenser is ready for use and you
can serve the wine now by pressing the
pouring button.
6. Fill the glass with required serving.
Placing bottles of wine in the dispenser
5
Thermostats are set up to hold the red wine area at a temperature of 64.4°F and
the white wine area at a temperature of 42.8°C. Take following steps to change
set-up:
Push SET button until the icon showing degrees Celsius starts flashing. Now,
the temperature may be changed by ▲ and▼ push buttons.
1. To confirm the new temperature, push the SET button once again.
2. If the SET button is pushed once, the thermostat will give the current
temperature in the wine dispenser.
If problems with the cooling sensors arise, symbols E-1, E-2 will appear on the
display. However the cooling system will not switch off and after some time,
the ice growth will occur again. If this happens, contact your servicing
department of By The Glass.
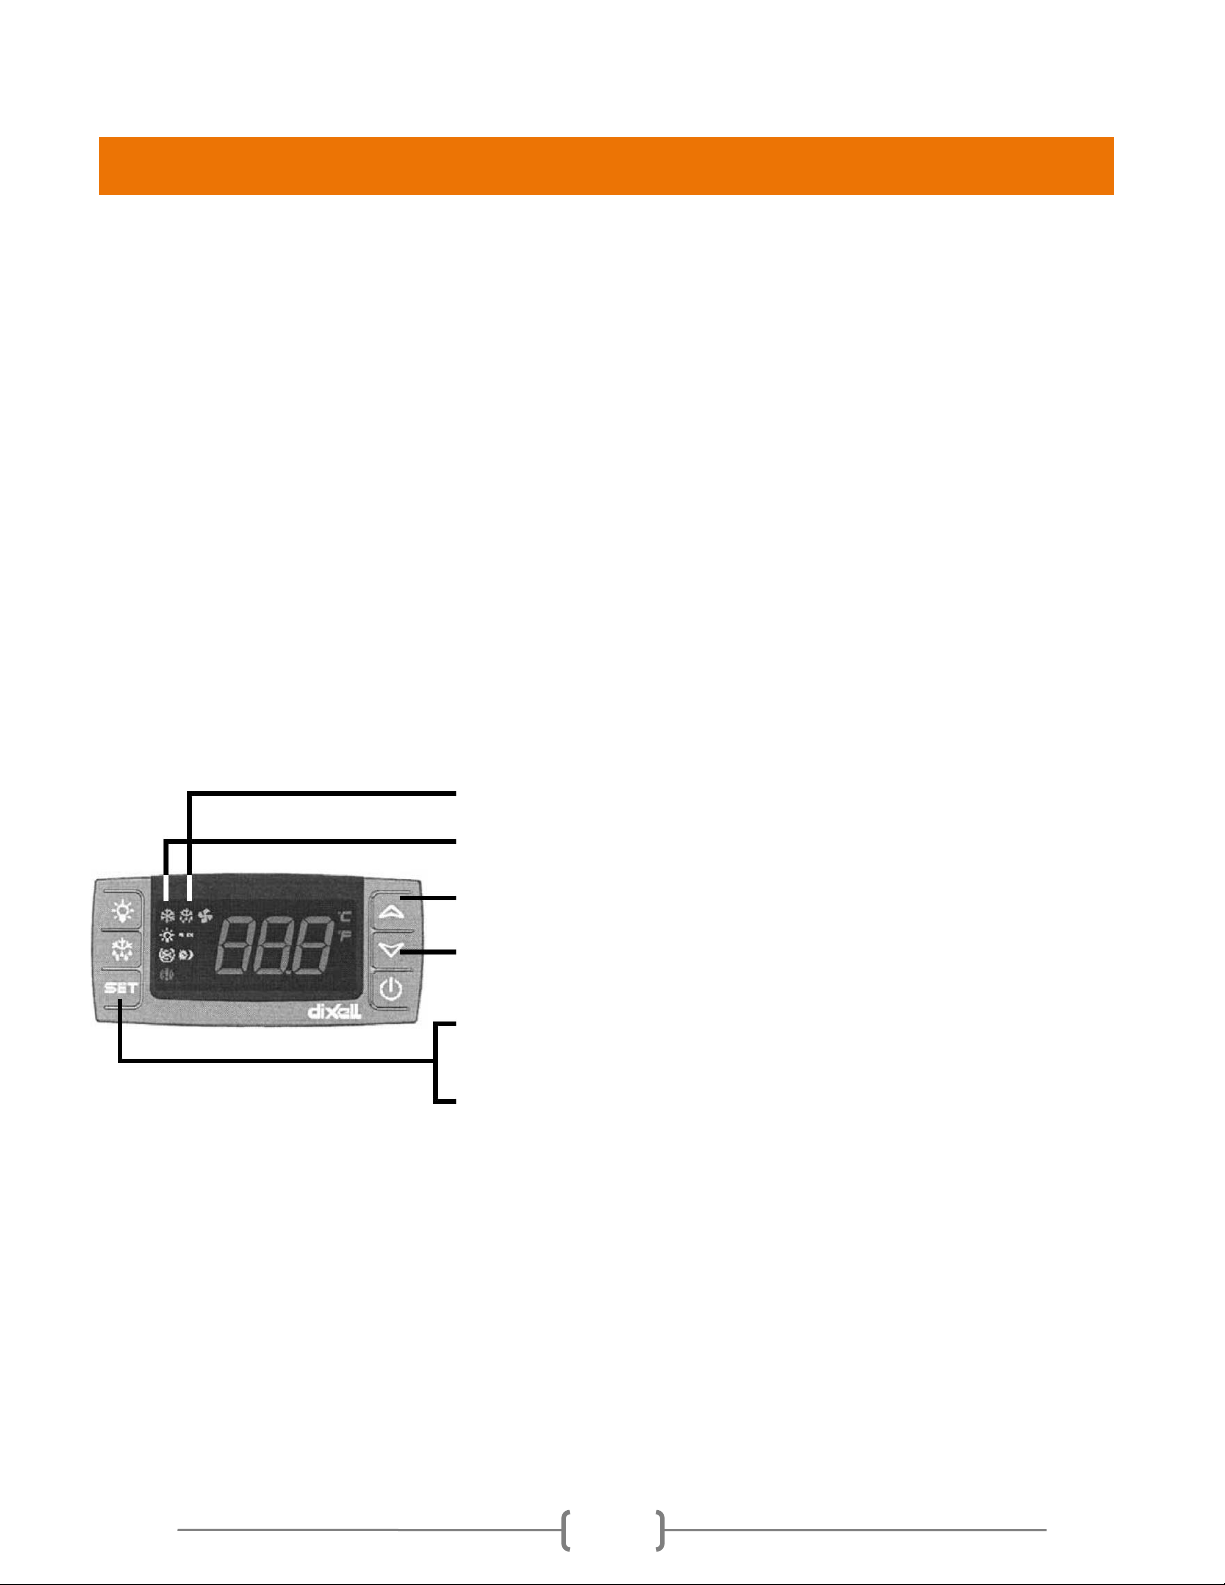
This light shows that defrosting program is in the
course.
The data show that the compressor is running.
The temperature can be increased with this button.
The temperature can be decreased with this button.
Hold the SET button for several seconds to set the
temperature.
Press the SET push-button once for indication of
real temperature.
Electronic Digital Thermostat

6
• White wine & rose wine: 42.8 – 48.2 °F
• White wine & rose wine: 42.8 – 48.2 °F
• Red wine: 60.8 – 66.2 °F
• Do not let the bottles of white wine lean against the back wall. The bottles
could get frozen.
• Before putting the dispenser in operation, it is recommended to clean the
inner side of the unit following the cleaning guide.
• Place the bottles so that those being served and those yet to be opened
are placed in the dispenser close to each other. Do not leave the sliding
door open. It is better to open the dispenser more times and close it again
than to leave the dispenser opened for several minutes. By doing this you
will avoid ice and condensation buildup inside the unit.
Switch the wine dispenser by pushing on/off switch on the unit thermostat.
Switch the light on or off by pushing the lighting switch of the white wine
thermostat.
Wine temperature and storage
Activation and operation
7
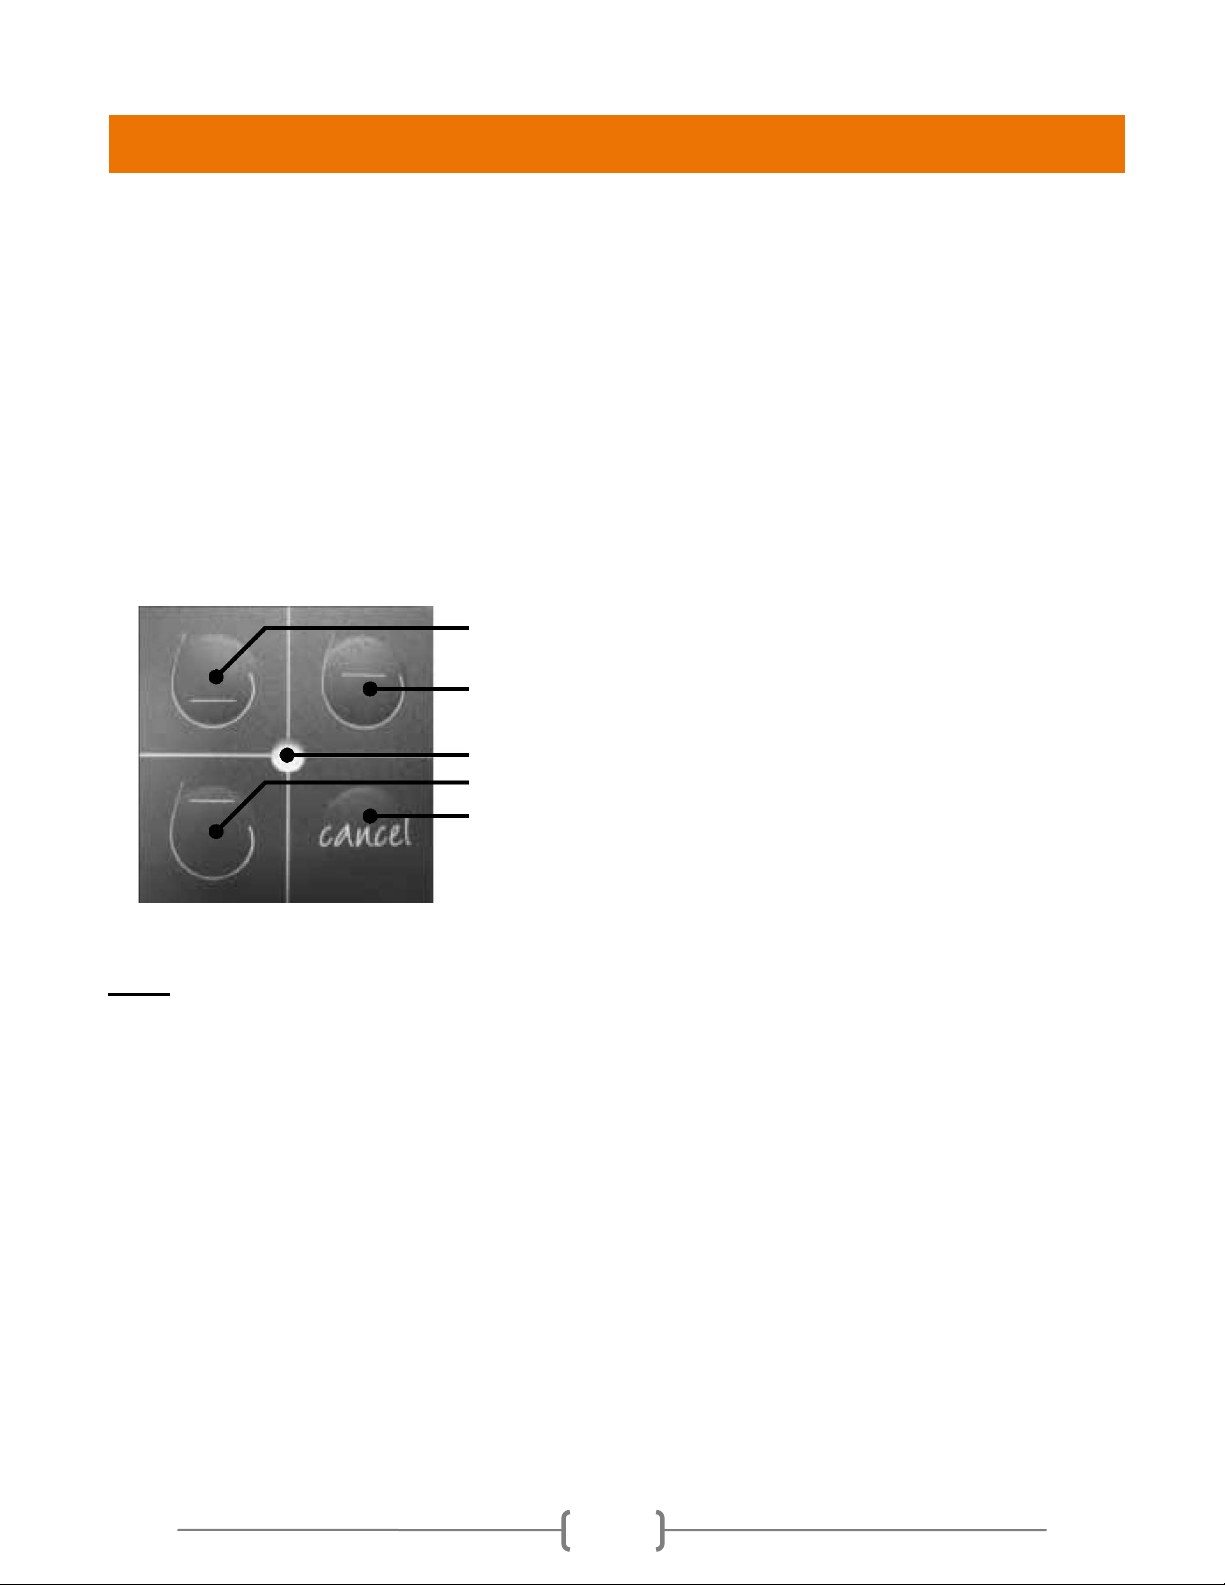
Programming the control panel
1. Hold glass under the dispensing valve.
2. Press button 1 and button 2 simultaneously until LED in the centre lights
up.
3. Fill glass by pressing one of the buttons 1, 2 or 3.
4. Press button 4 “Cancel” when the desired volume in the glass is reached.
By doing so total running time is saved.
5. Repeat this for the other 2 buttons.
6. Repeat the above for the other control panels.
Button 1: Portion size “Small
Button 2: Portion size “Medium”
Position of LED
Button 3: Portion size “Standard”
Button 4: Interrupt dispensing or Manual
dispensing
Note: Changes in pressure will change the pre-set volumes. Therefore it’s
important to keep the pressure on the same level after programming the control
panels.
Programming and usage of the control panel

8
Defrost and Clean
The wine dispenser will defrost automatically and the water produced will be
collected in the drain hose via a catchment tray. The hose may be connected to a
permanent drainage or an electrical evaporator.
• Inner and outer side of the wine dispenser should be cleaned with a slightly
wet cloth. Never use high-pressure cleaners.
Notice: Furthermore, never use chemicals, gasoline, alcohol,
detergents, disinfectants, vinegar, oil, acids, abrasives, caustics etc.
for cleaning the Wine dispenser. These materials could cause pitting
and oxygenated places on the stainless steel.
• 17. Pipelines cleaning
Periodic cleaning with citric acid
• Remove all bottles of wine for the duration of the cleaning. Take a clean
empty bottle and fill this with the citric acid and water solution.
• Cleaning agent P3-Ansep CIP can be purchased from By The Glass and is
guided with instructions. Never use lemon juice!
• Flush all pipes one by one with the solution and make sure the liquid stays
in the pipes for 15 minutes to soak. Use one bottle per position. Flush with
ample clean water, connect the wine bottles and with the cancel button
flush the remaining water out of the system until only wine is coming from
the metal tap/spout.18. Wine dispenser defrosting
General Cleaning
Wine dispenser defrosting
This manual suits for next models
1
Table of contents
Other By The Glass Beverage Dispenser manuals


Popular Beverage Dispenser manuals by other brands


Marvel
Marvel ML24BN Series Installation, operation and maintenance instructions

Cecilware
Cecilware 2K-GB-LD Catalog

Sure Vend
Sure Vend 673 Setup guide

Cornelius
Cornelius 2 Flavor Post-Mix Cold Coffee Dispenser Quest... Technical specifications

Nostalgia Electrics
Nostalgia Electrics KEG7000SS instruction manual

Bunn
Bunn LCR-3 HV Installation & operating guide


