•Mount the supplied pressure regulators accessibly and easy to read on a wall or
in the appropriate furniture piece. When choosing the mounting location, make sure
that the lines can be connected with the least possible torsion, so that they are
not under tension and move as little as possible during operation.
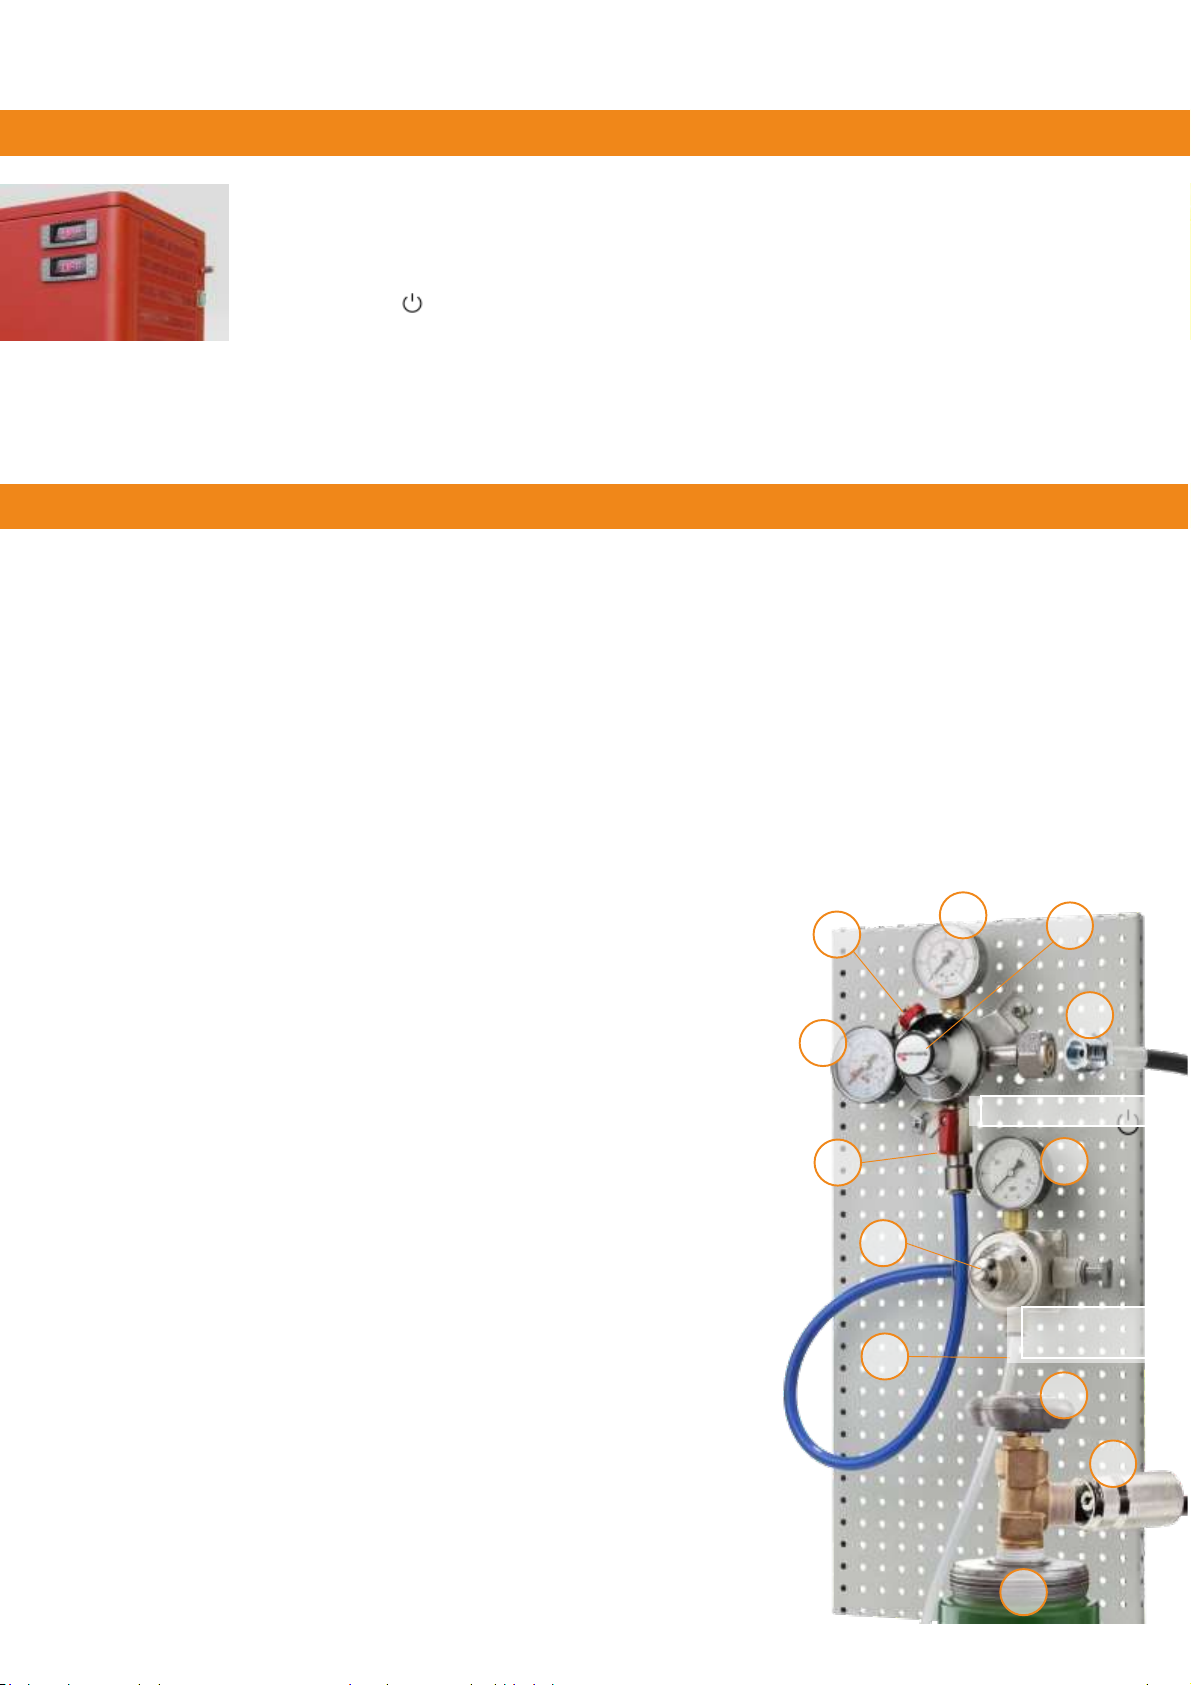
•Connect the high-pressure hose (8) to the high-pressure regulator. The thread
must be screwed very strongly and durably, to ensure tightness. Use two
matching wrenches, to avoid damaging the pressure regulator.
•Connect the quick coupling of the high-pressure hose (9) to the gas bottle. The
quick coupling has a safety mechanism that prevents the releasing of the
connection when under pressure. To release the connection, you must first close
the lever of the gas cylinder (11), and then release the pressure by means of the
manual release valve (4). (See also Para. 12 "Exchanging the Gas Cylinder".)
•Connect the low-pressure line of the Wine Dispenser (10) to the precision
pressure regulator. For this, pull off the red locking ring, and insert the tube all the
way into the plug-in connection. Secure the connection again with the red locking
ring.
•Close the shut-off valve (6) on the pressure regulator (horizontal position), and then
slowly open the cock of the gas cylinder (11). First, check whether the connections on
the high-pressure regulator (8) and the cylinder (9) are audibly proof.
•Now set the transition pressure (2) with the adjustment screw (5). Upon delivery, the
valve is closed, and the display shows “0”. Turn the Allen screw under the cover in
clockwise direction until the indicator (2) shows 1 to max. 1.5 bar. If the pressure
exceeds 1.5 bar, turn the screw backwards. For the indicator to drop, you must first
let out gas manually via the release valve (4).
•Now open the red lever (6), and adjust the discharge pressure (3) with the
adjustment screw (7) on the precision pressure regulator provisionally. Upon
delivery, the valve is closed, and the display shows "0". Keep turning the adjusting
screw clockwise, until the display shows a pressure between 0.25 and 0.4 bar (see
Para. 11 for subsequent fine adjustment of the discharge pressure).
•First check the tightness of the system. You can test the tightness reliably by closing
the gas cylinder again (11), while keeping an eye on the pressure gauge for the inlet
pressure (1). If even after several minutes, the manometer for the inlet pressure
doesn't drop, the system keeps the built-up pressure and is therefore tight.
•If, however, after closing the gas bottle, the inlet pressure drops after a few minutes,
this indicates a leak. The check for possible leaks at the joints can be performed with
a leakage spray by looking for bubbles forming.
7
Warning:
Always open the gas cylinder slowly and not abruptly, to prevent damage to
the lines and the pressure reducers.