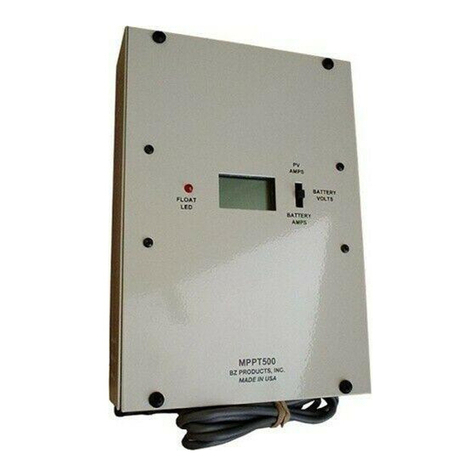
BZ PRODUCTS M20+ User manual

BZ PRODUCTS, INC.
INSTALLATION MANUAL
VERSION 2.0
MODELS M20+ and M25 PWM CHARGE CONTROLER
CAUTION! READ ALL INSTRUCTIONS PRIOR TO
INSTALLING OR USING THIS EQUIPMENT
SAFETY INSTRUCTIONS:
Refer service to qualified service personal. Incorrect installation may result in risk of fire. Remove all
sources of electrical power, photovoltaic and Battery before servicing this equipment. Never charge a
frozen Battery. Warning! Batteries produce explosive gasses. Install batteries in a well ventilated
area. Follow Battery manufacture maintenance and charging recommendations. Install properly
rated fuses PV and Battery circuits. Do not connect to generators or alternators.
CONNECTING BATTERY REVERSE POLARITY TO THE BATTERY OR PV WIRE
CONNECTIONS WILL DAMAGE THE CONTROLLER AND VOID THE WARRANTY.
DESCRIPTION: The M20+ / M25 PWM charge controller is a dual voltage (12 and 24 volt), high
efficiency shunt type PV charge controller capable 25 amps charge current. The remote digital meter
displays Battery volts and PV charge current in amps. A four LED Battery gauge indicates relative Battery
charge at a glance. The meter assembly may be mounted up to 25’ from the M25 control module. Four
large wire connectors accept up to # 2 wire. A low loss Schotkey diode prevents night time Battery
discharge. Float voltage is easily adjusted to suit any Battery chemistry. An internal MOV provides
lightning protection. Battery temperature compensation is standard. An auxiliary 13.7 volt (fixed voltage)
100 ma trickle charger is provided to charge engine or generator start batteries.
SYSTEM LAYOUT: Plan your installation. Install the M20+ / M25 control unit near the Battery bank.
Avoid installing the controller in wet, damp or small confined locations. Use short direct wiring. Install the
controller in accordance with state, local and national electrical codes. Securely fasten the controller to a
wall or other suitable structure. Provide support for all wiring. Place the Battery temperature sensor near
the batteries. Install properly rated fuses.
Install the M25 meter in any convenient location. A twenty five foot cable connects the M25 meter to the
M25 control unit. The cable connectors are keyed so that they connect properly. Insert the connector in the
M25 control unit. Run the interconnect cable from M25 control unit to the M25 meter and connect to the
meter connector. Use the M25 meter template to mark the cut out for the meter. A minimum of two inches
clearance is required behind the M25 meter. Do not pull on the meter cable connectors. Four black screws
are provided to mount the M25 meter.
WIRING: Use high quality stranded wire. Solid wire is not recommended. The M20+ / M25 Battery and
PV wire connectors will accept up to # 2 wire. The auxiliary Battery charger connector will accept up to #
14 stranded wire. Protect wire from damage. Clearly labeling all wiring with permanent wire markers will
simplify installation and help prevent wiring errors. Permanent wire labels are available from most
electrical parts suppliers. Route wiring as directly as possible to the PV panels and Batteries. Take care to
follow the wiring diagram exactly. Plastic insolating bushings are provided to protect the wiring from
chafing. Install properly rated fuses in the Battery, PV and Auxiliary Battery circuits as indicated.

USE CAUTION WHEN CHANGING FUSES.
FUSES: Separate fuse are required for the PV, Battery and auxiliary Battery circuits. See wiring diagram
for more information. Install the Battery fuse within nine inches of the Battery positive terminal.
PV and Battery fuses and fuse holders are not provided.
BATTERY and PV FUSE RATINGS: Properly rated fuses are required in all installations. Refer to the
fuse selection charts to determine the proper fuse ratings.
FUSE SELECTION CHART FOR 12 VOLT SYSTEMS
PV CURRENT 6 AMPS PV 100 WATTS BATTERY & PV FUSE RATING 10 AMPS
PV CURRENT 12 AMPS PV 200 WATTS BATTERY & PV FUSE RATING 20 AMPS
PV CURRENT 18 AMPS PV 300 WATTS BATTERY & PV FUSE RATING 25 AMPS
PV CURRENT 24 AMPS PV 400 WATTS BATTERY & PV FUSE RATING 35 AMPS
FUSE SELECTION CHART FOR 24 VOLT SYSTEMS
PV CURRENT 6 AMPS PV 200 WATTS BATTERY & PV FUSE RATING 10 AMPS
PV CURRENT 12 AMPS PV 400 WATTS BATTERY & PV FUSE RATING 20 AMPS
PV CURRENT 18 AMPS PV 600 WATTS BATTERY & PV FUSE RATING 25 AMPS
PV CURRENT 24 AMPS PV 800 WATTS BATTERY & PV FUSE RATING 35 AMPS
AUXILIARY BATTERY FUSE: Install a one amp fuse and fuse holder within nine inches of the
auxiliary Battery positive terminal.
DURING OPERATION THE M20+ / M25 MAY FEEL WARM
OPERATION: The M20+ / M25 is fully automatic. If the Battery voltage is lower than the float voltage
then full PV charge current is applied to the Battery. When the Battery voltage equals the float voltage the
M20+ / M25’s PWM circuitry activates and maintains the float voltage. During PWM operation Battery
charge current will diminish and the float LED located inside the M20+ / M25 control module will light.
The M20+ / M25 meter assembly displays Battery voltage or battery charge current depending on the
position of the meter selector switch. A four position switch located in the power unit selects between
12 and 24 volt operation and turns on or off the four LED Battery gauge. Voltages double in 24 volt
operation.
FLOAT VOLTAGE CALIBRATION: Battery float voltage is pre-calibrated to 14. 1 (28.2) volts. In
most installations the float voltage needs no adjustment. Check Battery manufacture specifications
for proper charge voltage.
To adjust the float voltage, switch the meter selector to display Battery voltage. Remove the top cover of
the M20+ / M25. Locate the float voltage adjustment, see wiring diagram. Using a 1/8” flat screw driver.
Adjust the float control in small increments until the desired float voltage is displayed on the M20+ / M25’s
digital meter. Clockwise increases the float voltage and counter clockwise reduces the float voltage.
Reinstall the top cover.
The Battery float voltage is temperature compensated for properly charging the Battery over a wide
temperature range. Battery voltage will be higher in cold temperatures and lower in warm temperatures.

AUXILIARY BATTERY CHARGER: The M20+ / M25 features a fixed voltage (13.8 volt) .1 amp
output trickle charger to keep engine/generator start batteries fully charged.
LED BATTERY GAUGE: Four LED’s form a easy to use Battery gauge. When all the LED’S are lit the
Battery is fully charged. As the Battery voltage drops the first Green LED will go off. When more power is
used from the battery the second Green LED will go off. As the battery discharges the Yellow LED will go
off. When only the RED LED is lit the battery is nearly empty. When all the LED’S are off the battery is
discharged. For best Battery life do not completely discharge the Battery. See specifications for LED turn
off voltages. The LED Battery gauge may be turned off by switching position 4 on SW1 to the left. See
wiring diagram for details.
MAINTENANCE: The M20+ / M25 requires little maintenance. Clean the M20+ / M25 meter assembly
and power module with a damp cloth. Inspect all wire connections. Tighten all connections as required.
Recalibrate float voltage if required. Visually inspect the entire PV system for damage. Keep the PV array
clean and properly aligned to the sun. Keep batteries clean. Follow Battery manufactures maintenance
recommendations.
WARRANTY: BZ Products, INC. Model M20+ / M25 is warranted to be free of defects in material and
workmanship for five years from the date of purchase. Failure to provide correct installation, operation or
care for this product, in accordance with the instruction manual, will void the warranty. Product liability
shall be limited to repair or replacement, at the discretion of the manufacture. The manufacture is not
responsible for the labor or other charges necessitated by the removal, transportation, or reinstallation of
any defective product. Warranty does not cover damage due to, mishandling, abusive conditions, lightning,
or exposure to weather. No specific claim of merchantability shall be assumed or implied beyond what is
printed in this manual. No liability shall exist from circumstances arising from the inability to use this
product, or it’s inappropriateness for any specific purpose. In all cases, it shall be the responsibility of the
customer to insure a safe installation in compliance with local, state and national electrical codes.
RETURN PROCEDURE: To return a model M20+ / M25 for repair provide the following information.
Name/Company name, return address, daytime phone number, description of failure, copy of sales receipt.
Return shipping charges collected via COD.
BZ PRODUCTS, INC.
7914 GRAVOIS ROAD St. LOUIS MO 63123 USA (314) 644-2490
SPECIFICATIONS: Note for 24 volt systems Battery and LED meter voltages double.
PV charge current 25 amps continuous Digital Meter .5” LCD display
Surge current 40 amps 10 min. DC volts range 0-99.9 volts ±.5%
Array voltage open circuit 60 volts DC amps range 0-99.9 amps ±.75%
Surge voltage 75 volts Temp. comp. -18mV/°C nominal
Min Battery voltage 5 volts Voltage drop <.6 volts @ 30 amps
Operating temp. -20 to + 50°C Storage temp. -30 to + 70°C
Float voltage range 12.5 to 15.5 volts Weight 2 pounds
Operating current .05 amps nominal Float regulation ± .05 volts nominal
Wire size # 2 max AWG Mounting # 6 screws
Battery size 100 AH minimum Reverse current .01 amps nominal
Wire access 1/2” conduit Float voltage 14.1 (28.2) volts
Lightning protection MOV 1000 watts Size (meter) 5 3/4” X 3 1/4”
Auxiliary Charger 13.8 volts .1 amp (fixed) Size (control) 6” X 7” X 1 1/2”
M25 meter cable 25’ Finish Black powder coat
LED battery gauge Red = 12.2 volts, Yellow = 12.7 volts, # 2 Green = 13.2 volts # 1 Green = 13.7 volts.

PV+ PV- BATT+ BATT-
AUX
BATT
EARTH
GROUND
PV FUSE
PV ARRAY
12 OR 24 VOLTS
BATTERY FUSE
9" FROM
BATTERY
+
FLOAT
ADJUSTMENT
METER JACK
1 AMP
FUSE
9" FROM
BATTERY
#2 MAX WIRE SIZE
STRANDED WIRE ONLY
1
2
3
4
JI
M20+ / M25 WIRING DIAGRAM
FLOAT LED
VER 2.0
SW 1
+ -
+ -
+ -
AUXILIARY
BATTERY
12 VOLT ONLY
MAIN BATTERY
12 OR 24 VOLTS
14.1
METER
METER CABLE
REFER TO INSTALATION INSTRUCTIONS
FOR PROPER FUSE RATINGS
GREY BATT TEMP
SENSOR POSITION
ON OR NEAR MAIN
BATTERY
ON ON 1
2
3
4
+ -
12 VOLT OPERATION 24 VOLT OPERATION
This manual suits for next models
1
Table of contents
Other BZ PRODUCTS Controllers manuals