Cablematic VV08 User manual

1
DVR Digital Video
Recorder 8CH H.264 VGA
CBVS D1 HDMI
User Manual!

2
Content
1 Overviews 3.............................................................................
1.1 Description 3...................................................................
1.2 Installation environment 3...................................................
2 Installation 4...........................................................................
2.1 Preparation 4...................................................................
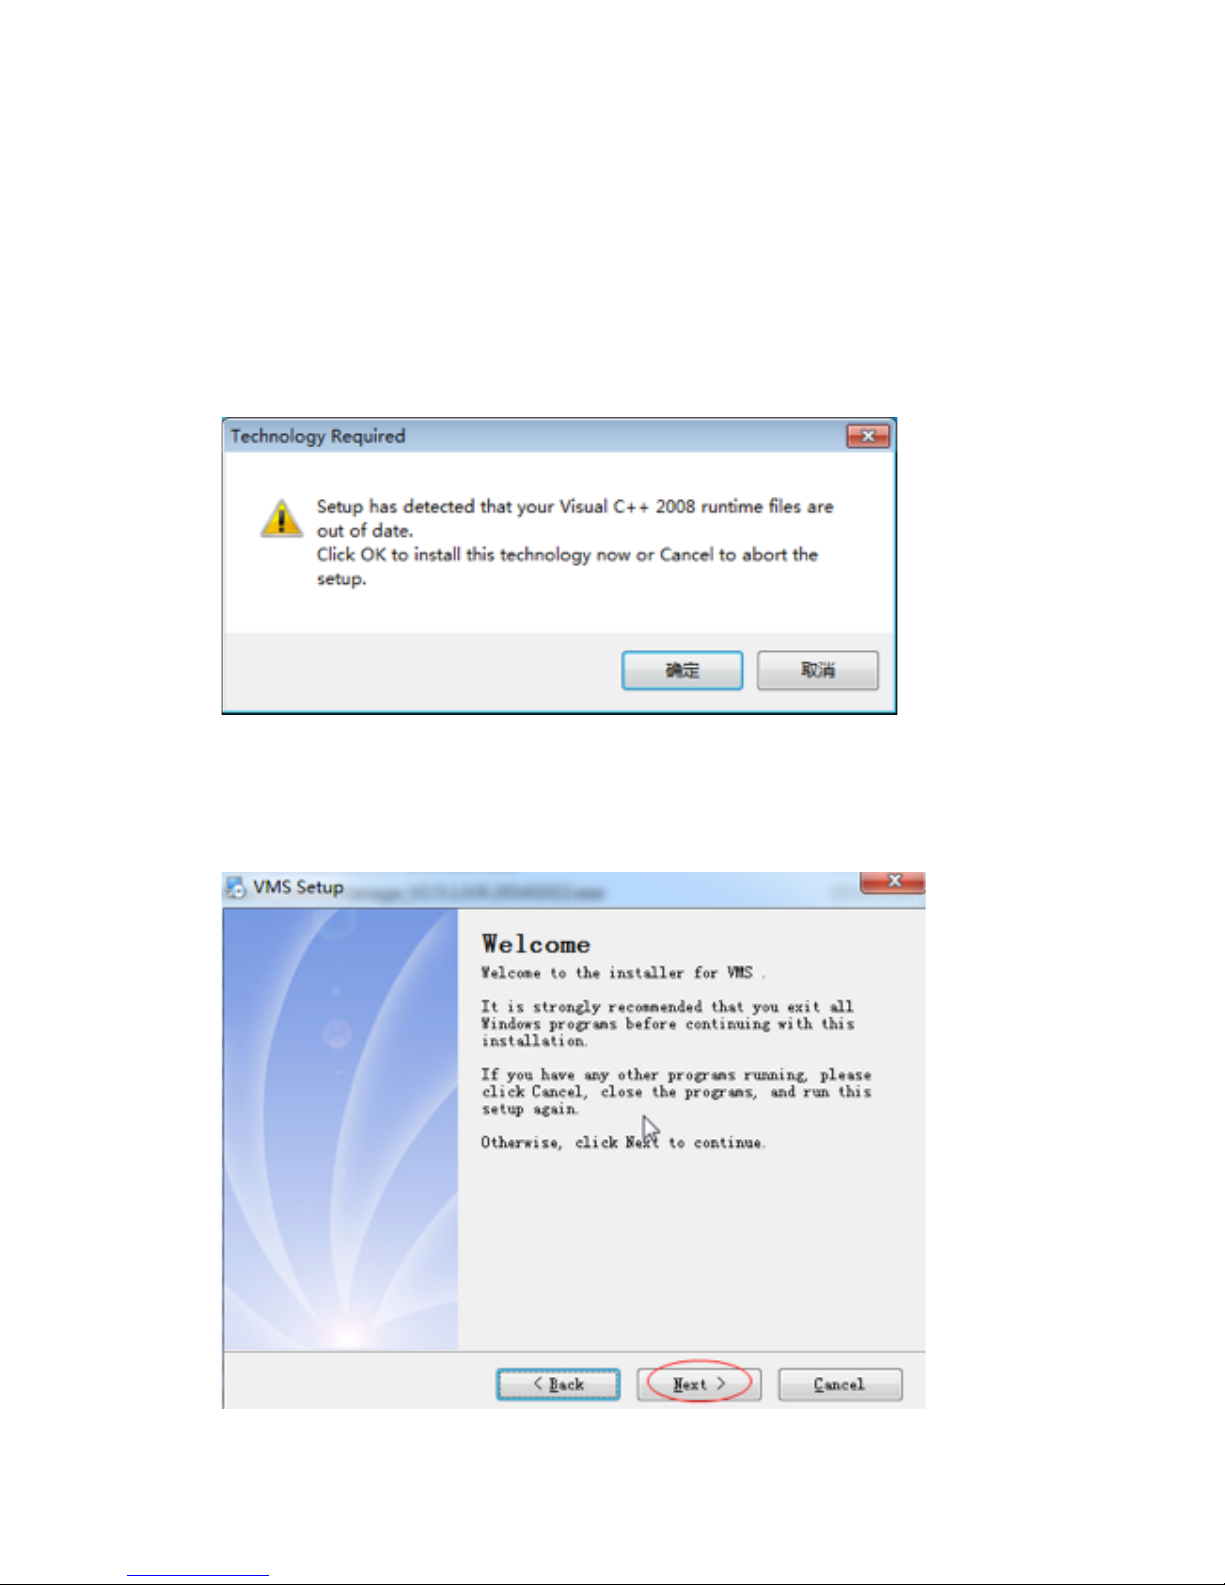
2.2 Installation 4...................................................................
3 Functional Specification 5............................................................
3.1 Log-in page 5...................................................................
3.2 Wizard 5........................................................................
3.3 Device Manager 6.............................................................
3.3.1 Search IP in LAN and Add 6...........................................
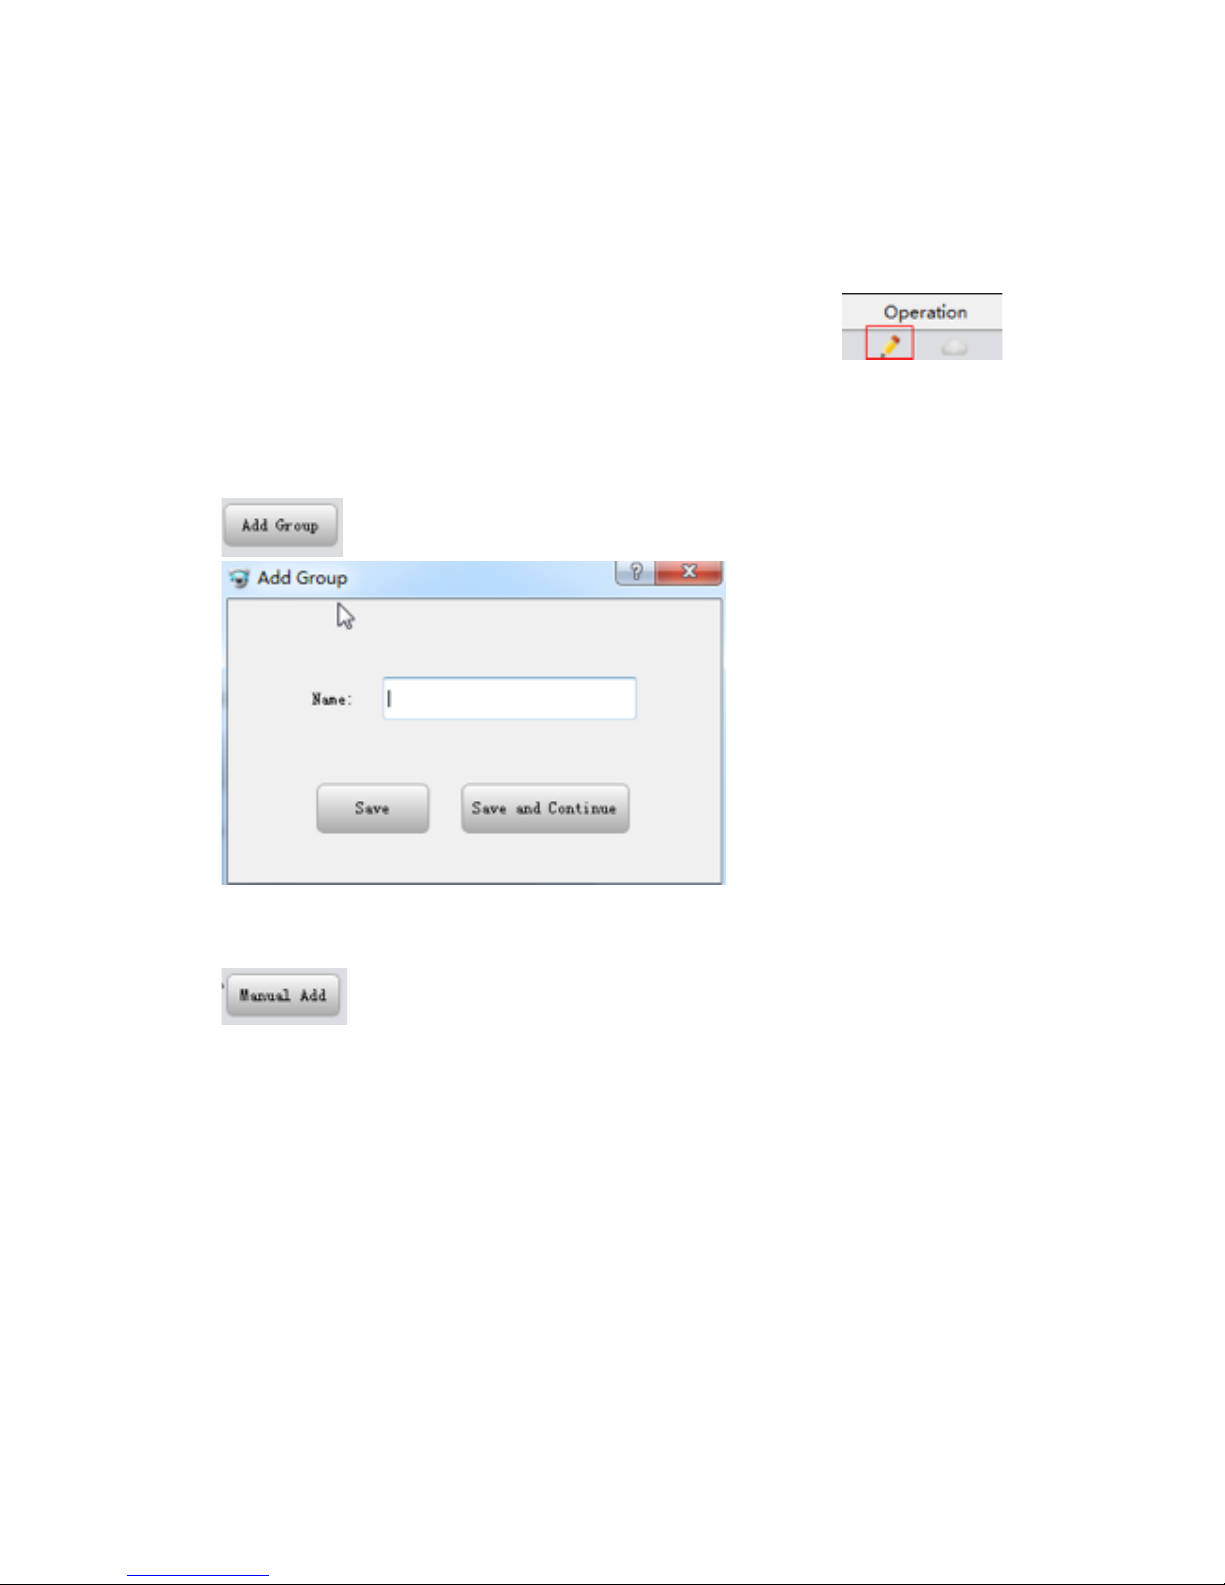
3.3.2 Add Group 7.............................................................
3.3.3 Add devices manually 7...............................................
3.3.4 Close window 8.........................................................
3.4 Monitoring 9....................................................................
3.4.1 View 10..................................................................
3.4.2 other features 11......................................................
3.5 Playback 12.....................................................................
3.6 Record Settings 13.............................................................
3.6.1 Storage settings 13....................................................
3.6.3 Record settings 13....................................................
3.7 Log 14...........................................................................
3.8 Alarm info 14...................................................................
3.9 Device Config 15...............................................................
3.9.1 Network 16..............................................................
3.9.1.1 Set device’s IP 16..............................................
3.9.1.2 PPPOE 16........................................................
3.9.1.3 Email 16.........................................................
3.9.1.4 FTP 17...........................................................
3.9.1.5 RTSP 24..........................................................
3.9.1.6 Cloud 25.........................................................
3.9.1.7 DDNS 25..........................................................
3.9.1.8 DAS 25...........................................................
3.9.2 Encode 27...............................................................
3.9.3 Camera parameters 27................................................
3.9.4 System 28...............................................................
3.9.5 Version info 28.........................................................
3.9.6 Exception handling 29.................................................
3.9.7 video detect 29........................................................
3.9.8 Disk manager 30........................................................
3.9.9 Record config 30.......................................................
3.10 Alarm config 30...............................................................
3.11 Tour 31.........................................................................
3.12 System Config 32.............................................................
3.13 Extensions 32.................................................................

3
1 Overviews
1.1 Description
VMS is a newly developed client software for our products . The
suppressible toolbar, succinct GUI and rich functionality make it a very
intelligent and user-friendly monitoring management software which can be
used in various scenes.。
VMS support talk with device, instantaneous screenshots
VMS support multiple video preview at the same time.
VMS support intelligent tour plans to displace manual operations.
You can easily search video files that not only recorded in PC (Local side)
but also recorded in devices.
Different alarm features meet customer’s every need.
The further extensions---”My cloud” and “Maps” will make it more
convenient for practical application.
1.2 Installation environment
➢In theory the preview number is 64 * 4. The actual preview number is
limited by the properties of the server, the resolution of devices (bit
rate) ,network bandwidth etc.
Operating system:
Windows system( it would support Mac and Linux
system in subsequent version)
CPU:
Above 2.4GHz
Memory:
Above 1GB
Graphics:
Discrete graphics

4
2 Installation
2.1 Preparation
When installing the VMS, it would prompt you to install Visual C++ 2008
first. This is to ensure your PC has installed all library files the VMS needs.
So if you see the following pop-up notification, please click yes to install it.
2.2 Installation
After installing Visual C++ 2008, choose language and start installing the
software.
Double click the shortcut icon on the desktop:

5
3 Functional Specification
3.1 Log-in page
Start VMS:
Input user name and password, click OK.
3.2 Wizard
There is a configuration wizard when you open the software for the first
time. It is to select a way to add devices:
Add devices automatically:
auto add devices (in the same LAN) to VMS.
Add devices manually:
when you choose this way, you need to go to
‘Device Manager’ to add devices manually.
Do not show next time:
Tick it, this wizard won’t show again
Next:
Click it, it will go to the ‘Device Manager’
page.
Cancel:
To exit the wizard

6
3.3 Device Manager
➢If you choose “add devices automatically”in wizard , it will come to this
page and countdown to auto add devices.
➢If you choose “Add devices manually” in wizard, you can either choose
the discovered devices to add directly (as shown in the following
picture) or you can click “Manual add” to add manually(See 3.3.3).
3.3.1 Search IP in LAN and Add
➢Sometimes you may find that the device is in the left discovered list but

7
you can’t add it to VMS. This means that your device is physically
connected in the LAN but its IP is not in the same network segment with
your PC. You can either use the function 3----modify IP automatically(it
will auto change your device’s IP to the same segment with your PC), or
you can manually modify the device’s IP by double click IP/port in the
left list(as shown in the above picture).
➢If you want to add the discovered devices by Cloud ID,
click this icon, choose login type: by IP/Domain or by Cloud ID.
3.3.2 Add Group
If you have many devices , you’d better divide them into different groups .
click this button to add new group. The interface is as follows:
3.3.3 Add devices manually
click this button to add device manually. The interface is as
follows:
Device name:
Edit a name for the device to identify
different devices easily.
Group:
select a group for this device
Log-in Type:
Choose a way to add device,by IP/Domain
or by Cloud ID
By IP/Domain
IP/Domain
Device’s IP/Domain
Port
Device’s TCP port
By Cloud ID
Cloud ID(SN)
Device’s Cloud ID(Serial Number)
User name, Password
Device’s Username and password

8
➢If you need to add more than one devices , please Click ‘Save and
Continue’, then you can add continuously.
➢If you only need to add one device, please click ‘OK’.
➢If you don’t want to add, please click ‘Cancel’.
3.3.4 Close window
Click the cross to close the window(as shown in the above pic).

9
3.4 Monitoring
◇There will be description when you put mouse on the icon
❖VMS support up to 4 windows at same time(0). Click and drag, each can
be dragged out into a separate window. This is very convenient for
multiple screen monitoring. Each window can see 64 channels at most,
64*4=256. So, in theory, you can see 256 at most. As said in overviews,
the actual preview number is limited by the properties of the server, the
resolution of devices (bit rate) ,network bandwidth etc.
1
Devices list. You will find all the devices you added, arranged in
groups.
Display devices’ name and device status, the red cross means the
device is not online
2
Support 1/4/6/8/9/16/25/36/64 split. Support Maximize window
3
4
View(see 3.4.1)
save view tour(see 3.11)

10
3.4.1 View
Double click the device name in the right list, or right click to choose main/
extra stream to connect real-time video. If you wanna the VMS remember
the view, please click ‘save view’ icon , save the current view. For
example:
Firstly ,I connect the devices as the following pic shows, then I save that
view as 11.
next time, I don’t have to connect one by one again, just need to double
click the saved view 11 .And it will show exactly same as ever.

11
3.4.2 other features
Put mouse on the top of current activity box, the auto-hiding toolbar will
appear.
Choose display scale, auto resize
turned on by default.
Temporary manual record

12
3.5 Playback
Click Playback icon in main interface.
Step 1: Choose local(PC) or devices according to where the video is stored.
Step 2: It shows the selection result in step 1.
Step 3: Choose query objects, from a group ,a device to a specific channel
of a DVR.
Instantaneous screenshots
Click to enable audio
Disconnect the video
Adjust the color of video on VMS,
Not of the device.

13
Step 4: Choose video type
Step 5: Choose date and time
Step 6: Click Search
Step 7: All video files that conform with search criteria are displayed at
bottom left. Double click any file, start to play.
3.6 Record Settings
3.6.1 Storage settings
➢Automatically identify the PC disk. The whole disk is used for storing.
➢The disk reverse space is specially set aside not to store video
3.6.3 Record settings
1.Select window
2.Tick enable
3.Click Apply to save
VMS will start recording once the selected window connect video.
➢Restore default---reset all record settings of VMS.

14
3.7 Log
On this page, you can search the operation Log of the client and device.
3.8 Alarm info
It shows all alarm info detected by VMS .
Red marks mean unprocessed. Double-click to change the processing status.
❖When VMS is running, you will find an alarm message floating window at
the top right corner. You can click to read the alarm message or right
click to hide it.
❖If you manna VMS show alarm prompt, you must enable the alarm
features both on device( see 3.9.7 )and VMS(see 3.10)

15
3.9 Device Config
➢All icon is gray before you choose a device. It will show the
corresponding function-option according to the device type you choose.
➢Full function-option for IPC( as shown in above pic).
➢For NVR, there is no Encode and Camera Parameters as the following pic
shows.
Click on the corresponding function to set and operate .

16
3.9.1 Network
3.9.1.1 Set device’s IP
3.9.1.2 PPPOE
1) Why: Device can build a connection with internet based on PPPOE.
2) How:
.the cable connected to device’s Ethernet port must support PPPOE;
.plug-in cable, then input user name and password provided by ISP.
三.Reboot the device.
3.9.1.3 Email
1) Why: with necessary parameter settings, the device will send alarm
information and snapshot picture to appointed mailbox.
2) How:
.Before you use email, make sure your device is connecting with
internet(that’s because the device need to connect to the mailbox server)
.Email configuration, as the following pic shows:

17
三.Click test, if it show success, please go to mailbox to check whether
you get the test mail.
3.9.1.4 FTP
1) Why:FTP is available only when alarm happens,it can upload related
record files and snapshot pictures to FTP server.
2) How:
➢You need to bu i l d a F T P server first if you don’t have a ready-made FTP
server . Here is a way to build a FTP server by Serv-U software.
a. Install the Serv-U software
b. After installing the software,it will appears the step wizard which help
you to define the domains and users,see as follow pic:
pic 1
Click"Yes",enter the next setting interface,see as pic 2

18
Pic 2
Input name and description,click"Next"
Pic 3
Click "Next",and see as pic 4. Choose your PC’s IP as the built domain’s IP
from the drop-down box.

19
Pic 4
Click"Next"
Pic 5
Click"Finish",the domain already had been defined,next step wizard will
help you define users

20
Pic 6
Click"Yse",it will appears a tip,see as pic 7
Pic 7
Click"Yse",enter the user wizard step 1
Pic 8
Input Log-in ID,Full name,Email Address messages,and click"Next"
Table of contents
Other Cablematic DVR manuals