Calex PyroSigma Series Manual

PyroSigma Series
Operator’s Guide

General
Measurement Temperature Range 0 to 1000°C
Analogue Output Selectable 0-5, 1-5 or 0-10 V DC, linear with
measured temperature
Alarm Output Open collector with adjustable temperature
threshold and hysteresis
Field of View 15:1 divergent optics (see OPTICS)
Accuracy ± 1.5% of reading or ± 1.5°C, whichever is greater
Repeatability ± 0.5% of reading or ± 0.5°C, whichever is greater
Response Time 250 ms
Conguration Via built-in display and controls
Emissivity Setting Adjustable 0.2 to 1.0
Max Temperature Span (Linear Output) 1000°C
Min Temperature Span (Linear Output) 100°C
Spectral Range 8-14 µm
Supply Voltage 24 V DC (max. 28 V DC)
Min. Supply Voltage (at Sensor) 12 V DC (for 0-10 V output)
6 V DC (for 0-5 V or 1-5 V output)
Max Current Draw (Sensor) 30 mA
Open Collector Alarm Output 6 to 24 V DC, 50 mA max (see Electrical
Installation)
Environmental & Conformity
Environmental Rating IP65
Ambient Temperature Range 0°C to 70°C
Relative Humidity 95% max. non-condensing
Electromagnetic Compatibility (EMC) EN61326-1, EN61326-2-3 (Electrical Equipment
for Measurement, Control and Laboratory Use -
EMC Requirements - Industrial)
RoHS Compliant Yes
Mechanical
Construction Black anodised aluminium and blue ABS
Cable Length 1 metre standard (longer lengths available to order)
Weight with 1 Metre Cable 65 g
Conguration
Congurable Parameters Linear voltage output type and temperature range
Alarm output threshold and hysteresis
Emissivity setting
Reected temperature (e.g. for measuring a target in an
oven or furnace)
Temperature Units °C / °F
2
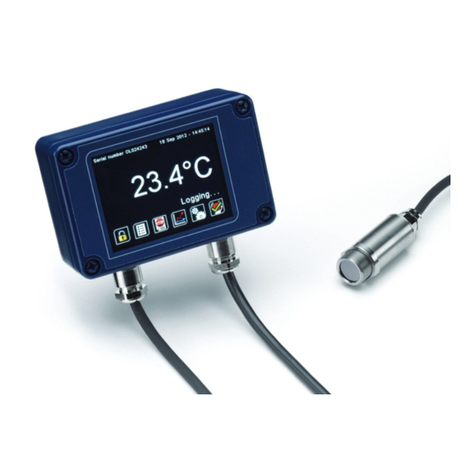
The PyroSigma is a xed-mount sensor for measuring the temperature of a surface without
contact. Its extremely small size makes it ideal for installation where space is restricted.
The sensor works by detecting infrared energy that is emitted by the target object. The
temperature is shown on the sensor’s built-in OLED display, and can be monitored
continuously via the DC voltage output, e.g. with industrial process instrumentation. The
sensor also has a congurable alarm output.
SPECIFICATIONS

ACCESSORIES
Accessories may be ordered at any time and added on-site. The following accessories are
available:
Fixed mounting bracket - Adjustable mounting bracket - Air purge collar
OPTIONS
Options are factory-installed and cannot be retrotted. The following options are available:
Certicate of Calibration - Extended cable
INSTALLATION
The installation process consists of the following stages:
Preparation - Mechanical installation - Electrical installation
Please read the following sections thoroughly before proceeding with the installation.
PREPARATION
Ensure that the sensor is positioned so that it is focused on the target only.
AMBIENT TEMPERATURE
The sensor is designed to operate in ambient temperatures from 0°C to 70°C.
Avoid thermal shock. Allow 20 minutes for the unit to adjust to large changes in ambient
temperature.
ATMOSPHERIC QUALITY
Smoke, fumes, dust and steam can contaminate the lens and cause errors in temperature
measurement. In these types of environment, the air purge collar should be used to help keep
the lens clean.
Sensor
CORRECT
INCORRECT
Target larger
than measured
spot
Target smaller
than measured
spot
Background
Distance: Sensor to object (inches)
Distance: Sensor to object (mm)
943 76
0.4 1.7 3.0
0 20 40
0500 1000
Spot
Diameter
(inches)
(mm)
D:S 15:1
OPTICS
The sensor measures the average
temperature within a spot. The size of this
spot depends on the distance between the
sensor and the target surface.
DISTANCE AND SPOT SIZE
Mount the sensor at a distance where the
measured spot size is smaller than the
target.
The spot size must not be larger than the
target.
3
The sensor may be used at longer
distances than shown, and will measure a
larger spot. The measurement accuracy is
not aected by the measurement
distance.
There is no maximum measurement
distance, provided the air between the
sensor and target is free of obstructions.
We normally recommend that the target
should be at least twice the size of the
measured spot for maximum accuracy.

ELECTRICAL INTERFERENCE
To minimise electromagnetic interference or ‘noise’, the sensor should be mounted away from
motors, generators and such like.
CABLE LENGTH
Check the length of the cable run between the sensor and the measurement instrumentation.
If necessary, the sensor can be ordered with a longer cable attached.
Also, the cable can be extended using a shielded cable with 4 or more cores (3 if the alarm
output is not used). Ensure the shield is also extended.
MECHANICAL INSTALLATION
All sensors come with a 1 metre cable and two mounting screws. The sensor can be mounted
on brackets or cut-outs of your own design, or you can use the xed and adjustable mounting
bracket accessories which are shown below.
The supplied mounting screws are for use with a panel or bracket at least 2 mm thick. The
screws are 8 mm long.
Between the mounting holes, there must be a hole to allow the sensor a clear view through
the panel or bracket. This hole must be larger than the lens of the sensor or the aperture of
the air purge, if used. Use as large a hole as possible. Ensure the mounting does not obstruct
the sensor’s eld of view (FOV); refer to the optical diagram in Specications and allow a clear
area twice the size of the FOV cone for maximum accuracy.
Note: The sensor must be grounded at only one point, either the cable shield or the mounting
screws, but not both.
MOUNTING BRACKETS
31.0 31.0
7.0
9.0
22.0
2 x Mounting Holes M4 Clearance
24.0
25.0
15.0
60°
60°
50.0
33.5
9.0
49.0
49.0
Ø13.5 Clearance 4 x Mounting Holes Ø3.2 on PCD Ø21.5
All dimensions in mm
4
Fixed Mounting Bracket Adjustable Mounting Bracket

AIR PURGE COLLAR
The air purge collar is used to keep dust, fumes, moisture, and other contaminants away from
the lens. It ts between the sensor and the mounting surface. Longer screws are provided for
use with a panel or bracket at least 2 mm thick.
Air ows into the hose barb tting and out of the front aperture. Air ow should be 5 to 15
litres/min.
Clean or ‘instrument’ air is recommended.
DIMENSIONS
INSTALLATION
All dimensions in mm
14.0
Ø13.5
Ø31.0
2 x Hole
Ø3.2
Section A-A
A
A
21.5
THIS
FACE
AGAINST
SENSOR
AIR
OUT
Air Inlet
Hose
barb
Ø 5 mm
Air inlet
5
Mounting bracket
or plate
Sensor
Sensor cable entry
Air purge collar
2 x screw, M3,
included with air
purge collar

All dimensions in mm
ELECTRICAL INSTALLATION / DIMENSIONS
!
!
Caution! Check the identication tags and ensure all
wiring is correct before applying power to the sensor.
* A choice of indicating controllers, providing
temperature display and relay outputs, is also available.
Contact Calex for more information.
+
+
-
-
PWR+
PWR-
OP+
21.5
Ø 31.0
30.0
13.3
AL
Optical eld of view
Output cable
Standard length: 1 m
(Red)
(Blue)
(Green)
2 x mounting holes
M3 x 0.5 mm
Depth 7 mm
Mounting screws included
Ø 3.2
nominal Congurable 0-5, 1-5 or 0-10 V DC
output, linear with measured
temperature, for display or controller*
Power supply
24 V DC
Open collector output
for alarm,
6 to 24 V DC, 50 mA max
Protection
diode
(Yellow)
6
POWER SUPPLY
Use a 24 V DC power supply.
Connect power between the PWR+ and PWR- wires. Do not apply voltage to the incorrect
wires as this will damage the sensor. See “Dimensions and Connections” for wiring.
IMPORTANT: Ensure the power supply is only connected to the PWR+ and PWR- wires, and the
polarity is correct, before switching the power on.
Ensure the supply voltage is suitable for the selected output type. For the 0-10 V DC output,
the supply voltage must be 12 to 24 V DC.
Do not switch the power o and on again quickly. If the power is switched o, allow 15
seconds before switching it back on.
If using the alarm output, choose a load that draws no more than 50 mA when powered from
1.2 to 24 V DC. For example, if the alarm supply voltage is 24 V DC, ensure the load is at least
480 Ω (24 V / 0.05 A = 480 Ω).

OUTPUT
The temperature output is a voltage signal, measured between OP+ and PWR-. The output
voltage is linear with measured temperature. The output voltage range is congurable in the
sensor’s Settings menu.
GROUNDING
The sensor is tested to industrial standards for electromagnetic compatibility (EMC) as shown
in Specications. For maximum protection against electromagnetic interference, the sensor
must be connected to earth at one point, either the cable shield termination or the metal
sensor housing, but not both.
To minimise electromagnetic interference or “noise”, the sensor should be mounted away
from sources of electromagnetic interference such as motors and generators.
OPERATION
Once the sensor is in position and the appropriate power, air and cable connections are
secure, the system is ready for continuous operation by completing the following simple
steps:
• Turn on the power supply
• Turn on the connected measurement instrument
• Read / monitor the temperature
DISPLAY / CONTROLS
21.3
RAW °C
• Enter settings menu
• Modify selected parameter
• Conrm / apply setting
Conguration buttons:
OLED display: 64 x 48 pixels
Temperature units (°C / °F)
Lock icon
(to change settings, unlock sensor)
Type of displayed
temperature:
RAW Unltered
measured
temperature
AVG Measured
temperature
with averaging
FIL Measured
temperature
with averaging
and peak/valley
hold processing
• Scroll between screens /
settings
• Press both simultaneously to
exit / go back
7

CONFIGURATION
Menu Setting Description
Emissivity Emissivity
Setting
Enter the emissivity setting (between 0.2 and 1.0). The
emissivity setting should match the emissivity of the target
surface. This can be determined experimentally by
comparing measurements with a trusted contact probe,
or estimated using an emissivity table.
Non-reective non-metals, such as rubber, foods, thick
plastics, organic materials and painted surfaces, generally
have a high emissivity, around 0.95. This is the default
setting.
Bare, clean metal surfaces can have a very low emissivity,
and are often dicult to measure accurately. If possible, a
measurable area of the surface should be painted or
coated to reduce reections and increase the emissivity.
Reected
Energy /
Reected
Temperature
In most applications, the target surface has the same
surroundings as the sensor (for example, it is in the same
room). In this case, Reected Energy Compensation
should remain Disabled for an accurate measurement.
This is the default setting.
However, if the sensor is positioned outside an oven or
furnace, with the target object inside, the reection of the
hot furnace interior can aect the measurement. In this
case, Reected Energy Compensation should be Enabled
and Reected Temperature should be set to the
temperature inside the oven or furnace.
Filtering Filtering settings are applied to the sensor’s voltage and alarm outputs.
They are optionally applied to the temperature display too (see Settings -
Display).
Average
Period
To slow the response time of the sensor, or to reduce
uctuations or noise on the measurement, enter an
averaging period (in seconds) here.
Hold Mode /
Hold Period
If required, hold processing can be applied by setting Hold
Mode to “Peak” or “Valley” and setting the hold period (in
seconds). This is useful if the temperature reading is
interrupted by gaps between moving objects, or by an
obstruction.
Voltage
Output
Set the temperature limits for the voltage output, and the output voltage
range (choose from 0-5, 1-5 or 0-10 V DC).
Alarm
Output
Set Point The temperature at which the alarm will be triggered. The
display ashes while the alarm is triggered.
Hysteresis In Auto Reset mode, this is the temperature dierence
between the Set Point and the reset level.
Reset Mode Manual: Press any button to acknowledge the alarm
and deactivate the alarm output. The display
keeps ashing until the alarm is reset. To
reset the alarm, go to Settings Reset Alarm.
Auto: The alarm will be reset automatically when
the temperature passes the reset level.
8

Menu Setting Description
Alarm
Output
(continued)
Alarm Trigger HI: The alarm is triggered if the temperature
is higher than the Set Point.
LO: The alarm is triggered if the temperature
is lower than the Set Point.
Output Mode Active HI: In an alarm condition, the alarm wire AL
will sink current to ground through the
attached load (e.g. a relay).
Active LO: In a non-alarm condition, the alarm wire
AL will sink current as above.
Temperature
Reference
Measured: The temperature of the target object.
Internal: The temperature inside the housing of the
sensor. This can be used to indicate the
ambient temperature where the sensor is
mounted.
Display Displayed
Temperature
RAW: Measured temperature without averaging
or hold processing
FIL: Includes averaging and hold processing
AVG: Includes averaging only
This setting does not aect the sensor’s outputs.
Temperature
Units
Select Celsius or Fahrenheit. Units are changed
throughout the sensor’s interface.
Screen Saver If enabled, the sensor’s display turns itself o after 1
minute of inactivity. Press any key to turn the display on
again. The display will still turn on and ash if the alarm
is triggered.
Rotation Change this setting from “Normal” to “Inverted” to make
the display easy to read if the sensor is installed upside-
down.
Reset
Alarm
In Manual Reset Mode, after the alarm has been triggered and
acknowledged, this function allows the alarm to be triggered again.
Enter PIN /
Lock
Sensor
Enter the PIN to unlock the sensor and change the settings. The PIN is
1234. When conguration is complete, lock the settings again by selecting
Lock Sensor.
9

10
IMPORTANT
Be aware of the following when using the sensor:
• If the sensor is exposed to signicant changes in ambient temperature (hot to cold, or cold
to hot), allow 20 minutes for the temperature to stabilise before taking or recording
measurements.
• Do not operate the sensor near strong electromagnetic elds (e.g. around arc welders or
induction heaters). Electromagnetic interference can cause measurement errors.
• Wires must be connected only to the correct terminals. Check all connections before
applying power.
• Do not damage the cable, as this could provide a path for moisture and vapour into the
sensor.
• Ensure the sensor is grounded at one point: either the cable shield termination, or
the mounting screws, but not both.
• When the power is switched o, allow at least 15 seconds before switching the power back
on.
LENS CLEANING
Keep the lens clean at all times. Any foreign matter on the lens would aect measurement
accuracy. Blow o loose particles (if not using the air purge accessory) with an air ‘puer’.
MAINTENANCE
Our customer service representatives are available for application assistance, calibration,
repair, and solutions to specic problems. Contact our Service Department before returning
any equipment. In many cases, problems can be solved over the telephone. If the sensor is
not performing as it should, try to match the symptom below to the problem. If the table does
not help, call Calex for further advice.

11
Symptom Probable Cause Solution
No output or display No power to the
sensor
Check the power supply and wiring
Inaccurate measured
temperature
Target too small for
sensor’s eld of view
Ensure the sensor’s view is completely lled
by the target. Position the sensor closer to
the target to measure a smaller area.
Incorrect emissivity
setting
Choose the correct emissivity setting for the
target material. See “Conguration -
Emissivity” for more information.
Target is a reective
metal surface
Try using a low emissivity setting, or paint or
coat a measurable area of the target to
make it non-reective
Field of view
obstruction
Remove obstruction; ensure sensor has a
clear view of target
Dust or condensation
on lens
Ensure lens is clean and dry. Clean gently
with a soft lens cloth and water. If problem
recurs, consider using an air purge collar.
Voltage output does
not match displayed
temperature
Output temperature
scale mismatch
Check the output range and scale in Voltage
Output settings; ensure the output scale
matches the input range of the
measurement instrument
No alarm output Incorrect wiring or
conguration
Check electrical connections (see
Installation), Reset Alarm, and Alarm Output
settings
Cannot change
settings
Sensor is locked
(padlock icon is
displayed)
Go to Settings – Enter PIN to unlock the
sensor
TROUBLESHOOTING

Calex Electronics Limited
PO Box 2, Leighton Buzzard, Bedfordshire, England LU7 4AZ
Tel: +44 (0)1525 373178 | mail@calex.co.uk | www.calex.co.uk
Issue A - Aug 2020
12
DEFAULT SETTINGS
The sensor is fully congurable via the display and controls. No conguration is necessary in
many applications: the sensor will work straight out of the box with the below default settings.
All settings are adjustable except those marked (xed).
GUARANTEE
Calex guarantees each instrument it manufactures to be free from defect in material
and workmanship under normal use and service for the period of two years from the date
of purchase. This guarantee extends only to the original buyer according to Calex’s standard
Terms and Conditions of Sale.
Setting Range of Values Default Value
Output Voltage 0-5 V / 1-5 V / 0-10 V 0-10 V
Temperature Low 0°C to 900°C 0°C
Temperature High 100°C to 1000°C 1000°C
Alarm Trigger HI / LO / O HI
Temperature Reference
(Alarm)
Measured / Internal Measured
Alarm Set Point 0°C to 1000°C 100°C
Alarm Hysteresis 0°C to 30°C 1°C
Output Mode (Alarm) Active HI / Active LO Active HI
Alarm Reset Auto / Manual Auto
Emissivity Setting 0.2 to 1.0 0.95
Reected Energy
Compensation
On/O O
Reected Temperature 0°C to 1000°C 25°C (note: this value is
automatically overridden
when Reected Energy
Compensation is O)
Averaging Period 0 s to 60 s 0 s
Hold Mode Peak/Valley/O O
Hold Period 0 s to 1200 s 0 s
Displayed Temperature RAW / FIL / AVG RAW
Temperature Units °C / °F °C
PIN 1234 (xed)
Table of contents
Other Calex Temperature Controllers manuals
Popular Temperature Controllers manuals by other brands

United Electric Controls
United Electric Controls 800 Installation and maintenance instructions

Honeywell
Honeywell HCW 82 Installation and operation

Pike
Pike EZ-ZONE PM quick start guide

Panasonic
Panasonic KT4 series instruction manual

domat
domat UC905 quick start guide

Secco
Secco SUPERCOOL-1000 user manual